The "Robots (Роботы)" section in the "Clients (Клиенты)" tab automates communication with Students and Employees: class reminders, payment notifications, birthday greetings and other scenarios. A robot is tied to a funnel stage or to a Student event and triggers automatically, without manager involvement.
Next we'll go over how to configure a ready-made template and what to do if there is no suitable condition and the robot needs to be built from scratch.
A banner may appear at the top of the page saying "Auto-notifications from mailing settings are also active". This is a separate feature: such messages are sent on their own schedule and are not included in the list of robots below. If clients receive messages that are not visible in the robots list, the cause should be sought in the mailing settings.
Below we'll explain on a concrete example how to configure such a robot.
Step 1. Open the section and select the funnel
In the left menu open the kanban, then settings, in the "funnel settings" block click "Robots".
At the top, in the "Editing funnel" field, select the required funnel. If your center has several funnels, the robot must be configured in each of them separately.
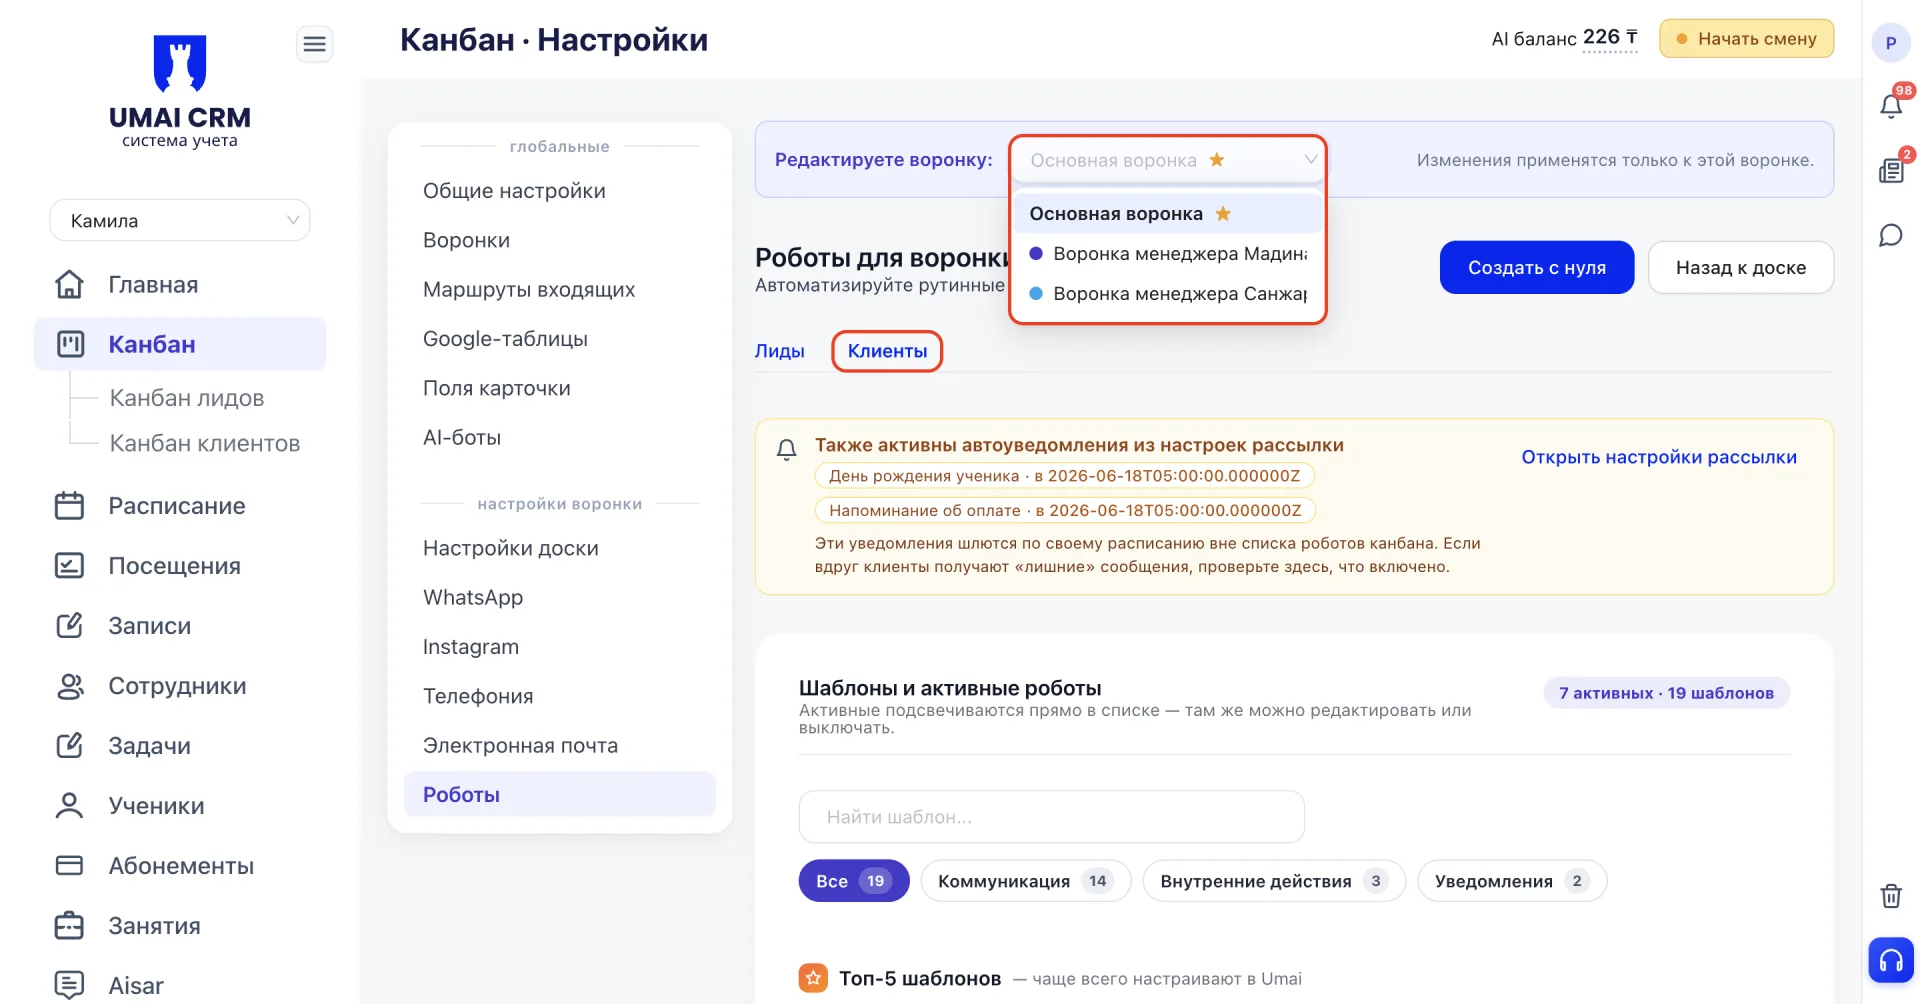
After that a list of templates for the selected funnel will open. By default the "Leads" tab is selected. To go to robots for Students who are already studying, click the "Clients (Клиенты)" tab next to it.
Step 2. Find a ready-made template
In the "Templates and active robots" list choose the required template. Templates are divided into categories: "Communication" contains messages to the client, "Internal actions" contains tasks and comments for Employees, "Notifications" contains internal notifications to the manager.
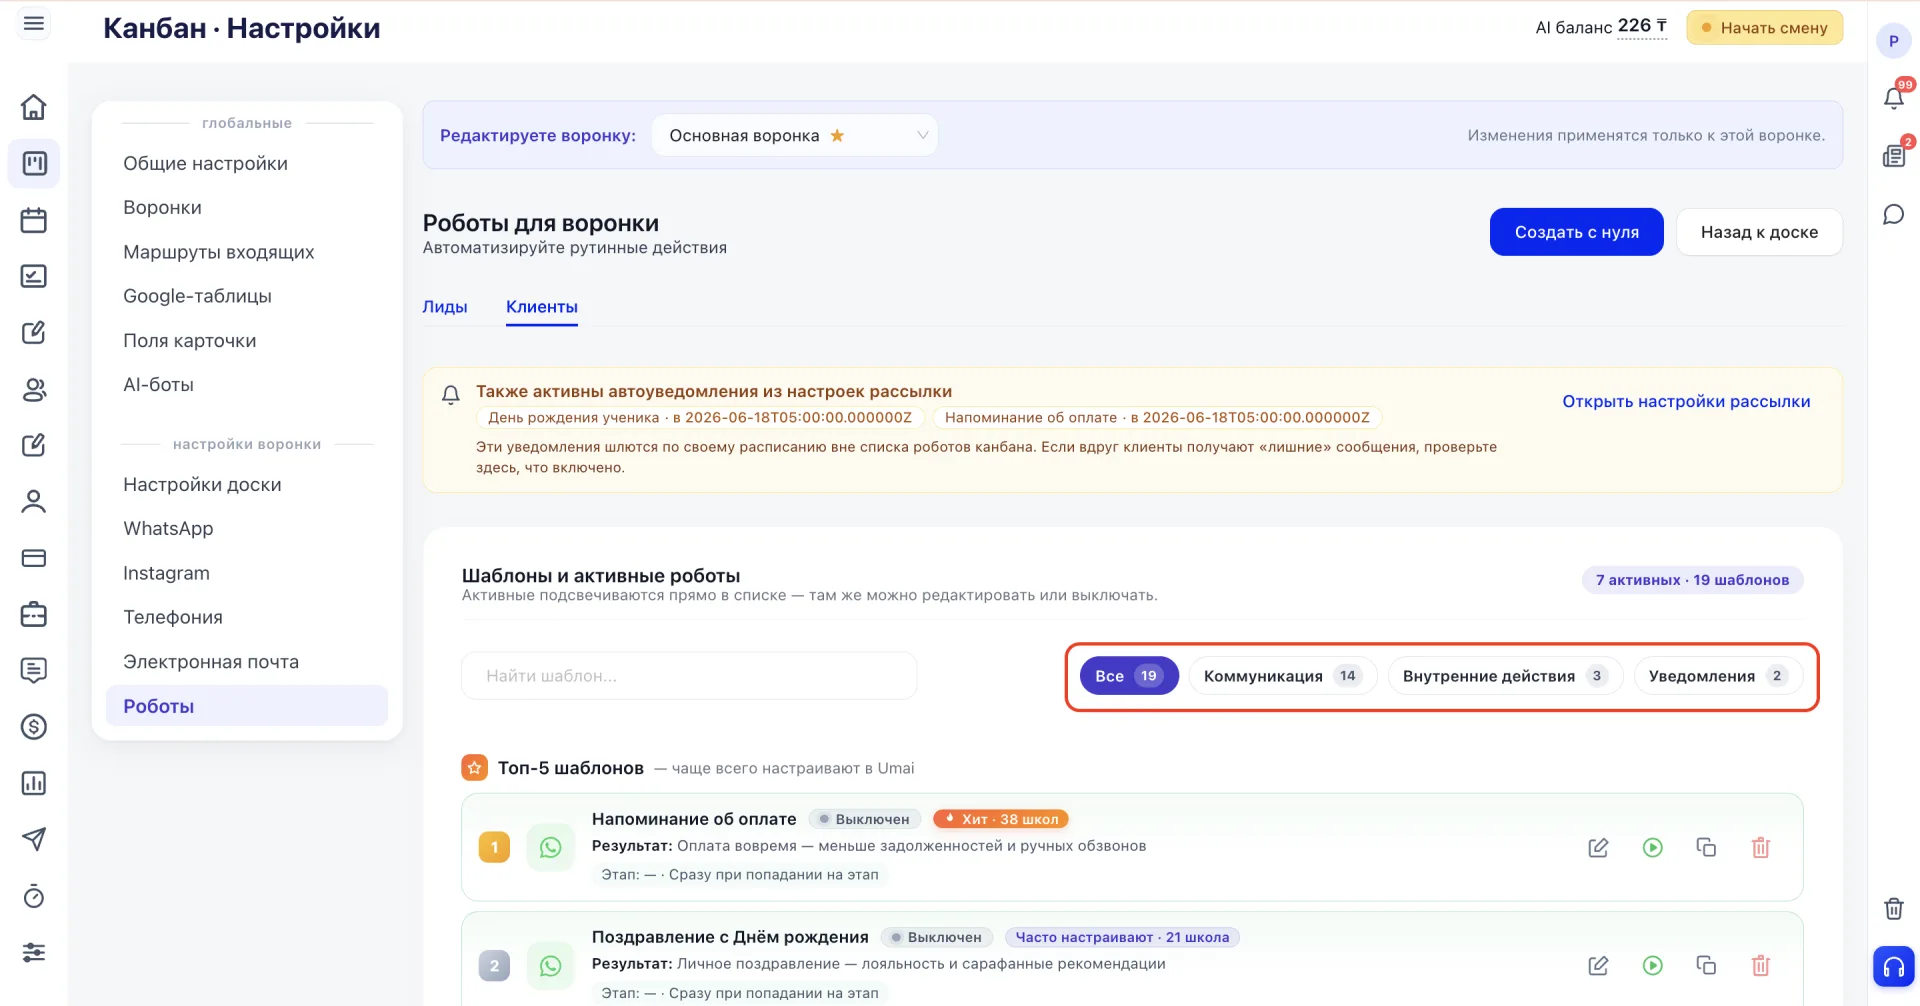
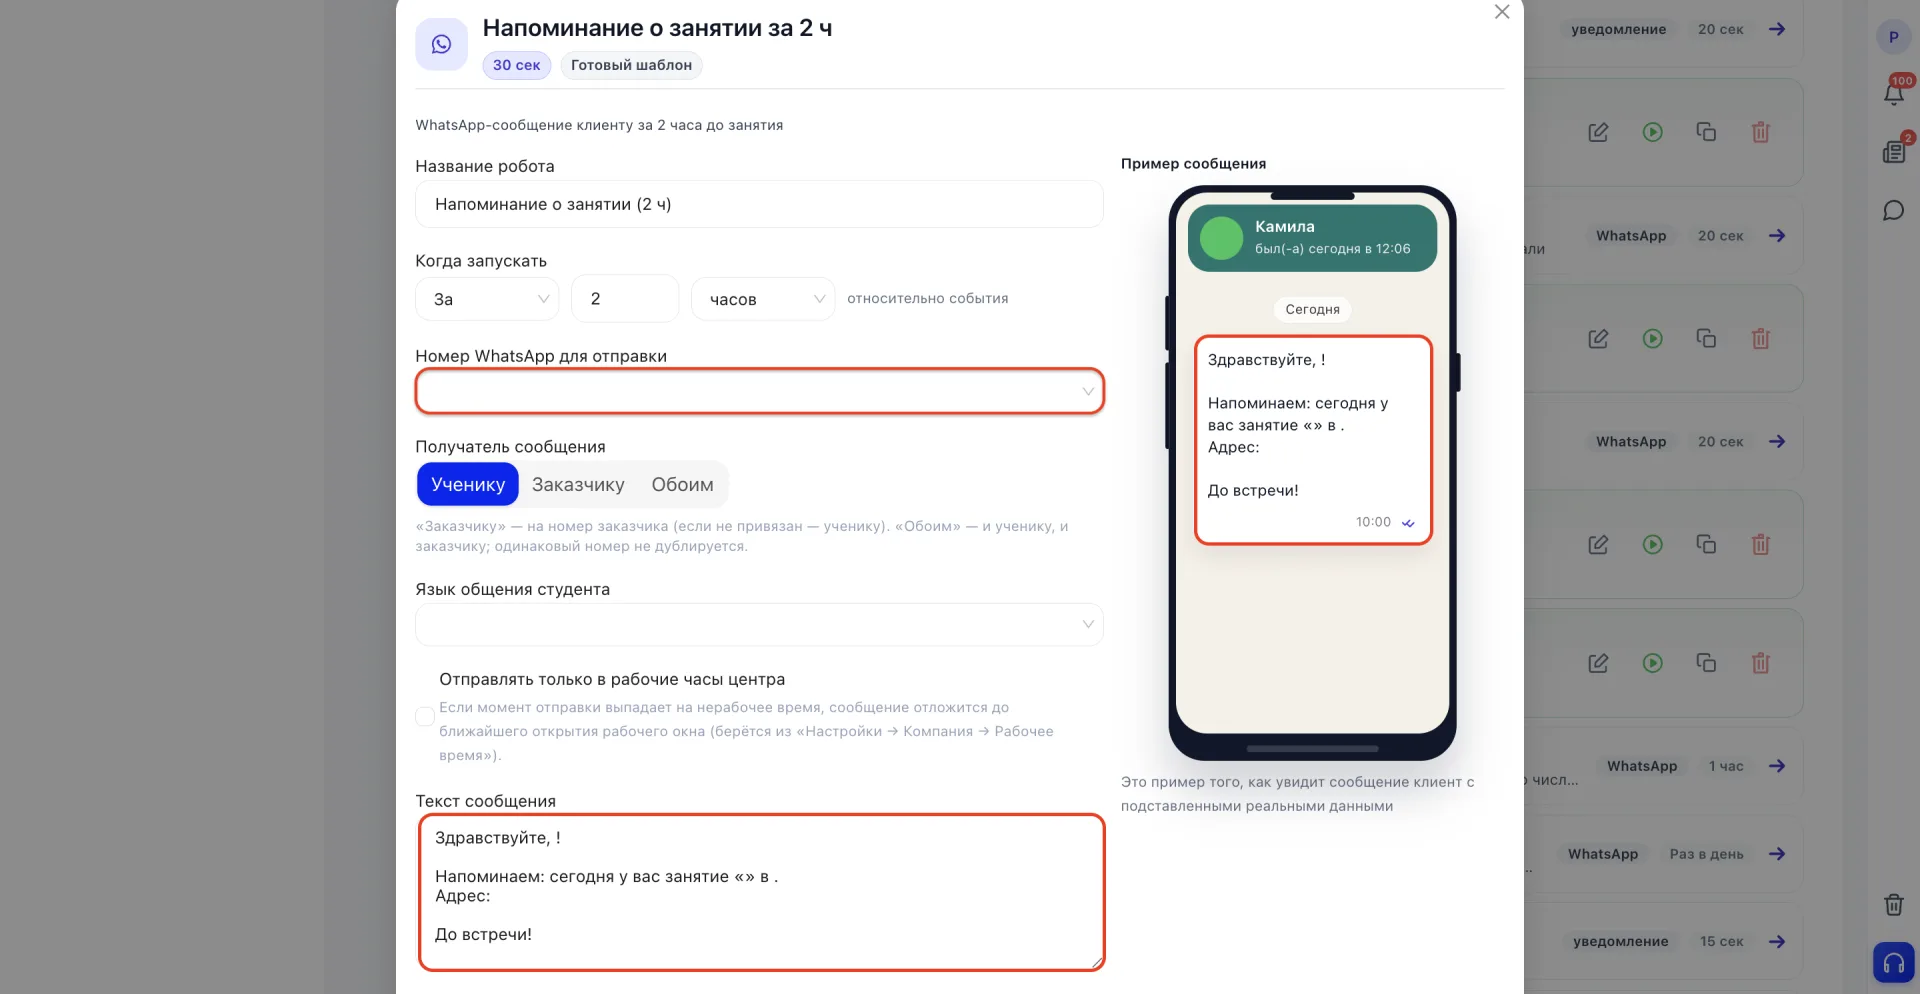
For clarity, let's examine the template "Class reminder 2 hours before" from the "Communication" category. Click the desired template to open its settings.
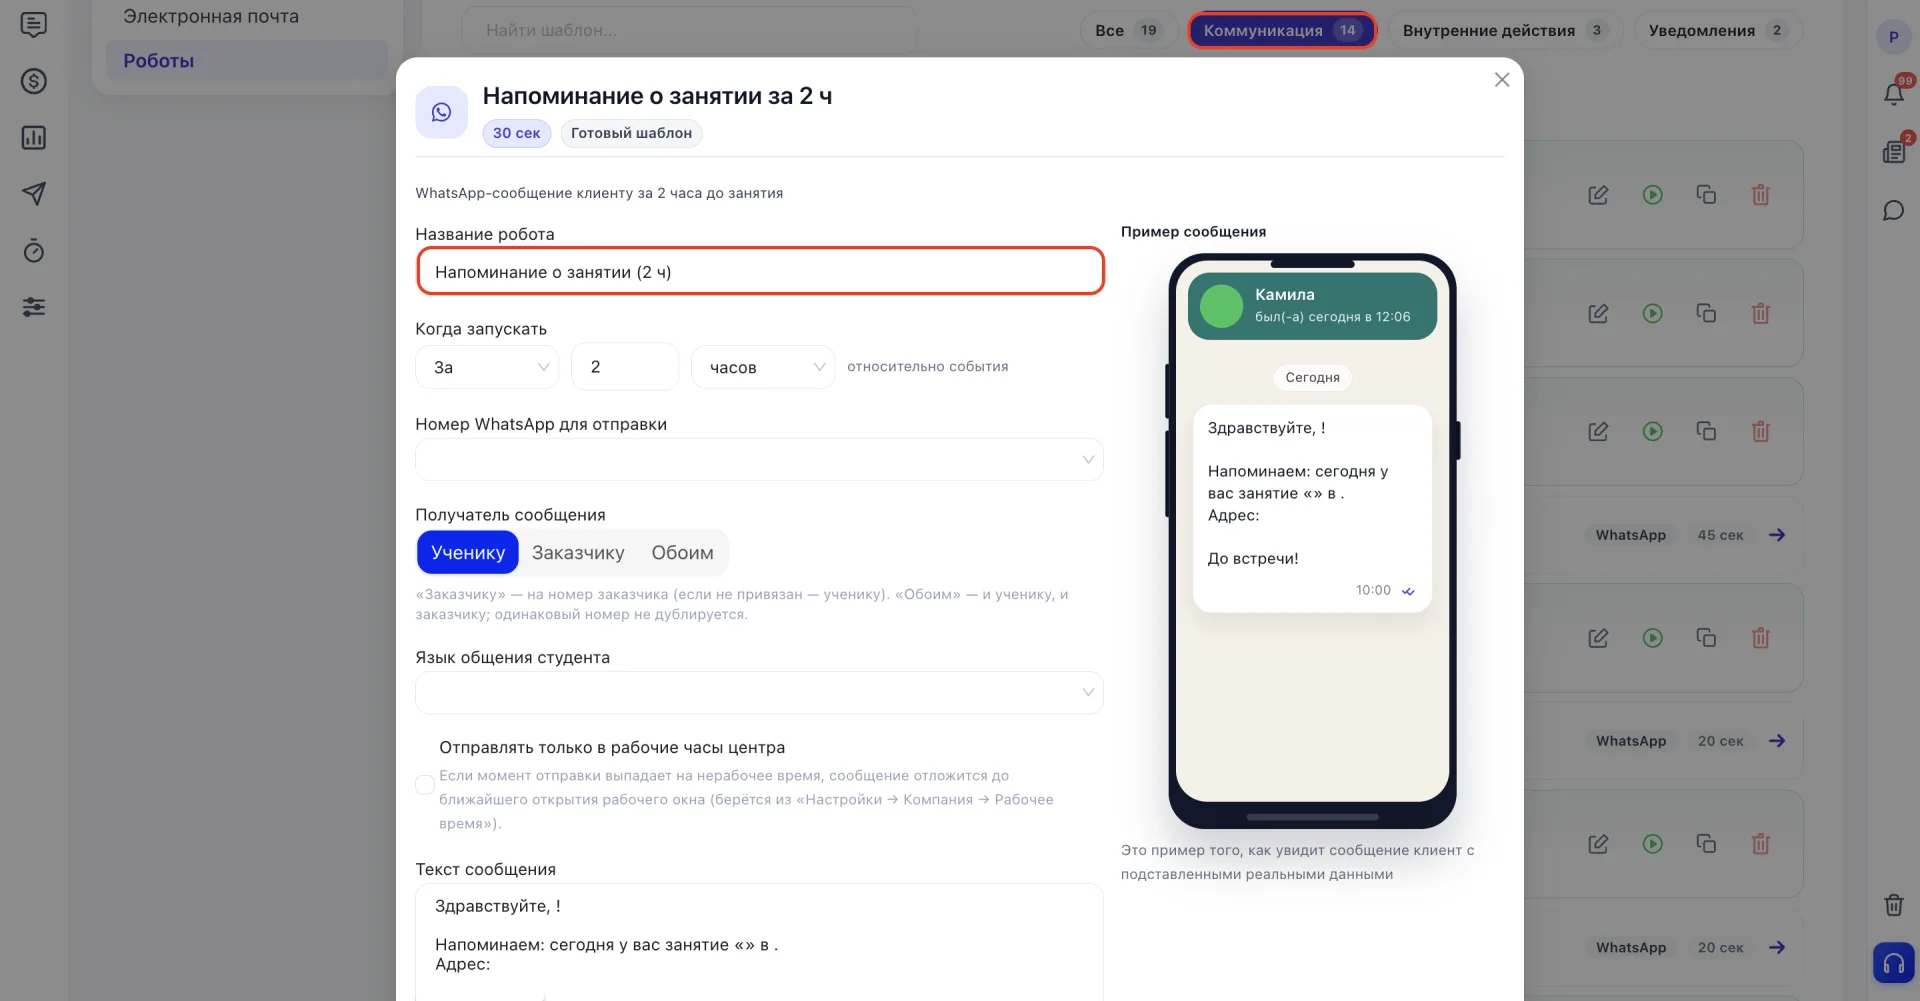
Step 3. Check when the robot will trigger
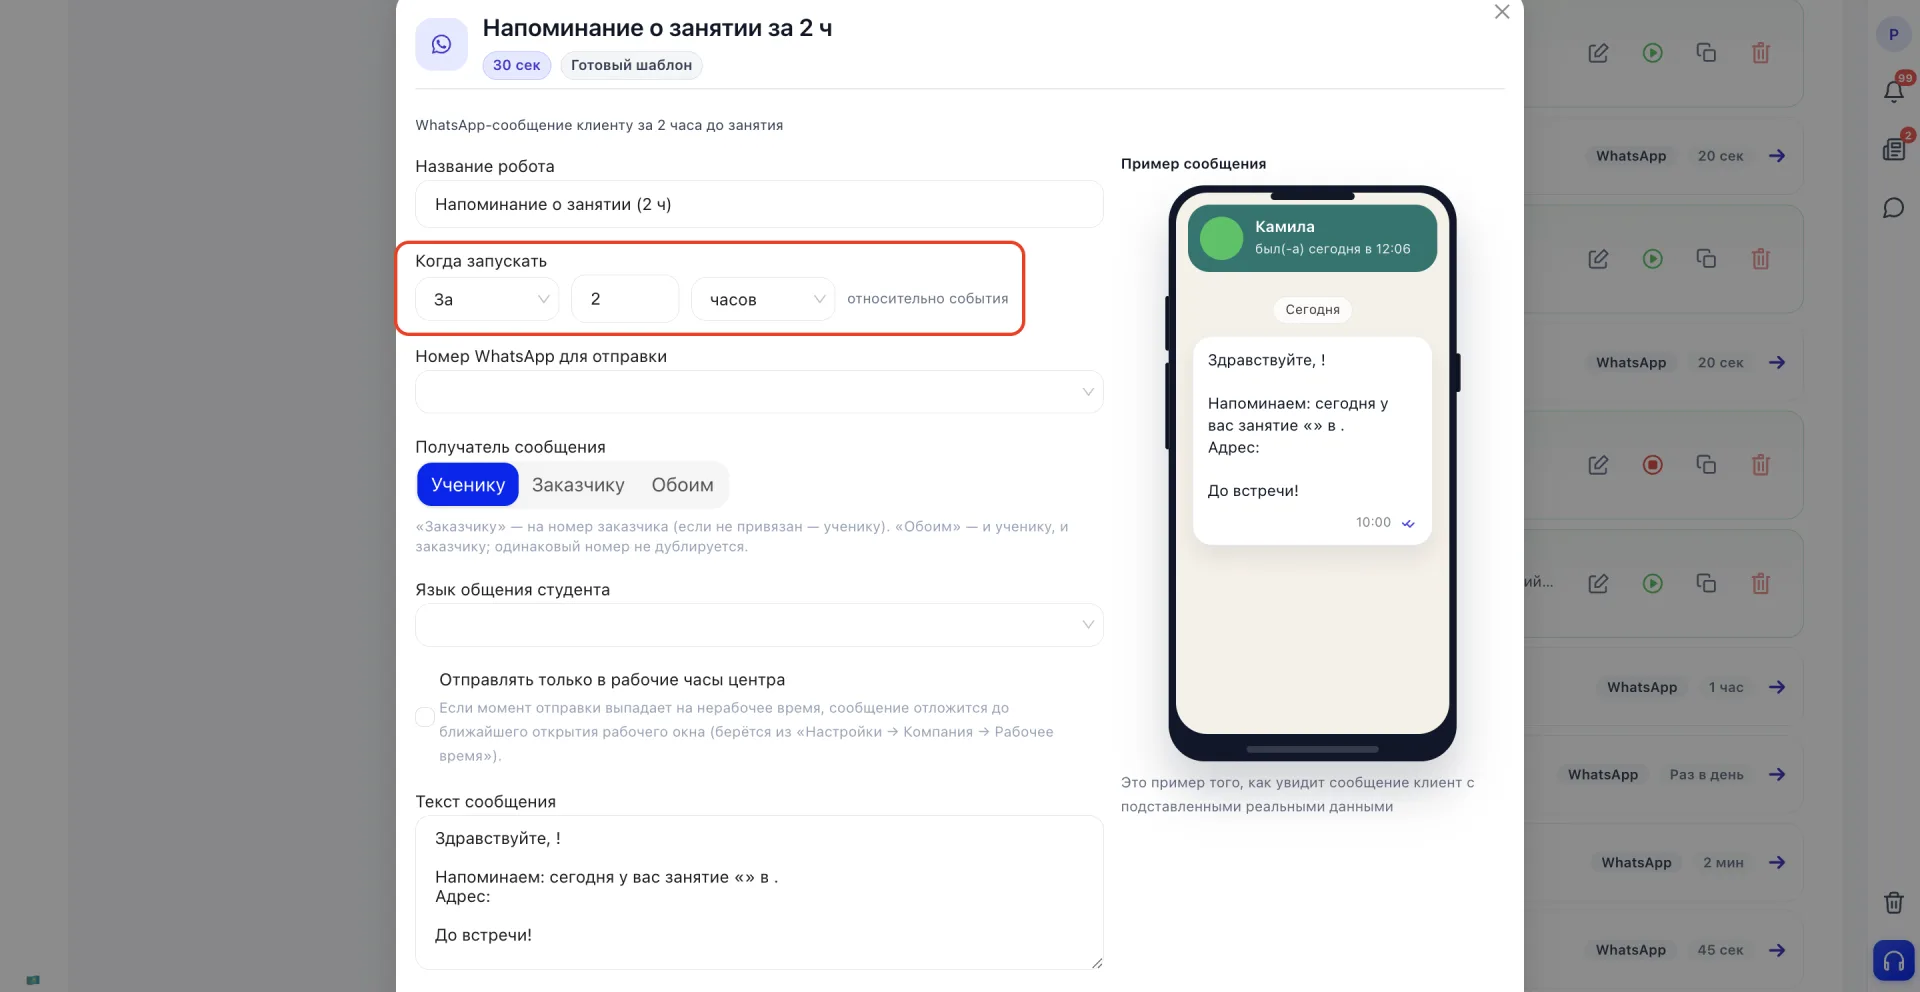
If you need to change the interval, for example to warn not 2 hours but 30 minutes before, change the number and the unit of time right in this field.
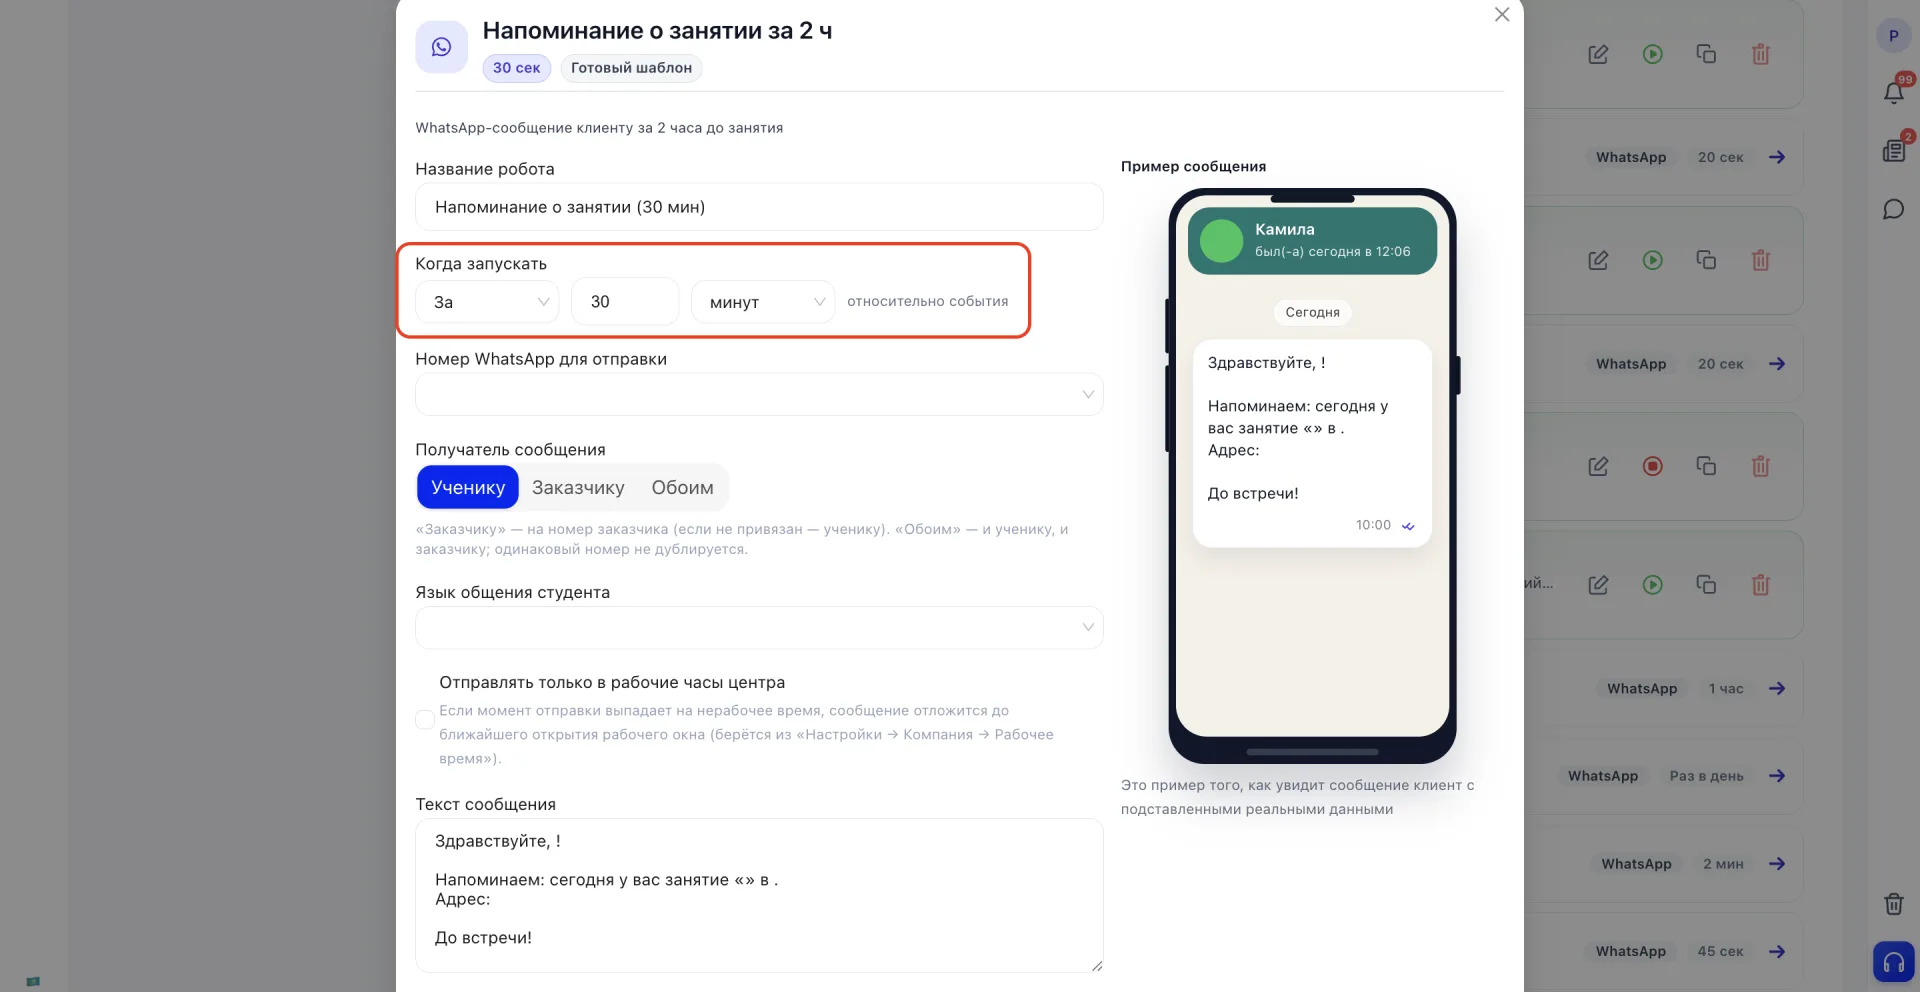
Below is the "WhatsApp number for sending" field (if the center has several channels connected, choose the required one here) and the "Message recipient" field with three options: "To Student", "To Client" and "To Both". This template has "To Student" selected, so the message will be sent to the Student's number. "To Client" will send to the client's number, and if they are not linked to the card, the message will still go to the Student. "To Both" will send to both Student and Client, and if they have the same number specified, the message will not be duplicated.
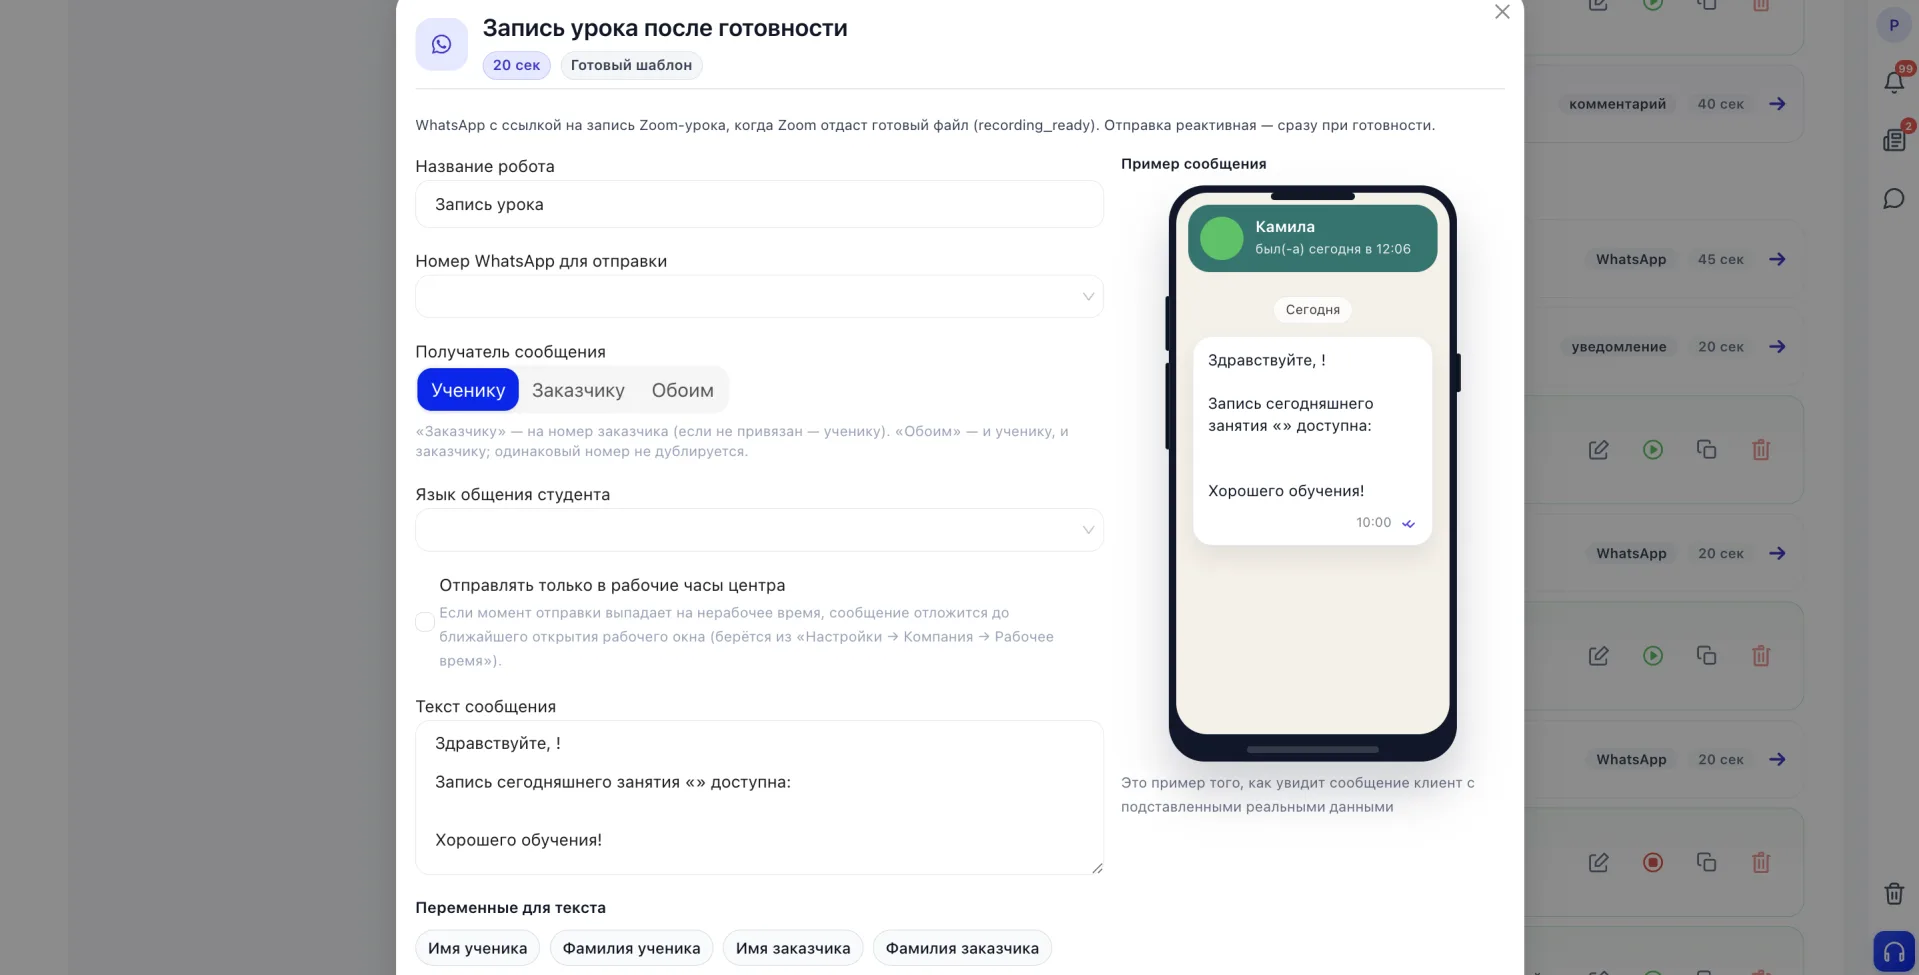
This template sets the time in one line, but in other ready templates from the same list the same place in the form may look different. For example, the template "Lesson recording after readiness" has no separate time field at all: sending is strictly tied to the moment when the class video recording becomes available and cannot be changed.
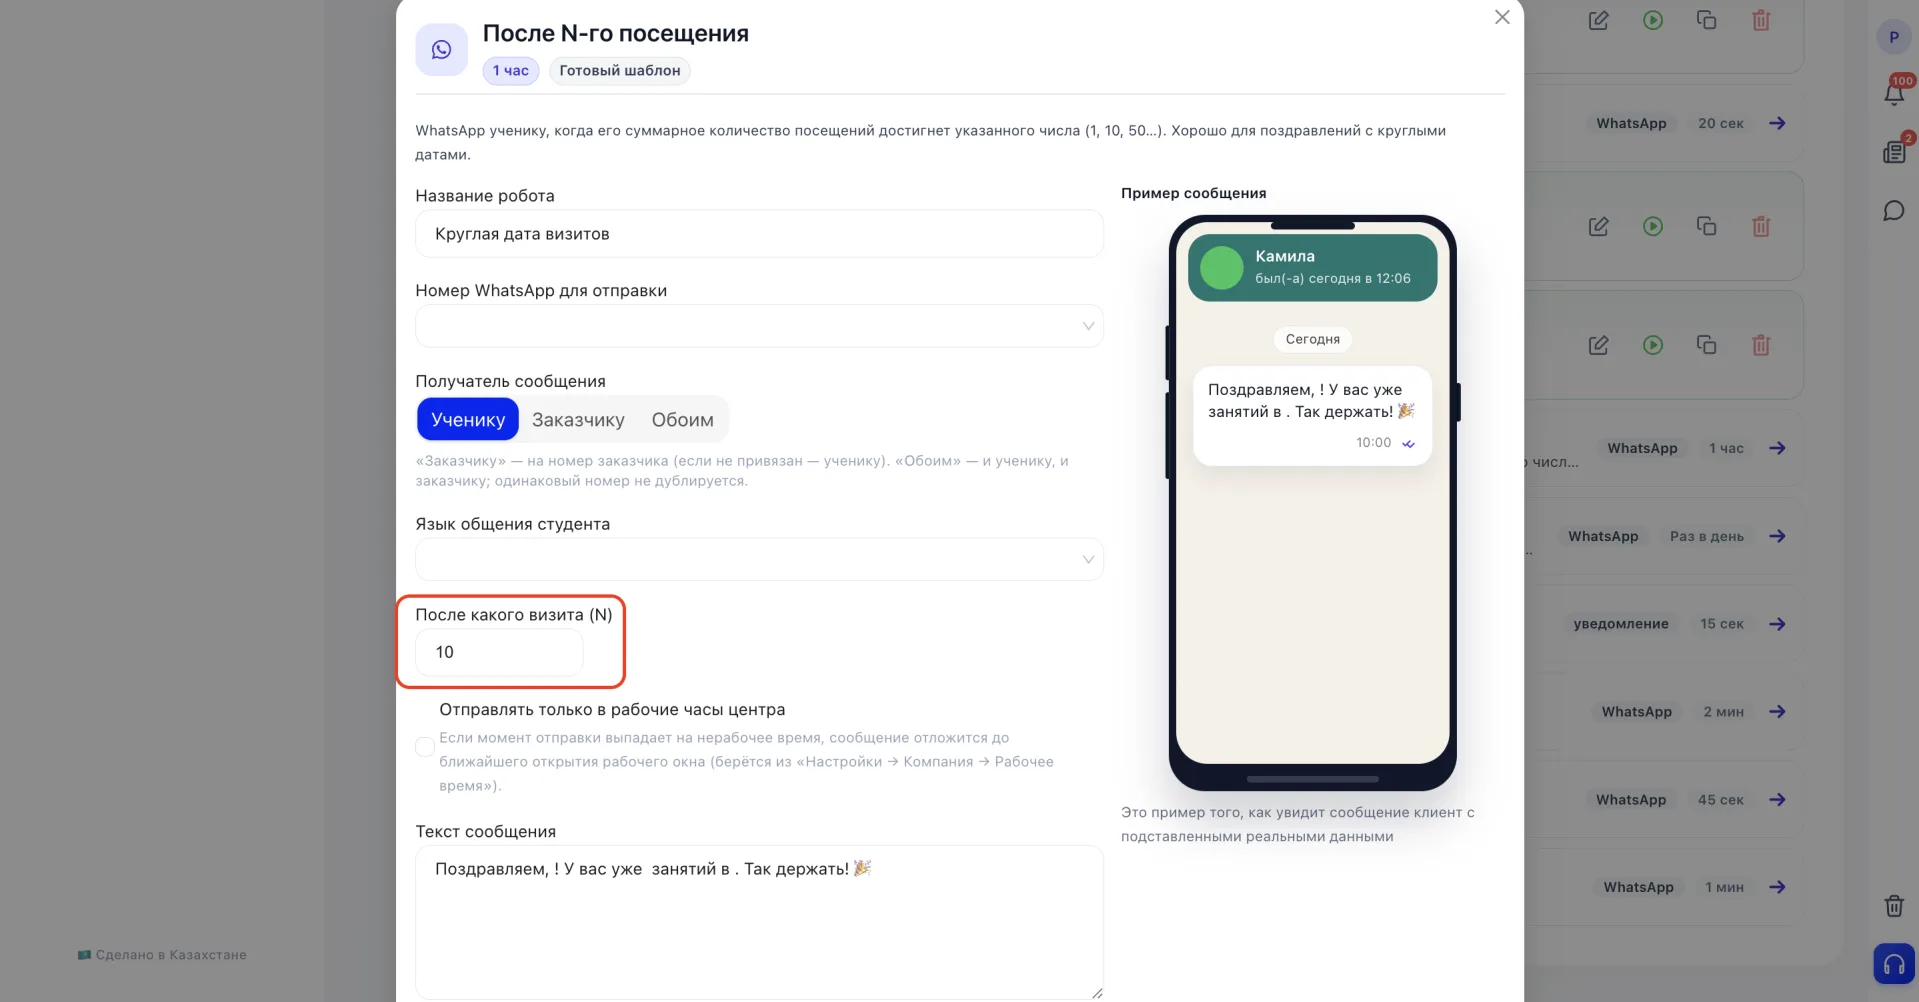
And the template "After Nth visit" has a number instead of time, "After which visit", and the message will be sent when the Student's total number of Visits reaches the specified number.
The template "N absences in a row" is arranged similarly: it specifies not a time but the number of consecutive missed Classes after which the reminder triggers. All three templates are located in the same list "Templates and active robots" that you opened in step 2, so you can open and inspect them yourself if desired.
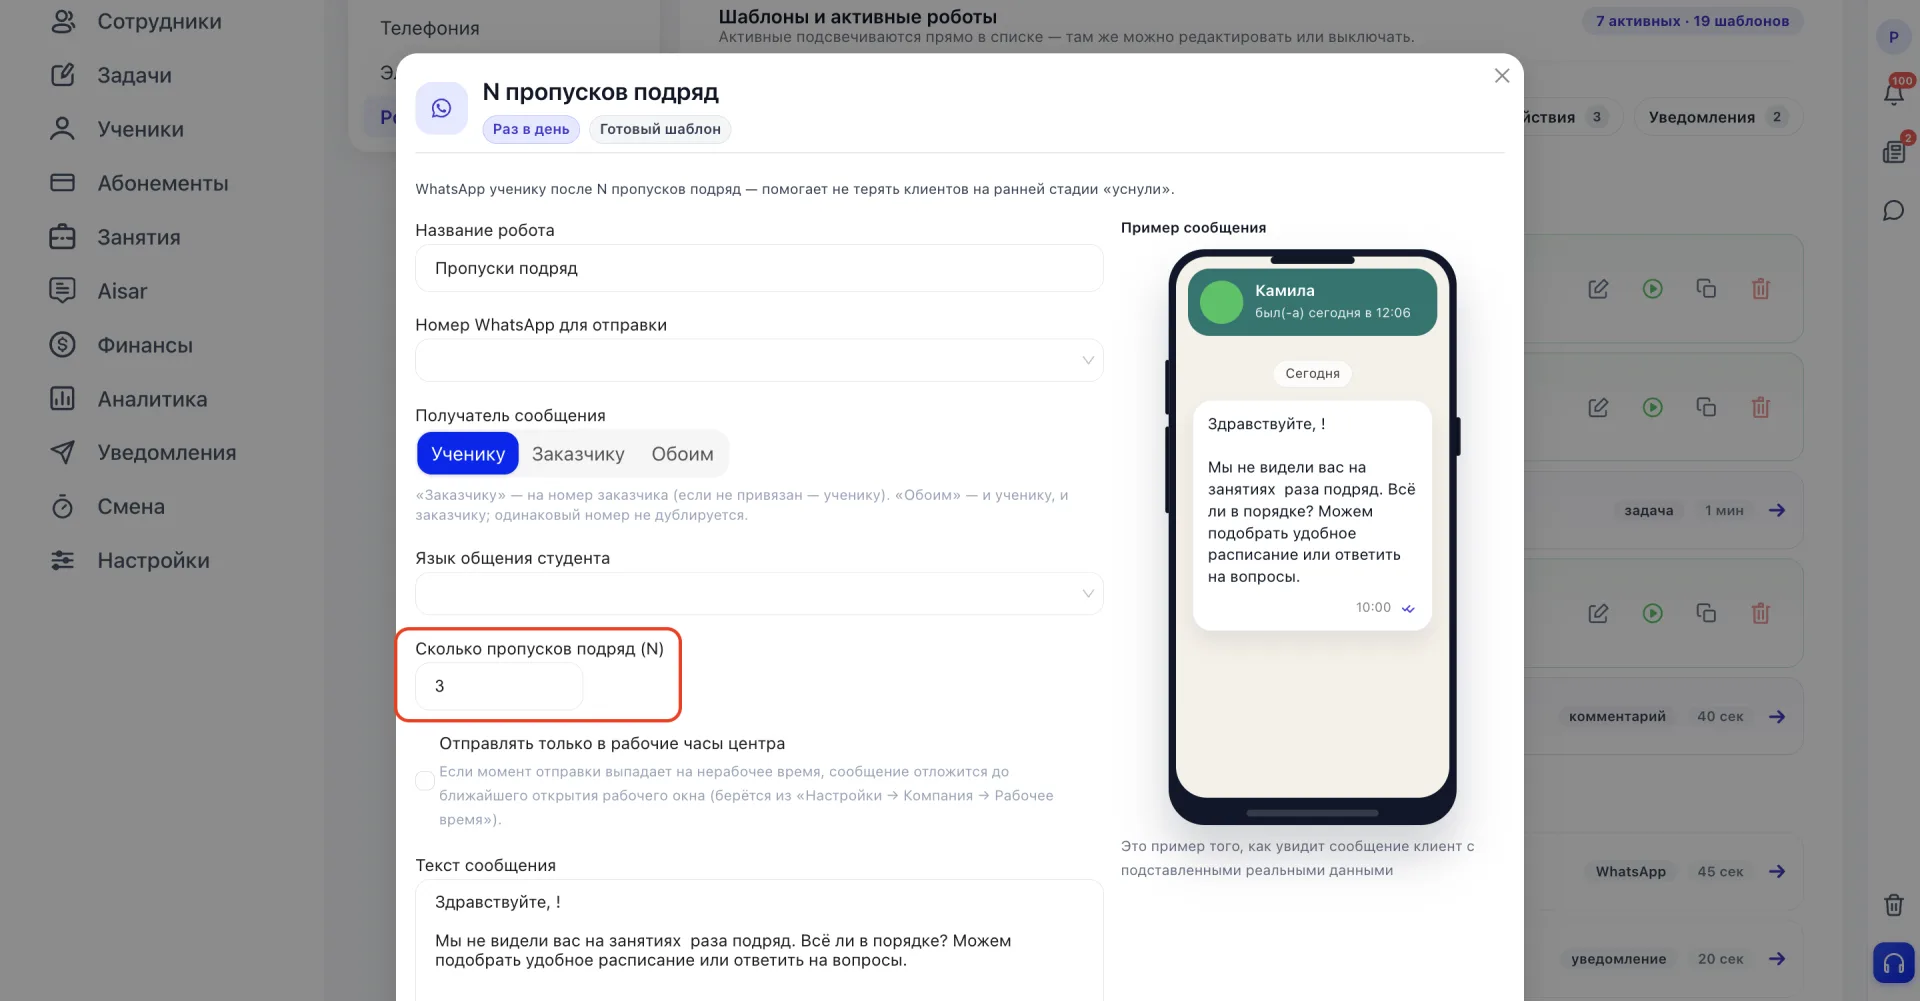
So before changing values, first look at which specific field the template form shows: it hints at how this robot determines the sending moment.
Step 4. Check what the robot will send
Let's return to the template "Class reminder 2 hours before". Lower on the same page there is a field "Student communication language" (if left empty, the message will be sent in the default language) and a checkbox "Send only during center business hours". It is needed in case the calculated sending time falls at a moment when the center is not yet open or already closed, for example early morning or late at night. If the checkbox is enabled, such a message will not be sent immediately but will wait until the center opens according to schedule. If the checkbox is disabled, the message will be sent exactly at the calculated time, regardless of whether the center is open or not.
Below is the "Message text" field. For the "Class reminder 2 hours before" it already contains a ready-made text:
Hello, {student name}!
Reminder: today you have a Class "{class}" at {time}.
Address: {address}
See you!
The message is sent to the Student in WhatsApp, to the number selected in the "WhatsApp number for sending" field just above.
Below the text there is a list of variables. Their set depends on which channel is selected for this template. WhatsApp messages receive an extended set of variables with contact details: student name, center name, address, phone, email, etc.
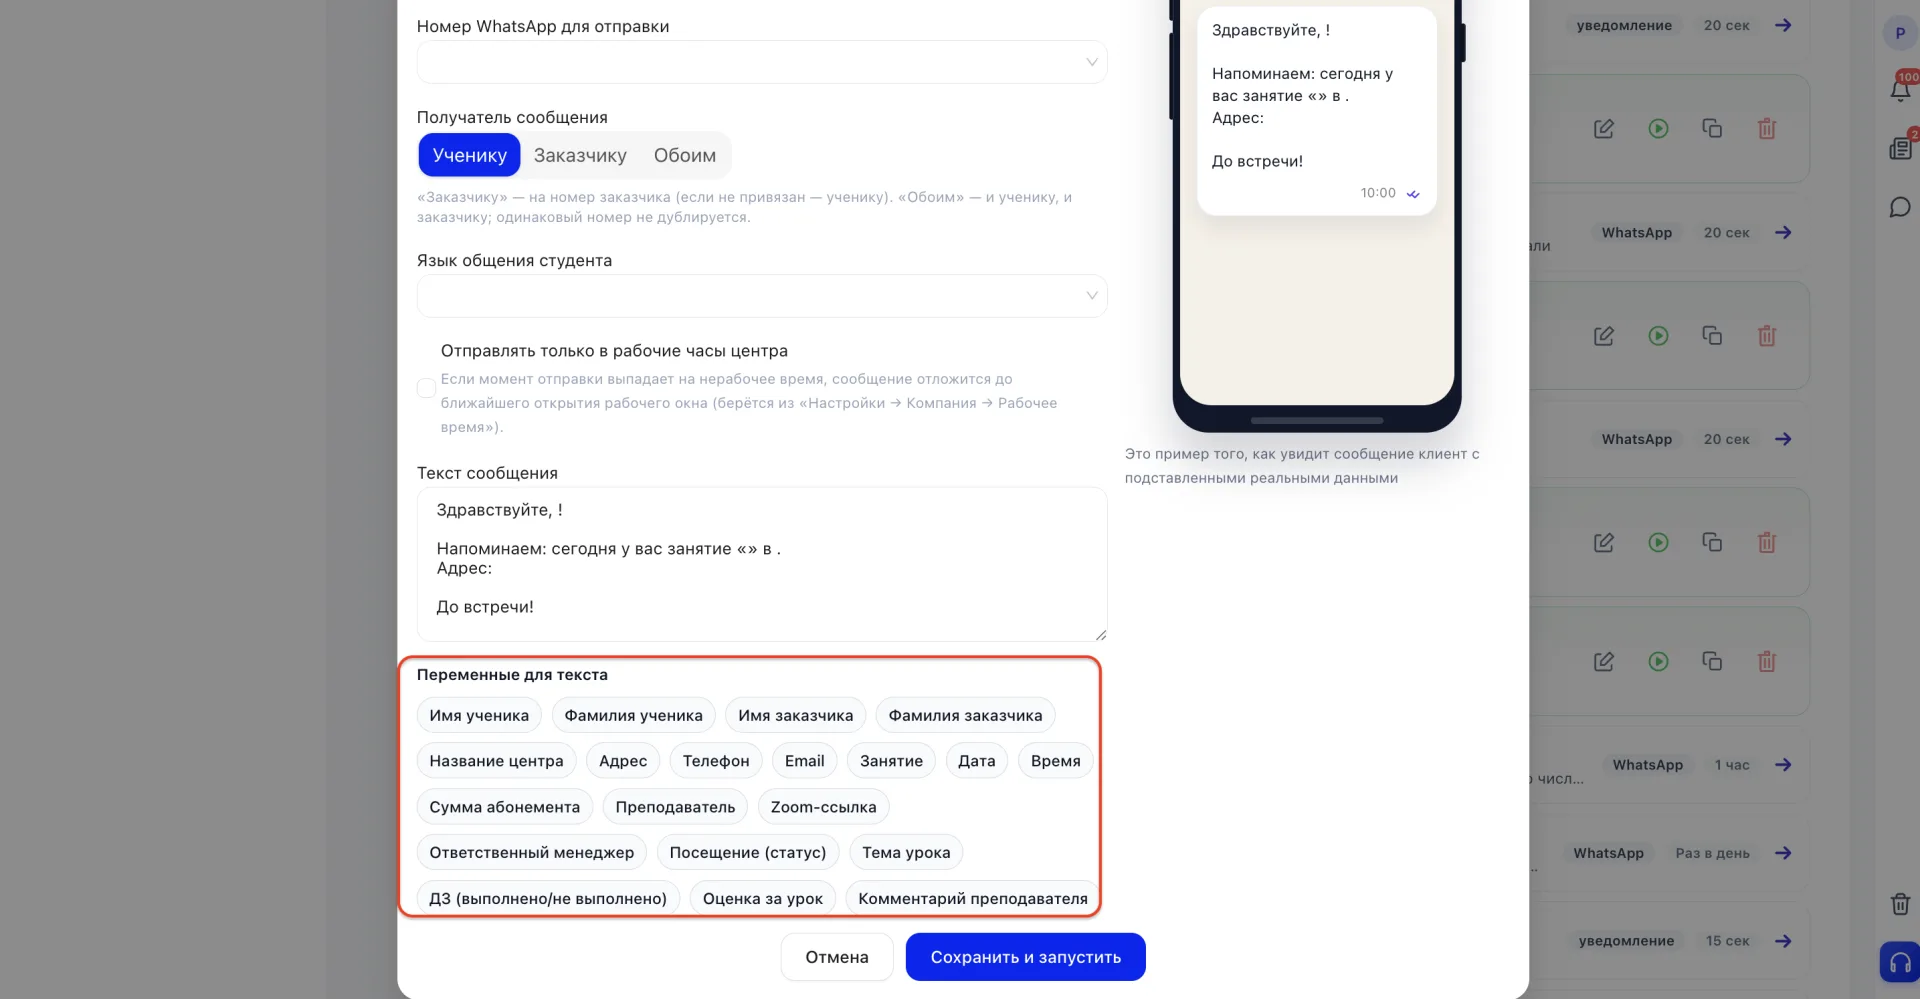
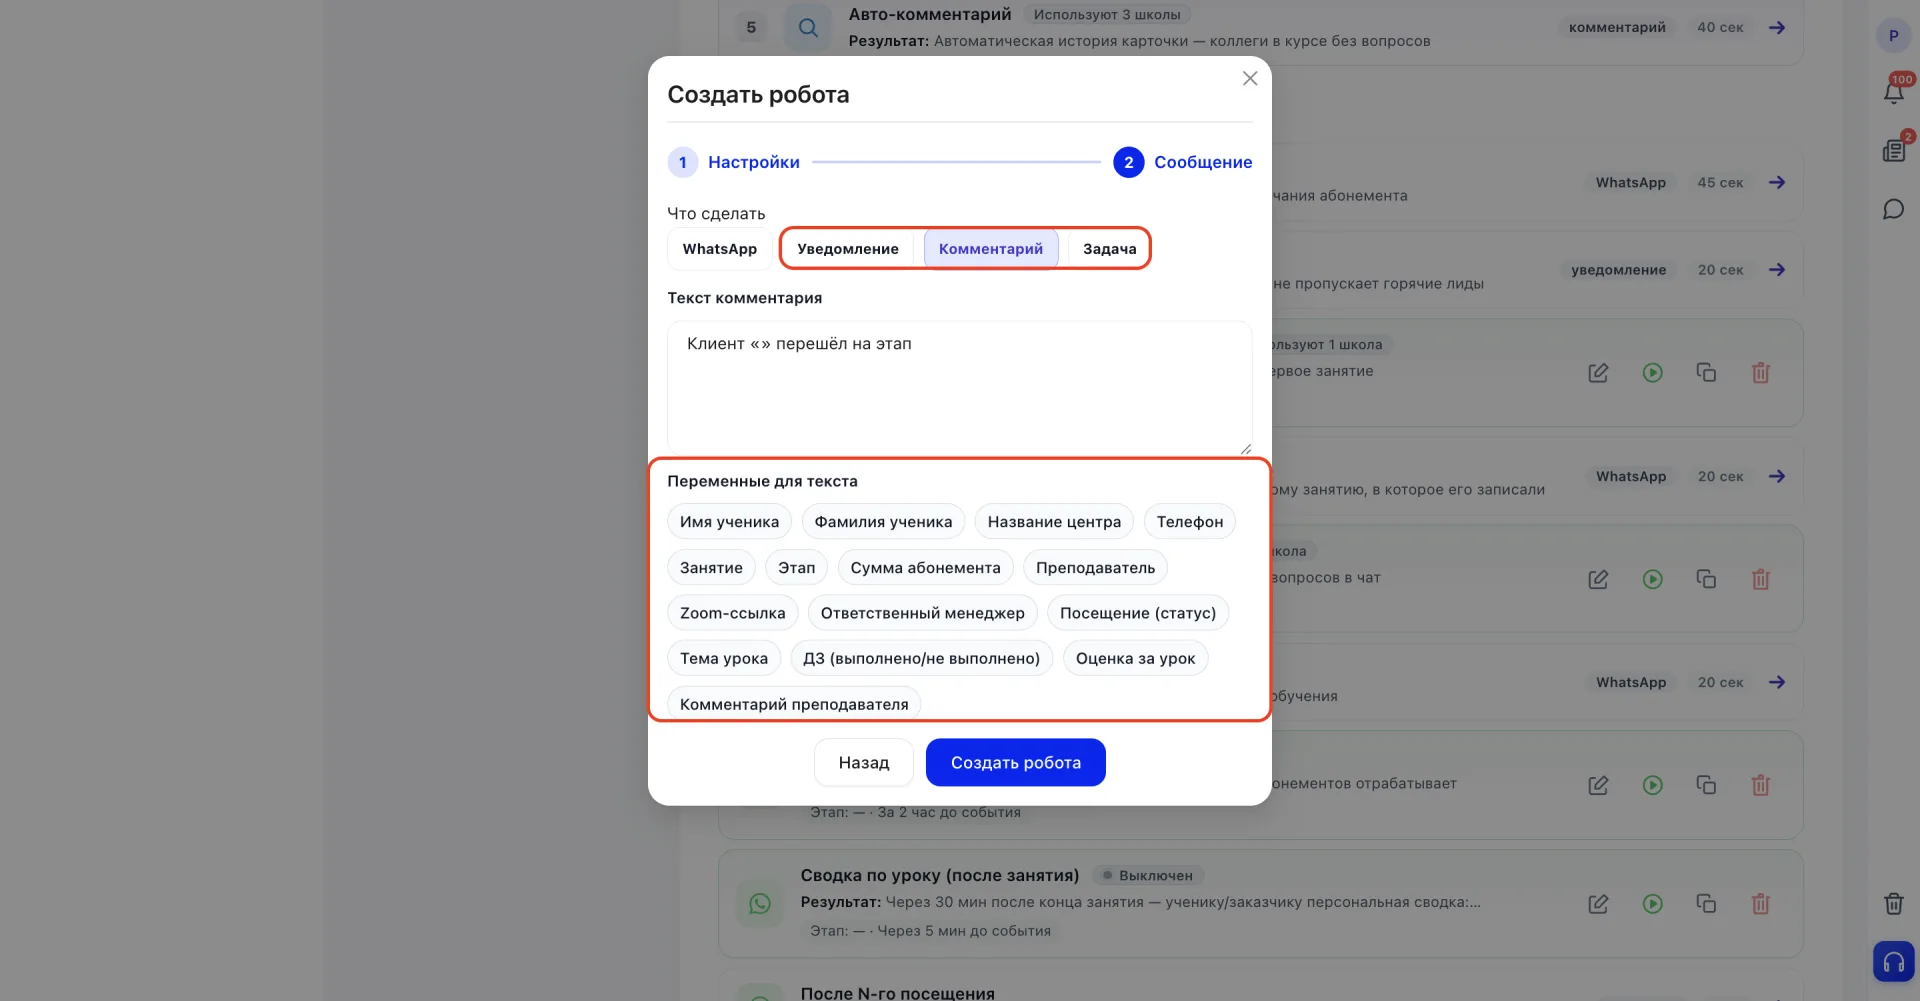
Internal types (Notification, Comment, Task) have a shorter set: for example, they do not include address and email, but add the variable "Stage", which is not present for WhatsApp.
Step 5. Save and make sure the robot works
Click "Save".
The robot will return to the general list with status "Active" and will send a reminder to all Students two hours before their Classes.
If you need to temporarily stop the robot, click the red pause button right in the list. To enable it again, click the green ▶ button that will appear in its place.
The same principle is used to configure the other ready-made templates Most templates from the "Communication", "Internal actions" and "Notifications" categories open in the same form we just reviewed and are configured by the same steps. Only the name, sending condition, text and variables change.
If the required template is not in the list, there is an option to create a robot from scratch. To do this click the "Create from scratch" button in the top right corner of the page.
If the robot is created from scratch
In this case a different form opens, with two steps: "Settings" and "Message". First you need to enter the robot name, and then choose when to launch it. Four options are available here.
"On stage change" launches the robot immediately as soon as the client lands on the selected funnel stage. After choosing this option a field "On which stage" appears and, below, a "Group" field where you can limit the robot to Students from a specific Group, leaving the field empty if you need to cover everyone.
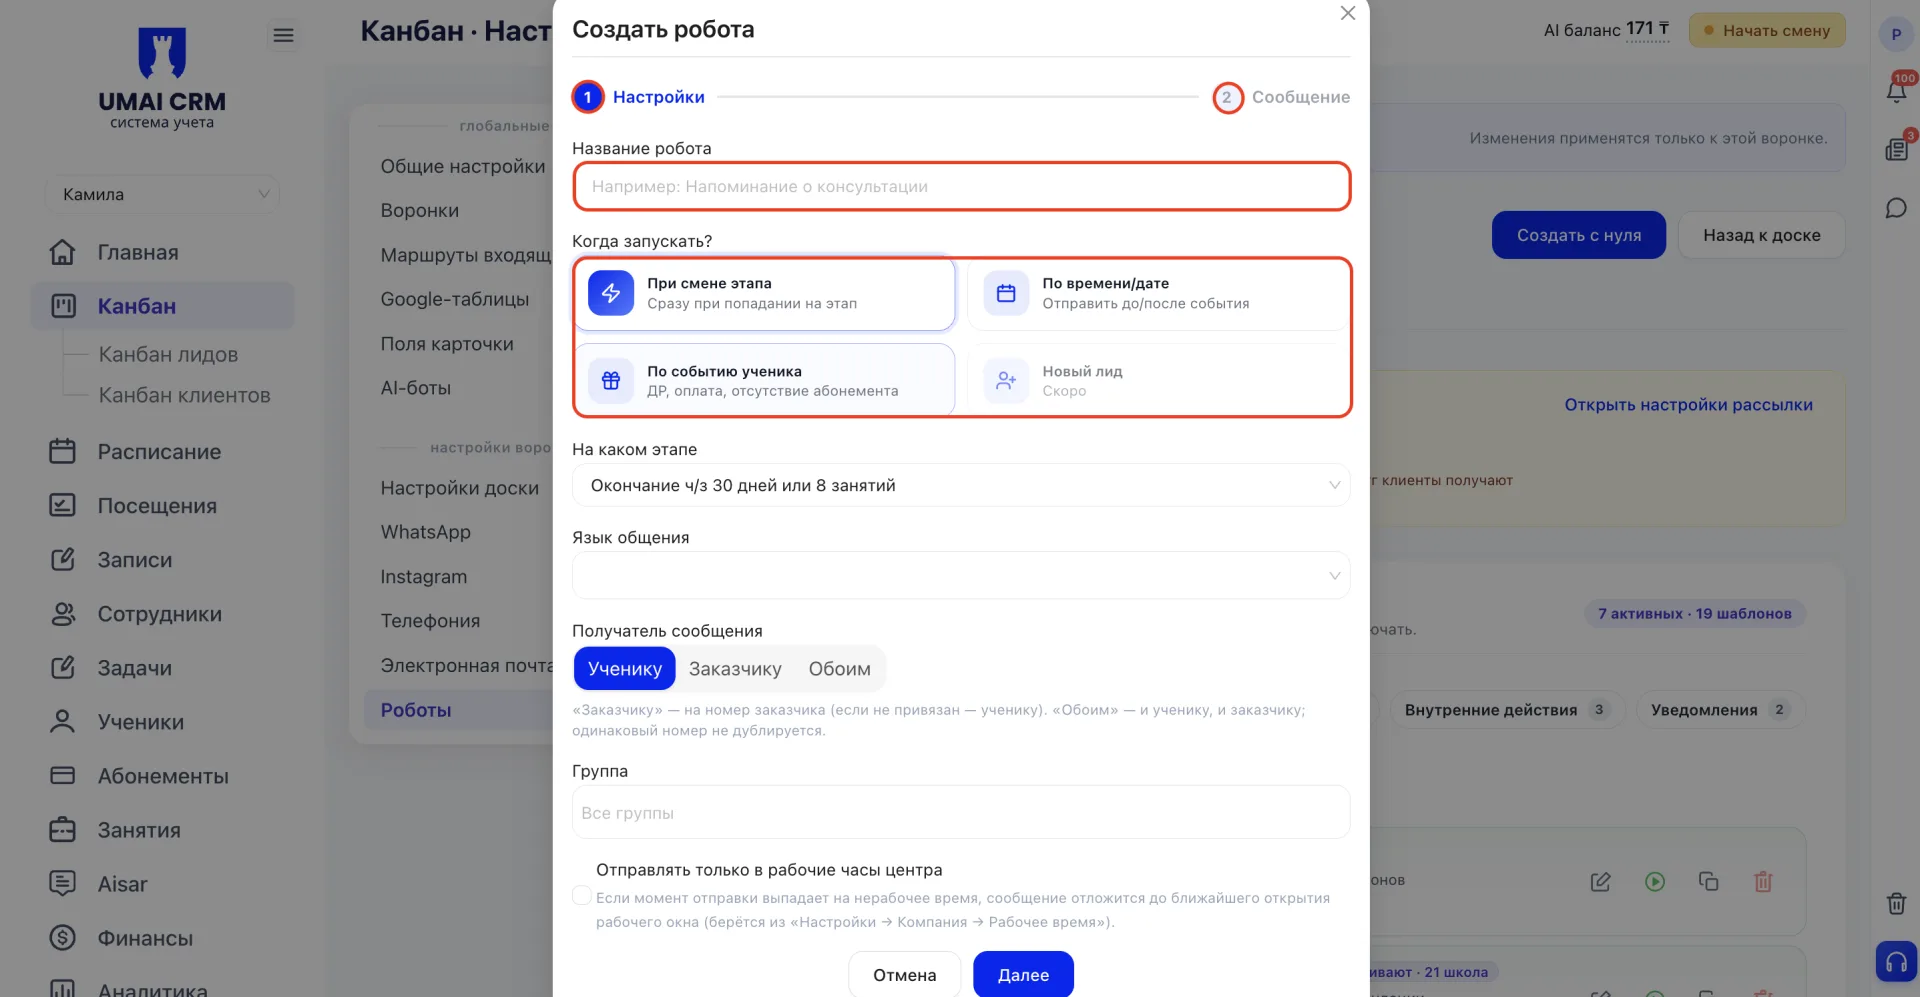
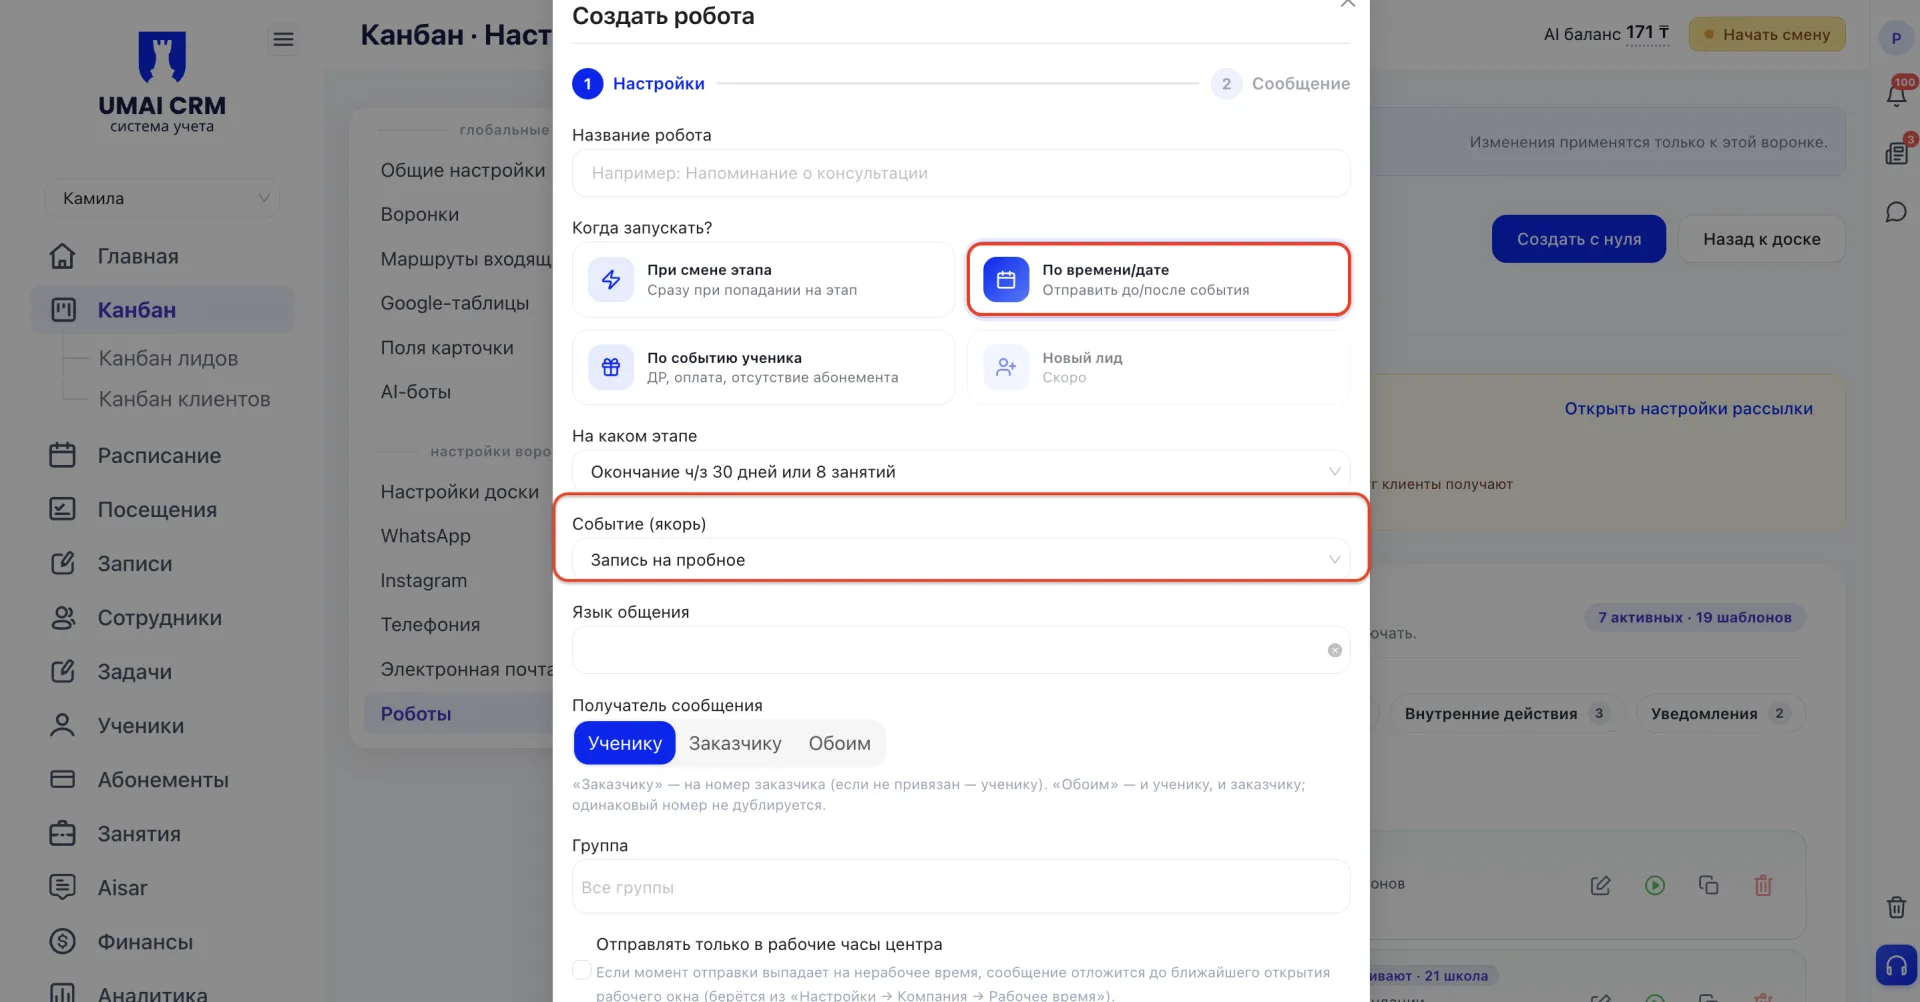
"By time/date" sends a message before or after an event, as in the leads kanban. Only the list of events themselves is different: for Clients it is oriented to Membership. For example, in the "Event (anchor)" field you can choose "Sign up for trial".
"By Student event" exists only for Clients and is not found in the leads kanban. The robot handles events related to education and payment, and is discussed separately below.
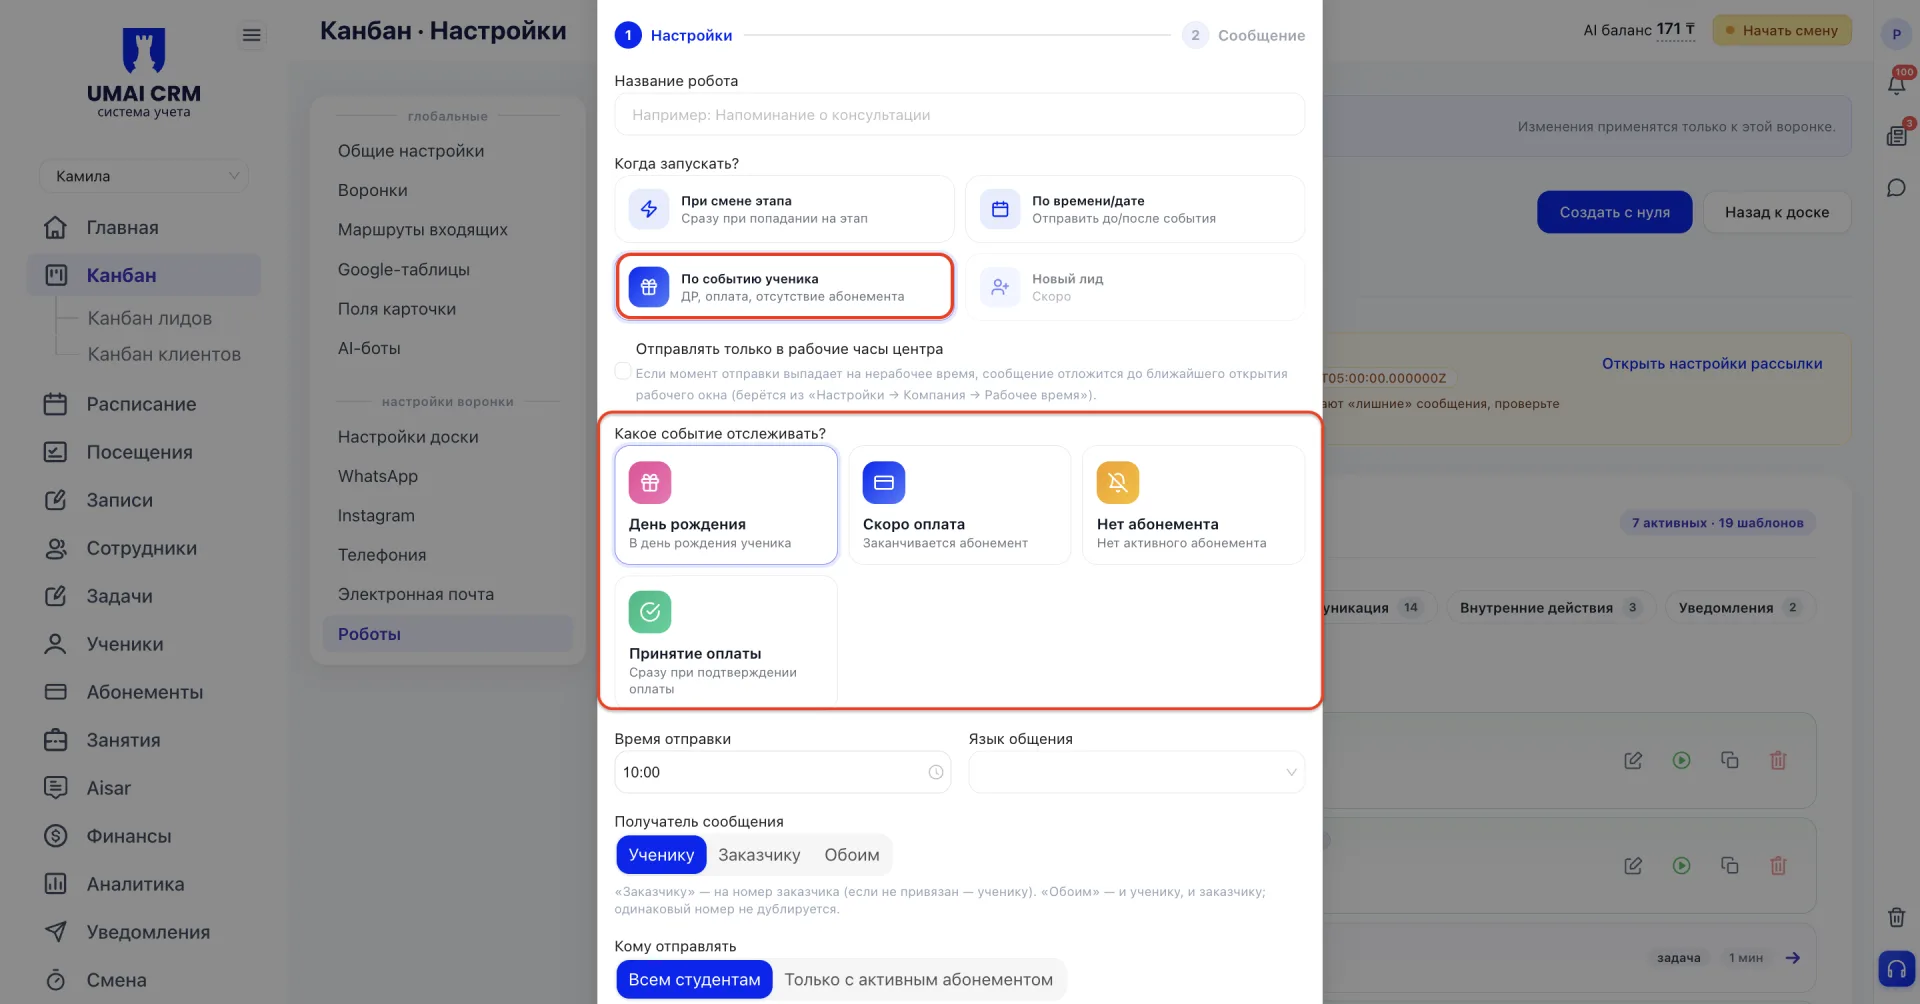
This option launches the robot not by time and not by stage change, but by a specific event in the Student's life. After selection a block "Which event to track" appears with four cards.
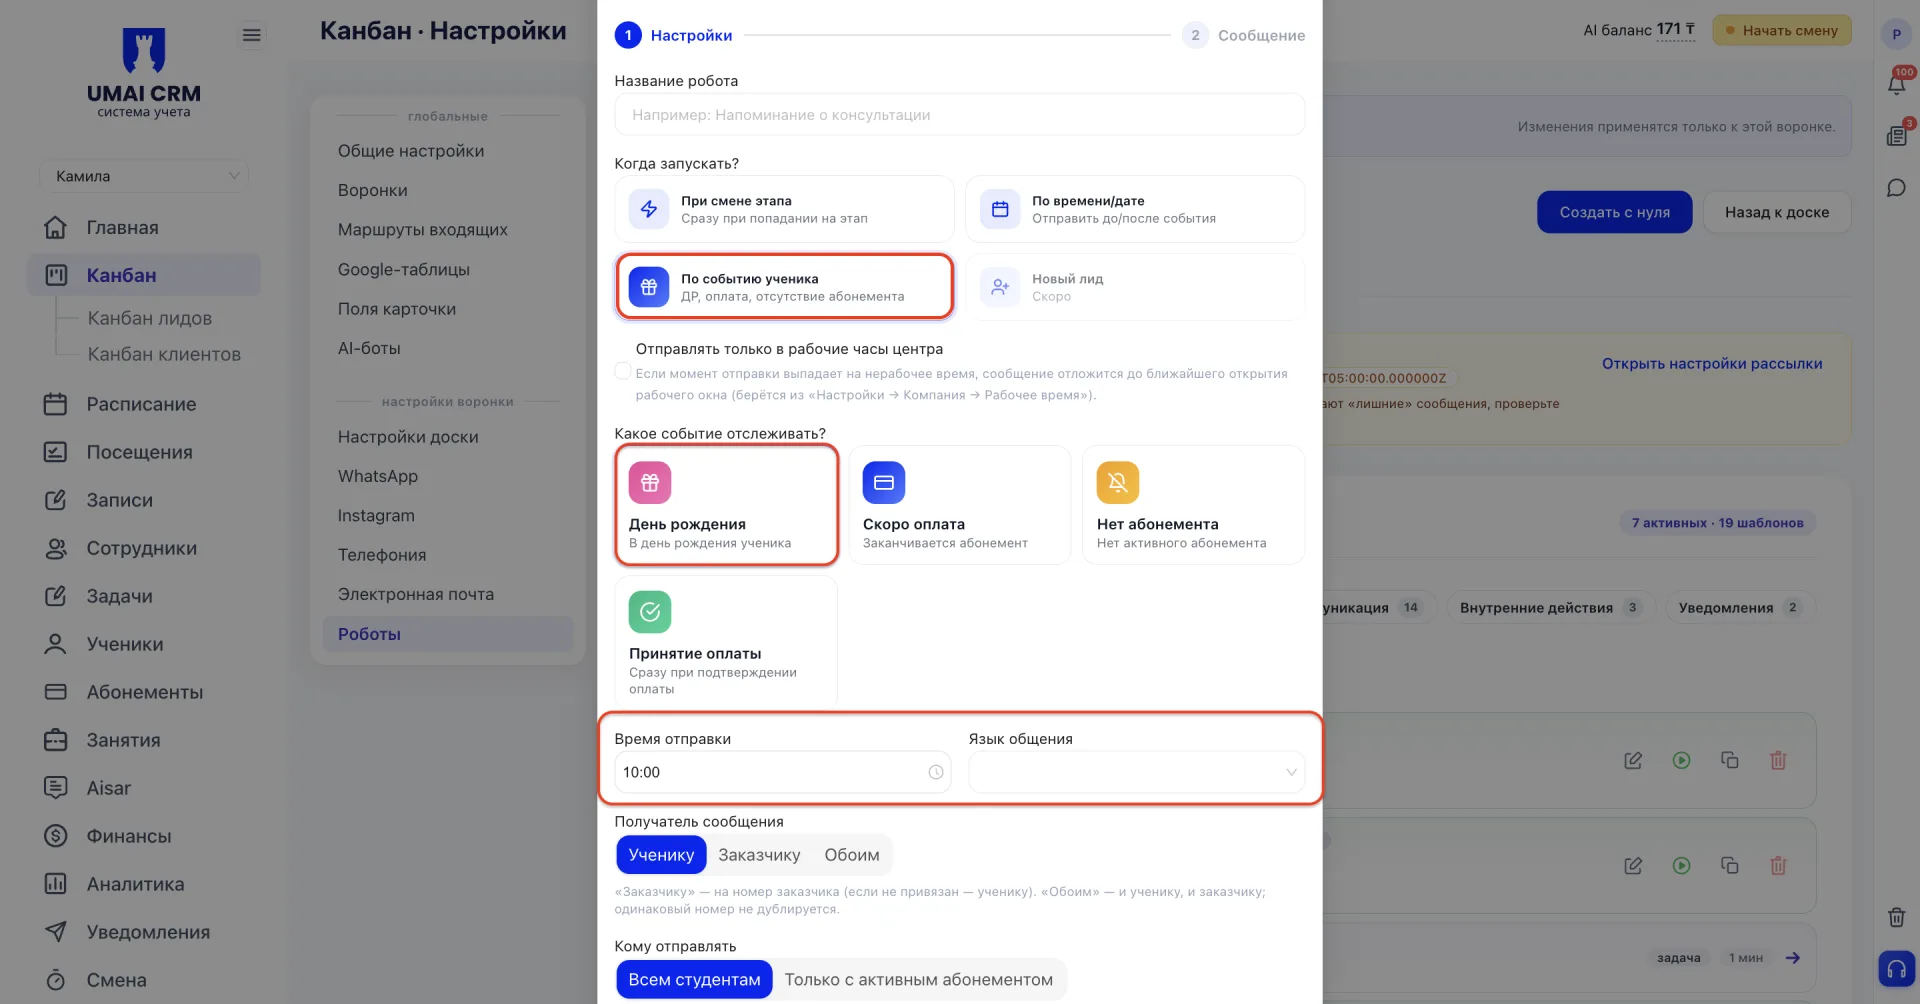
"Birthday" launches the robot on the Student's birthday. This event has a minimal set of additional fields: only the sending time.
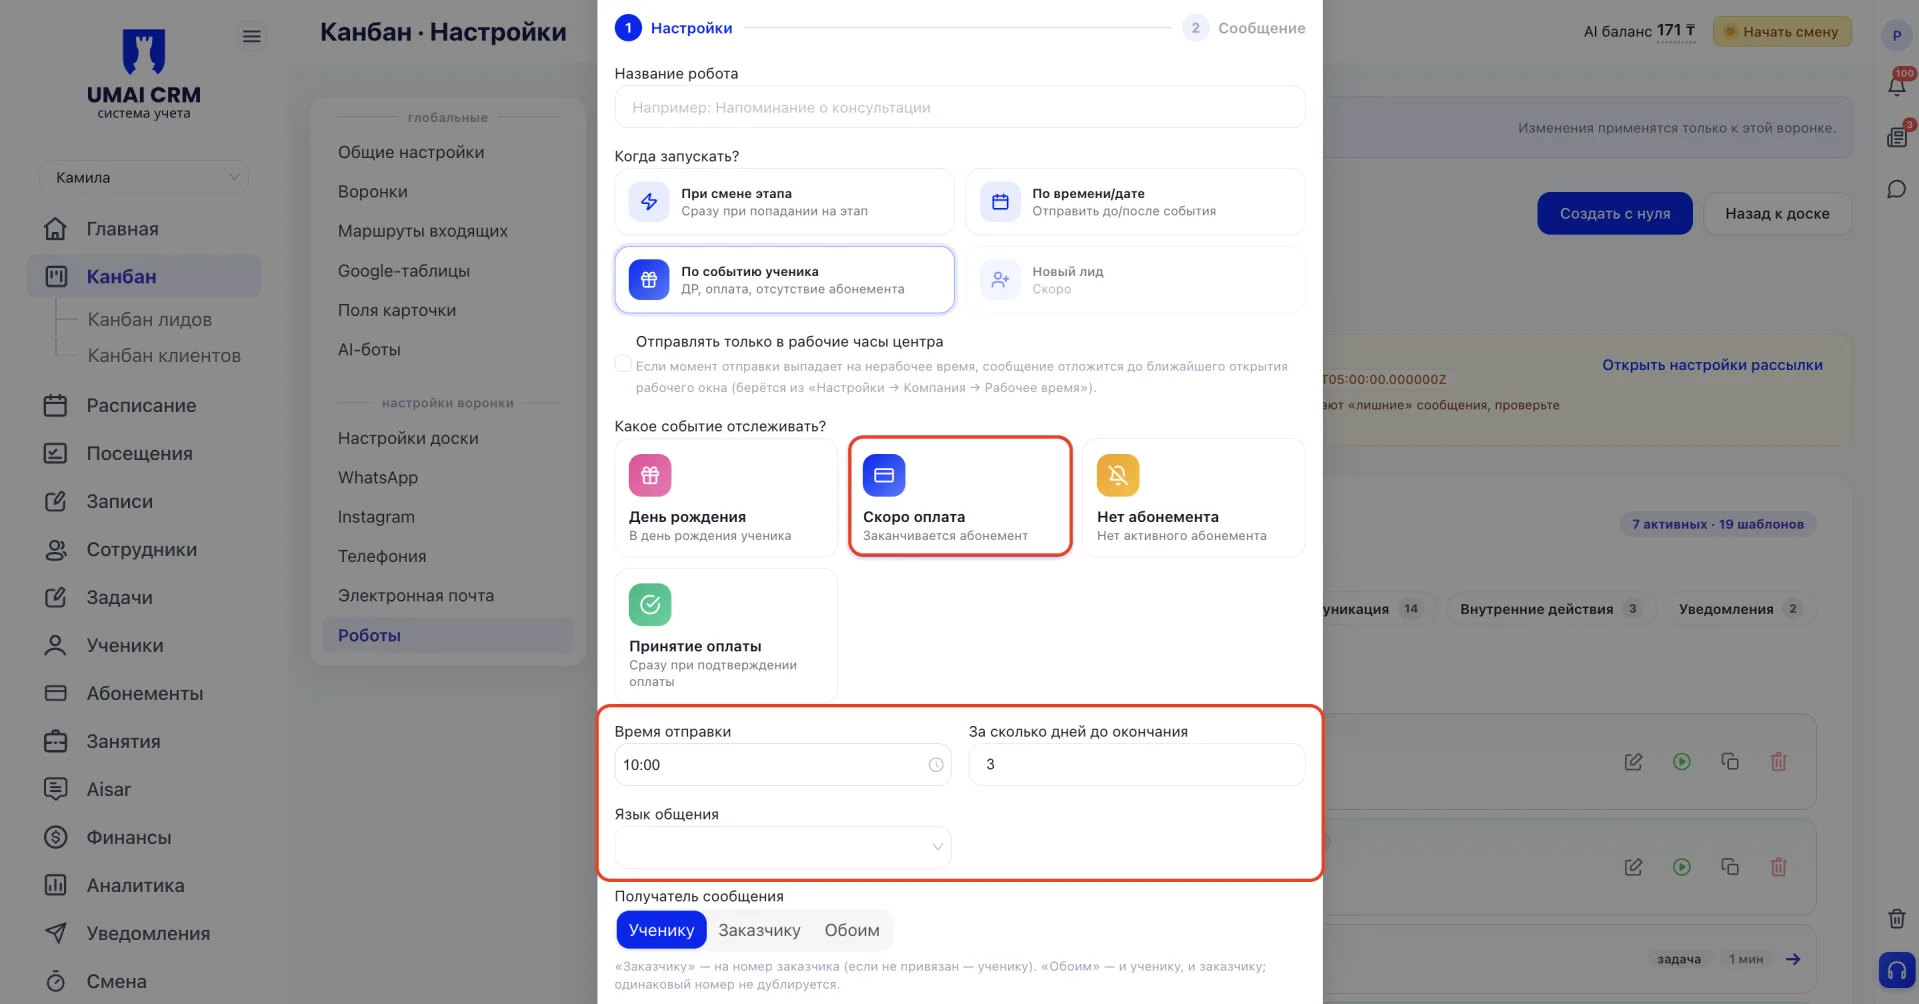
"Upcoming payment" launches the robot when the Student's Membership is about to expire. An additional field "How many days before expiration" appears here, where you set how many days before the end of the Membership to send the message.
"No membership" launches the robot when the Student has no active Membership left. There are no additional fields here except for the sending time.
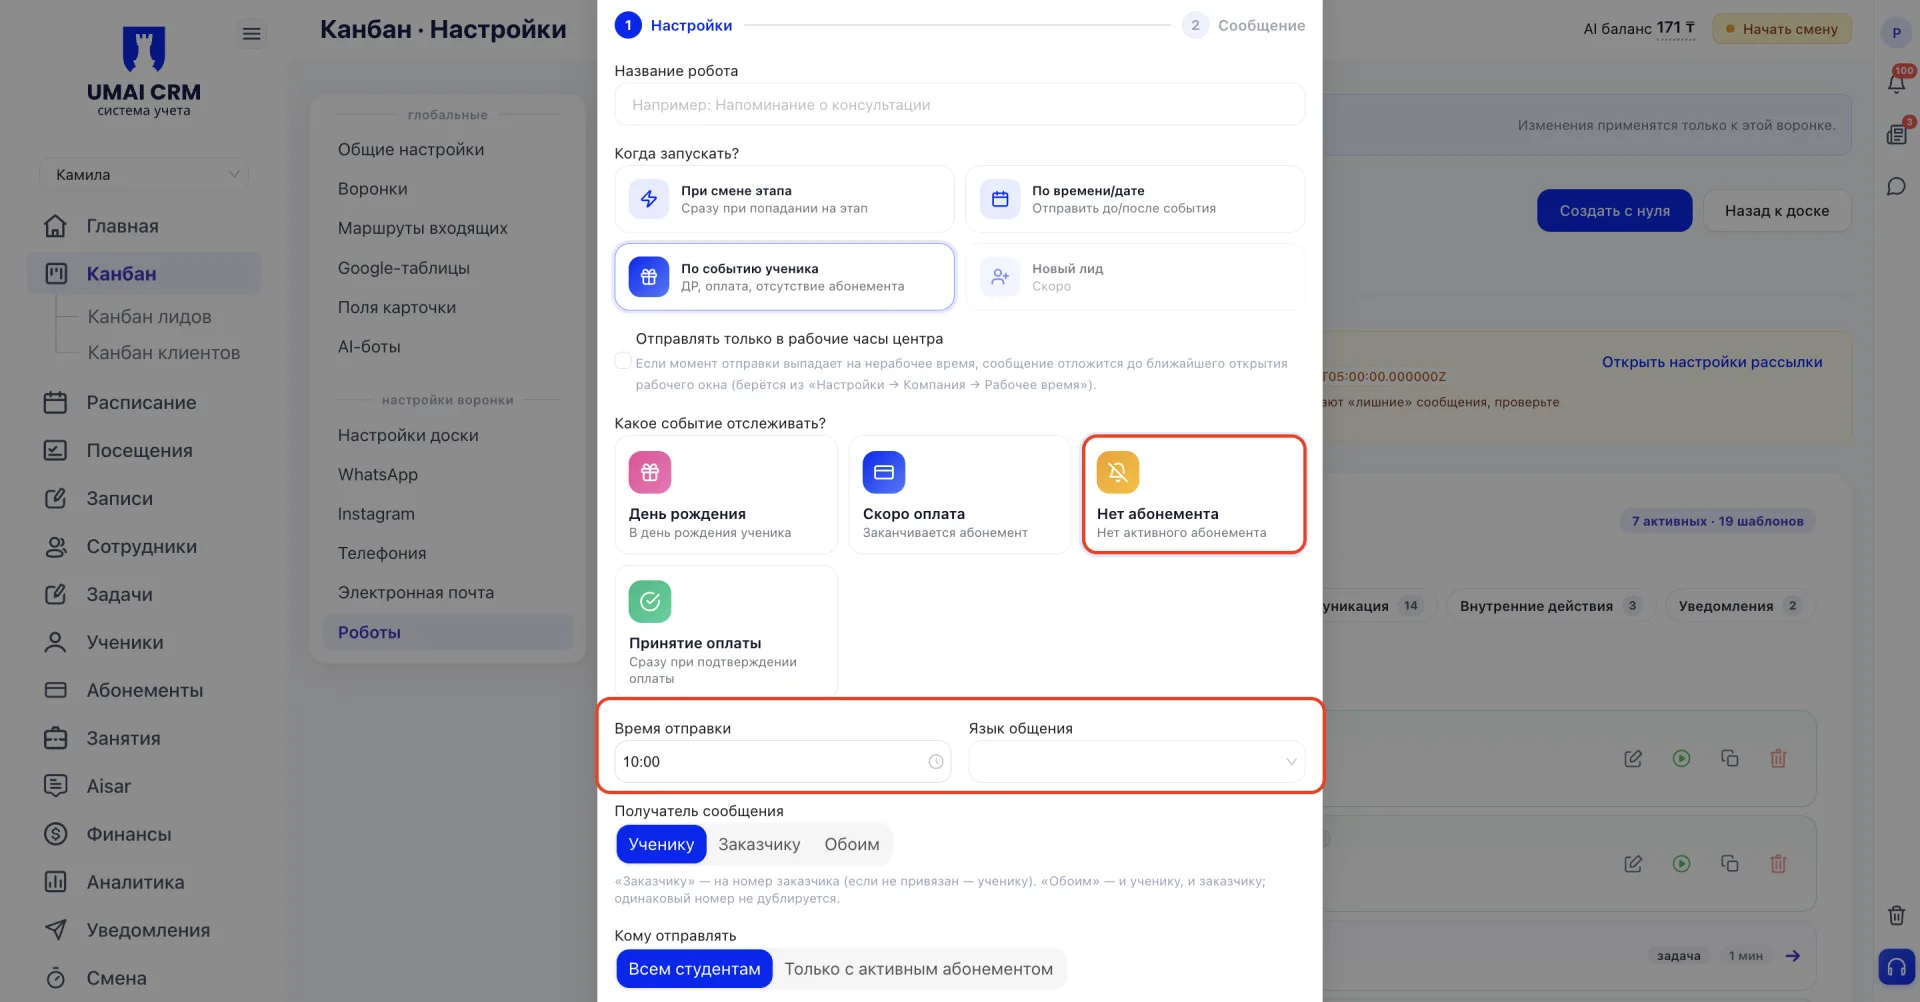
"Payment acceptance" launches the robot immediately at the moment of payment confirmation. This event does not even have a sending time field because the message is sent instantly.
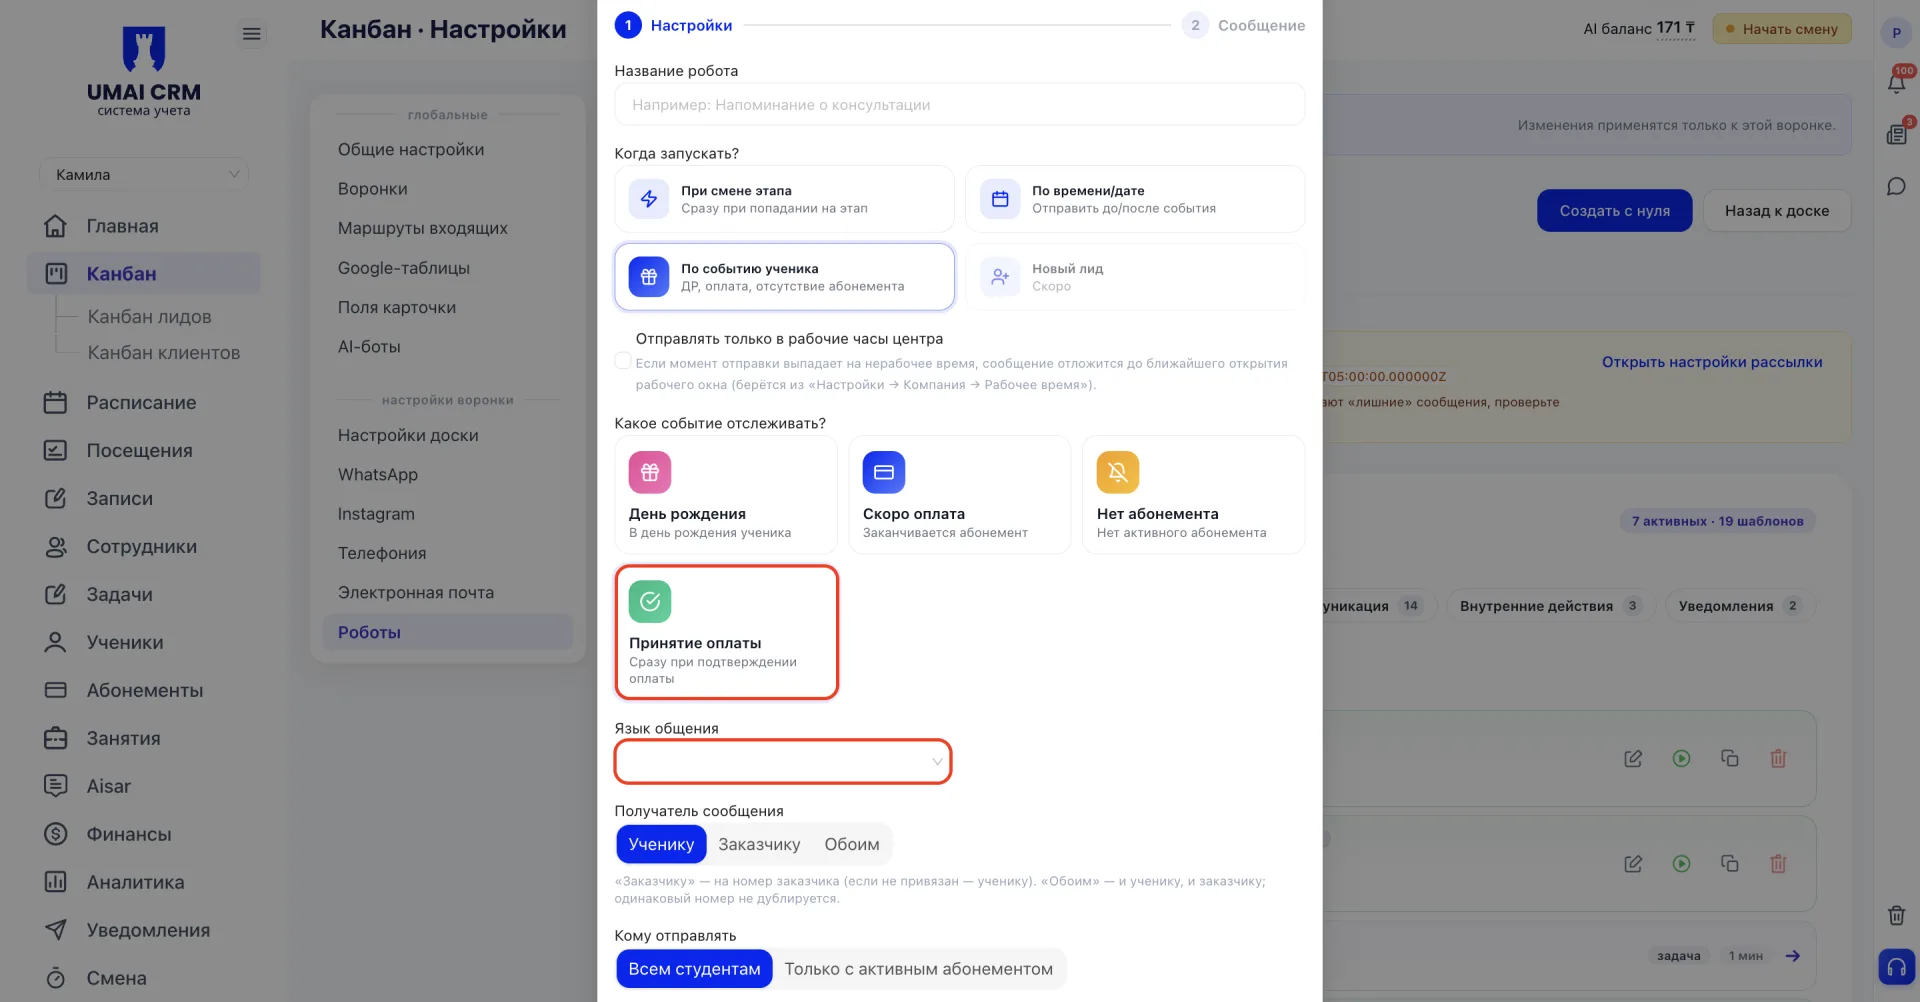
After selecting the event the familiar fields appear: message recipient (to Student, to Client or to both) and, for the "Upcoming payment" and "No membership" events, a toggle "Who to send to" — all Students or only those who have an active Membership.
When the sending condition is selected and filled in, click "Next" and proceed to message setup as shown in step 4.
Important to consider
- The template "Notification of absence of membership" (event "No membership") has default text that talks about an upcoming end of Membership, although by the meaning of the event the Membership is already gone. Before launching such a robot, it is worth checking and correcting the text manually.
- Some templates have tariff limitations. If a template is available only on a certain plan, the form warns about this directly when you try to configure it.
- Some templates actually combine several messages in one form rather than being configured as a single robot. Inside such a form several messages with different intervals may be assembled (for example, after several days, after a month, after six months), and each can be edited or deleted separately. For other templates instead of multiple messages you can add several dates and times for sending the same text using the "+ Add time" button. If you open such a template and see several blocks with text or schedule inside, this is not a bug but a feature of that template.