The Robots section automates the manager's actions at stages of the funnel (воронка). A robot is attached to a specific stage and triggers when a Lead enters that stage — immediately or after a set time. For example, it can remind the client about an appointment.
Below, using concrete examples, we will explain how to configure such a robot.
Step 1. Open the section and choose a funnel
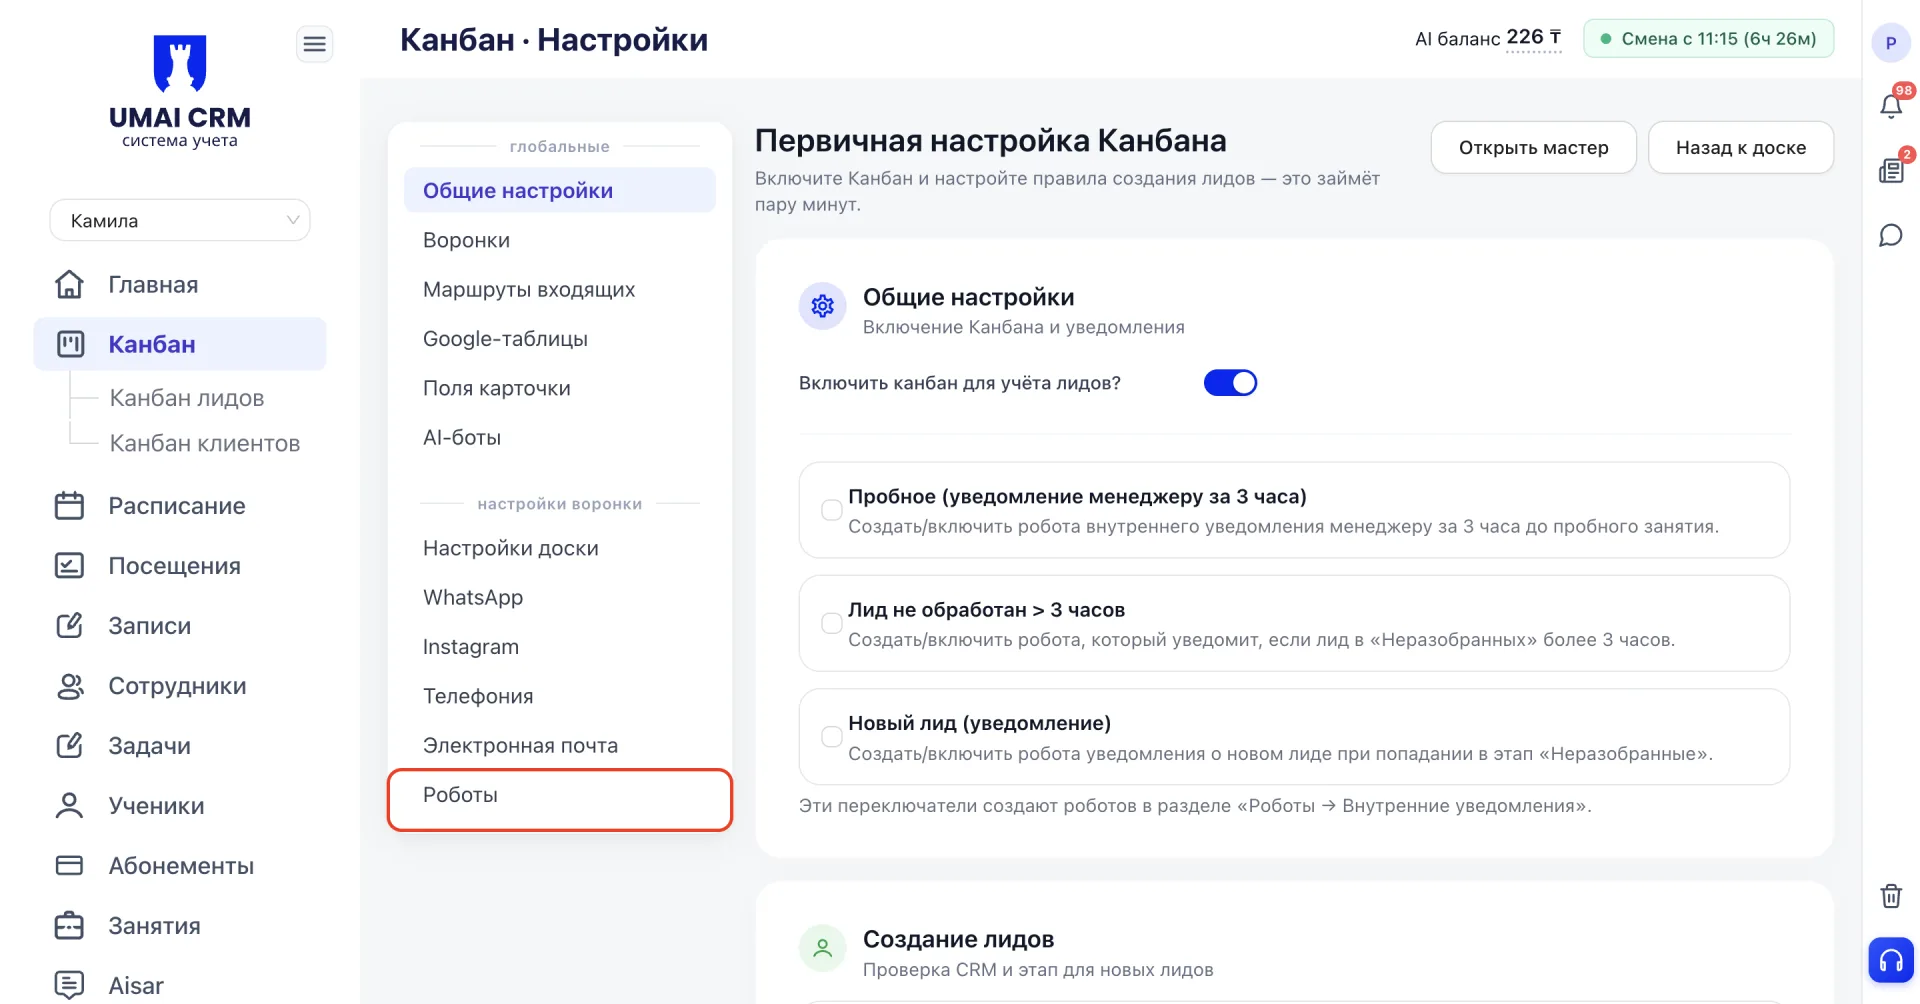
In the left menu open the kanban, then "Settings", select the "Robots" section.
At the top, in the field "Editing funnel", choose the desired funnel. If your center has several funnels, for example separate ones for different managers, the robot must be configured in each of them separately. Otherwise it will monitor only the Leads in the funnel where it was created, and in the others it simply will not trigger.
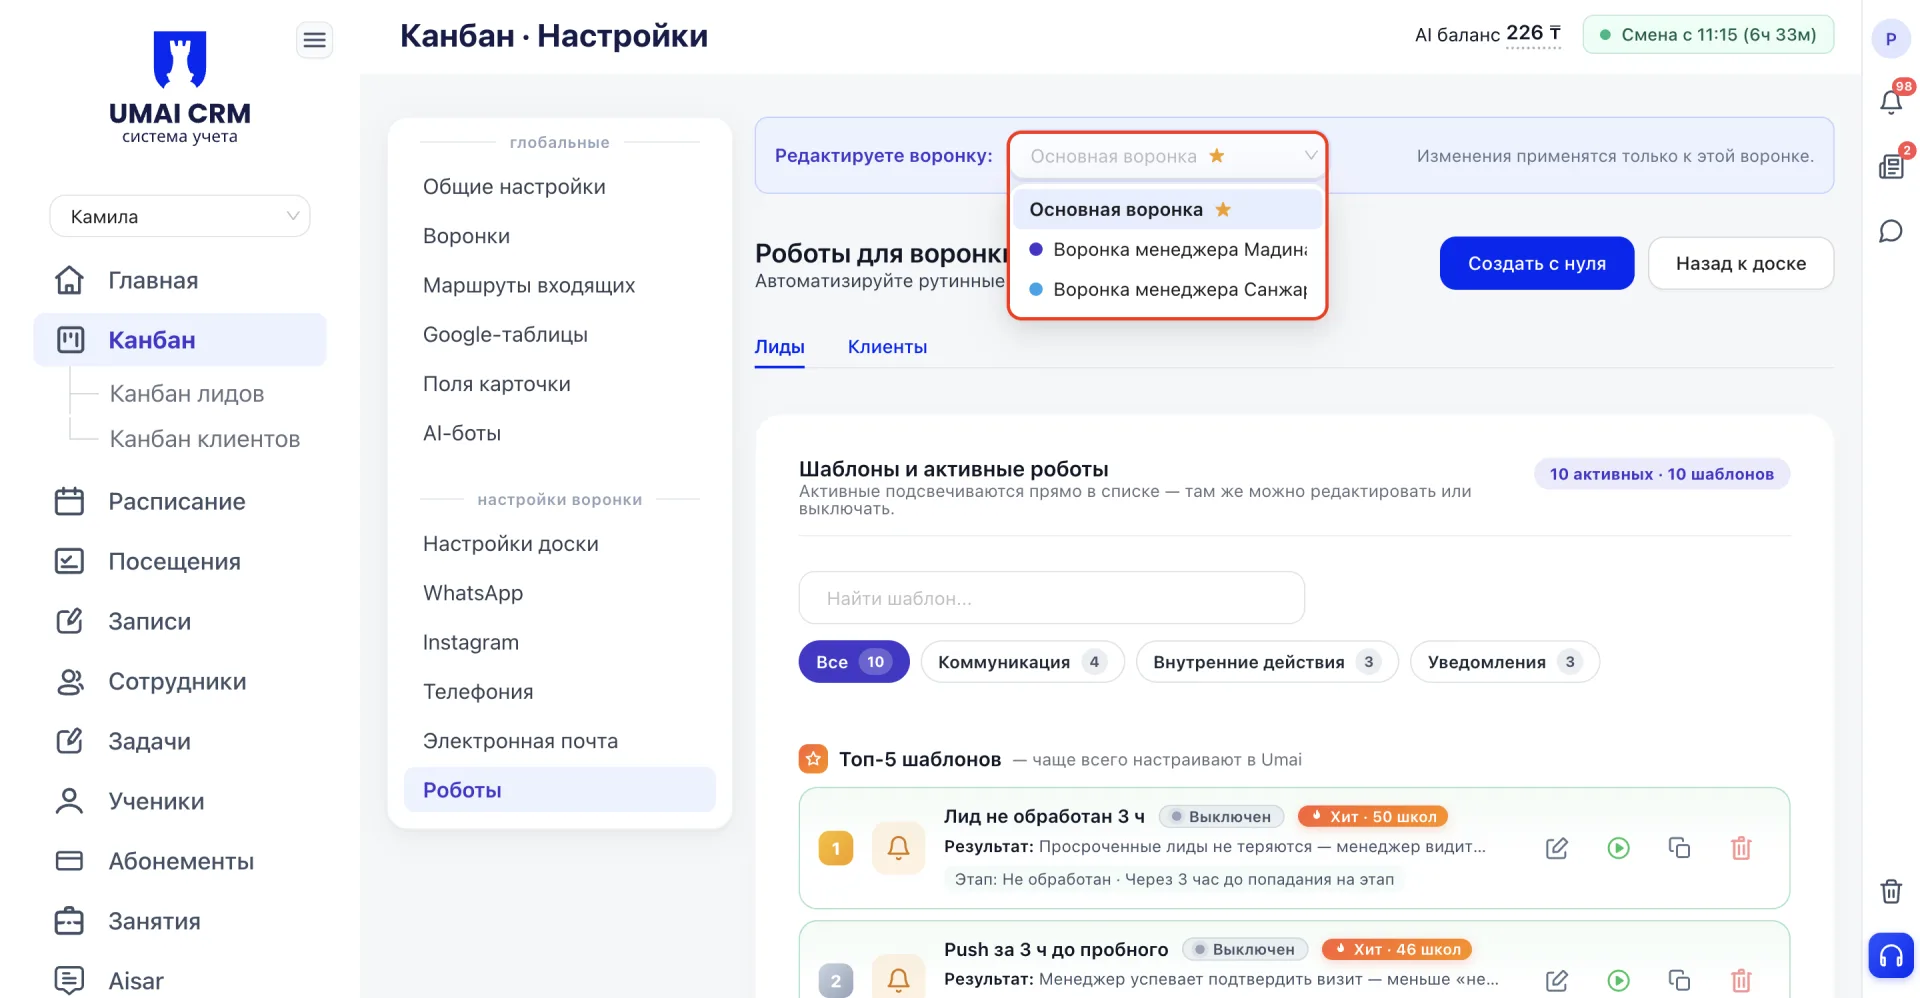
After that, the list of templates for the selected funnel will open on the "Leads" tab.
Step 2. Find a ready-made template
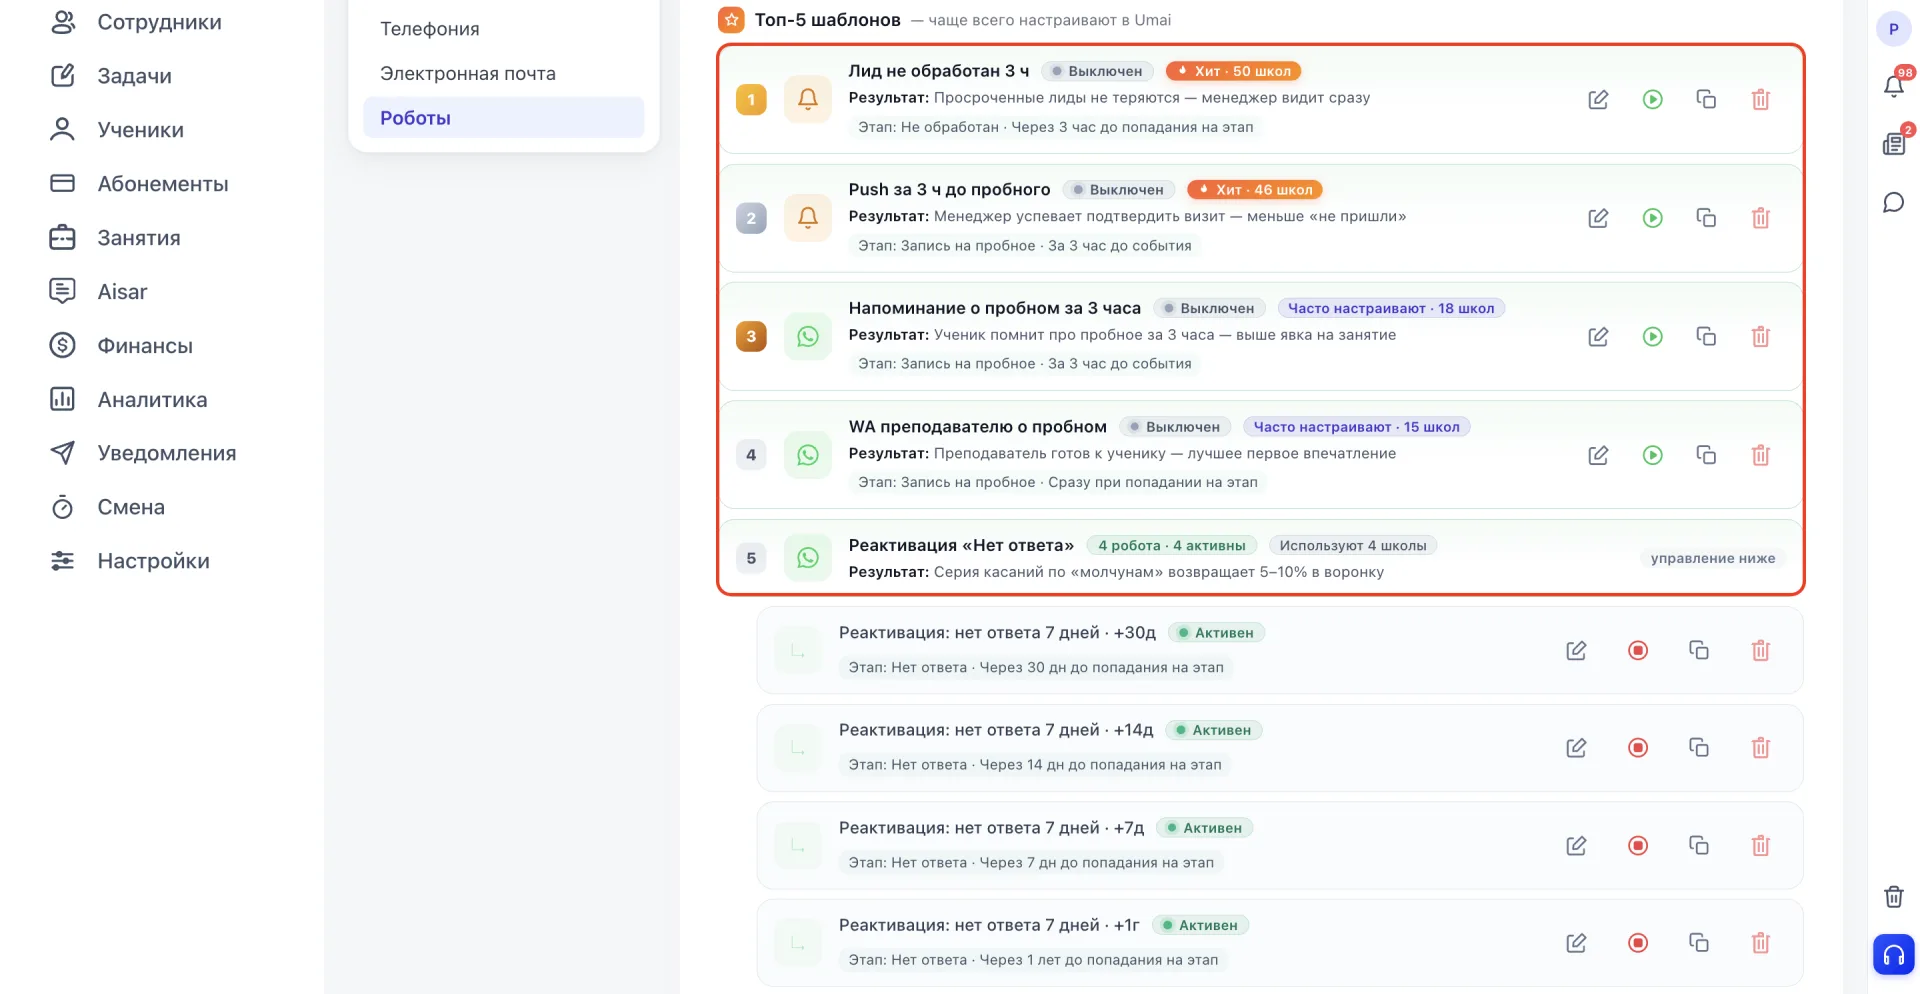
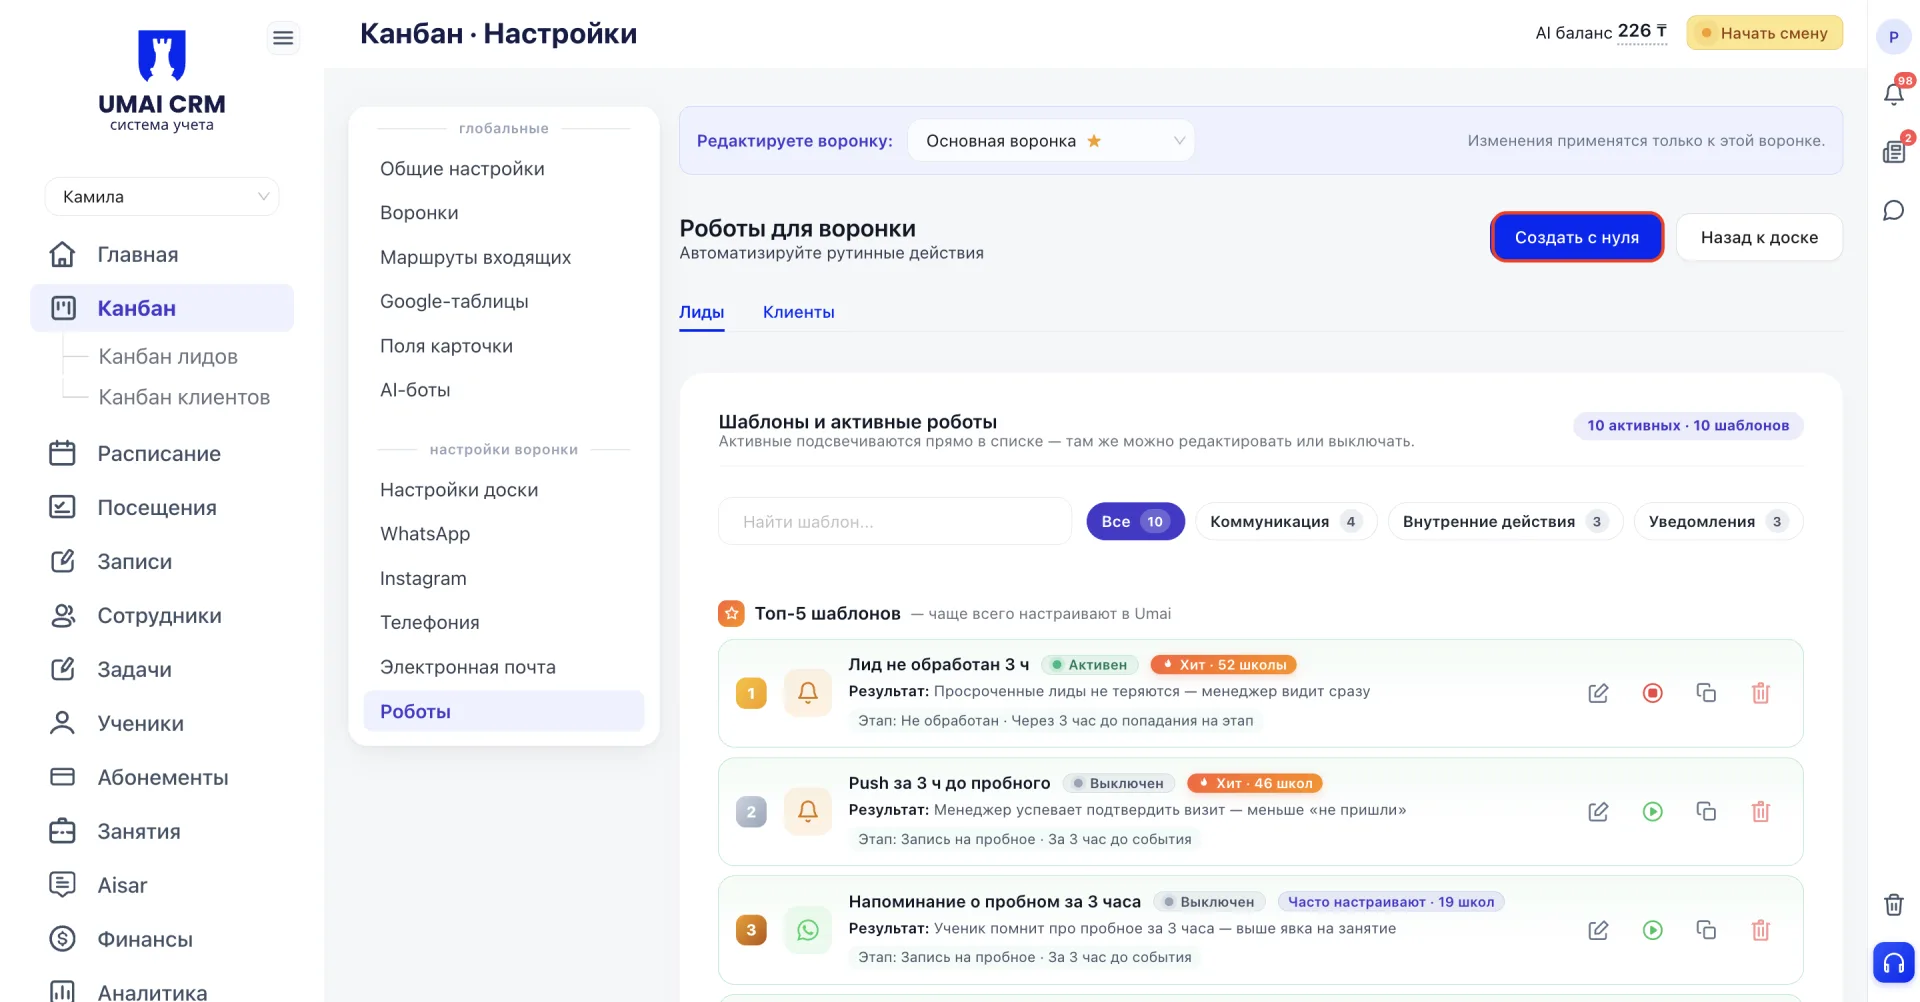
Click the desired template to open its settings. If the required template is not in the list, you can create your own robot using the "Create from scratch" button. A window with empty fields for creating and filling the template will open.
Step 3. Check when the robot will trigger
The "Settings" tab is already filled in. The robot runs by time and date on the selected stage; in the template the default is "Unprocessed (Не обработан)", but the stage can be changed to any other. The choice is up to the user. The countdown starts from the moment of entering the stage, and the notification itself is sent after 3 hours.
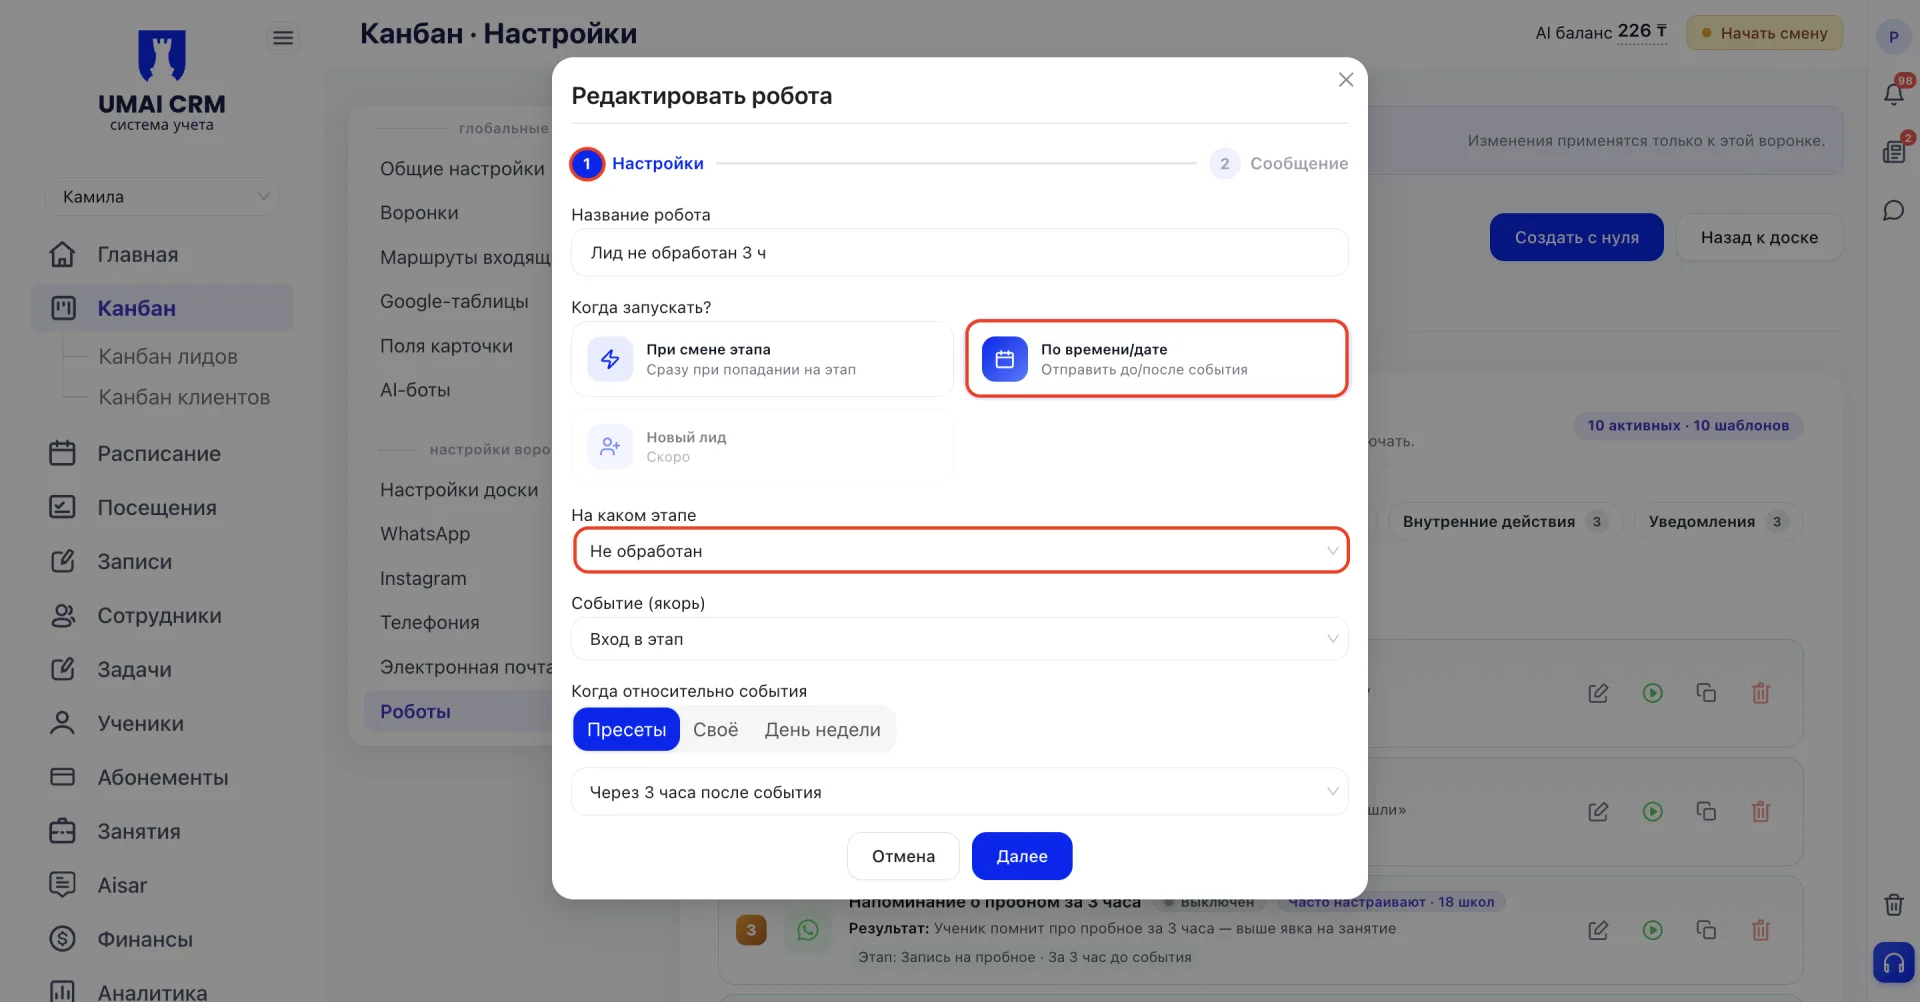
As soon as a Lead enters the "Unprocessed (Не обработан)" stage, a three-hour countdown starts, and if during this time the Lead does not leave the stage (that is, the manager does not process it), the robot will trigger. If you need to change the period, for example, to notify the manager after 1 hour instead of 3, there are three ways to set the time, which are switched by tabs directly under this block:
- Presets — choose a ready-made option from the list.
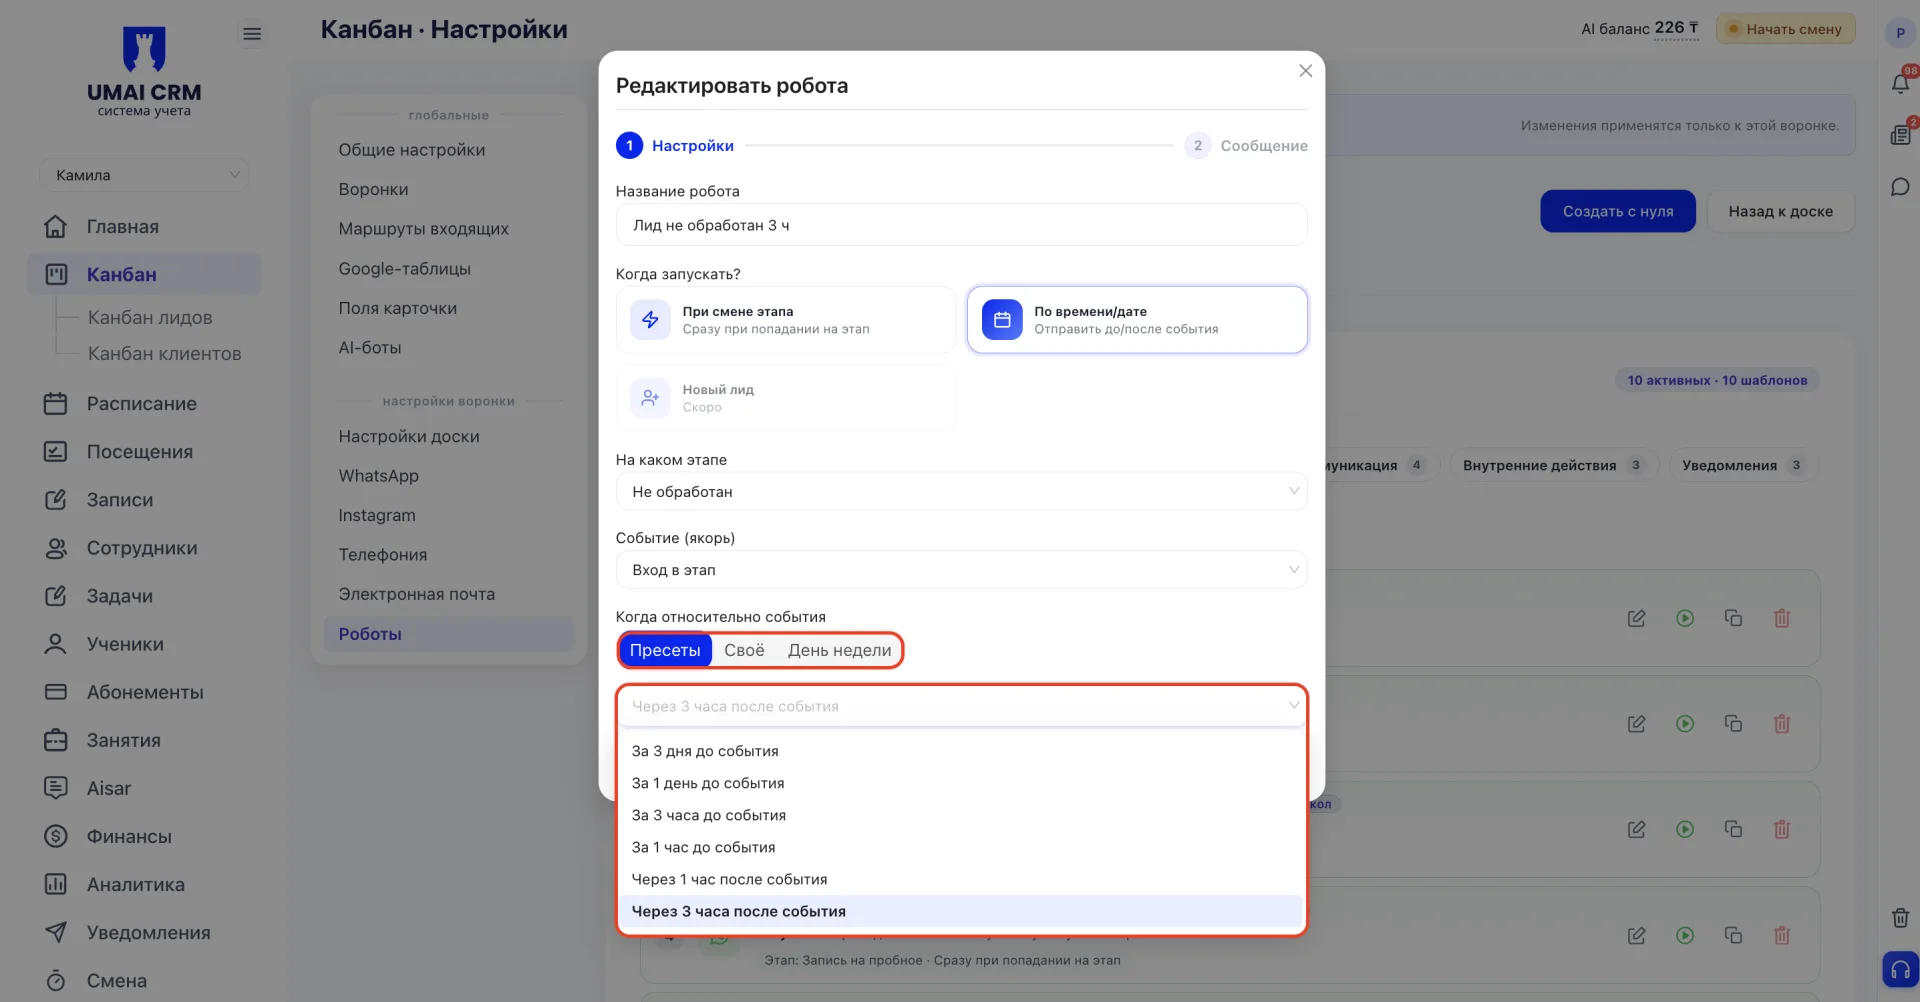
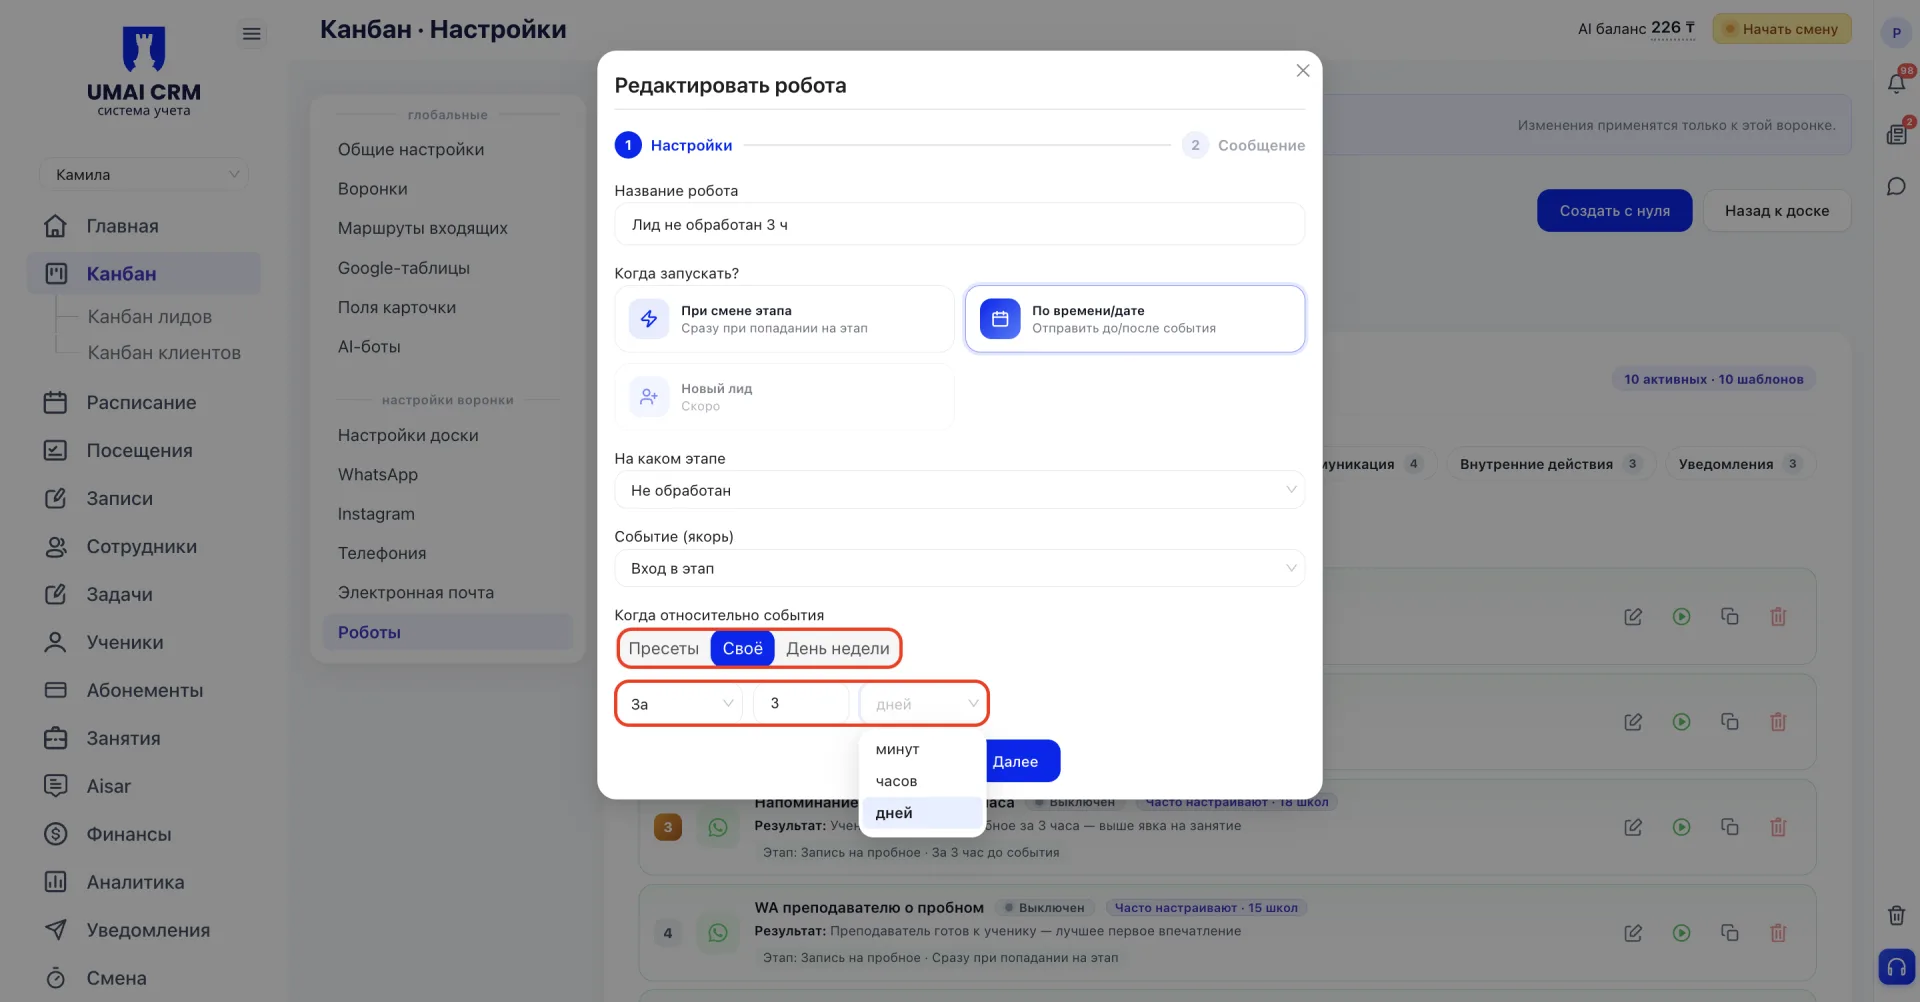
- Custom — enter the number and unit of time yourself (hours, days, etc.) if no preset fits.
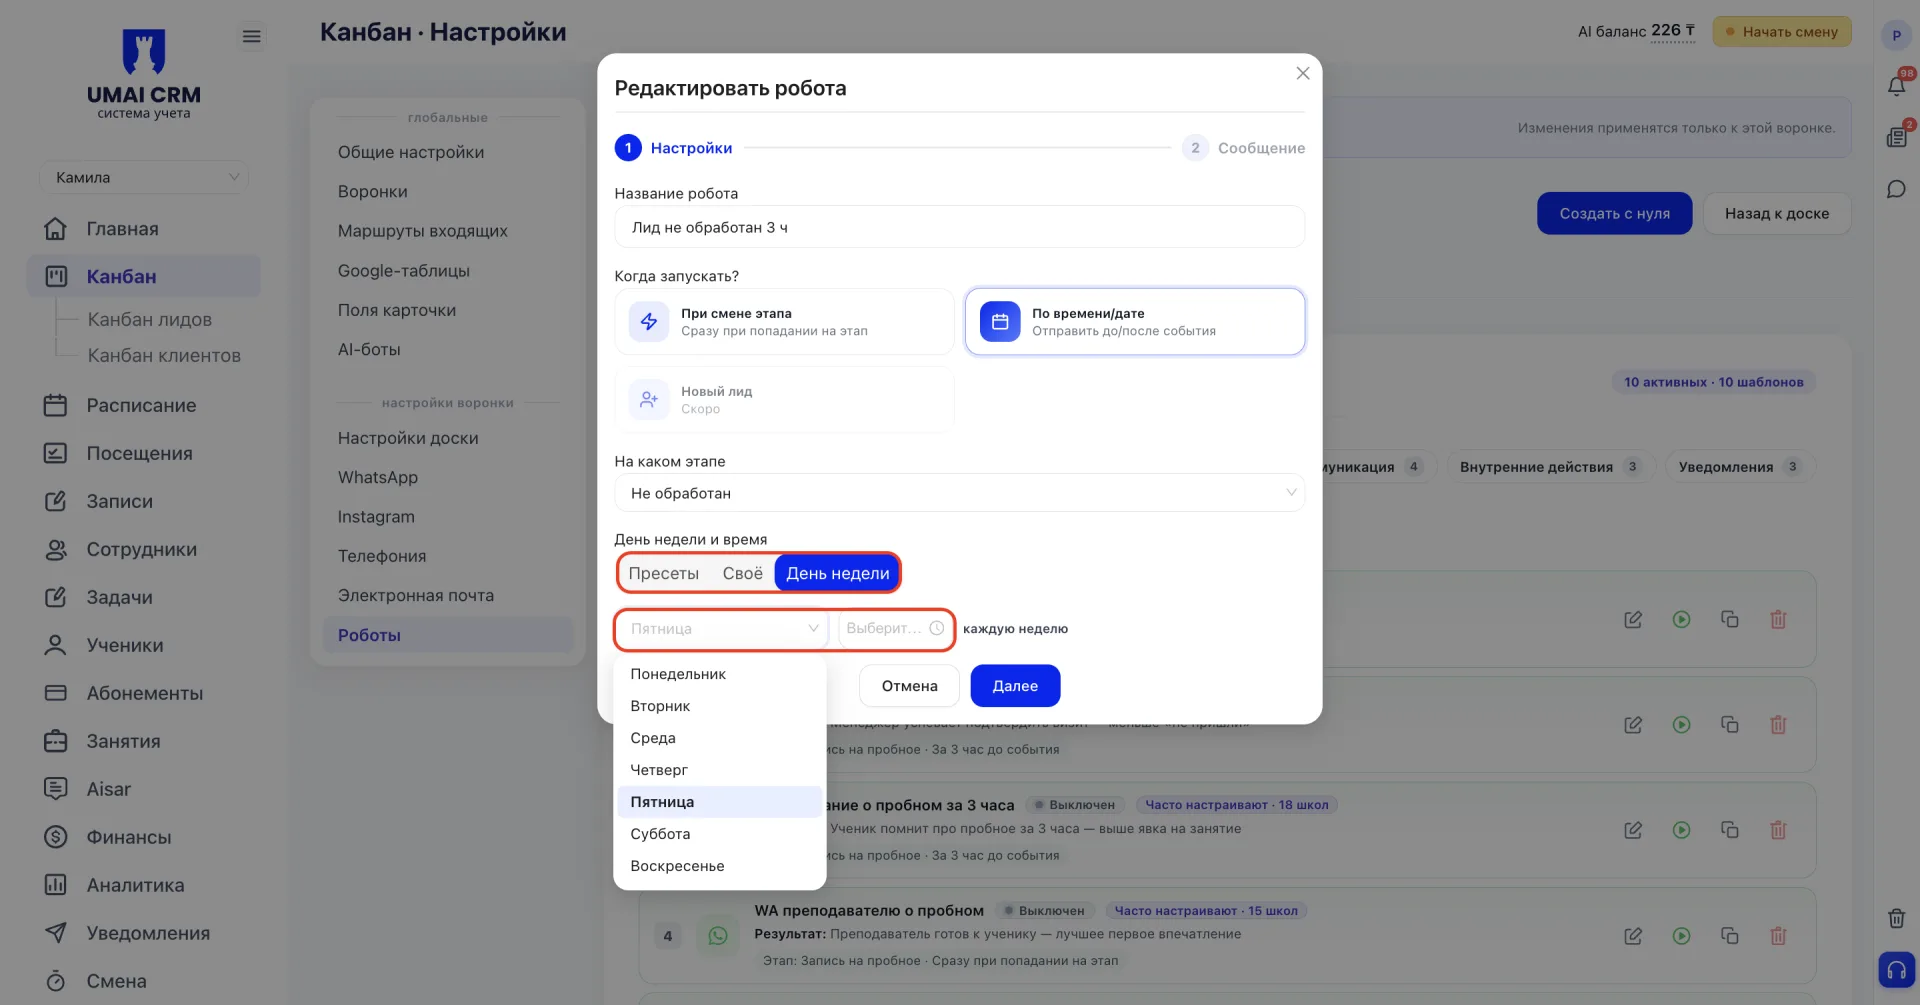
- Day of the week — set a specific day and time that will repeat every week. This is no longer a countdown from the Lead entering the stage, but a fixed schedule: the robot will trigger at that day and hour for all Leads on the stage at once, regardless of when each of them entered it.
If the robot is created from scratch
The "Create from scratch" button was mentioned in step 2. The form that opens through it is filled in differently than for a ready-made template, so we will separately explain what needs to be done in it.
First, enter the name of the robot. It does not change the operation of the robot itself, it just helps to find it in the general list.
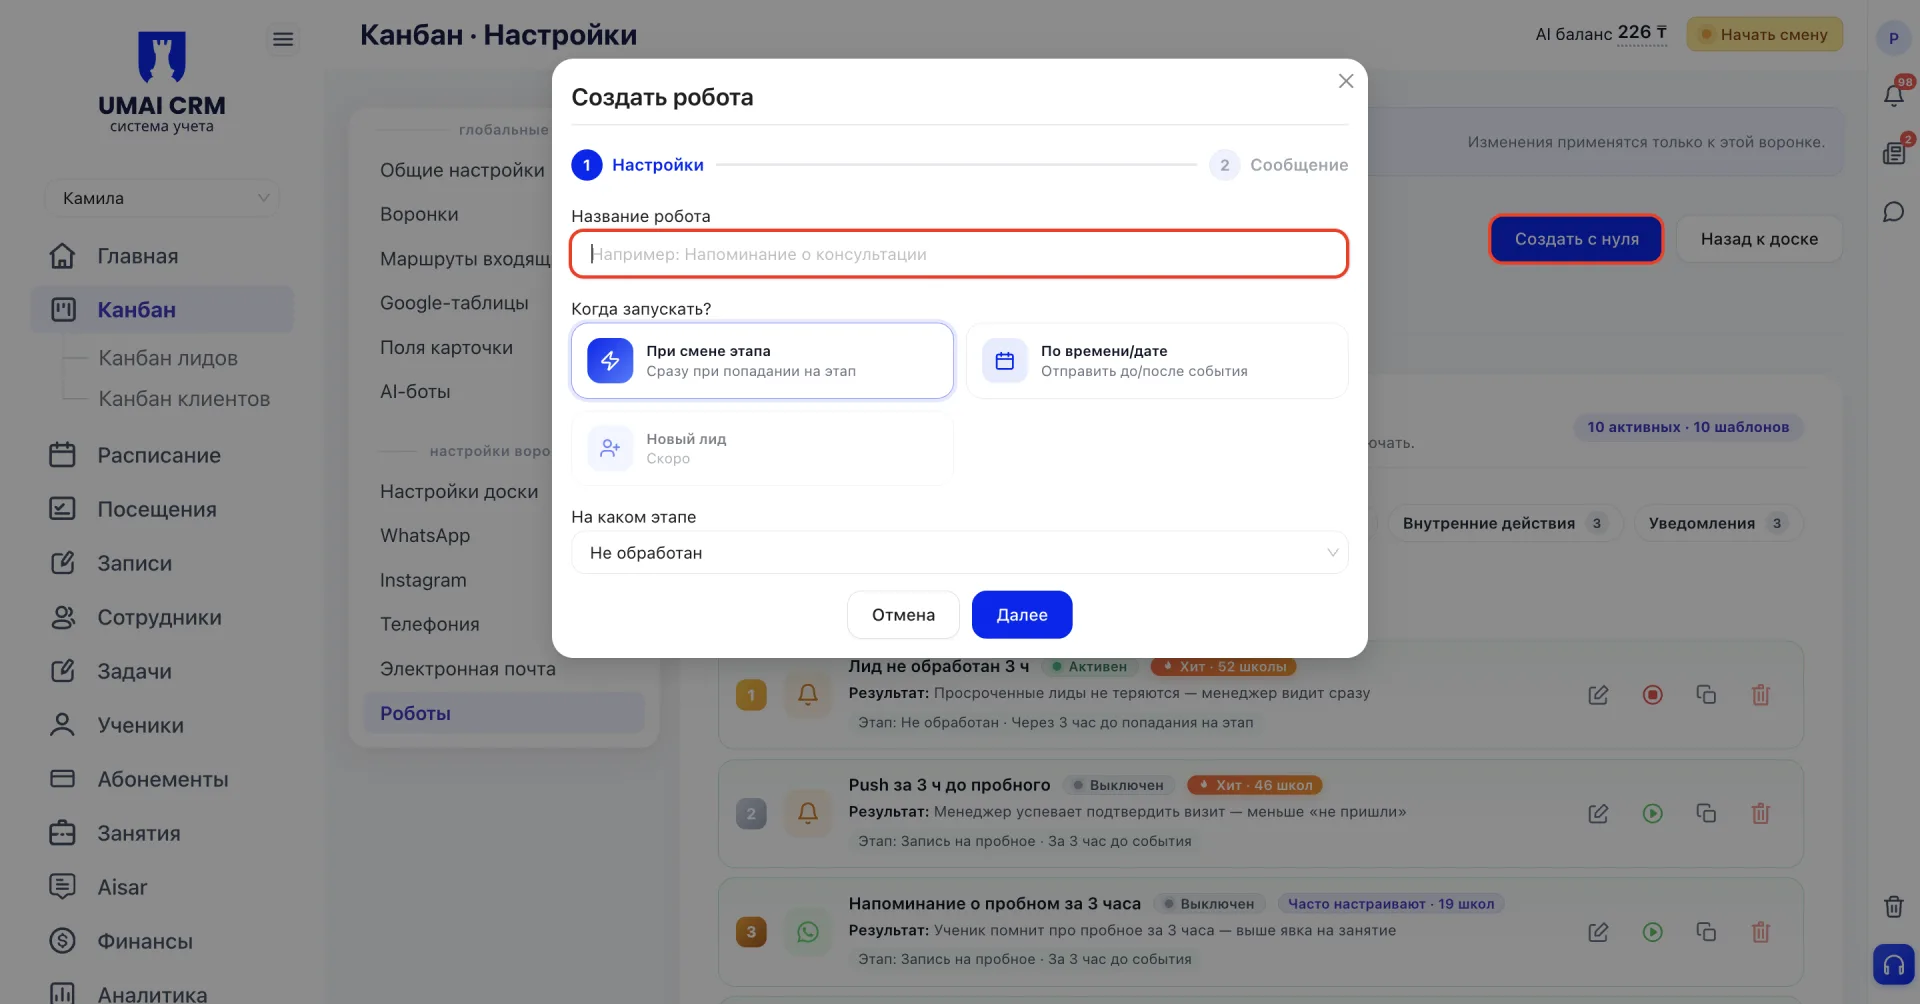
Next you need to choose when to launch the robot. The option "On stage change" will be suitable if the notification should be sent immediately when the Lead enters the stage. The option "By time/date" is needed if a delay before or after the event is required, as shown above for "Lead not processed 3 h".
When selecting "By time/date" three more fields appear. First "On which stage", where you select the funnel stage that the robot will monitor Leads on. Then "Event (anchor)", from which the delay is calculated: this does not have to be entry into the stage, the event can be, for example, booking a trial Class. And finally, the block with the already familiar three tabs, Presets, Custom and Day of the week, described above.
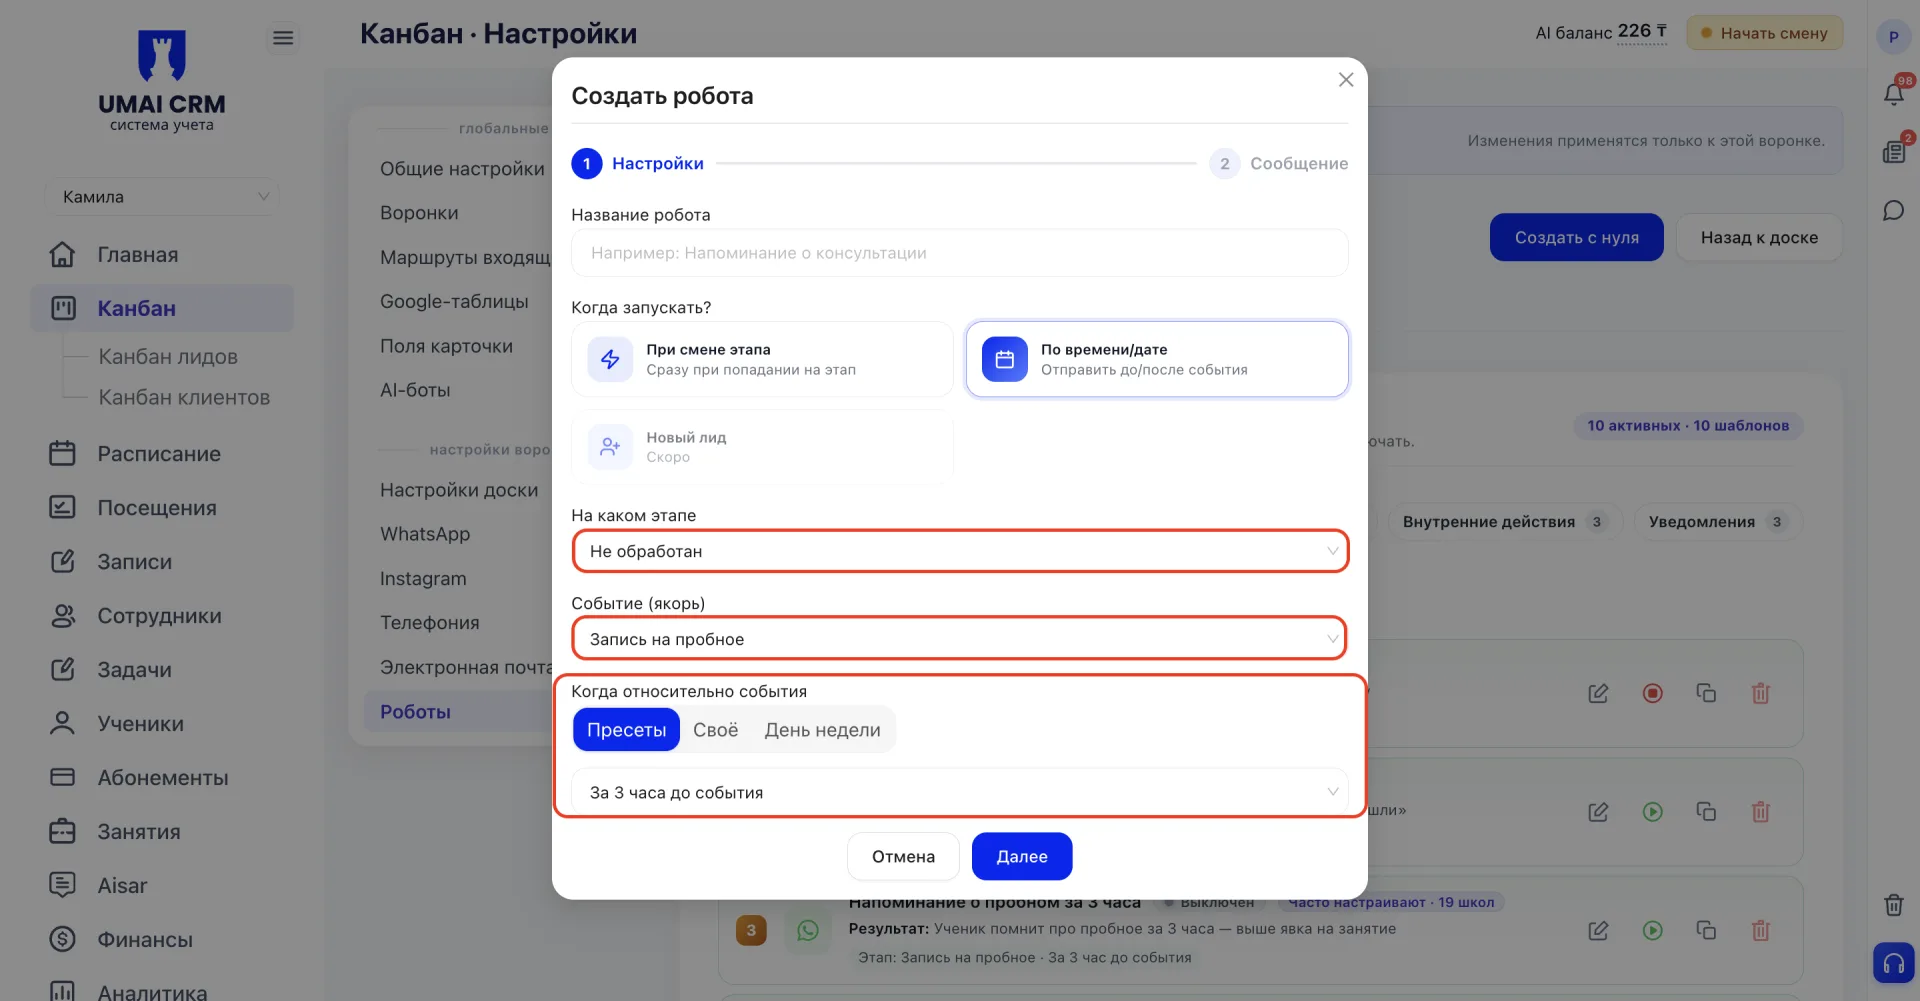
After this step is filled, everything else happens the same as when working with a ready-made template — proceed to configuring the message.
Step 4. Check what the robot will send
Go to the "Message" tab. For "Lead not processed 3 h" the type is set to "Notification" with a ready-made text:
Lead "" not processed for more than 3 hours. Phone:
The result will be received not by the client, but by the manager: he will see an internal notification with the Lead's name and phone number.
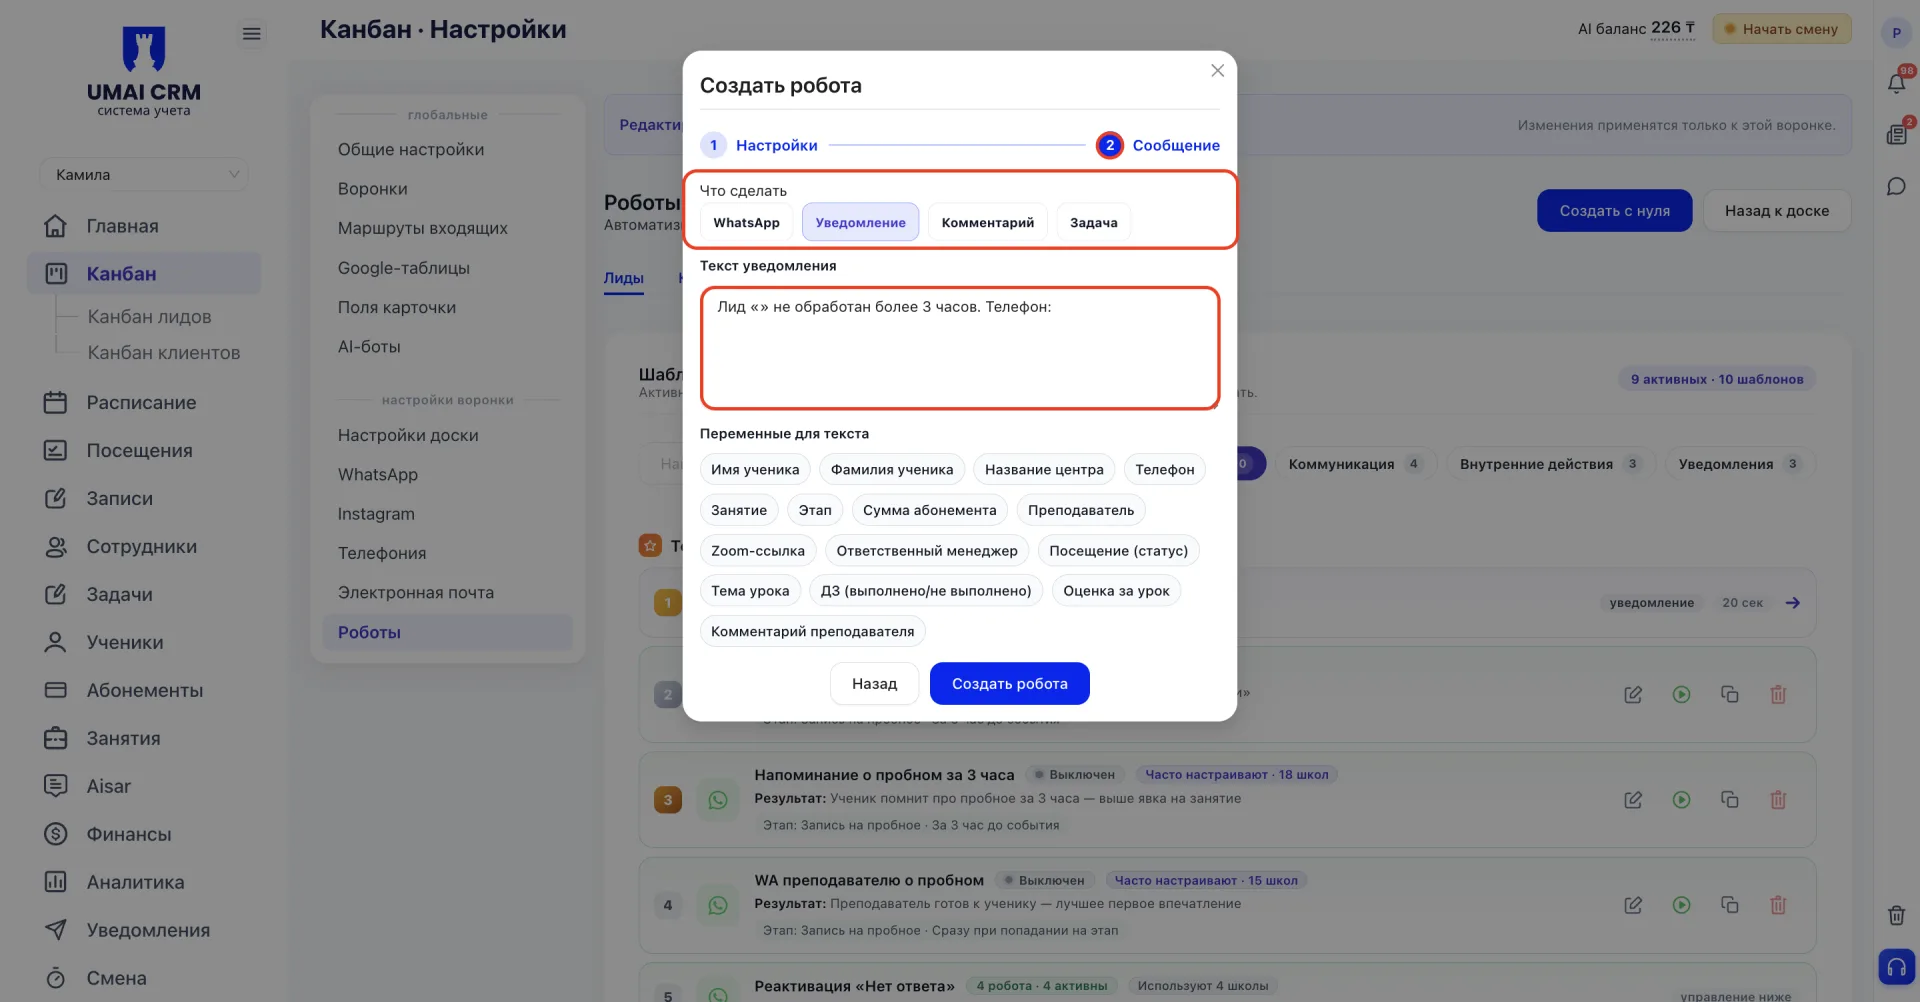
If instead of "Notification" another option were chosen: "WhatsApp", "Comment" or "Tasks", only the recipient and the place where the result arrives would change: to the client in WhatsApp, to the card history, or to the employee's task list. The label of the text field and the set of variables under it (Student name, phone, Class and others) remain the same for all four options. Variables automatically substitute the actual data of the specific Lead at the moment of triggering.
Step 5. Save and make sure the robot works
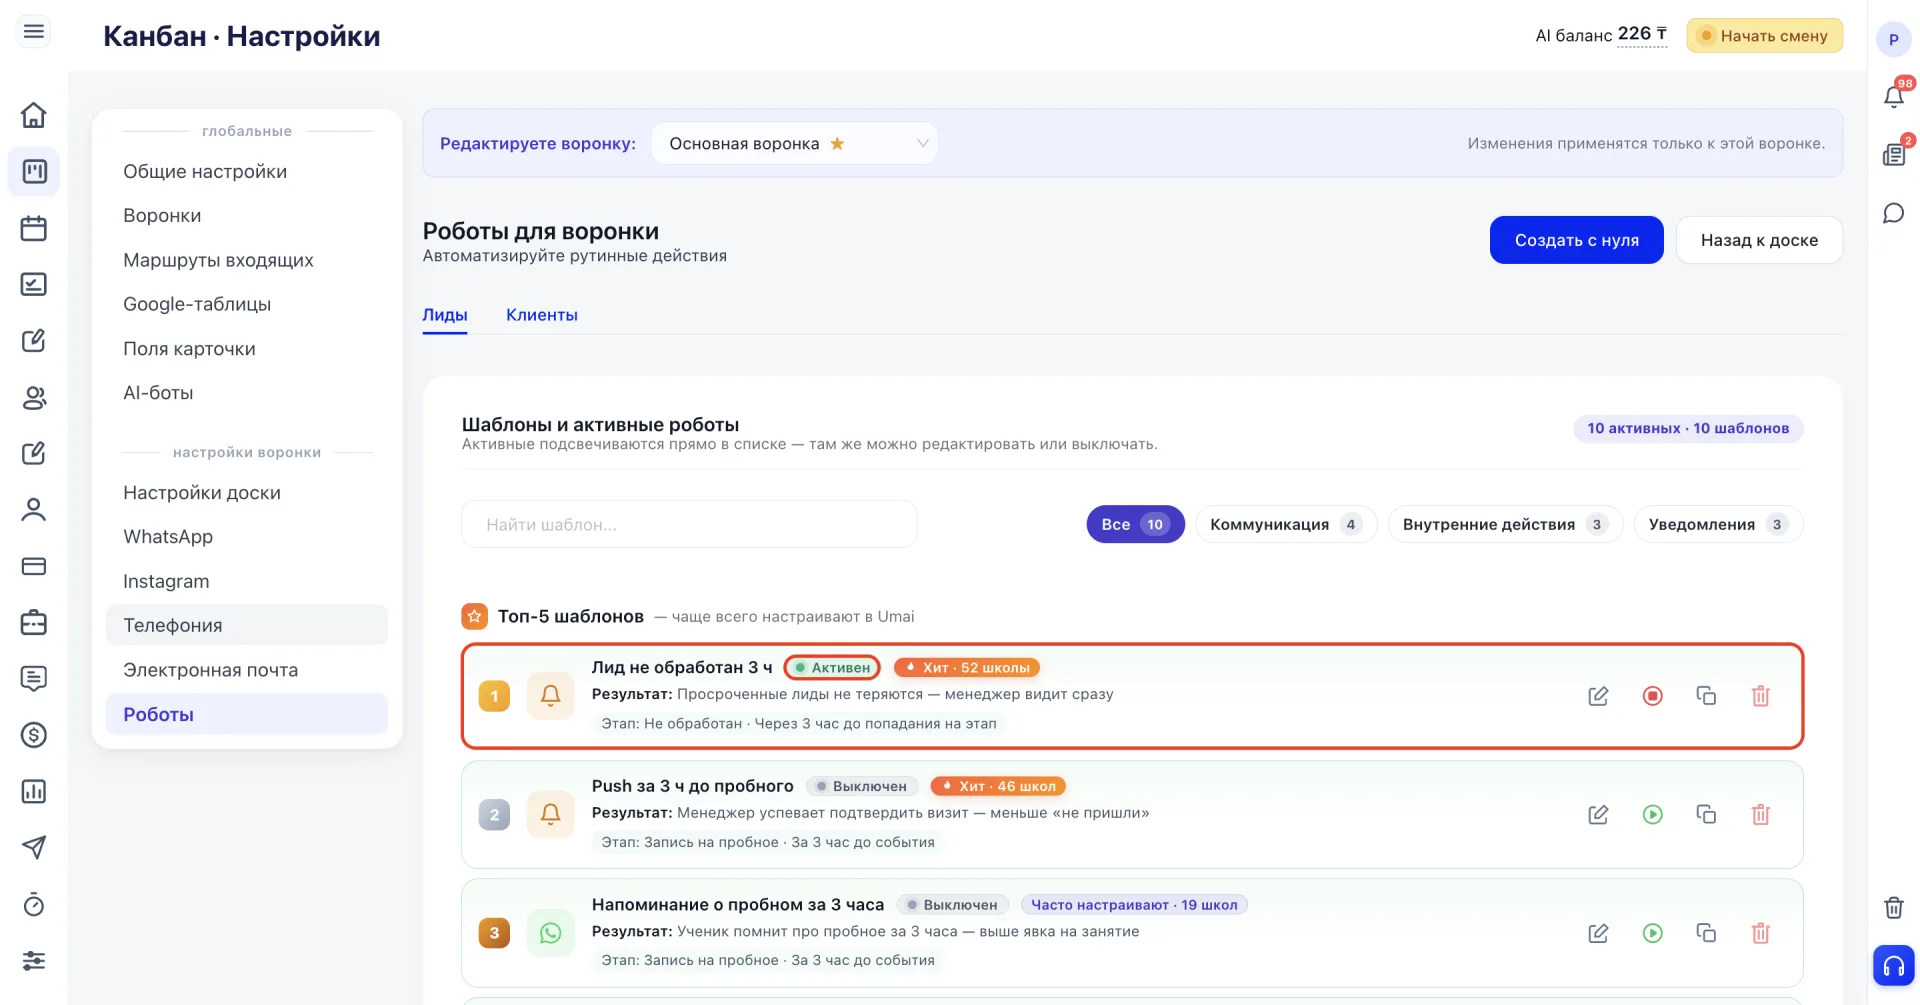
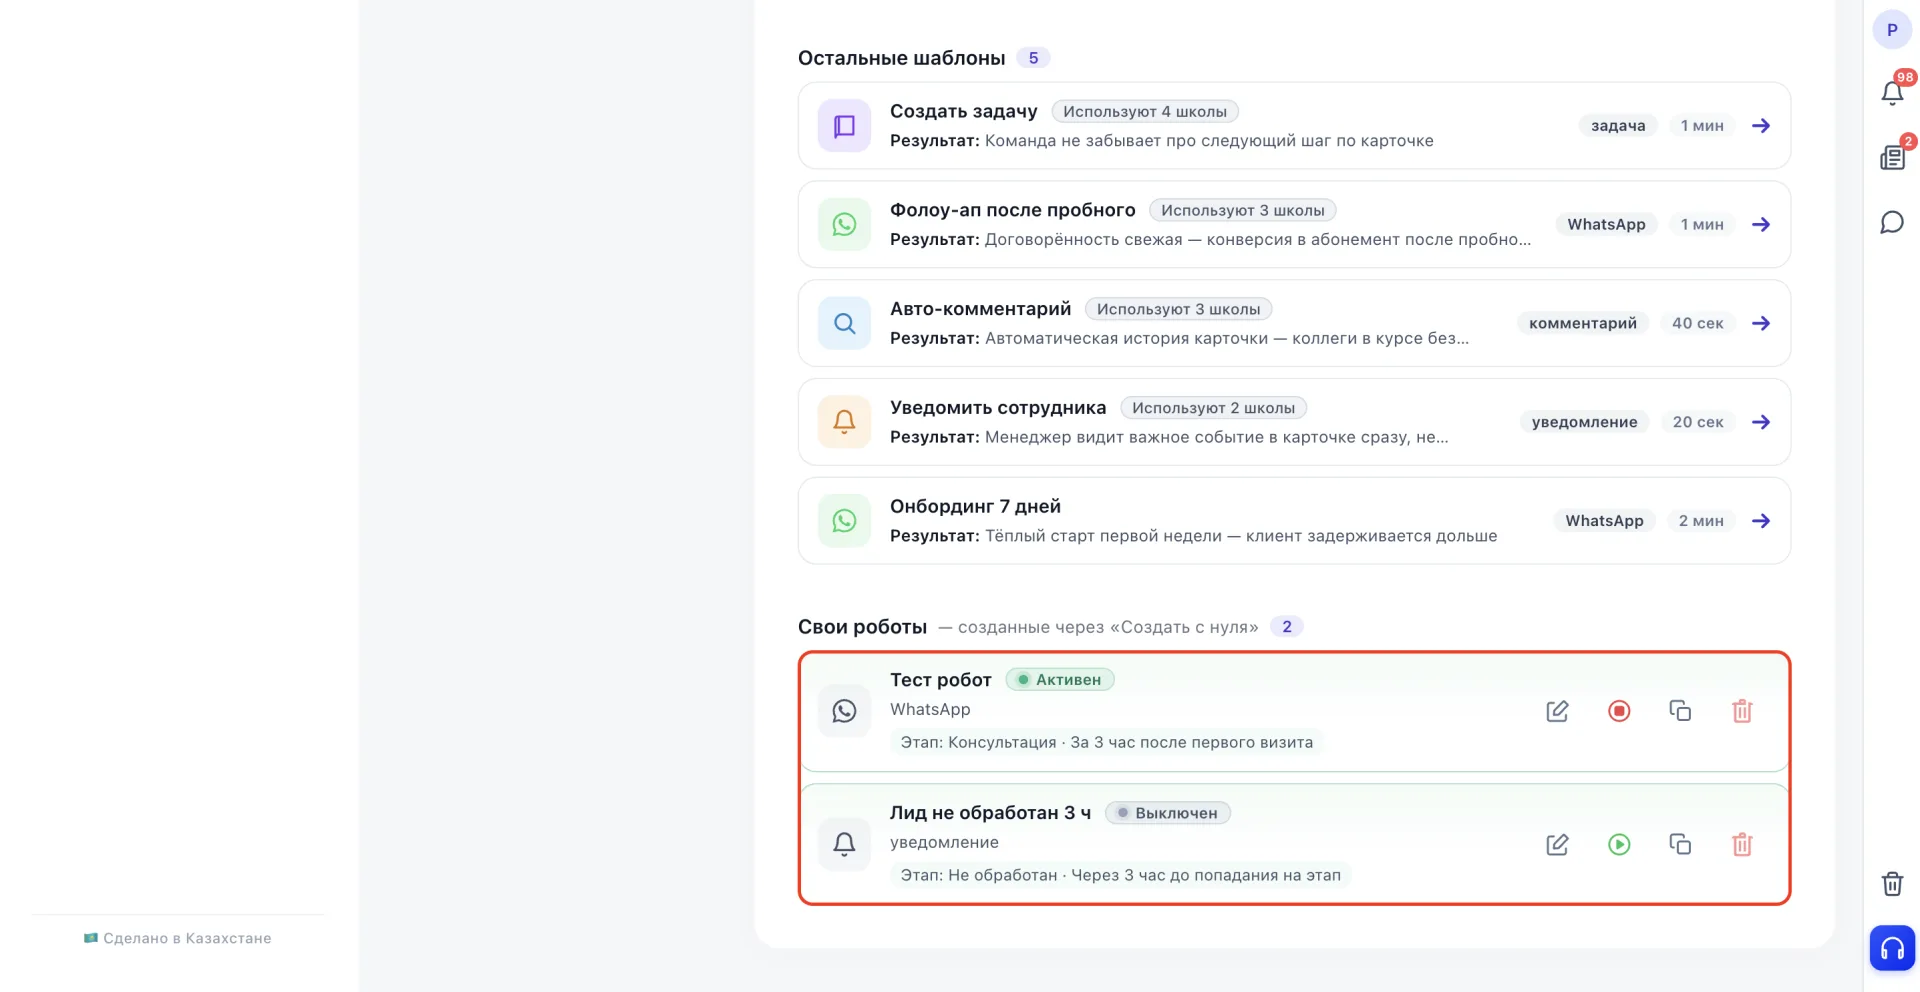
If you need to temporarily stop the robot without reopening the settings, click the red pause button directly in the list. To turn the robot back on, click the green ▶ button that will appear in its place.
Robots created via "Create from scratch" are displayed separately in the "Custom robots" block at the very bottom of the list.
The same principle is used to configure other one-off robots
All templates that require a single action under a single condition (for example, remind a client about a trial Class, notify a Teacher about a new booking, or assign a Task to a manager) are configured according to the same principle as the "Lead not processed 3 h" robot.
Only the stage, event, interval and the text on the "Message" tab change.
If your task falls into this scenario, you can stop reading the instructions. It is enough to repeat steps 1–5, specifying the required values.
When you need not a single send but a series
If you need not a one-time reminder, but to win back a Lead using a series of touches with pauses between them (for example, messaging the client after 7, 14 and 30 days, gradually changing the tone of the messages), one robot will not be enough. For this, a chain of robots is configured.
For example, the template "Reactivation \"No answer\"" looks like one item in the list, but in fact consists of four separate robots with different intervals: +7 days, +14 days, +30 days and +1 year.
Each robot is managed independently. Therefore, you can stop, for example, only the annual reminder without affecting other stages of the chain.
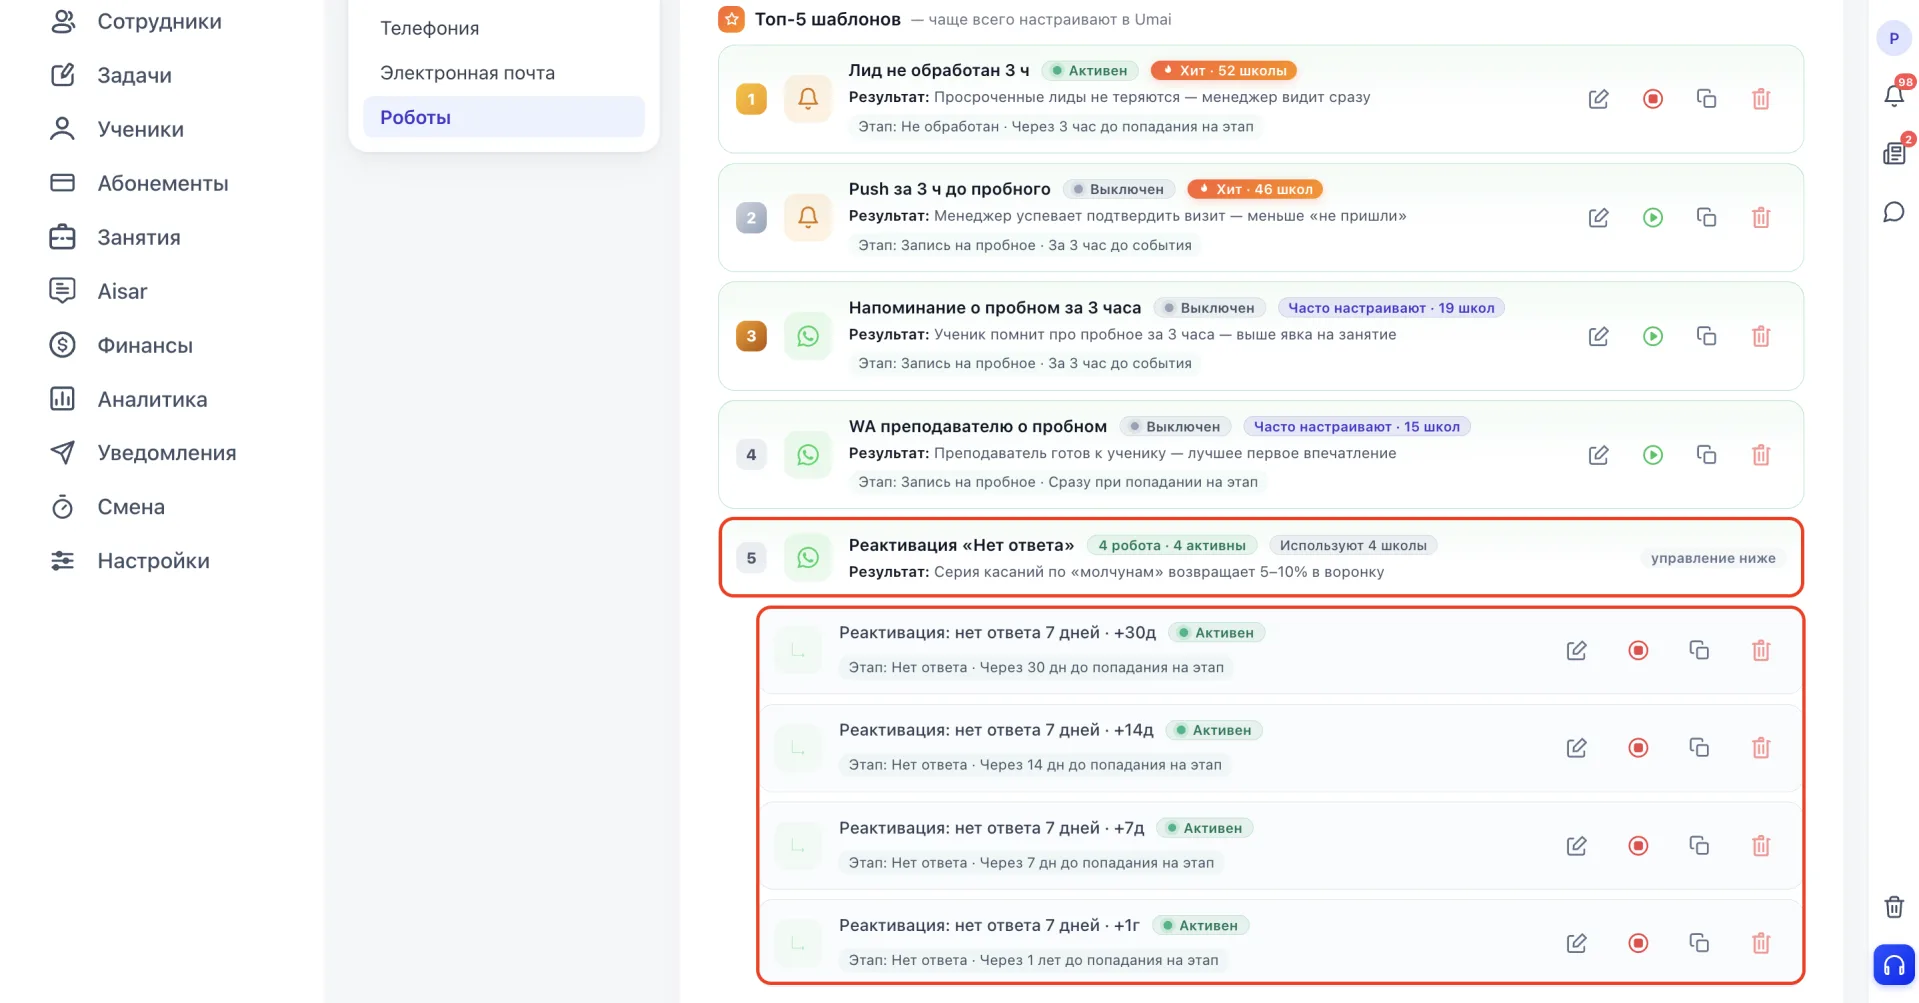
Each robot in the series is set up the same way as a regular one-off robot using "By time/date". The same stage and the same countdown from entering the stage are used; only the interval differs.
If you open such a robot for checking or editing, rely on the data in the form itself when first opened and do not switch the time tab. The robot name and the label in the general list may not match the actual interval, so it is important to look at the settings inside the form.
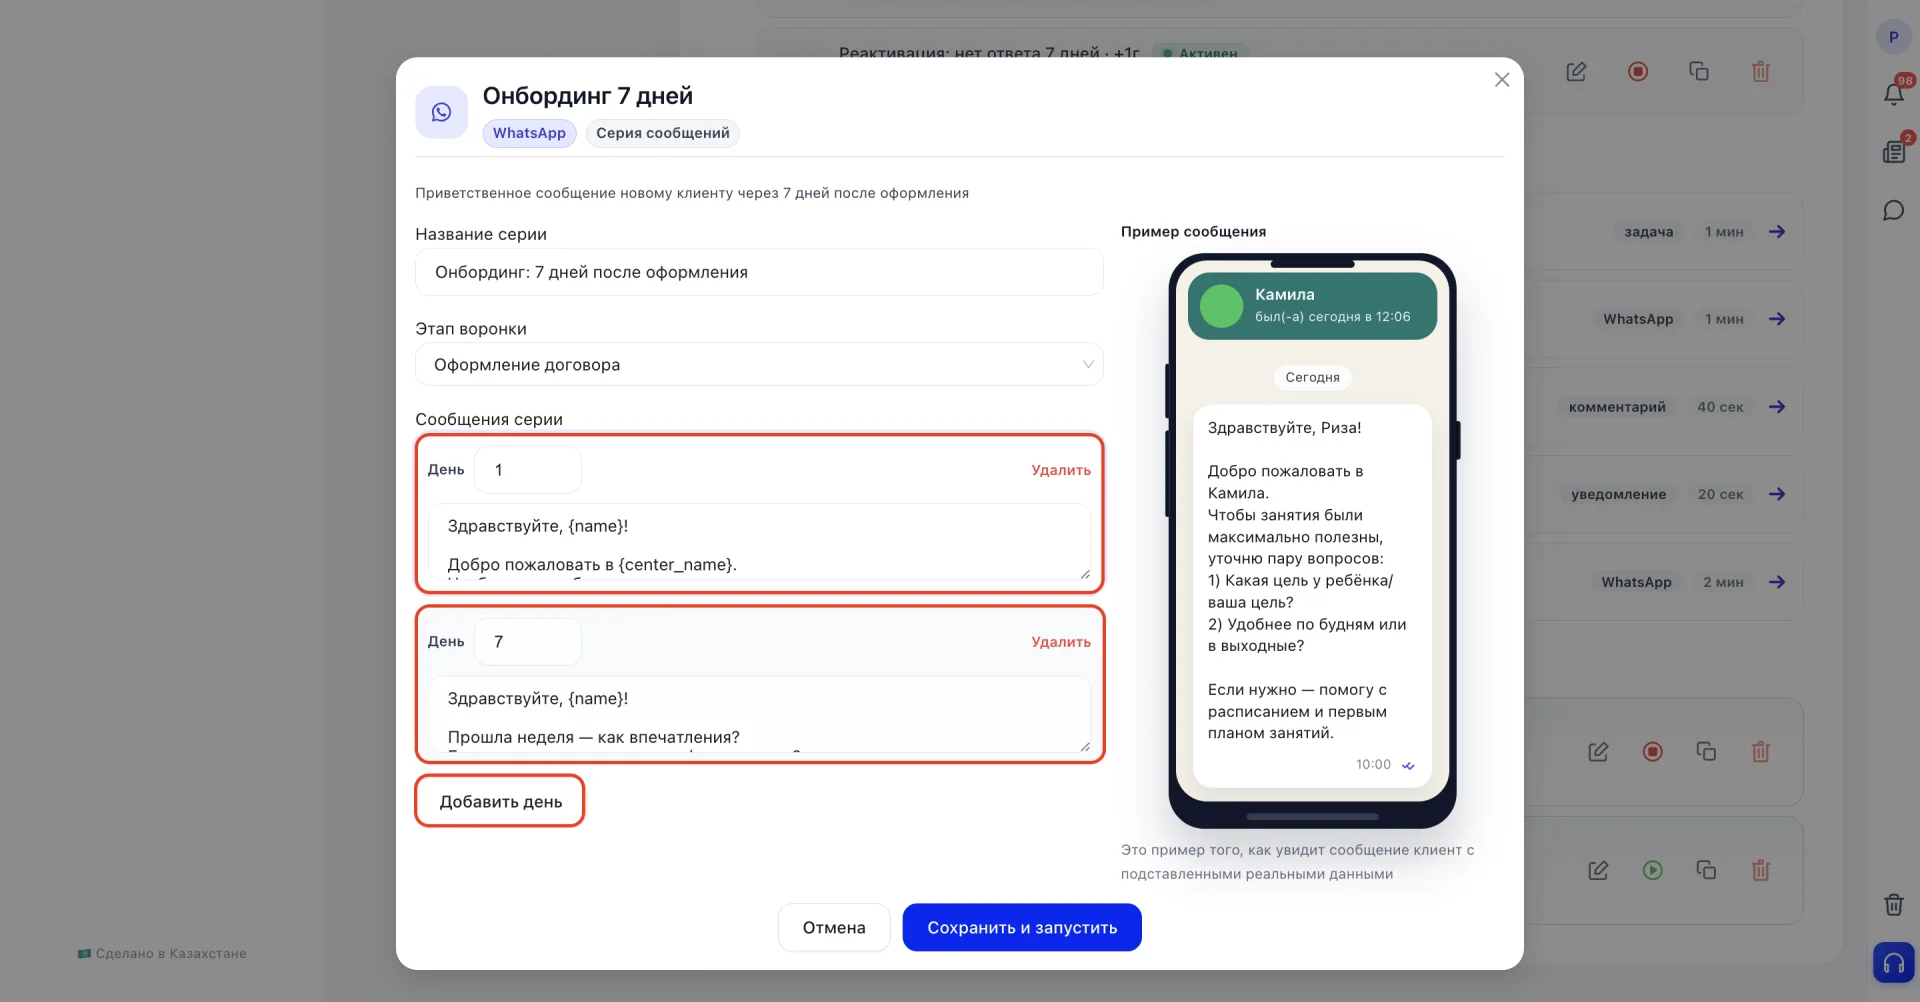
There is a second series format. In it, time is specified not by interval but by the day number from the start — "Day 1", "Day 7" and so on. For example, in the template "Onboarding 7 days" this is a chain of welcome messages to a new client, where new steps are added with the "Add day" button under the last field.
Before creating a new robot
Often several robots with different recipients are already working on the same stage: the client, the manager or the Teacher. Before creating a new robot, check the list of existing ones on this stage. Perhaps the desired result is already achieved by one of them, and it is enough to simply change the text or time.
It is important to consider that the same template in the list can be either a single robot or part of a series of several robots with different intervals. Therefore, when editing or disabling, rely not on the name in the list but on the settings inside the specific robot's form.