The setup wizard helps quickly prepare the system for work after center registration: specify the field of activity, create the first class, add the first student, and configure automatic messages to parents. Completing the wizard takes a few minutes and allows you to start working in the system right away.
Main blocks:
- Access to the section
- Wizard stages
- Profile
- Class
- Student
- Message
- Done
1. Access to the section
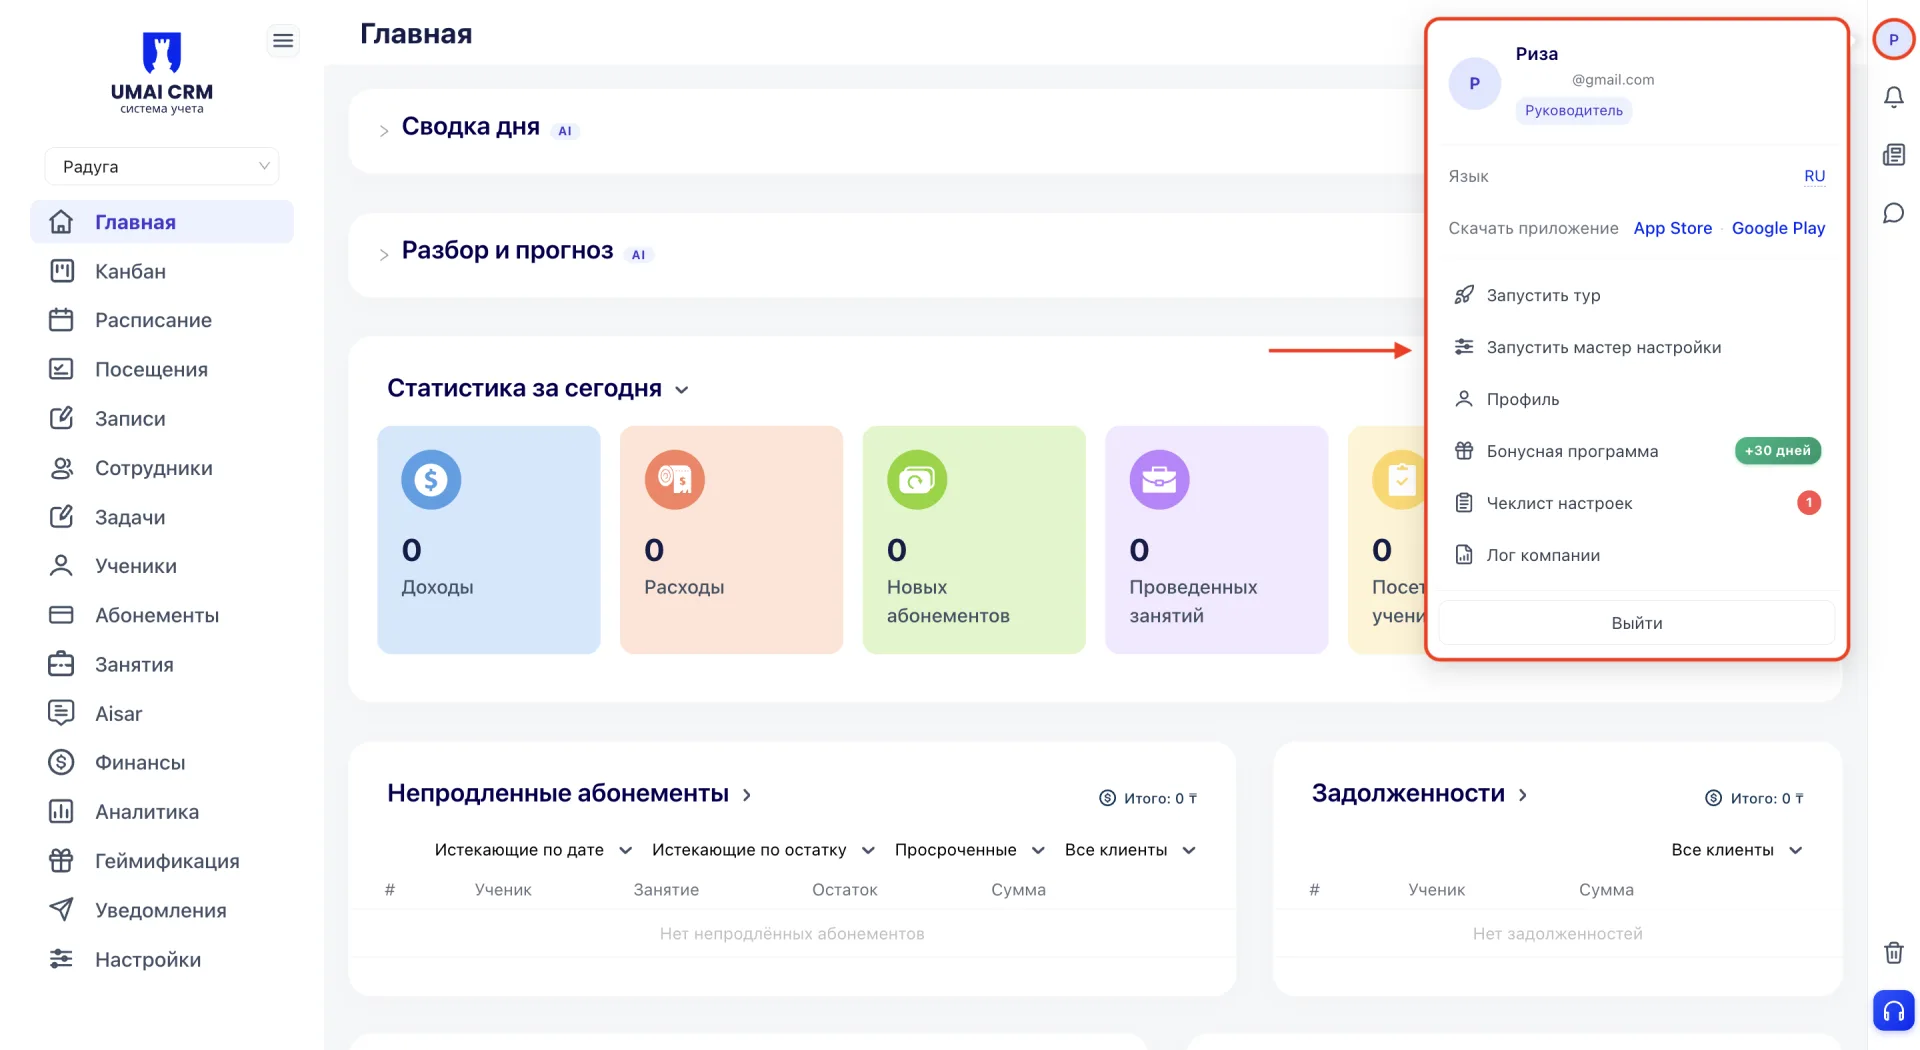
The setup wizard starts automatically immediately after center registration in the system.
If the wizard was skipped or closed, you can run it again manually: click the profile icon in the top right corner of the screen and select the item “Run setup wizard” from the menu that opens.
2. Wizard stages
The setup wizard consists of five stages, which are displayed as a progress bar at the top of the screen: "Profile", "Class", "Student", "Message", "Done". Completed stages are marked with a green check, and the current stage is highlighted.
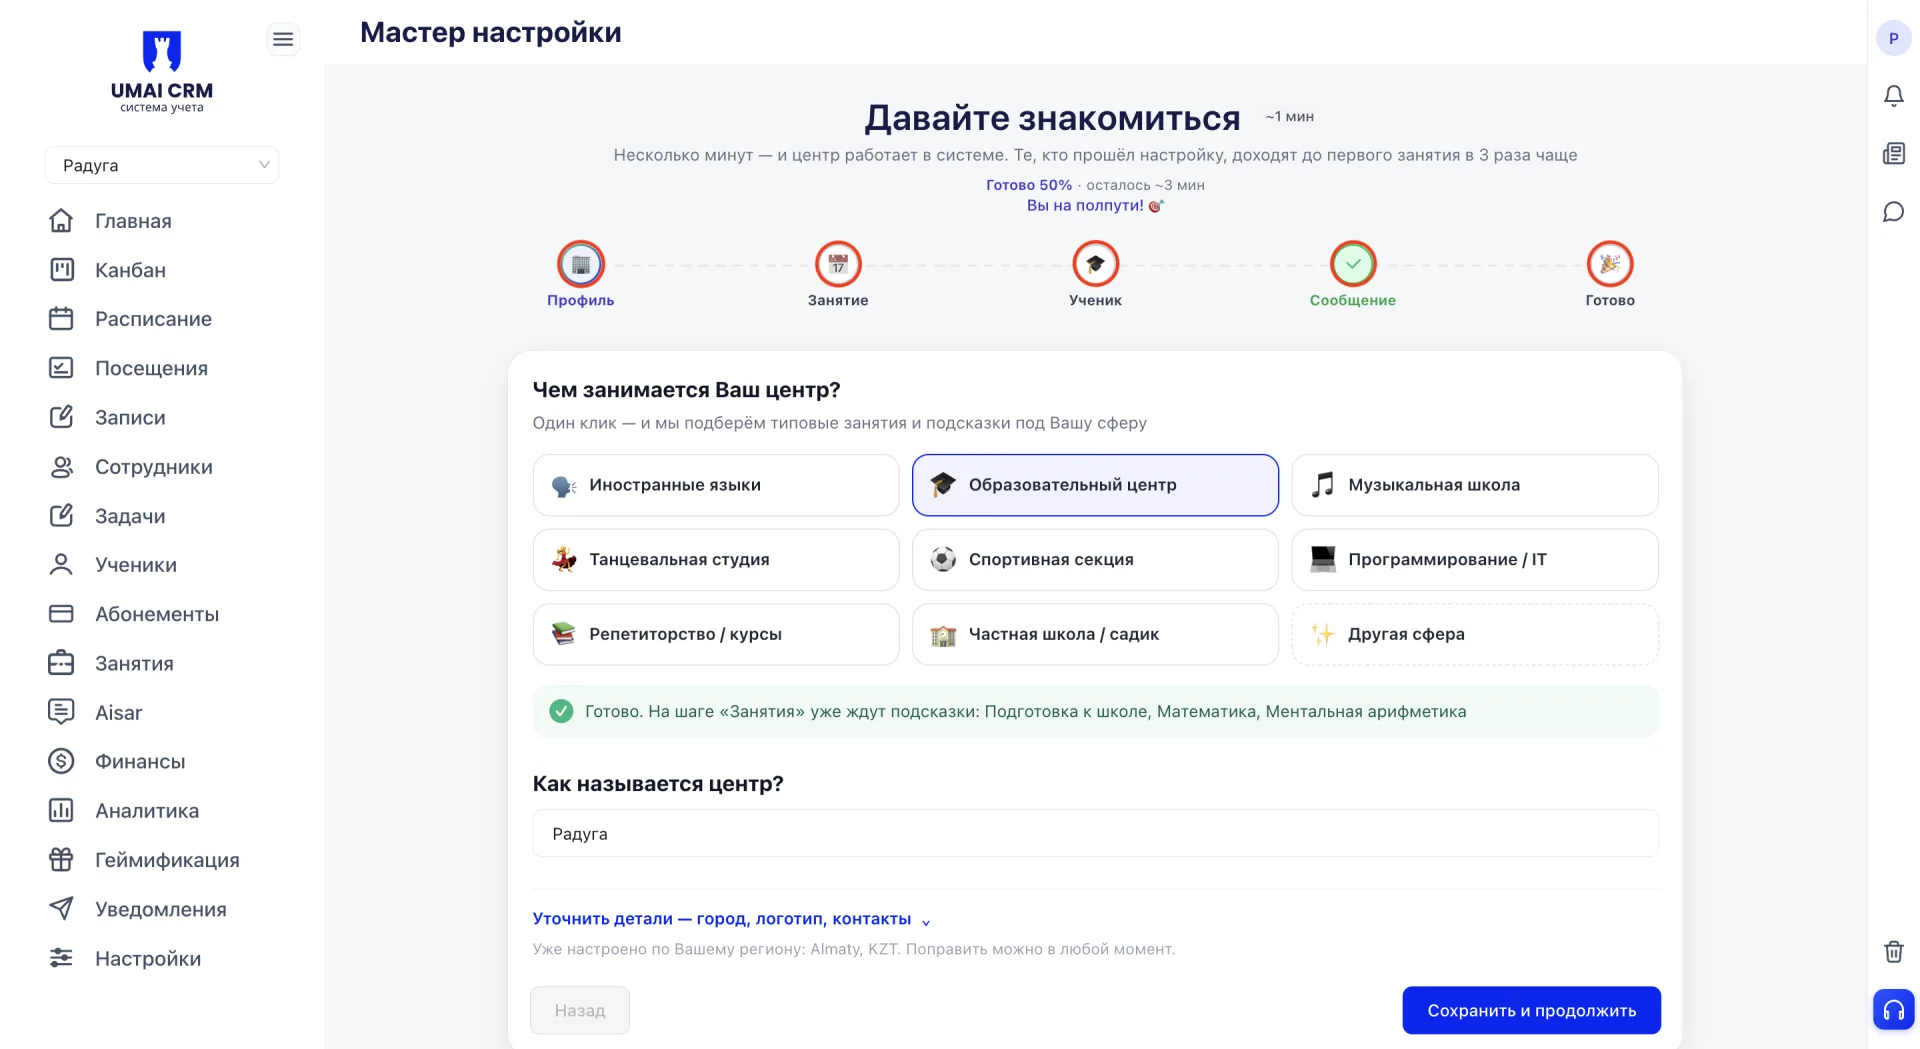
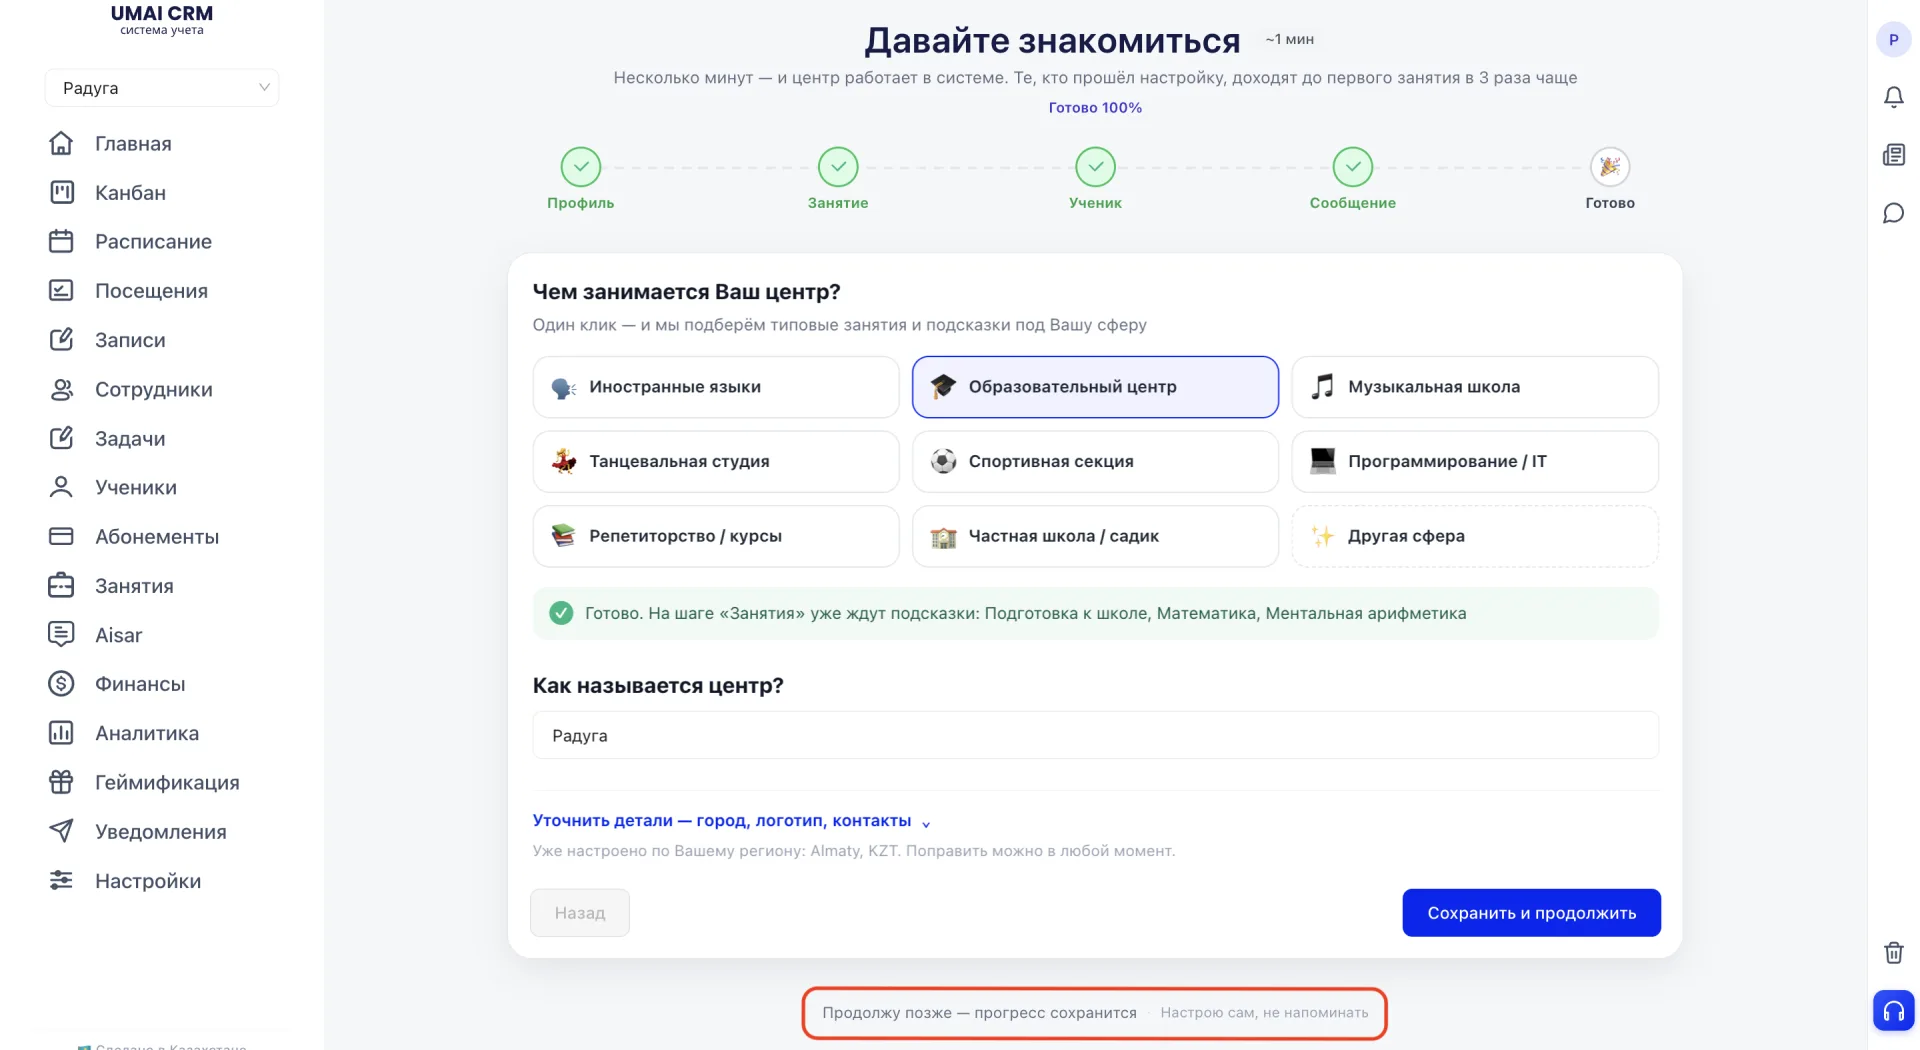
At each stage except the last, the links “I’ll continue later — progress will be saved” and “I’ll set up myself, don’t remind me” are available. The first allows you to close the wizard and return to setup later without losing entered data; the second disables reminders about completing the wizard.
3. Profile
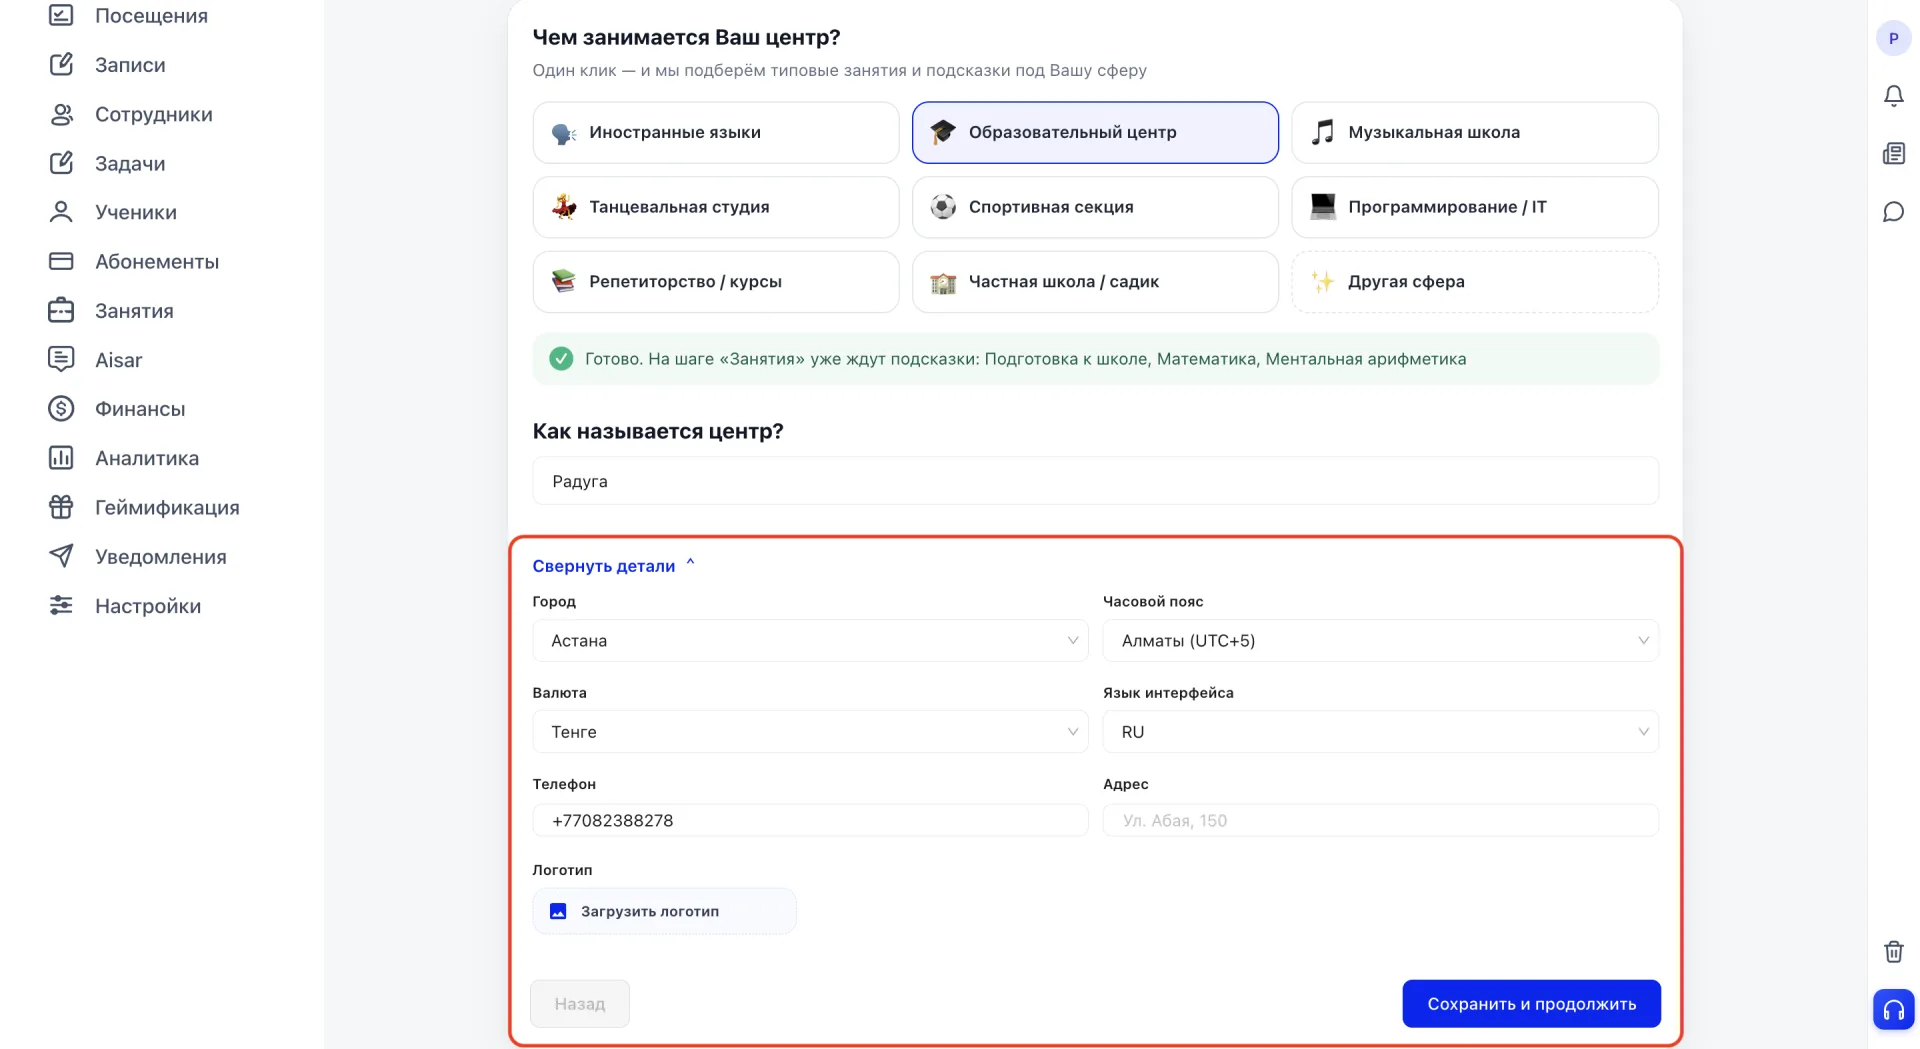
Specify the center’s field of activity. Options available: foreign languages, educational center, music school, dance studio, sports club, programming or IT, tutoring or courses, private school or kindergarten, or another field. The chosen field affects the list of typical classes that will be suggested at the next stage.
Below, enter the center’s name.
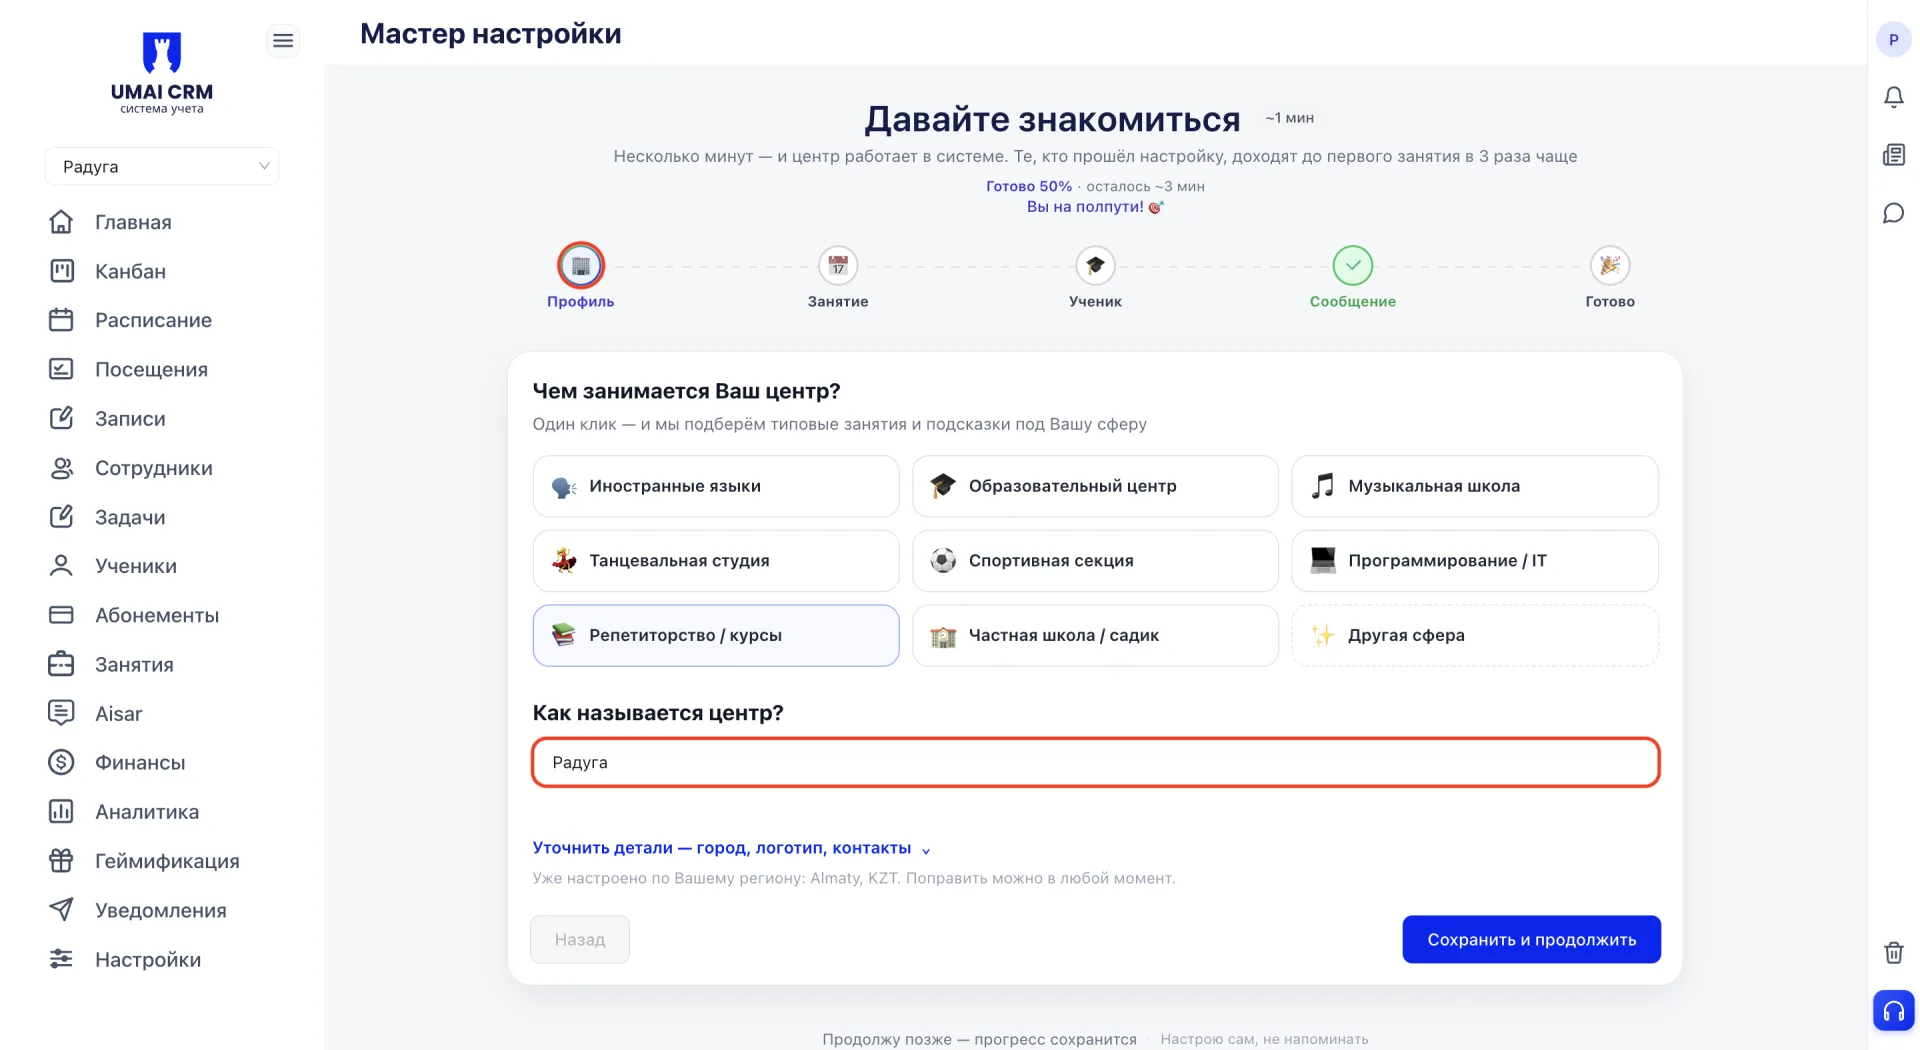
The link “Specify details — city, logo, contacts” opens additional fields. There you can specify the city, contact details, and upload the center’s logo.
4. Class
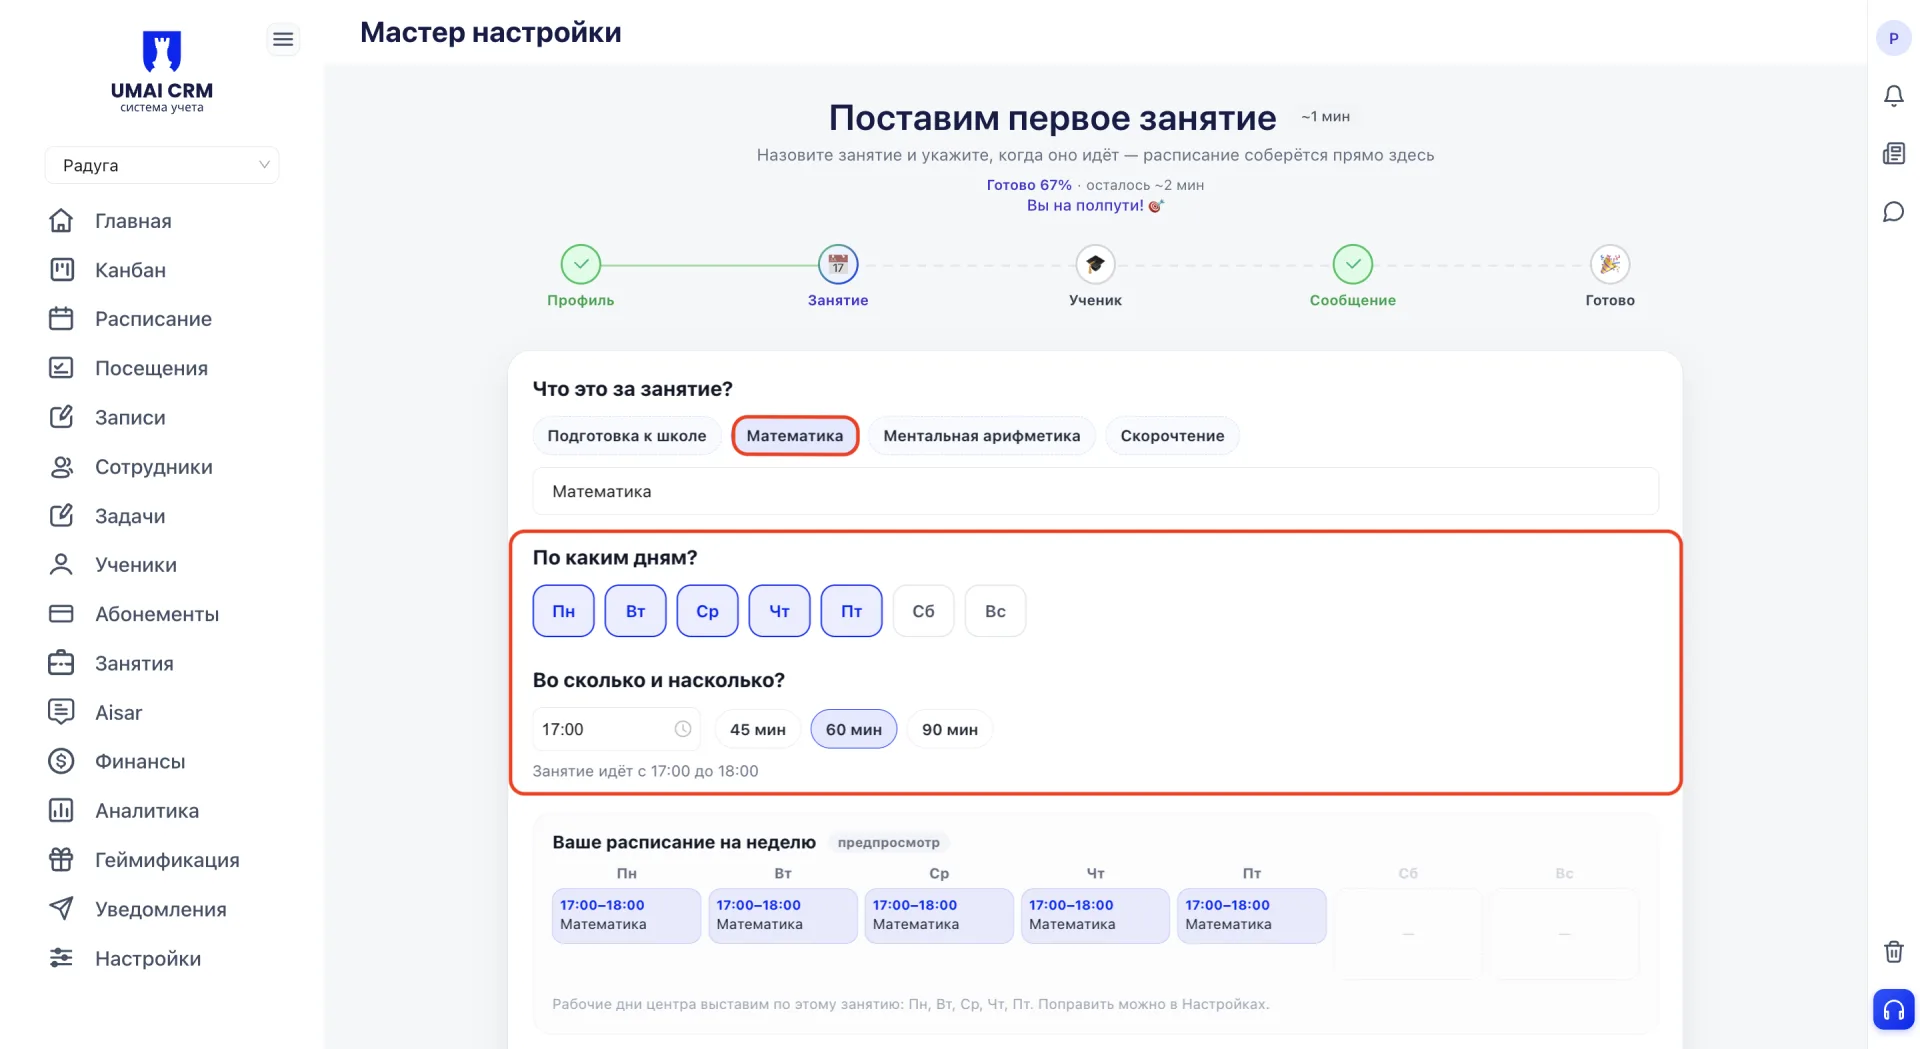
In the field “What is this class?” options for names are suggested based on the field of activity selected in the first stage. You can choose one of the options or enter your own class name manually.
Next, specify the days of the week when the class will take place, as well as the start time and duration. Options of 45, 60, and 90 minutes are available, or you can specify the time manually.
As you fill in the fields below, a weekly schedule preview with the label “preview” is formed, showing how the class will look in the calendar.
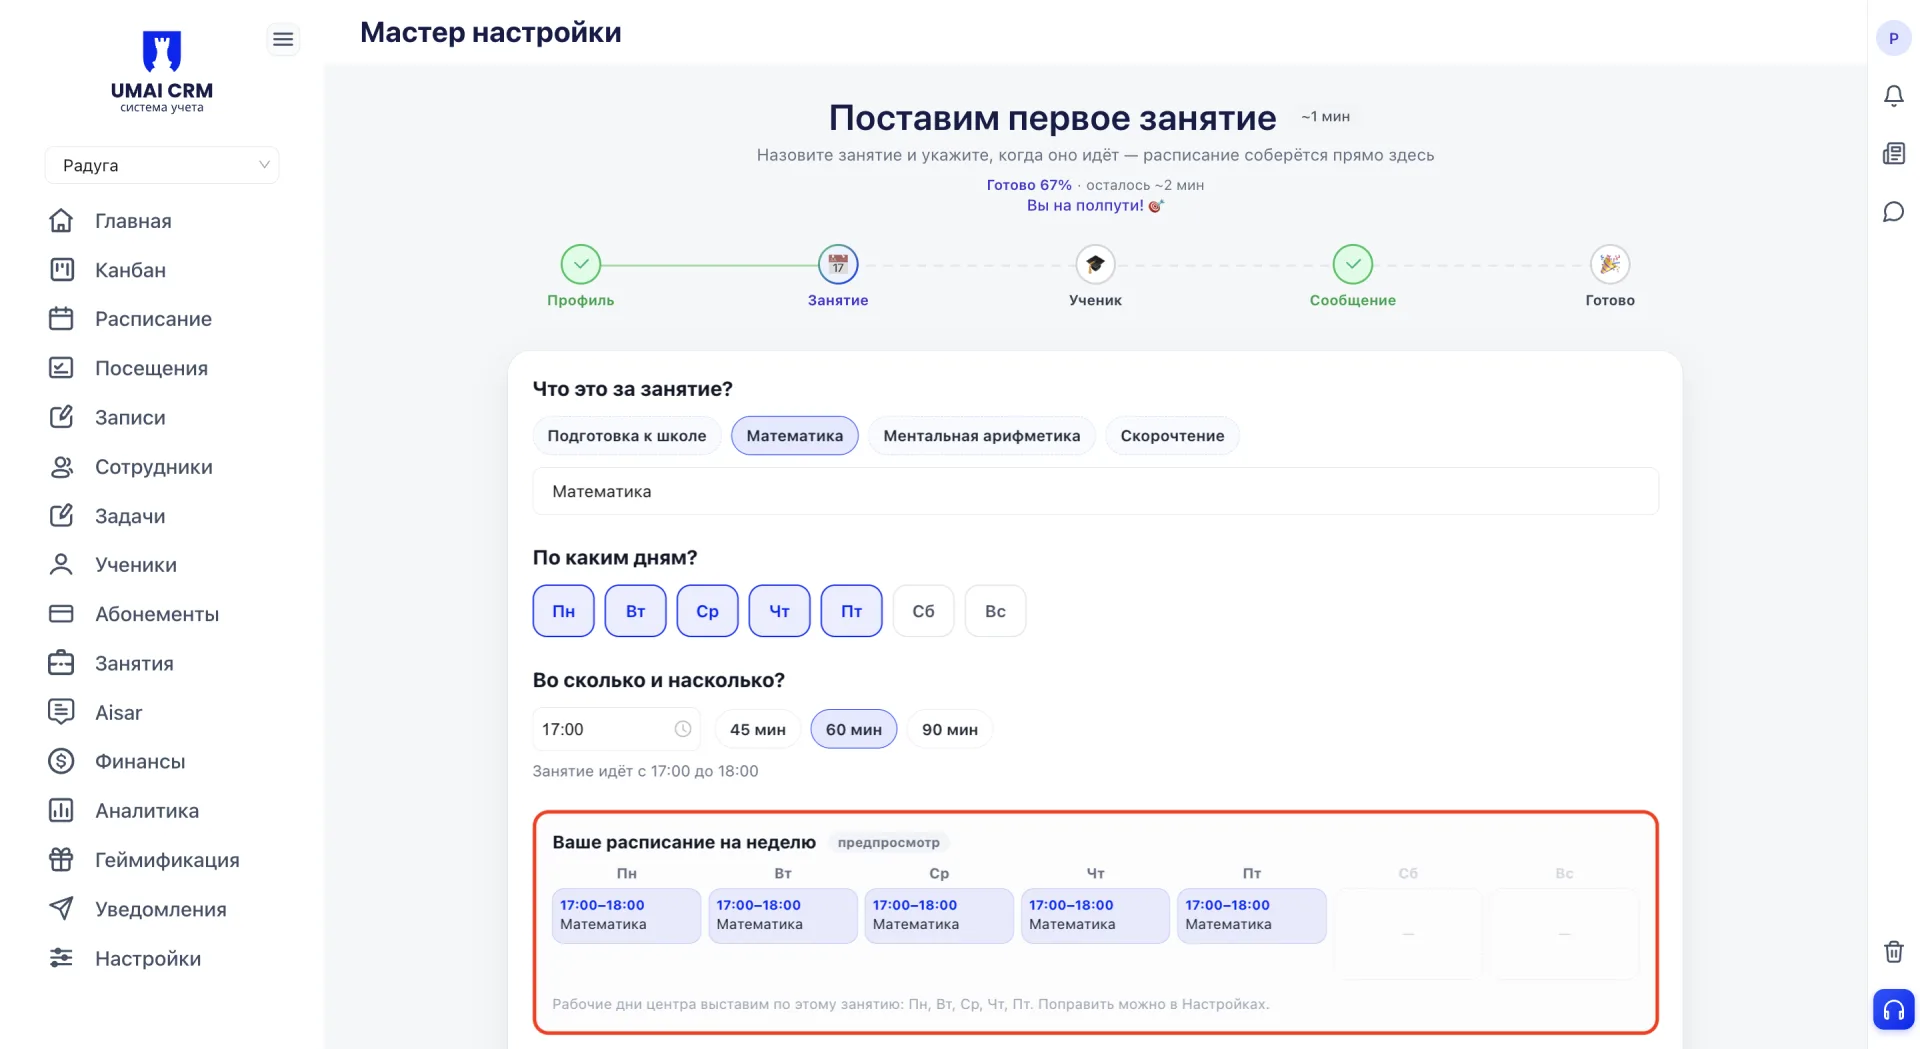 Working days of the center are set automatically based on the days chosen for this class. You can change the center’s working days later in the Settings (Настройки).
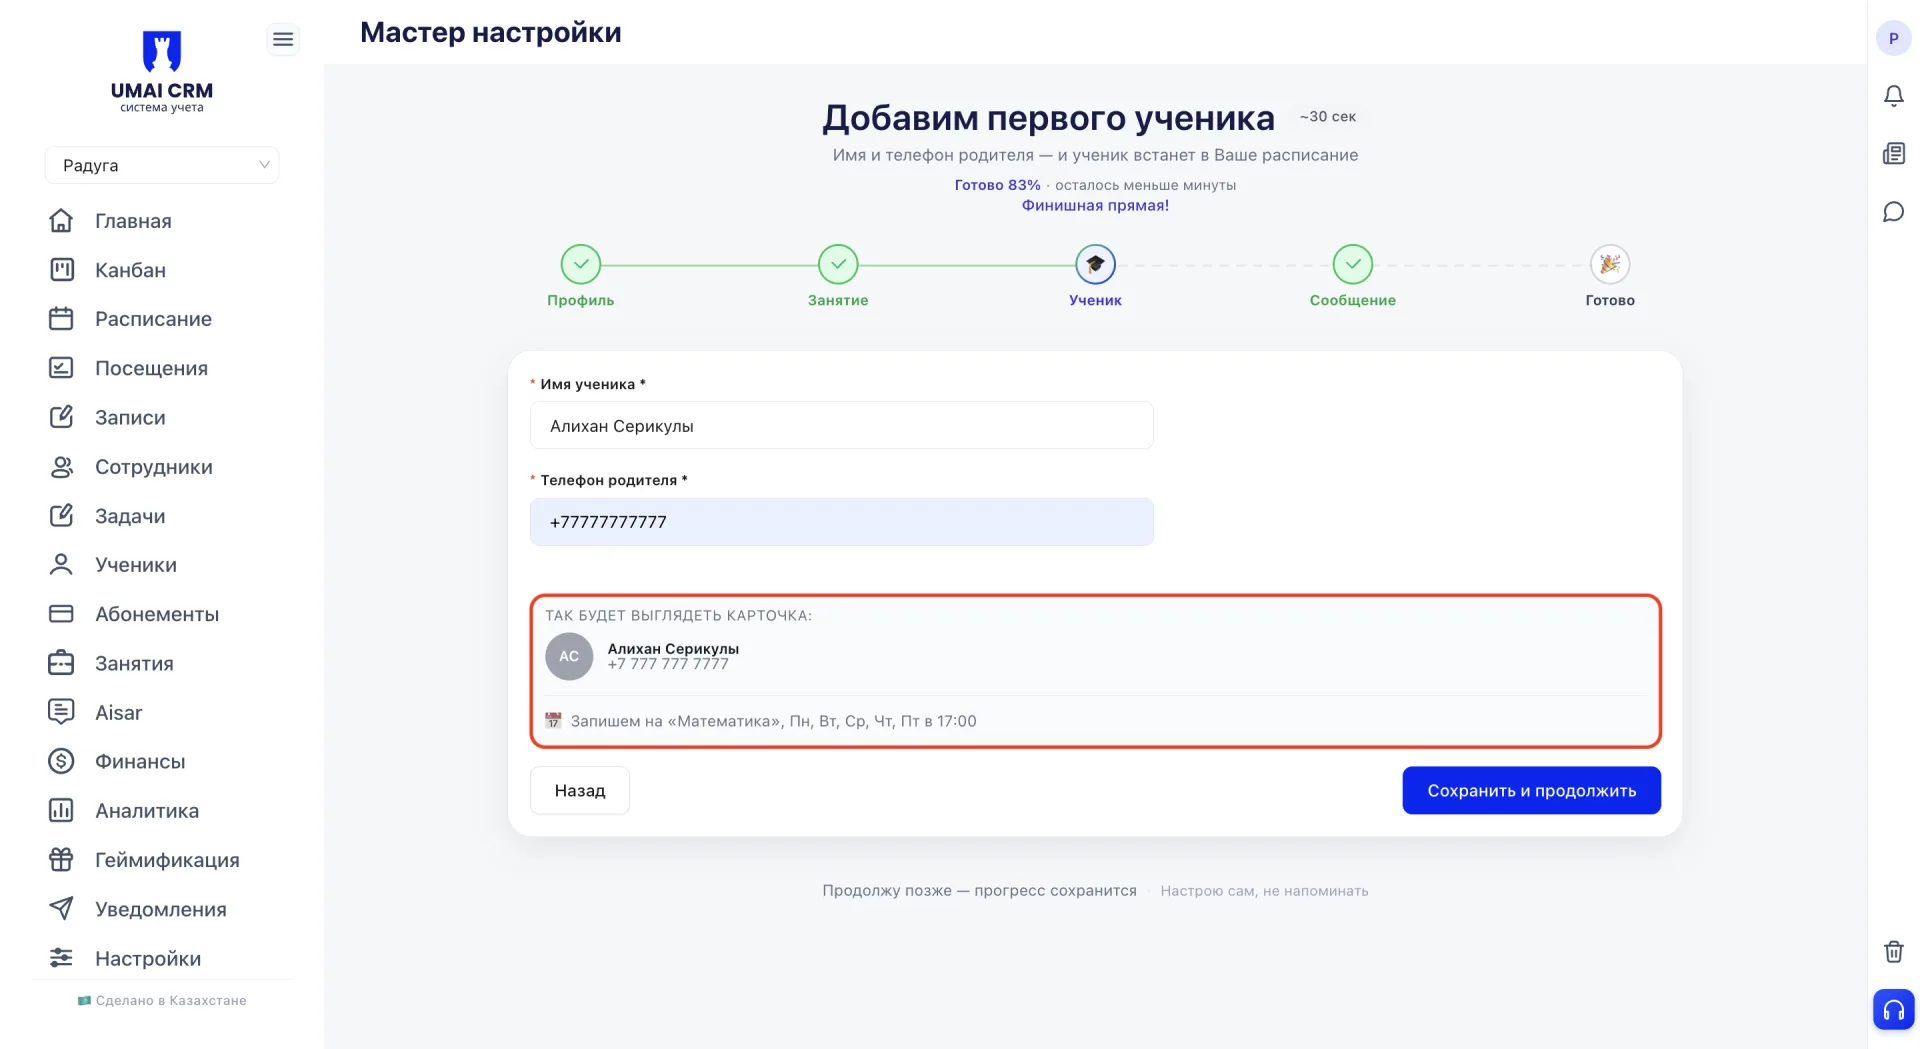
5. Student
The first student is added. Enter their name and the parent’s phone number.
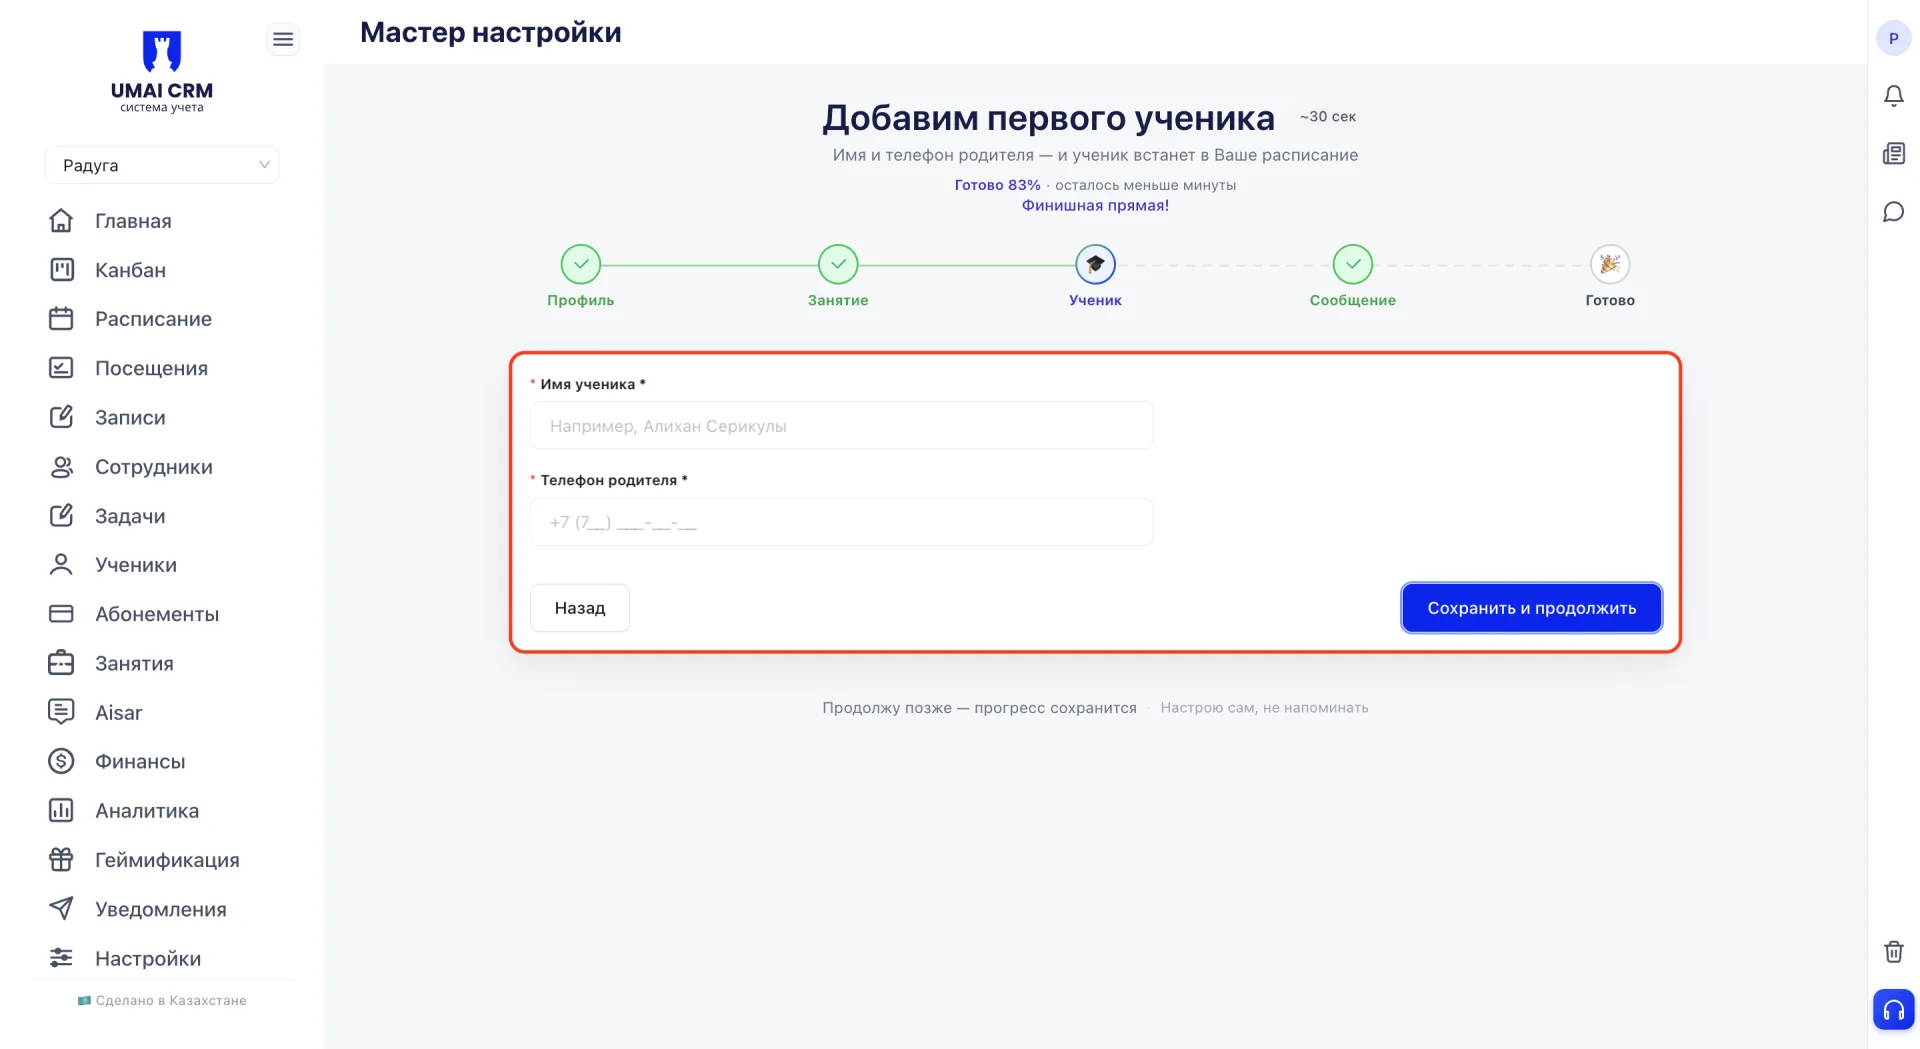
During entry, a student card preview is displayed, as well as a summary of which class and on which days the student will be enrolled.
6. Message
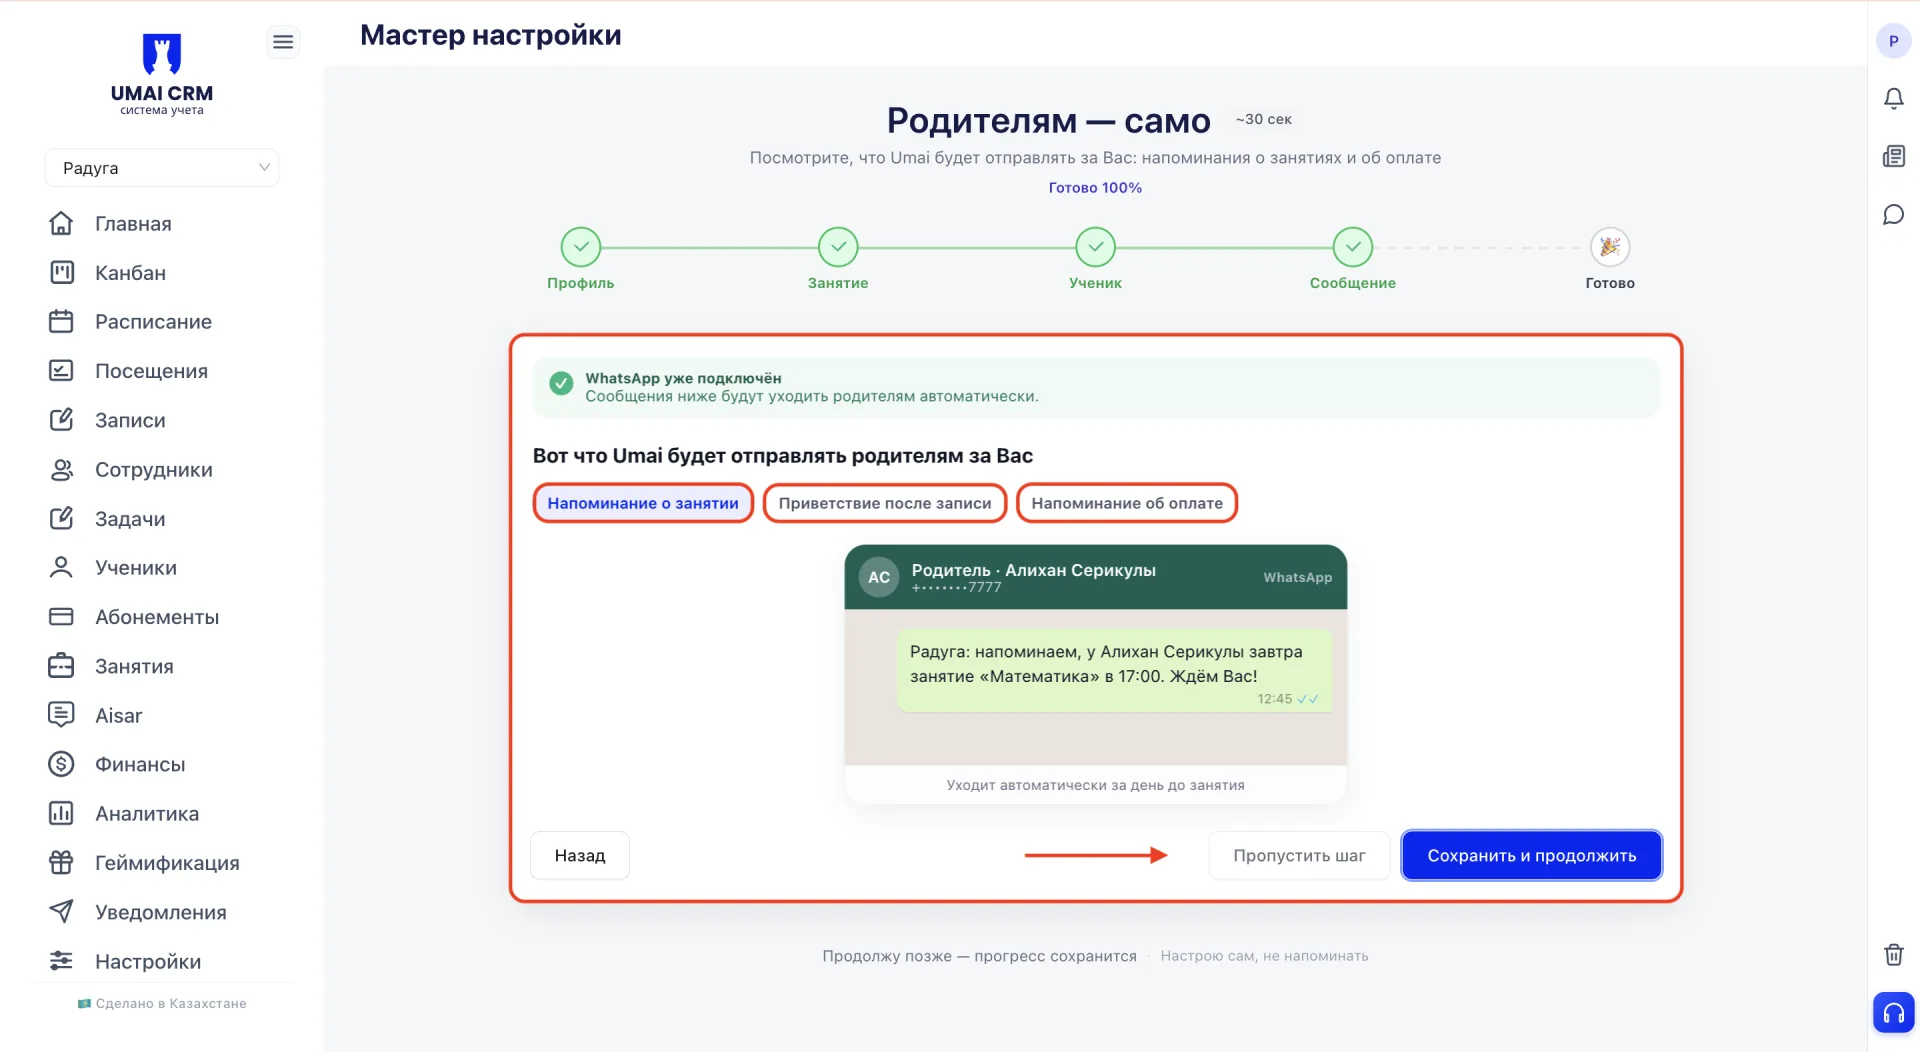
If WhatsApp is already connected to the system, a corresponding note is shown at the top of the screen. A “Skip step” button is also provided.
7. Done
The final stage confirms that the center is set up and ready to work. A summary of completed actions is shown: a class was created with specified days and times, a student was added and enrolled in the class, and WhatsApp was connected.
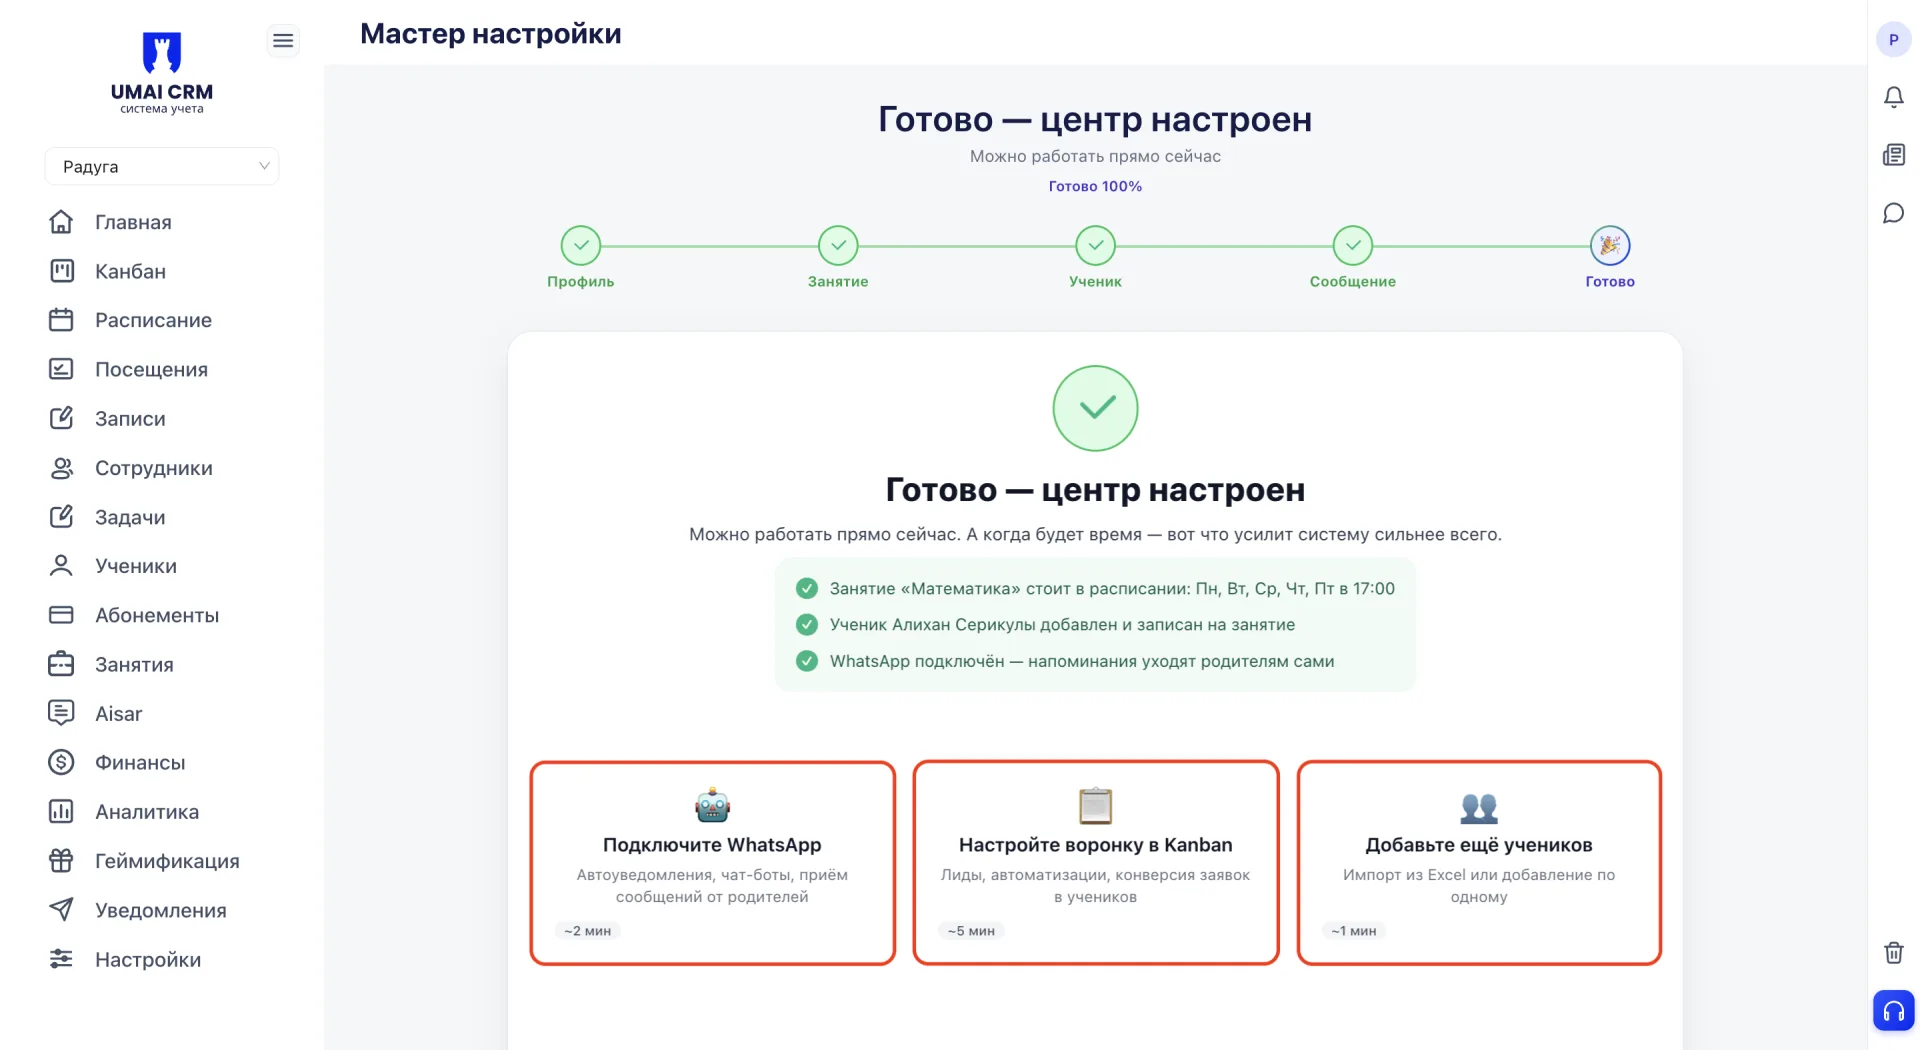
Below, further steps are suggested to strengthen the center’s setup.
- Connect WhatsApp. Set up auto-notifications, chat-bots, and receiving messages from parents.
- Set up the Sales funnel in Kanban. Working with Leads, automations, and converting applications into Students.
- Add more students. Import from Excel or add one by one.
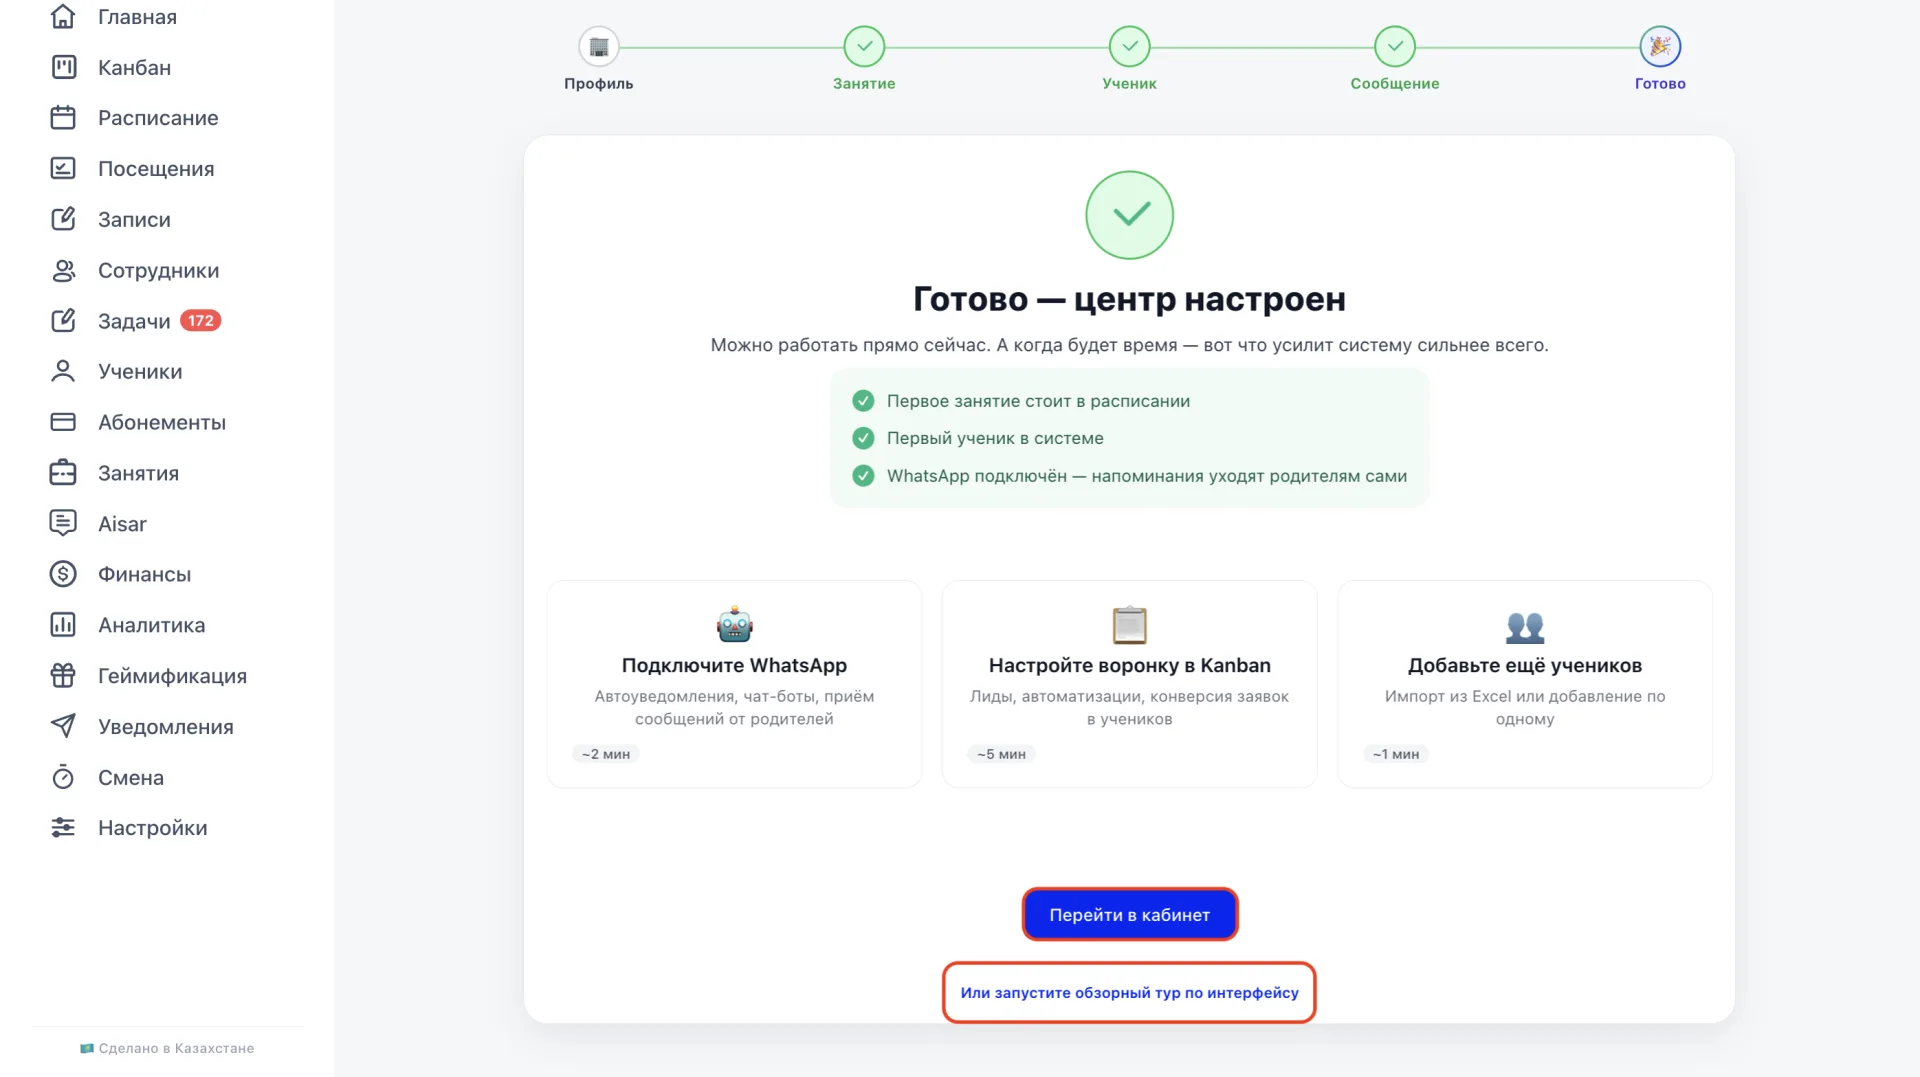
Finish working with the wizard by clicking “Go to the dashboard (кабинет)”, or start a guided tour of the interface.
Important to note:
- The list of typical classes at the “Class” stage depends on the field of activity chosen at the “Profile” stage.
- The center’s working days during the first run of the wizard are set automatically based on the days of the first class and are later adjusted in the Settings (Настройки).
- The setup wizard can be closed and continued later; entered data is saved.