The section consolidates all actions, related to classes: creation, configuration, schedule, and student list. It helps manage the process and control class delivery.
Main blocks:
- Access to the section
- Search and filtering
- Classes table
- Adding a class
1. Access to the section
The "Classes" section is located in the left side menu.
After navigating, a table with a list of all center classes will open. Here you can view existing classes, search for the required ones, apply filters, and create new ones.
2. Search and filtering
At the top of the page there are tools for searching and filtering classes:
- Search by name — allows quickly finding a class by its name.
- Type — filter by class type (for example, group or individual).
- Status — allows displaying only classes with a specific status.
- All employees — filter by Teacher. Allows viewing classes of a specific employee.
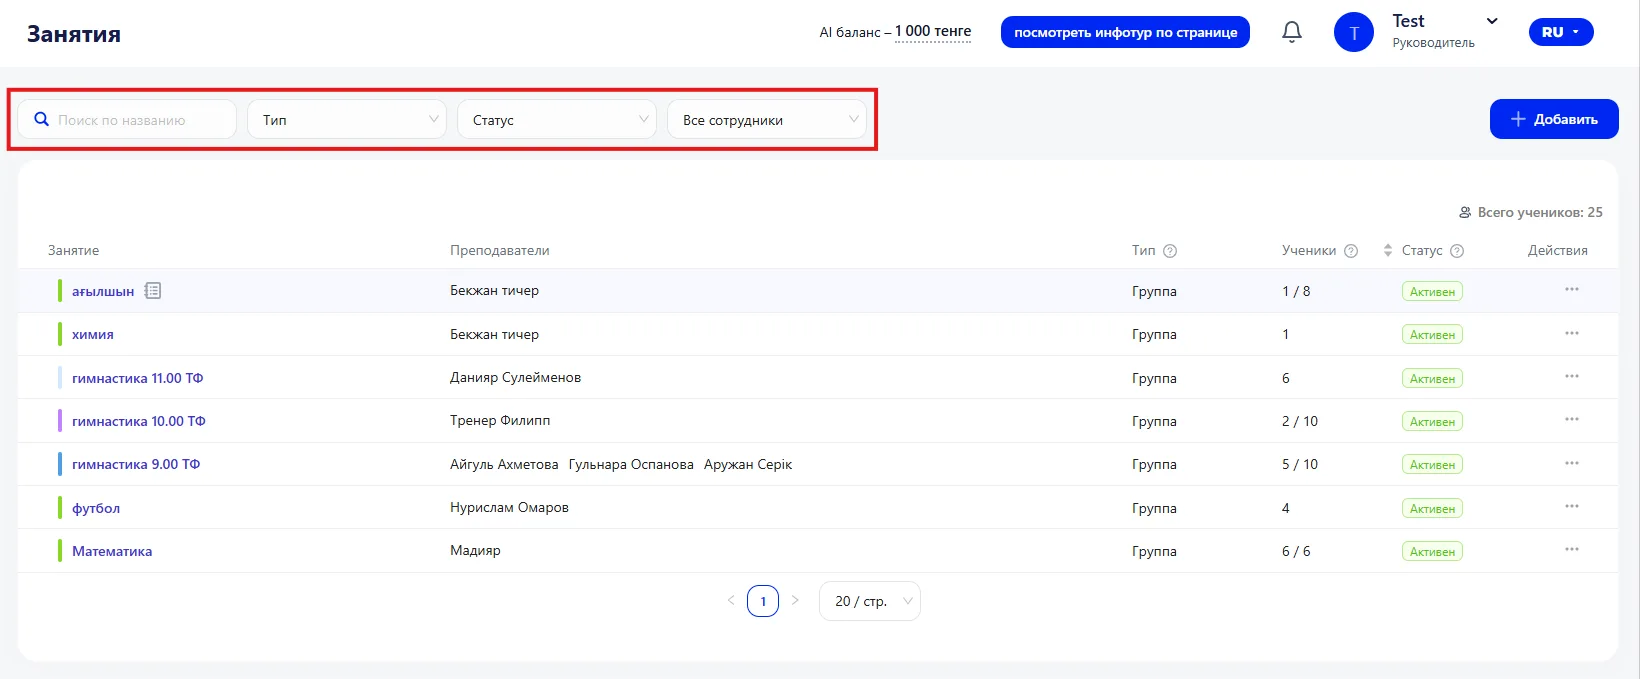
Filters only change the display of the list and do not affect the data in the system.
3. Classes table
The table displays the main data for each class:
- # — sequential record number.
- Class — the name of the class. A color tag is displayed next to it to help quickly visually distinguish classes in the schedule.
- Teachers — the employee who conducts the class.
- Type — class type. Can be group or individual.
- Students — the number of students enrolled in the class and the maximum number of seats.
- Status — the current status of the class (for example, active).
- Actions — allows opening detailed information about the class, using quick view, or deleting the record.
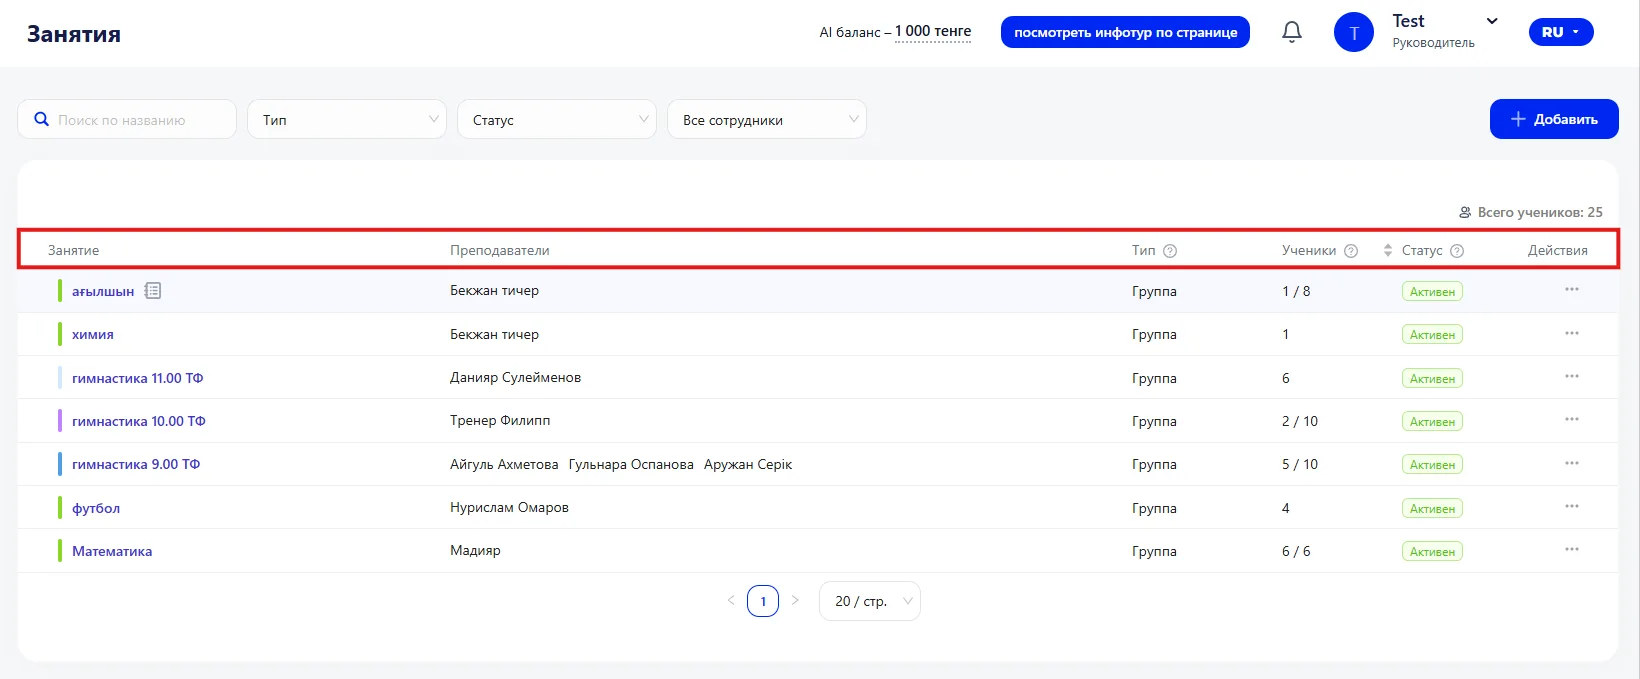
The table allows quickly viewing information about classes and performing main actions with them. To go to detailed information, click on the class name — its class card will open. (link to the card and class tabs)
4. Adding a class
To create a new class, click the "+ Add" button at the top of the page.
The "New class" form will open, where you must specify the class parameters.
Main parameters
- Type — defines the format of the class. You can choose a group or individual class;
- Format — the format of conducting the class: offline, online.
- Name — the name of the class that will be displayed in the system.
- Description — additional information about the class.
- Base price — the cost of the class, which can be used when forming Memberships.
- Enrollment limit — allows setting the maximum number of students.
- Color — the class color used in the schedule for visual distinction.
- Status — defines the activity of the class.
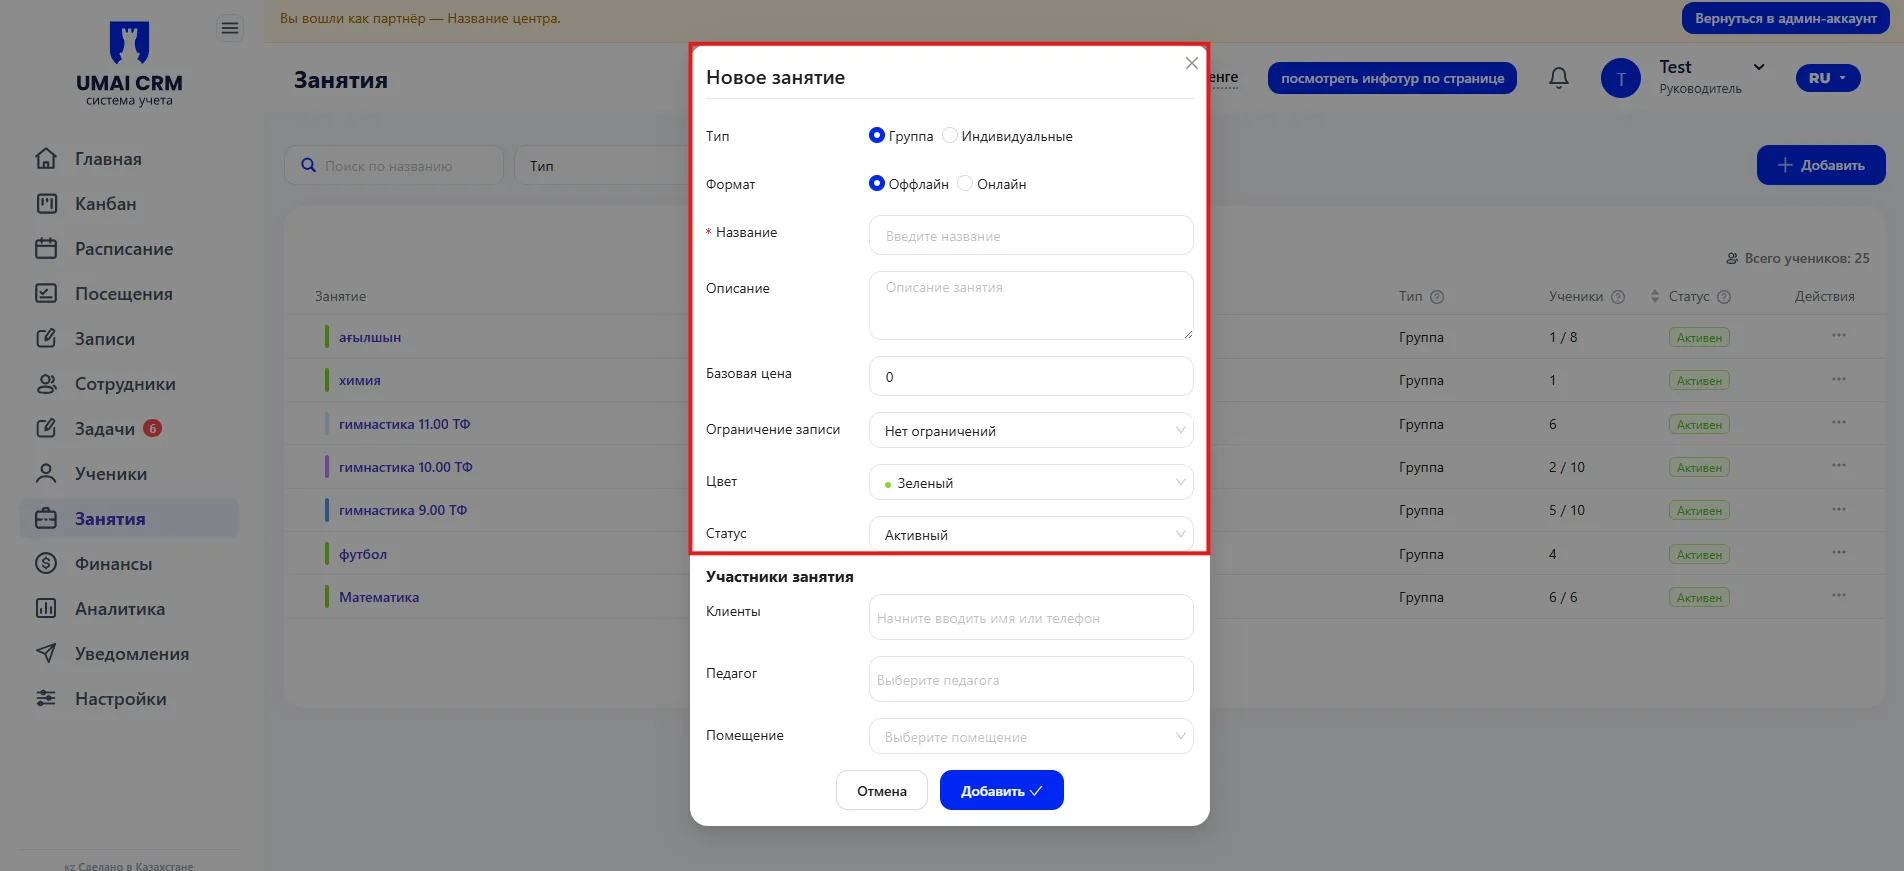
Filling these fields allows properly configuring the class and making it convenient for student enrollment and schedule formation.
Class participants
In this part of the form you can specify:
- Clients — students who will be enrolled in the class.
- Teacher — the Teacher who will conduct the class.
- Room — the office or classroom where the class takes place.
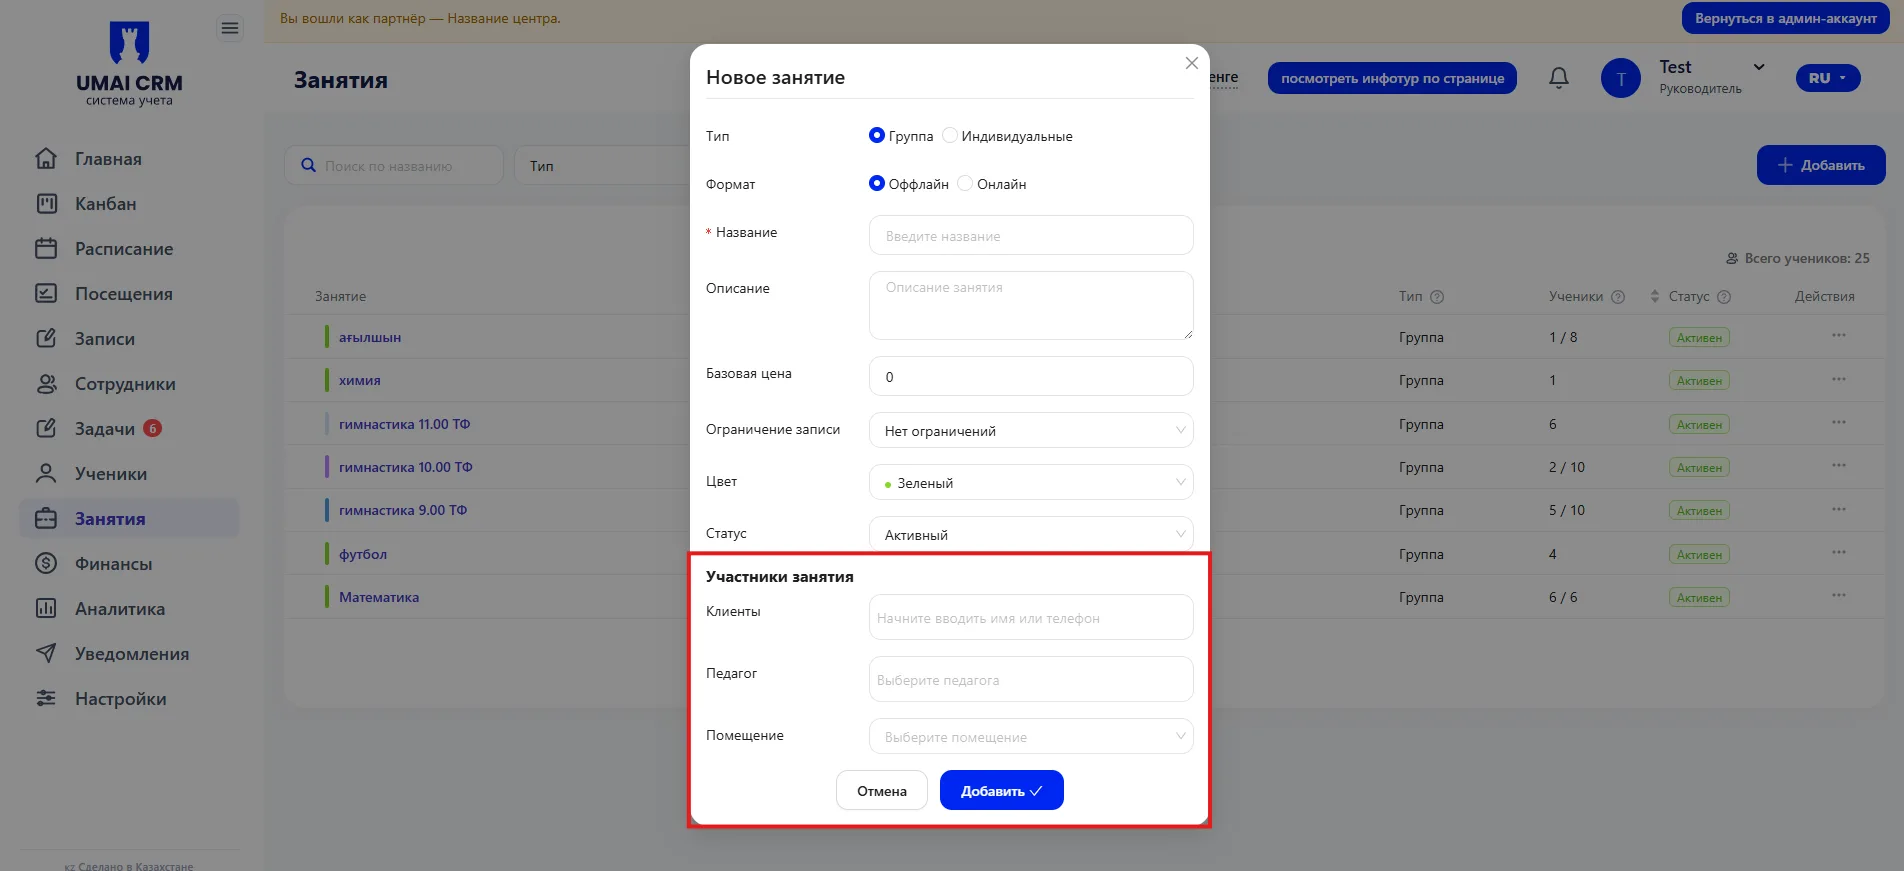
Update
Creating a schedule when adding a class
Now when creating a class you can immediately set a schedule for it. Previously it had to be added separately; now everything is done in one window — this saves time and reduces errors.
To do this, enable the switch "Create schedule immediately" at the bottom of the form.
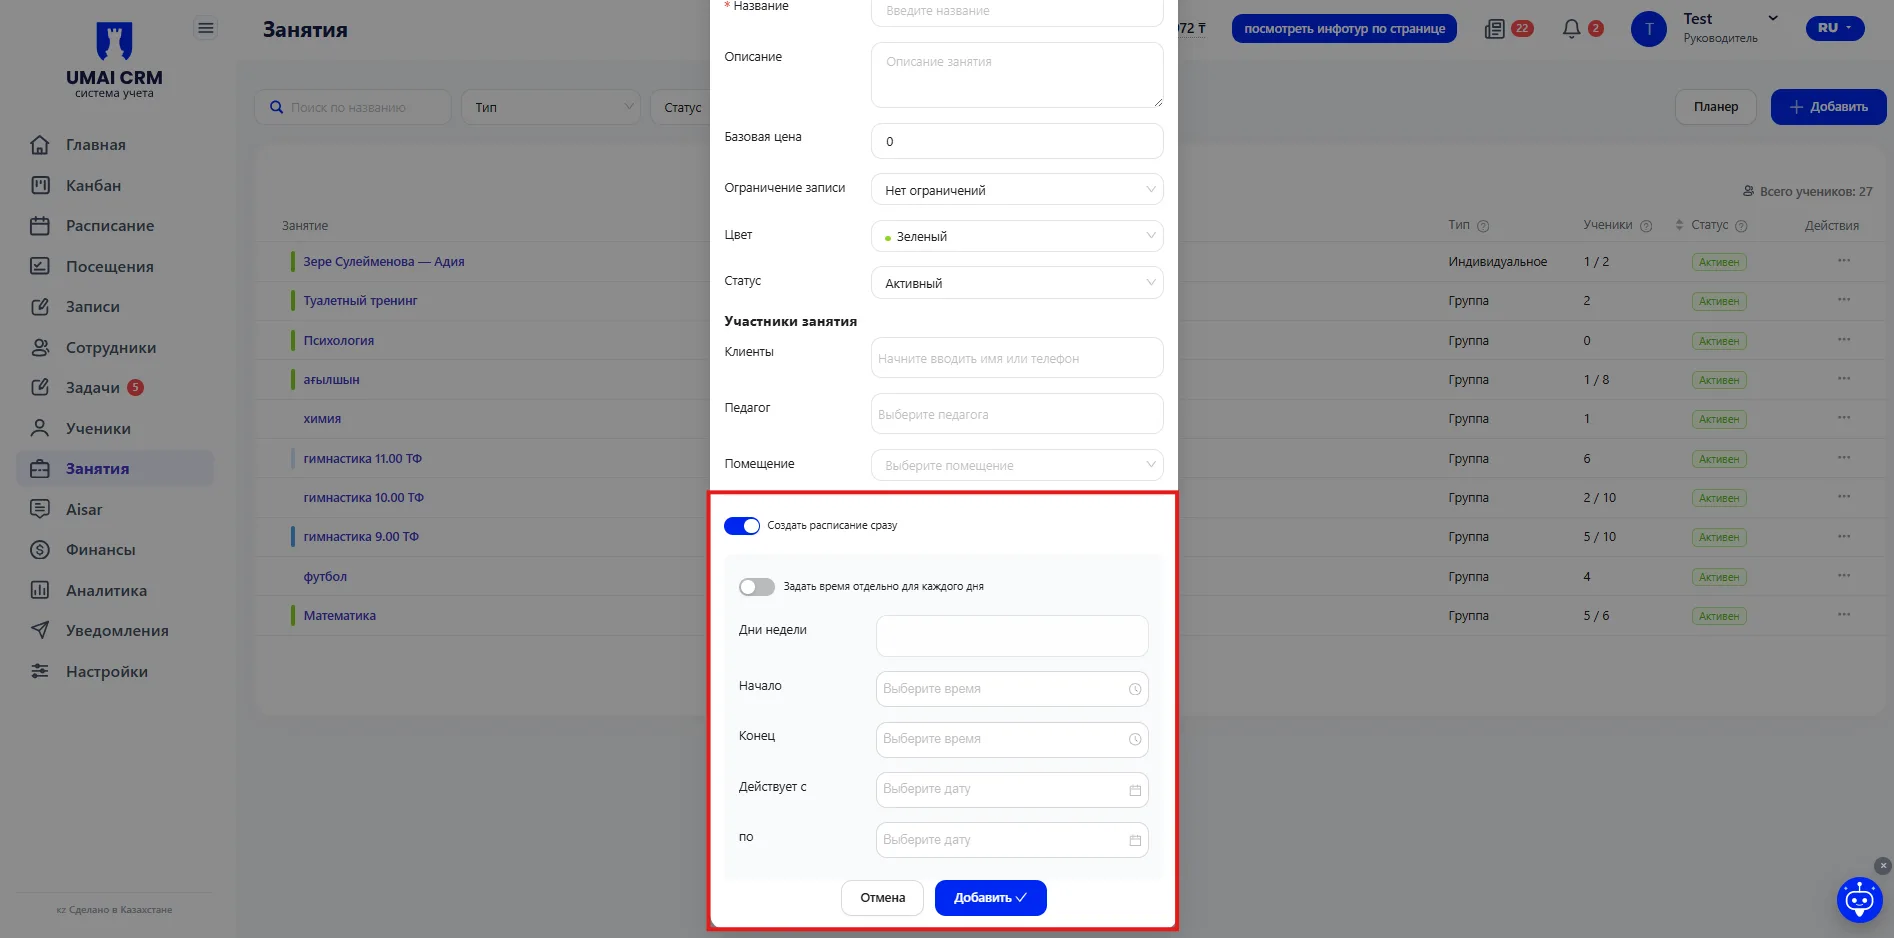
After enabling, fields for configuring the schedule will open.
How to configure the schedule
1. Select the days of the week
Specify which days the class will take place.
2. Set the time
Specify the class start and end times.
3. Specify the validity period
- the "Valid from" field — the start date of the schedule
- the "to" field — the end date (if you need to limit the period)
After filling in these fields the system will automatically create a schedule for the selected days and times.
Different times for different days
If classes occur at different times depending on the day of the week, enable the switch
"Set time separately for each day".
In this mode you will be able to:
- add multiple rows with different days
- for each row specify its own start and end time
- flexibly configure the schedule for any format
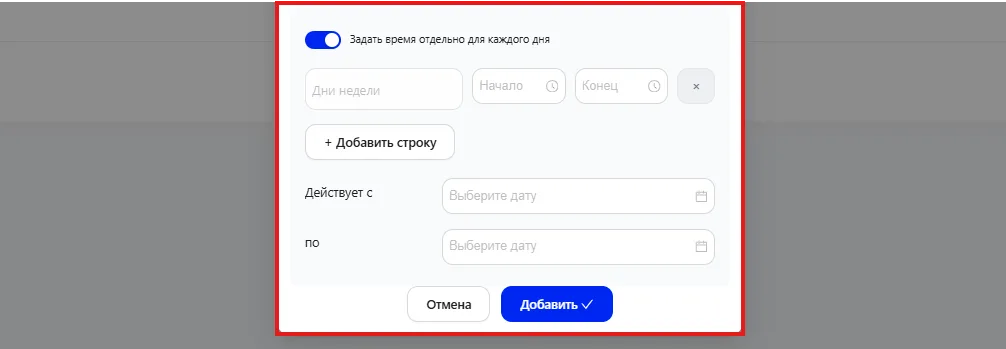
After filling out the form click "Add".
The new class will appear in the general list and become available for student enrollment, Memberships creation and schedule formation.
The "Classes" section consolidates management of lessons, schedule, Memberships, and participant lists, allowing effective planning and control of the educational process.
Important to note
- All changes to a class are applied only after saving the form or clicking the "Add" button.
- When creating or editing a class the parameters Type, Format, Color, and Enrollment limit affect its display in the schedule and students' enrollment capabilities.
- Changes in Memberships or participant lists do not affect classes that have already taken place.
- The schedule shows only current and planned classes, so for analysis of past lessons use the "Conducted classes" tab.
- When creating new students or Memberships make sure required fields are filled, otherwise the record will not be saved.
- Use filters and search to quickly find required classes, students, or Memberships - they only change the display of data, not the information itself in the system.