The format is used to view the schedule of Classes as a table. The schedule is displayed sequentially by time with the Teacher, room, and number of Students indicated. This view is convenient when you need to quickly review all Classes for a selected date and get brief information about each of them.
Main blocks:
- Access to the section
- Main interface elements
- Creating Classes
- Viewing and editing a Class
1. Access to the section
After navigating, you need to select the display mode "List (Список)" on the right side of the top panel.
In this mode, Classes are displayed as a table for the selected date.
2. Main interface elements
In "List (Список)" mode the schedule can be viewed in different display options. Switching is done using the tabs at the top of the table: "Time (Время)", "By Teachers (По преподавателям)", "Rooms (Помещения)".
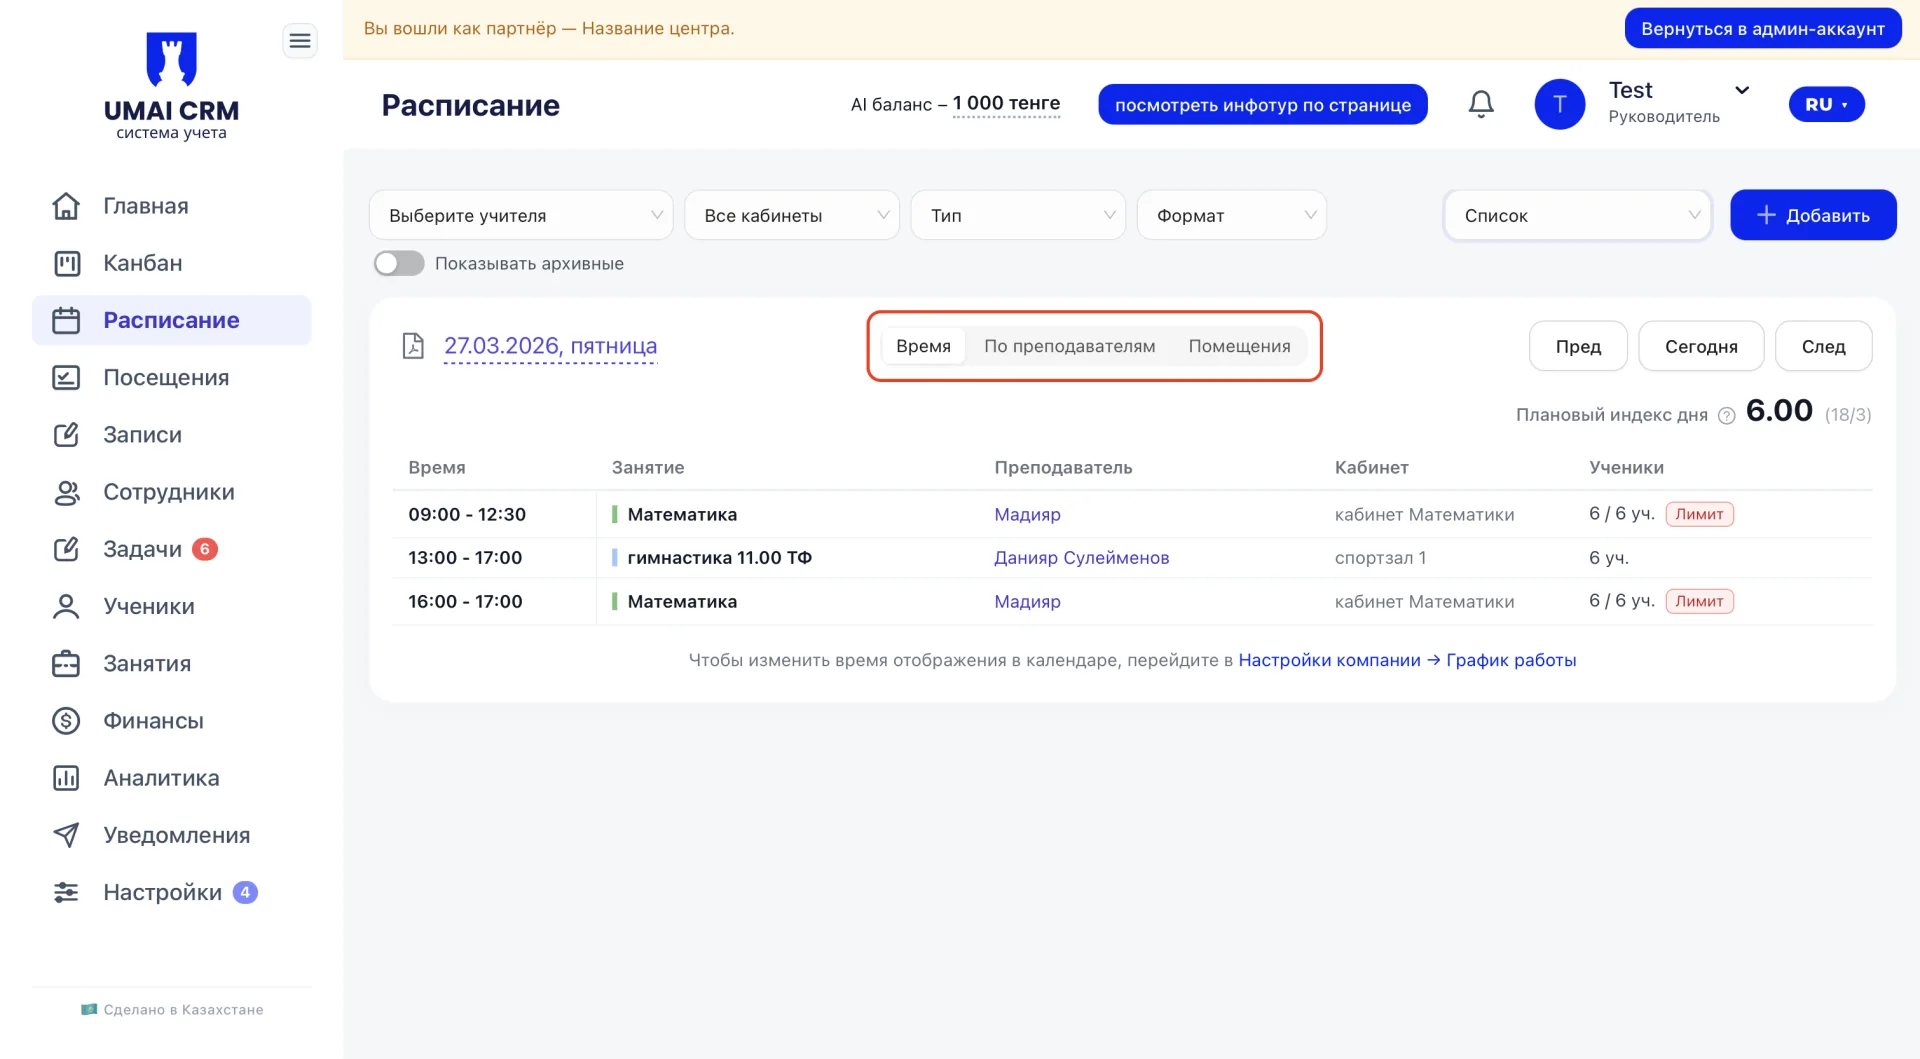
All three options show the same Classes but differ in the way they are grouped.
- Time (Время) — this is the primary display option. Classes are shown sequentially by time throughout the selected day. This format allows you to quickly see the full order of Classes and understand how the day proceeds in the center.
By Teachers (По преподавателям) — Classes are grouped by Teacher. The Teacher is shown first, and below are all Classes they conduct on the selected day. This format is convenient when you need to view a specific Employee's schedule or check their workload.
Rooms (Помещения) — Classes are grouped by room or premises. The room is shown first, and below are all Classes that take place there during the day. This helps control room occupancy and quickly find free classrooms.
Below we will look in more detail at the display of the "Time (Время)" tab, since this option is used most often to work with the schedule.
Top panel
At the top of the page there are filtering and schedule management elements.
Here you can:
-
select a specific Teacher;
-
filter the schedule by rooms;
-
specify the type and format of Classes;
-
enable display of archived Classes;
download the schedule as a PDF;
- press "+ Add" to create a new Class;
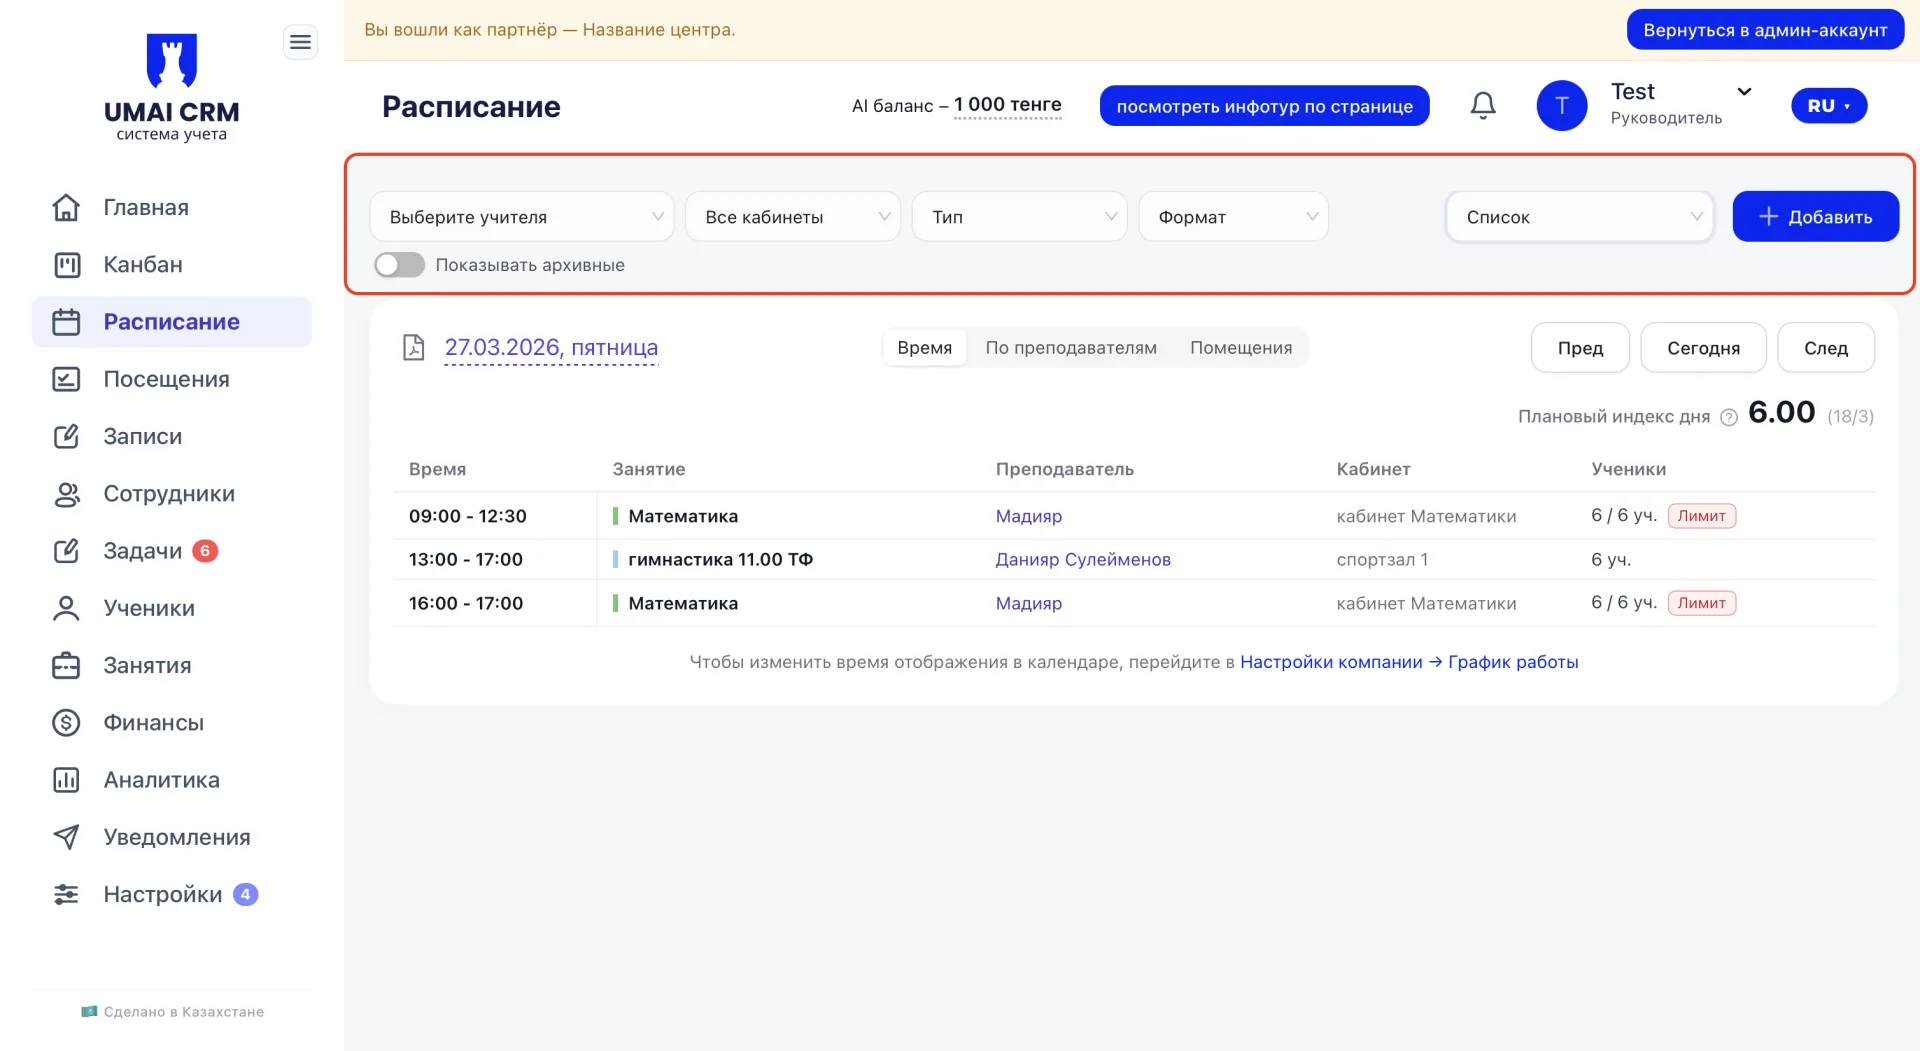
These tools allow you to quickly filter the schedule and focus on the required information.
Period navigation
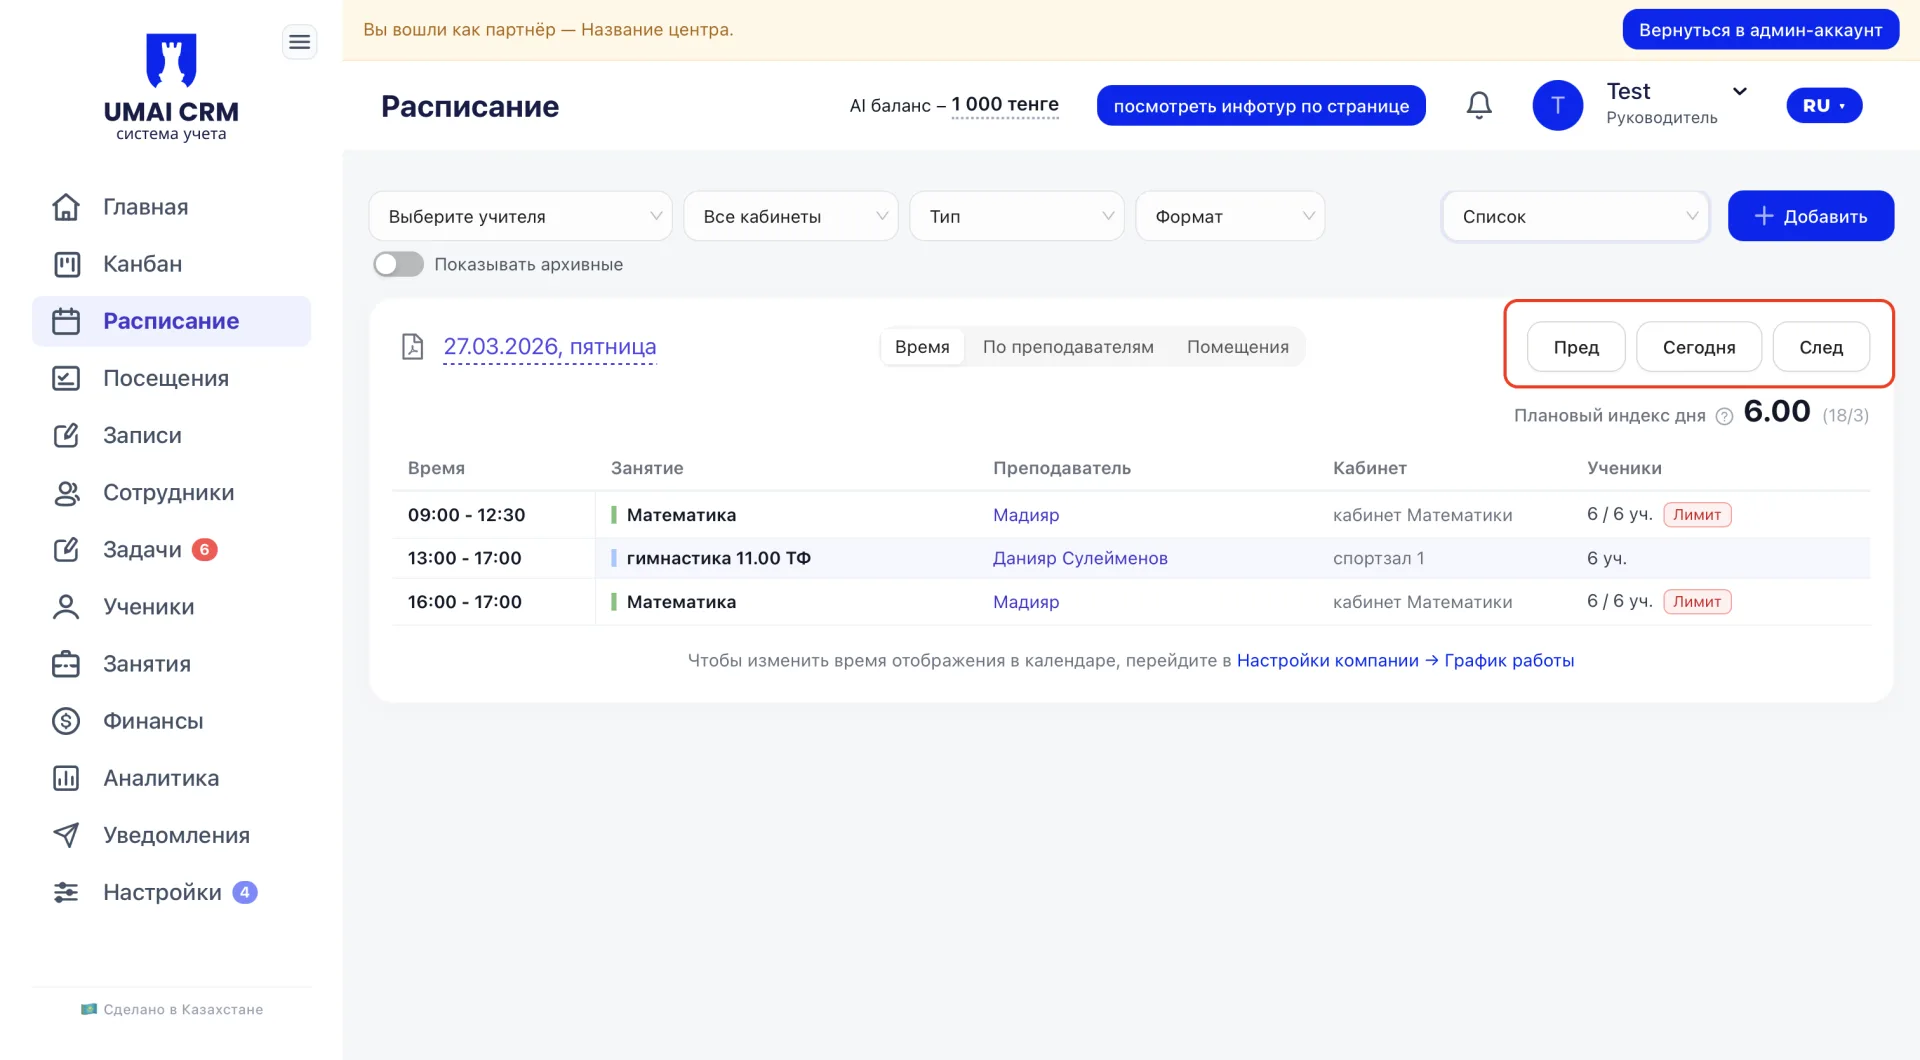
Below are the date control elements.
The buttons allow you to move through the schedule:
- "Prev (Пред)" — move to the previous day
- "Today (Сегодня)" — return to the current date
- "Next (След)" — move to the next day
On the right side of the panel the "Planned day index (Плановый индекс дня)" indicator is displayed.
It helps quickly assess the center's workload for the selected date.
The index is calculated based on the number of scheduled Classes and the number of Students enrolled in them. Next to the indicator the ratio of the total number of Students to the number of Classes is displayed.
For example:
3.75 (15/4)
where:
-
3.75 — the overall daily load index;
-
15 — the number of enrolled Students;
-
4 — the number of scheduled Classes.
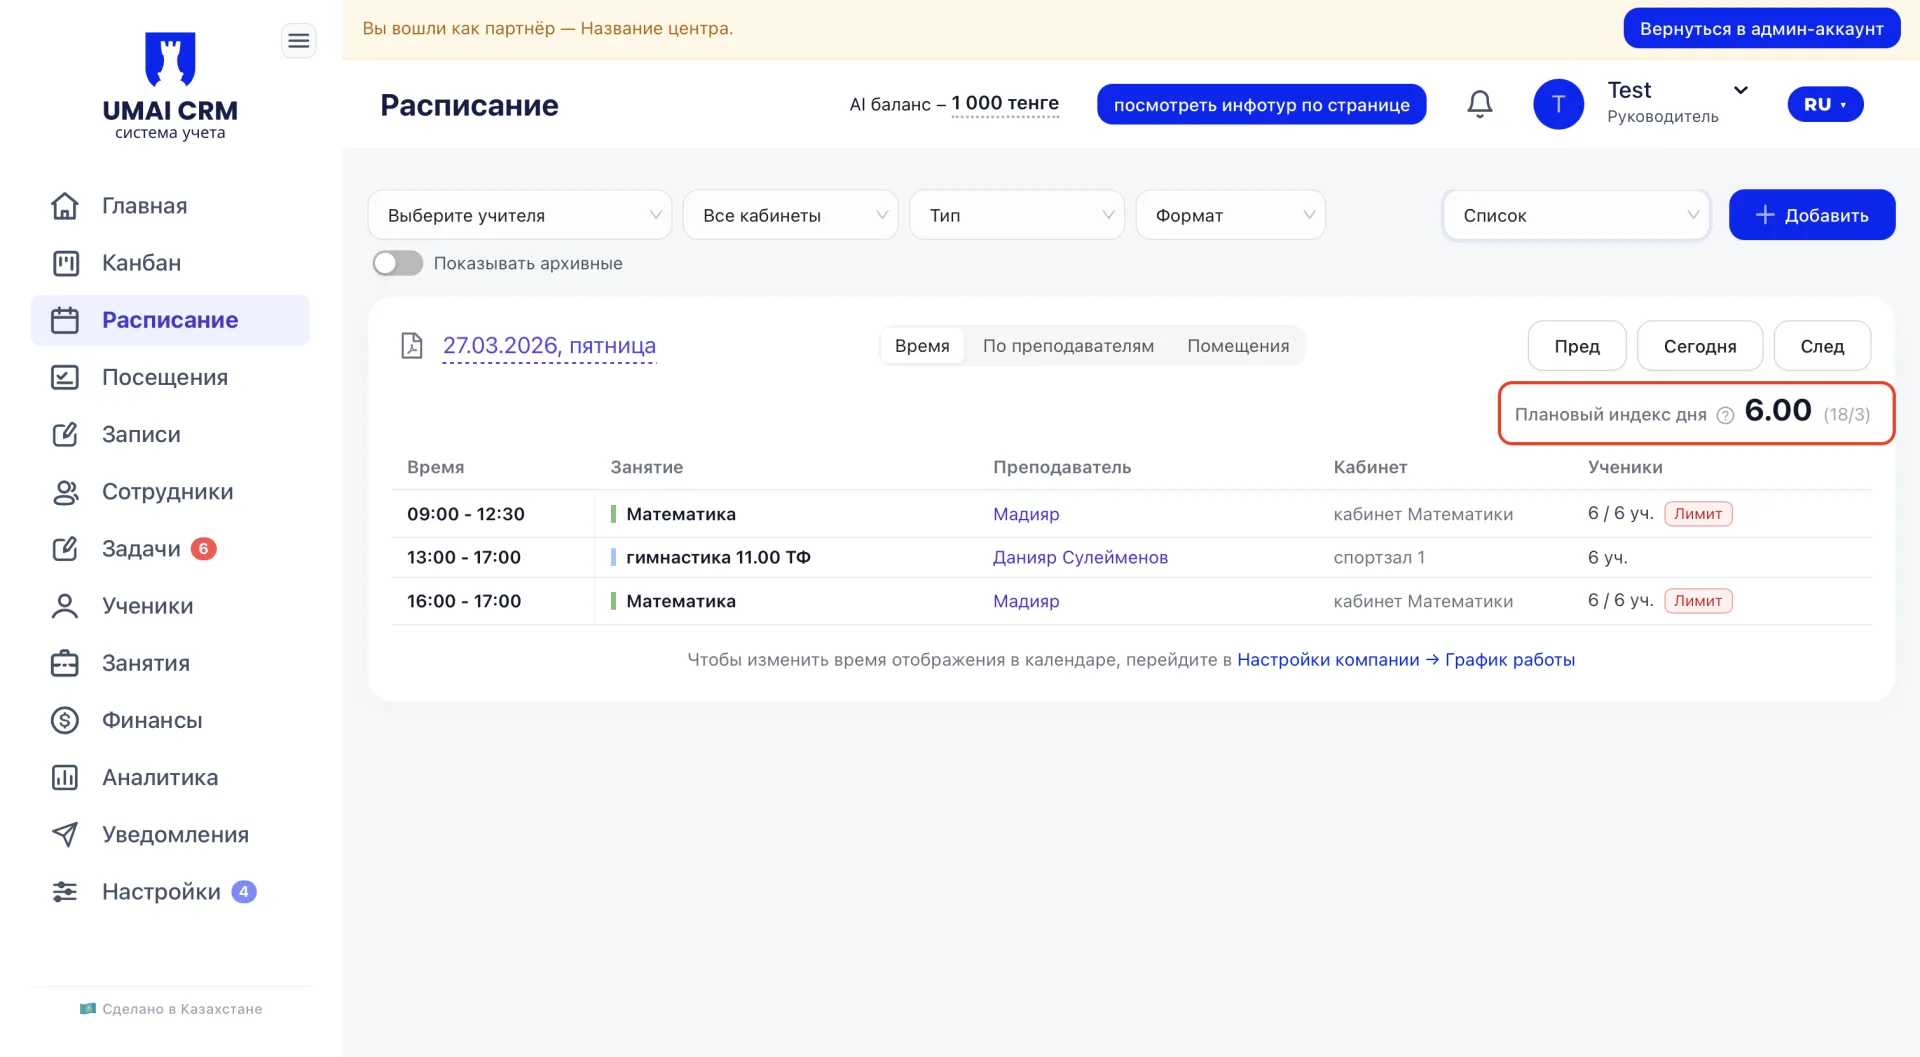
This indicator allows the administrator to quickly understand how full the schedule is, whether there are free spots in Groups and whether additional Classes can be added.
Classes table
The main part of the page is a table with a list of Classes for the selected date.
The table displays the following parameters:
-
Time — the period of the Class;
-
Class — the name or direction of the Class;
-
Teacher — the Employee leading the Class;
-
Room (Кабинет) — the premises where the Class takes place;
-
Students — the current number of enrolled Students.
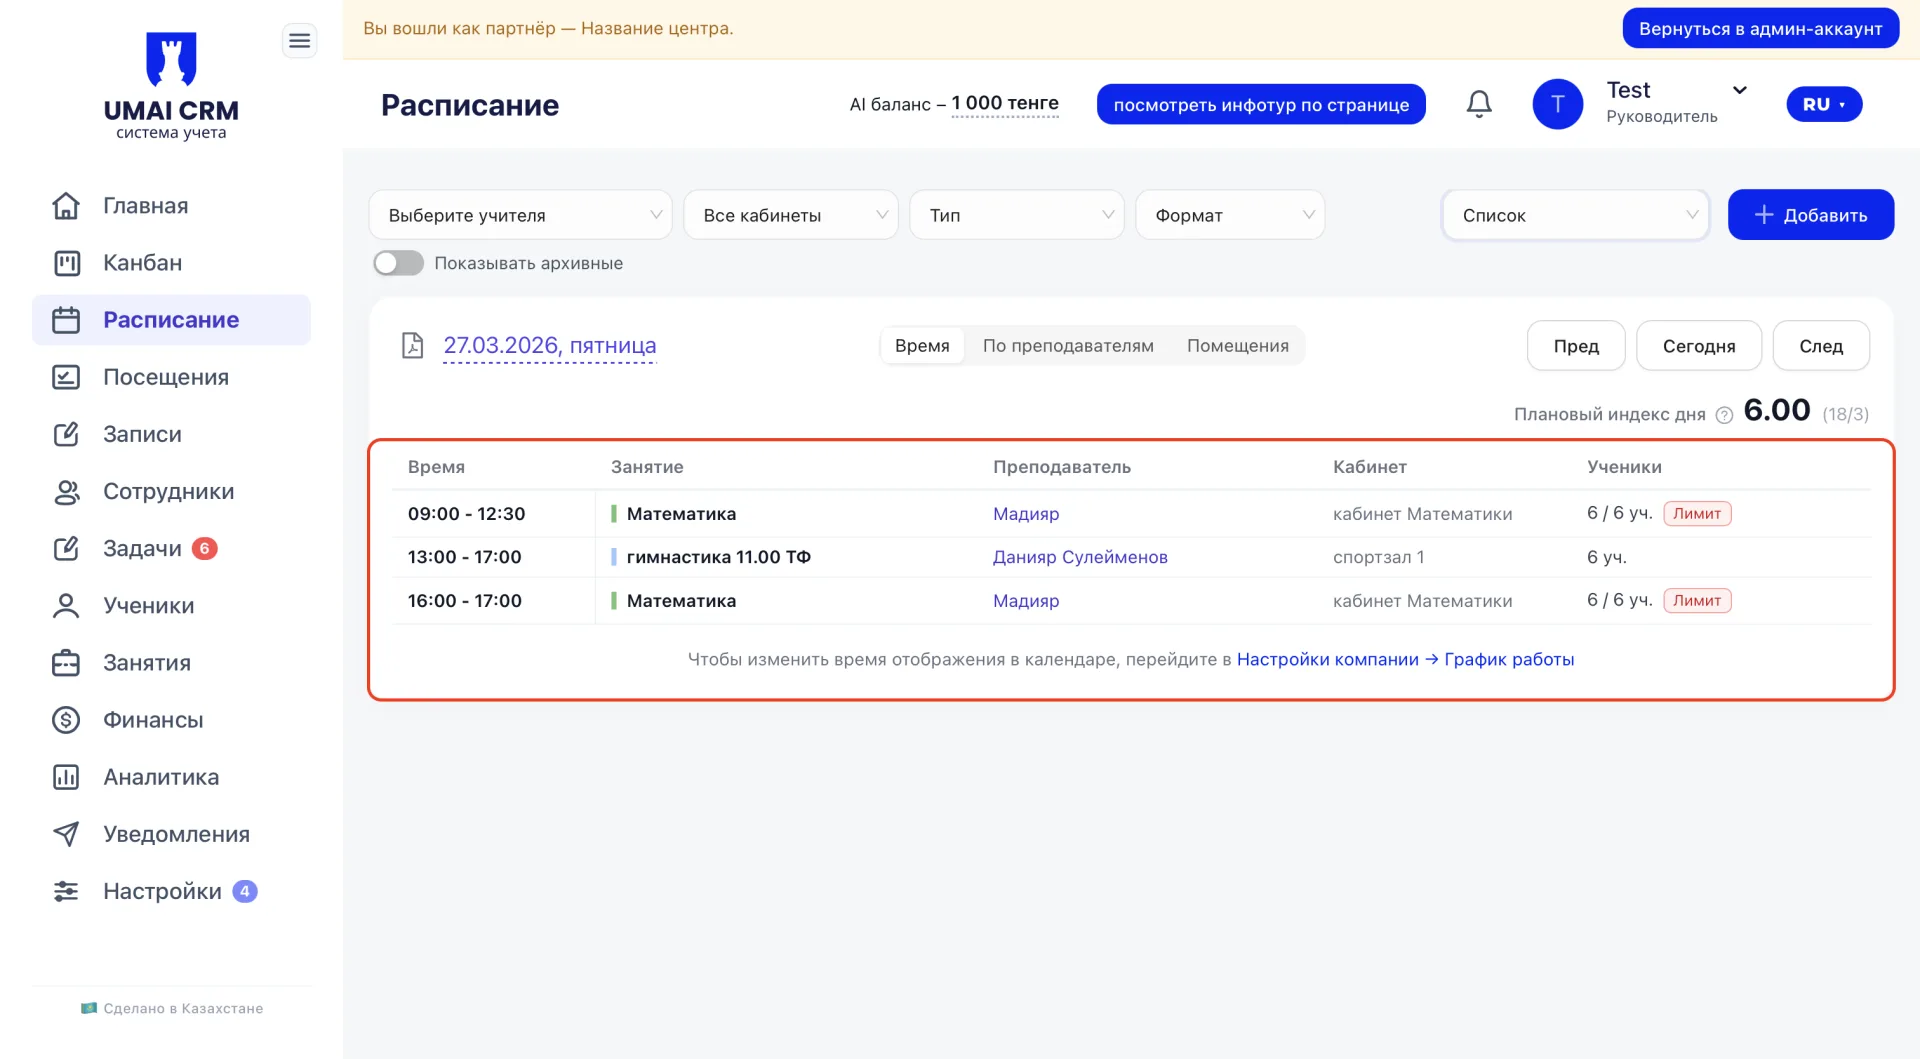
Each row of the table corresponds to a separate Class.
This display format allows you to quickly review the day's schedule and get brief information about each Class.
3. Creating Classes
In "List (Список)" mode adding Classes is done using the "+ Add" button located on the right side of the top panel.
After clicking, a window opens where you can select the type of event to add:
-
Class (add a series of Classes)
-
Trial lesson
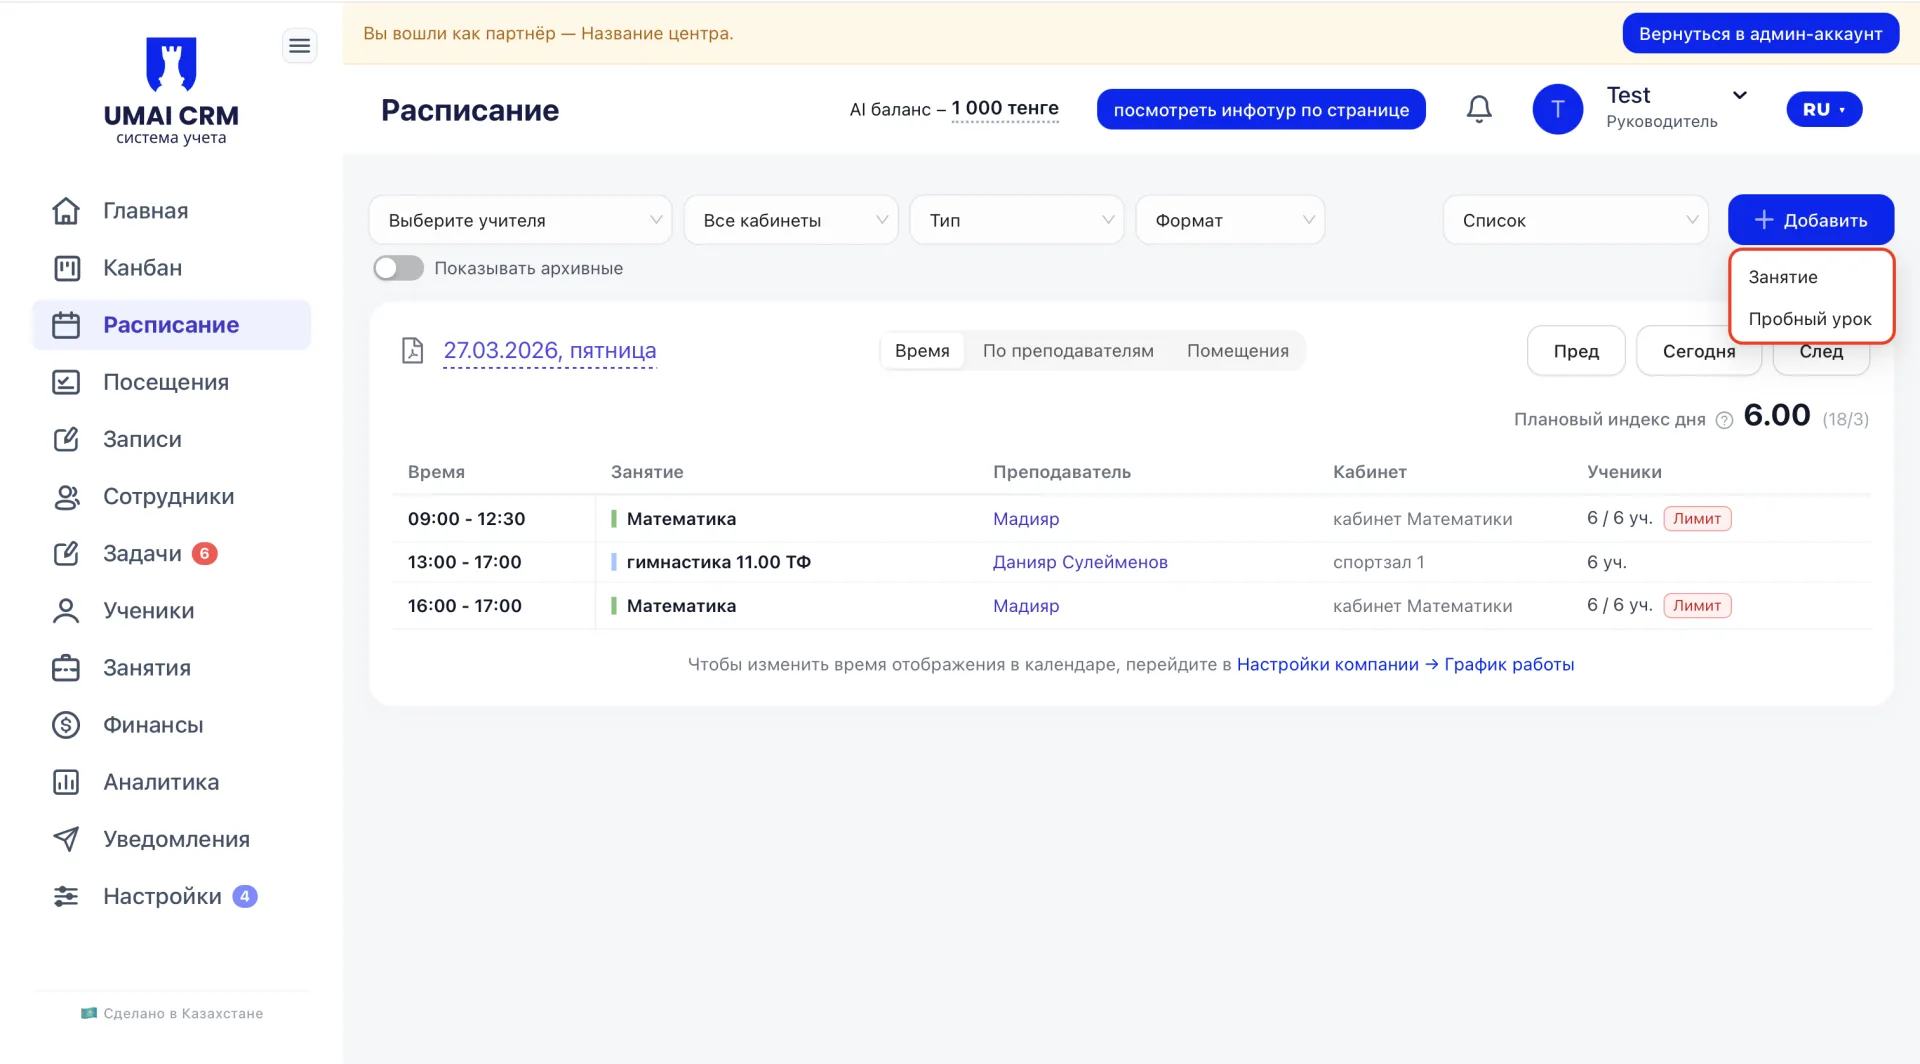
Further filling of parameters is done the same way as in other schedule modes.
4. Viewing and editing a Class
Any Class in the list is interactive.
When you click on a Class row, a panel with detailed information opens.
The panel displays:
- the Class name;
- the room;
- days of the week
- time of conducting;
- list of Teachers;
- the number and list of Students.
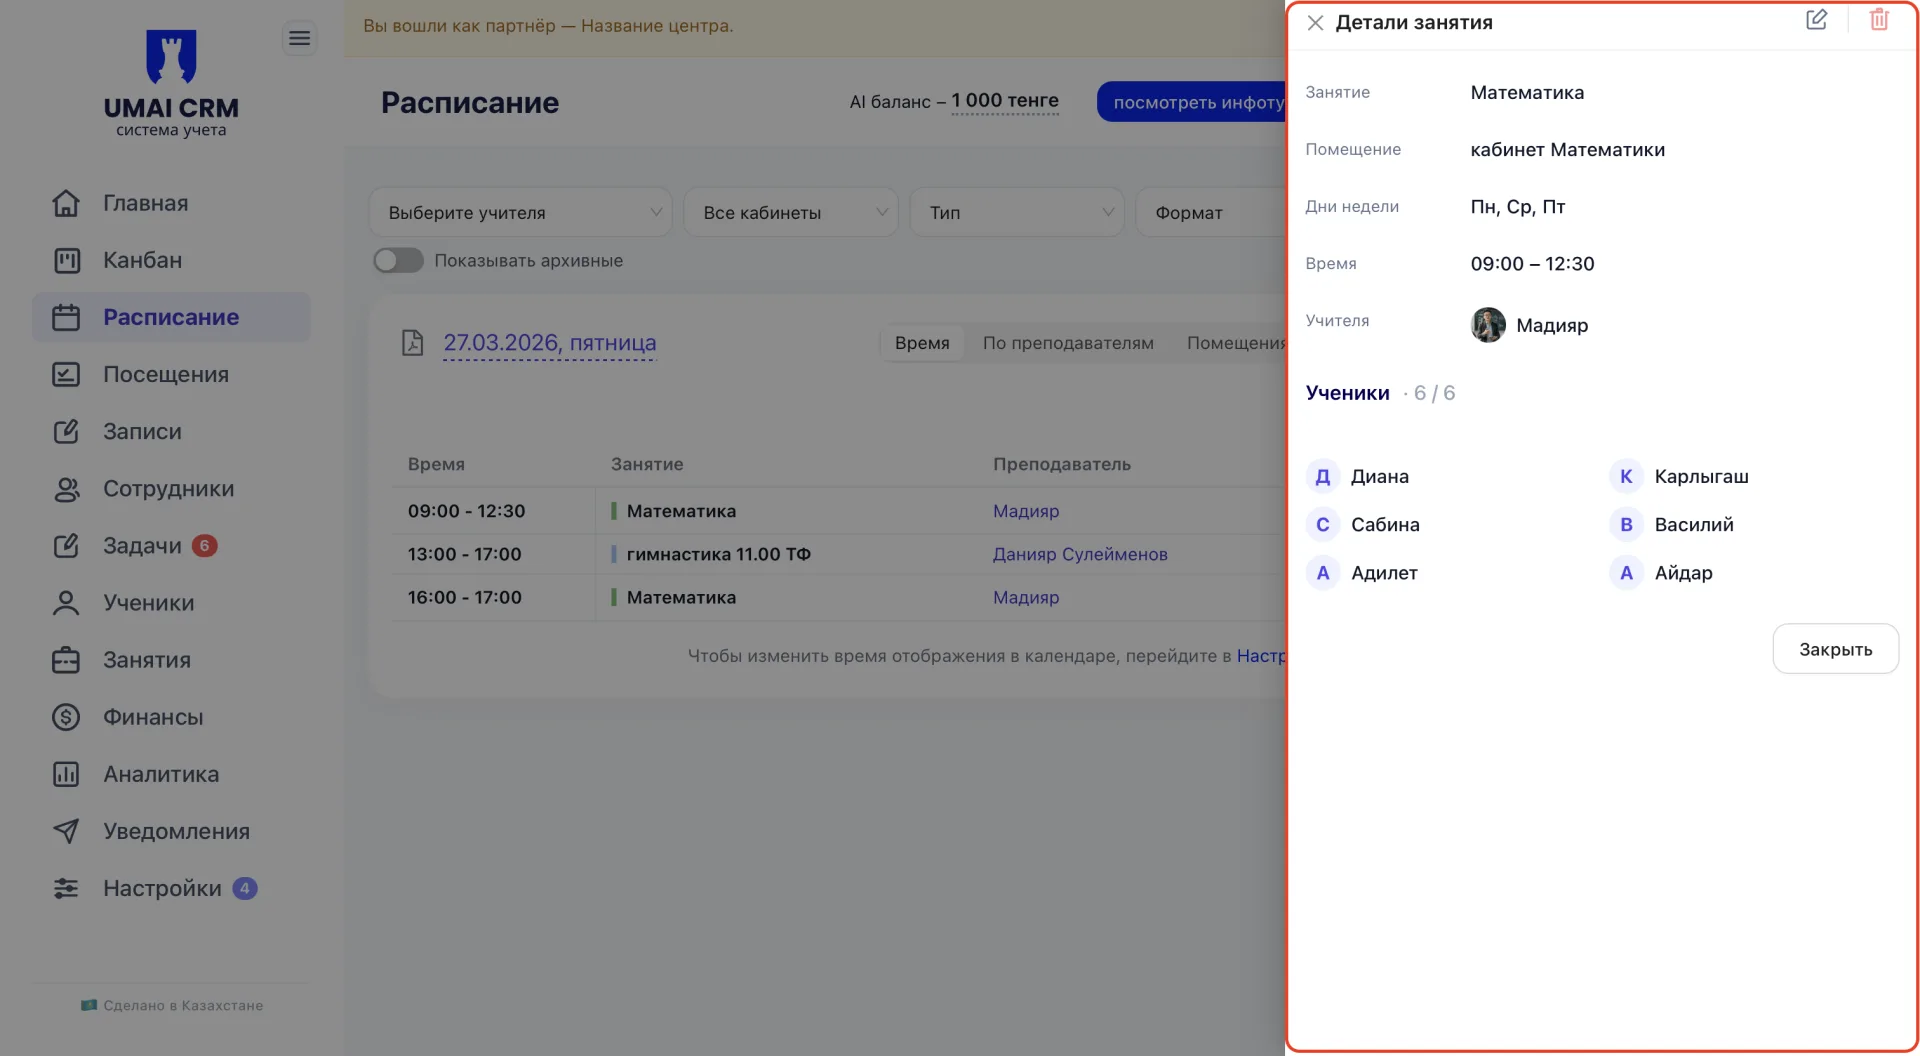
Using the controls at the top of the panel you can edit Class parameters, change the Students list, or make other changes.
Important to consider
Changing the time or date of a Class affects Students' attendance and deduction of Classes from Memberships.
-
Deleting a Class removes it from the schedule and from attendance calculations and reporting.
-
Changing the Teacher affects their workload and the display of Classes when filtering by Employees.
The number of Students in a Class directly affects the load indicator and the value of the planned day index.