The section is used to plan and control teachers' schedules for the week. In this mode, Classes are displayed separately for each Teacher, allowing you to quickly assess their workload and distribution of Classes (По учителю на неделю).
Groups and individual lessons are created here, Teachers are assigned, Students are added, and room utilization is tracked.
Main blocks:
- Access to the section
- Main interface elements
- Creating Classes
- Viewing and editing a Class
1. Access to the section
The section is opened via the side menu «Schedule».
After navigating, you need to select the display mode «By Teacher for the Week» (По учителю на неделю) on the right side of the top panel.
In this mode the schedule for the entire week is displayed, grouped by Teachers.
2. Main interface elements
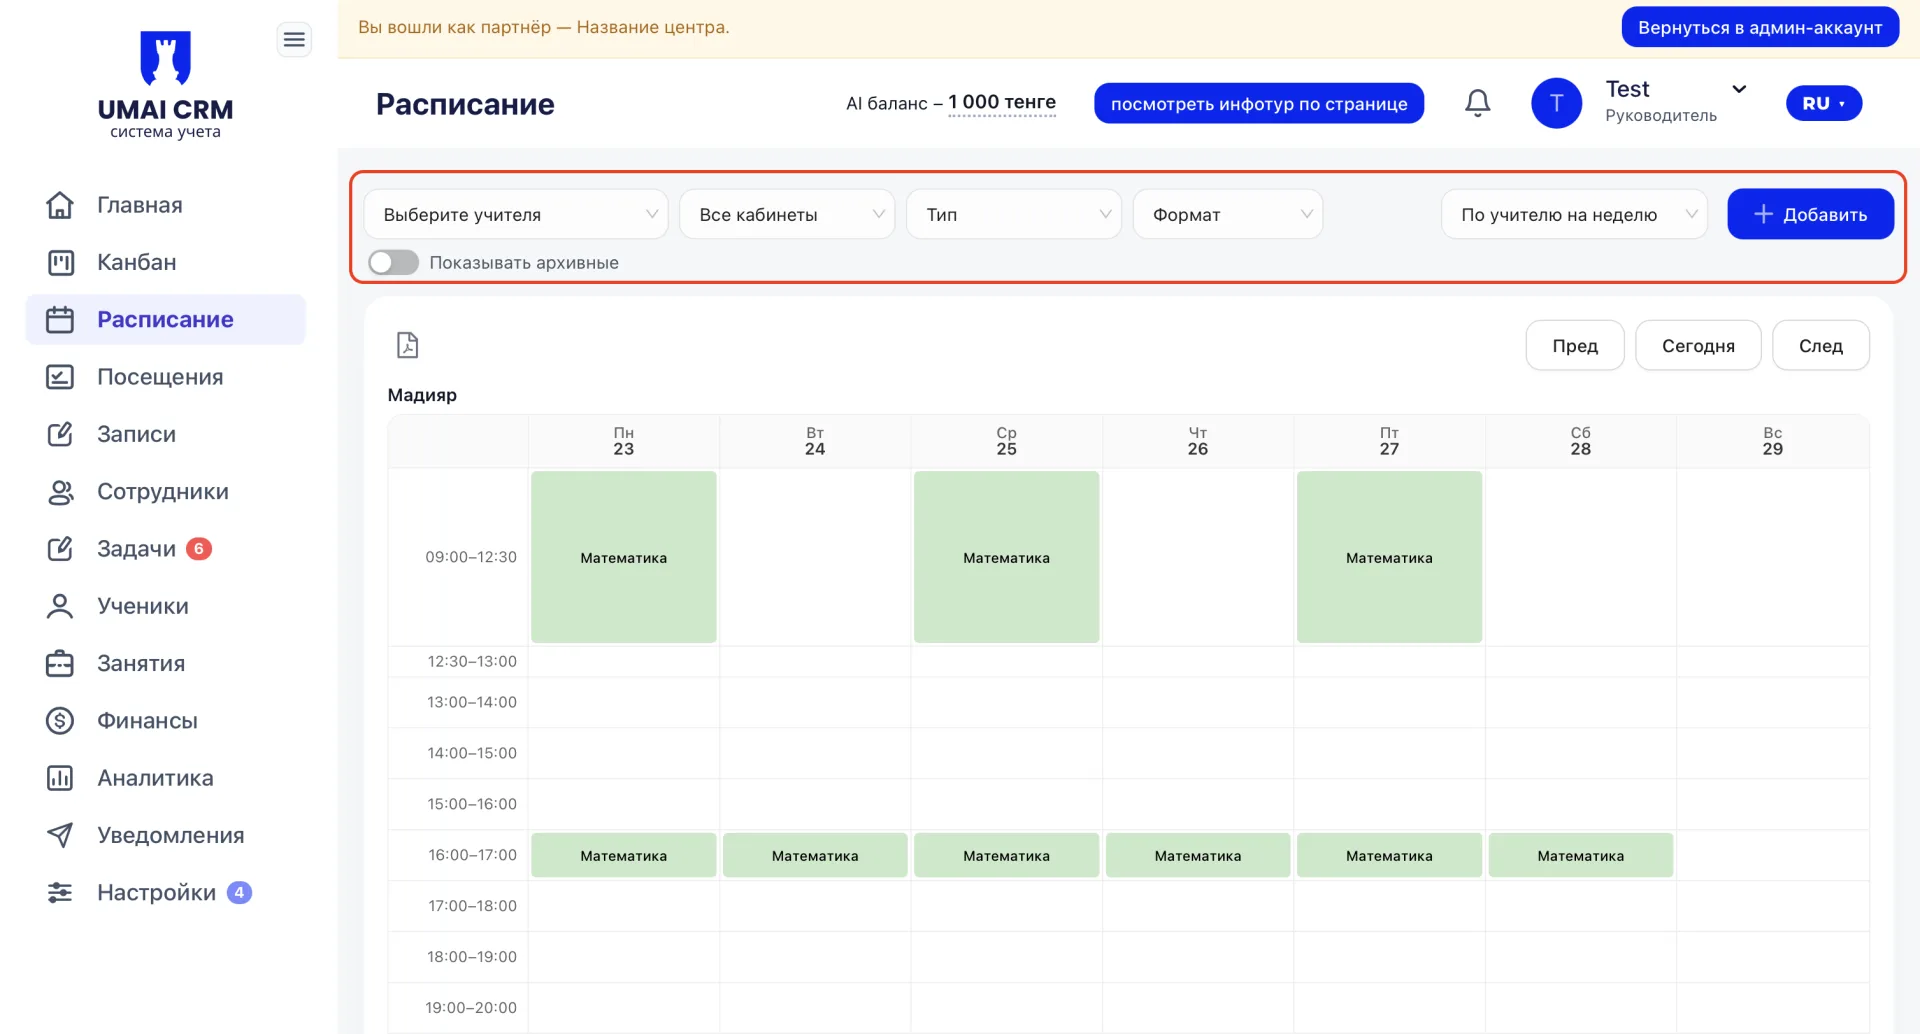
Top control panel
The top part of the page is responsible for filtering and creating Classes.
Here you can:
- select a specific Teacher to see only their Classes;
- filter the schedule by rooms;
- specify the type and format of Classes;
- enable display of archived (completed) Classes;
- click "+ Add" to create a new series of Classes.
Period navigation
Date control elements are located below.
The buttons allow you to move through the schedule:
- «Prev» — go to the previous week
- «Next» — go to the next week
- «Today» — return to the current date
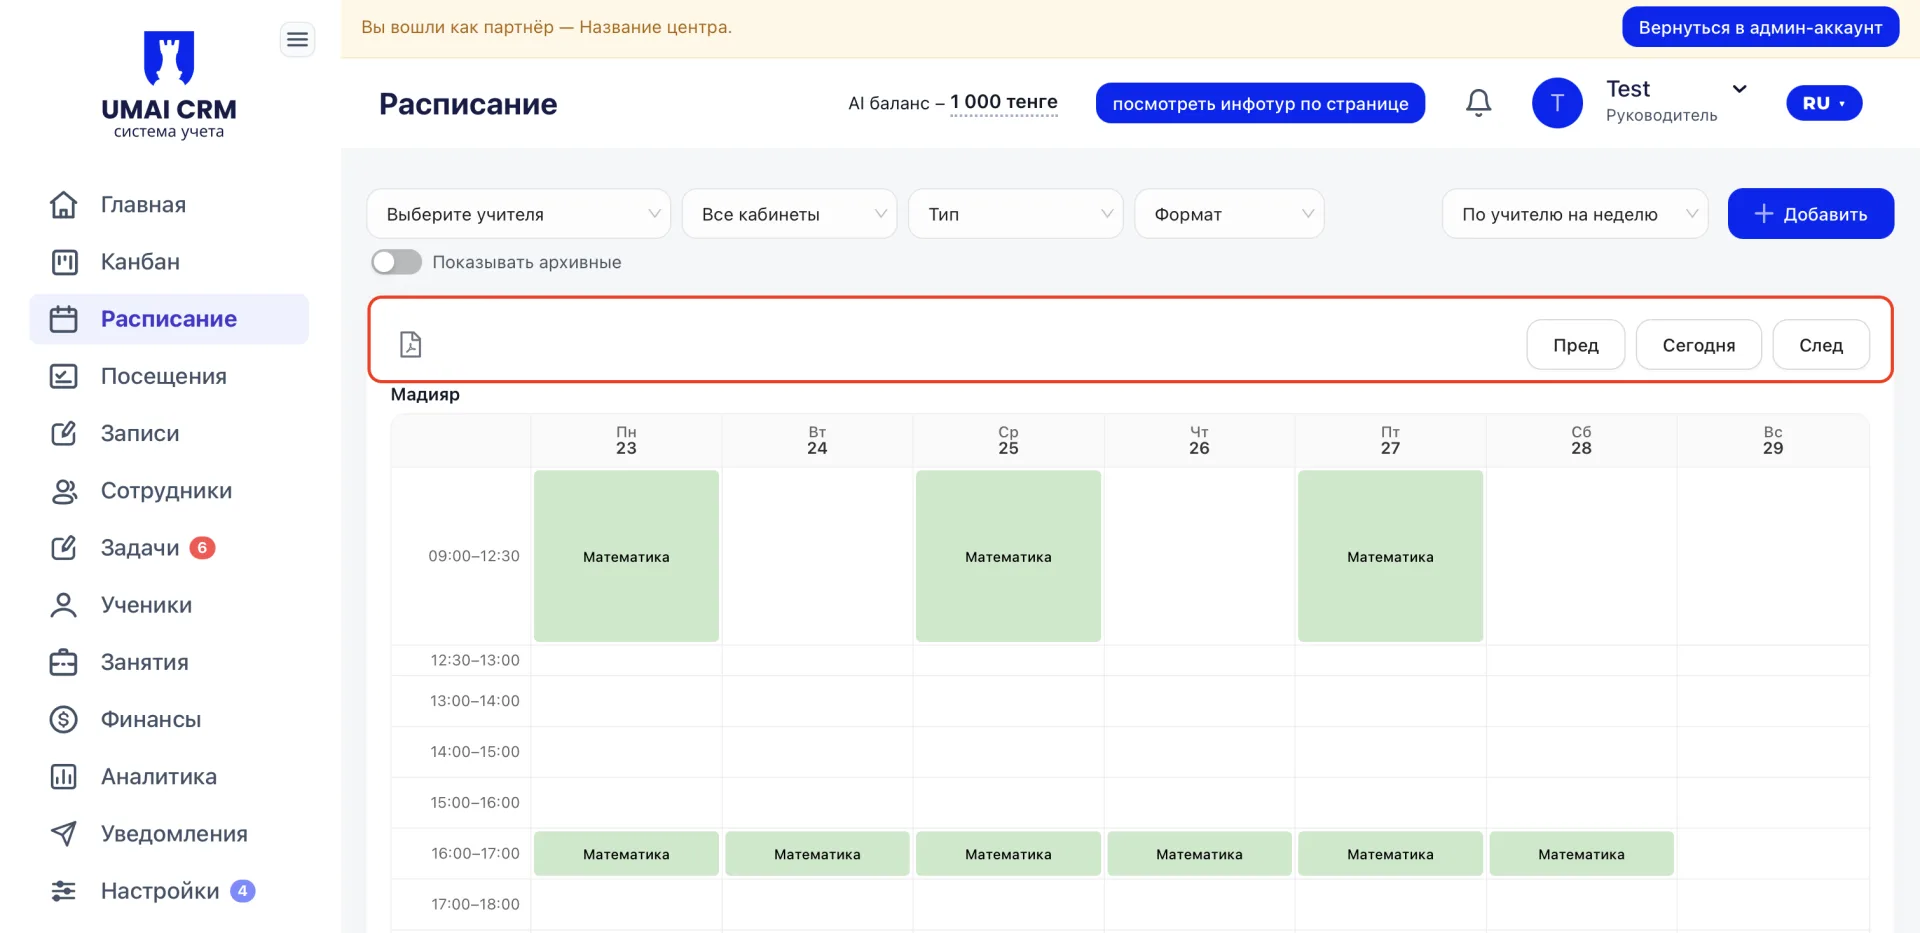
On the right there is a button with a sheet icon — through it you can download the schedule as a PDF.
Schedule grid
When you scroll the page down, you can see the schedules of the other Teachers.
The central part of the page displays the weekly schedule grid.
Days of the week are arranged horizontally, and Class times vertically.
The main feature of this mode is that the schedule is divided by Teachers.
A separate block with their schedule is displayed for each Teacher.
Within the grid, Classes are displayed as colored cells.
Each block shows:
-
Class time;
-
Class title;
-
additional information (for example, Group or direction).
Color helps quickly distinguish different directions or Groups.
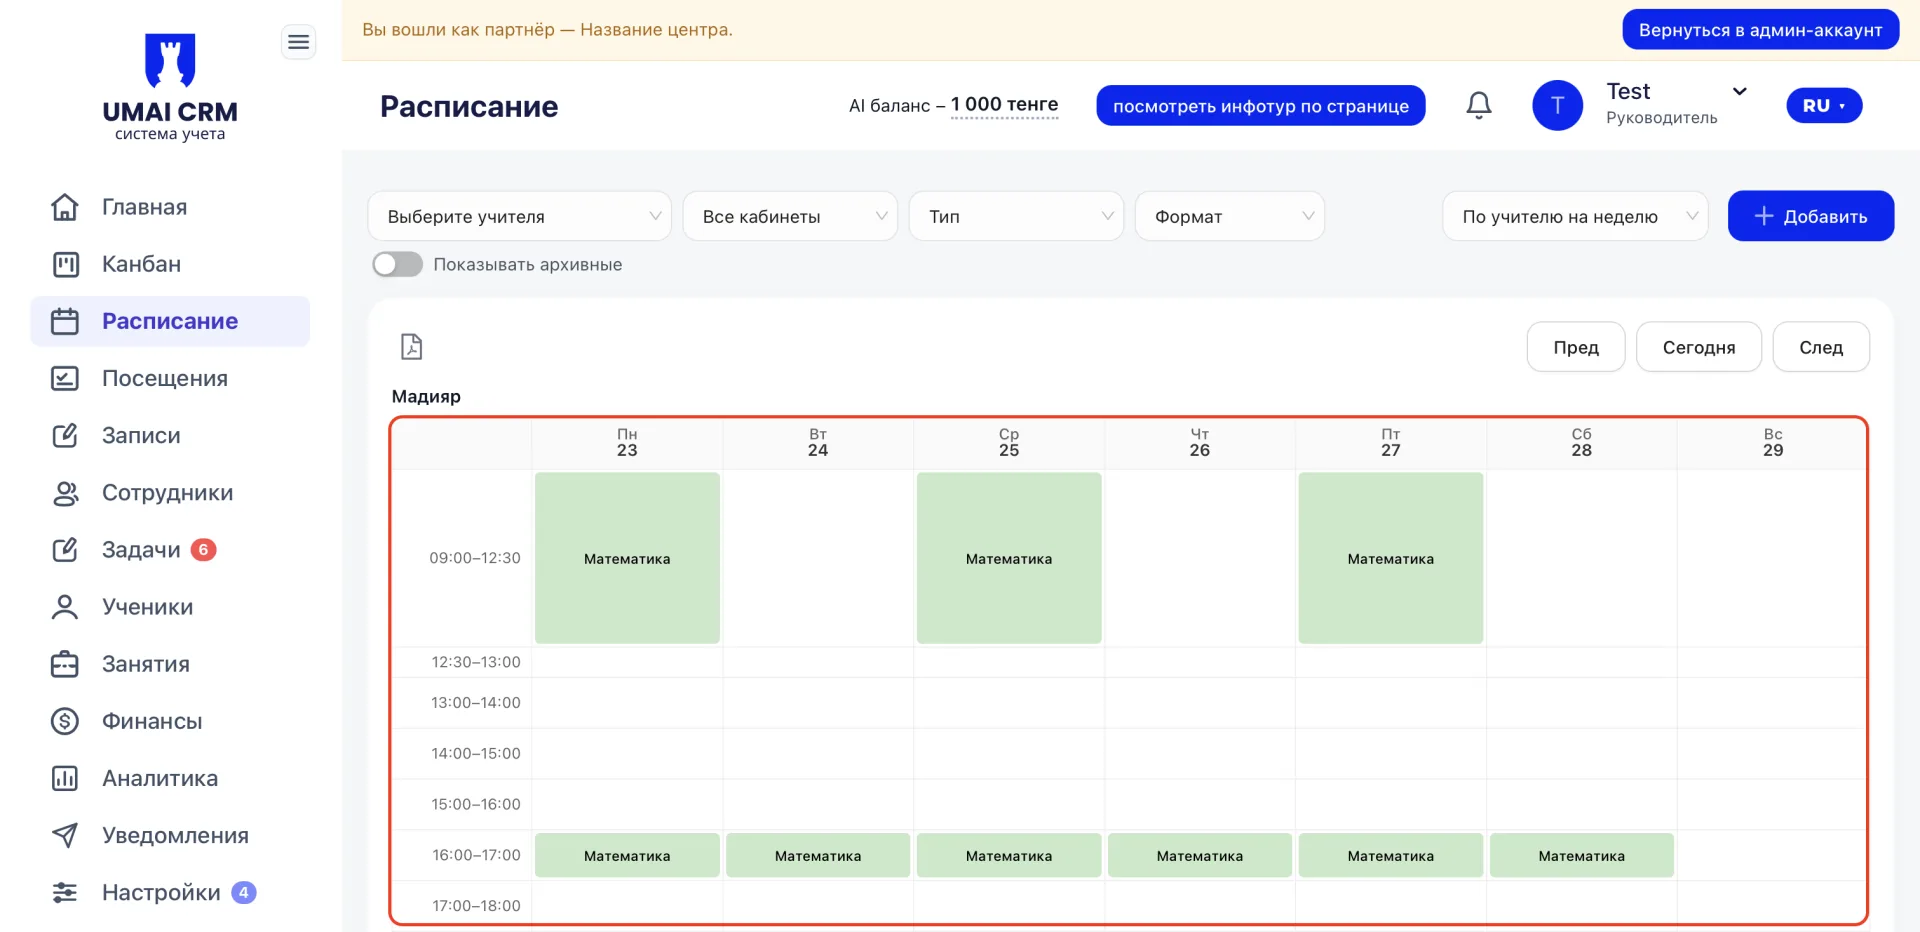
This display format allows you to:
-
see each Teacher's workload for the week;
-
quickly compare schedules of different Employees;
-
find free time slots;
-
check for possible time overlaps.
3. Creating Classes
In the «By Teacher for the Week» (По учителю на неделю) mode there are two ways to add a Class:
-
using the "+ Add" button
-
by clicking an empty cell in the schedule grid
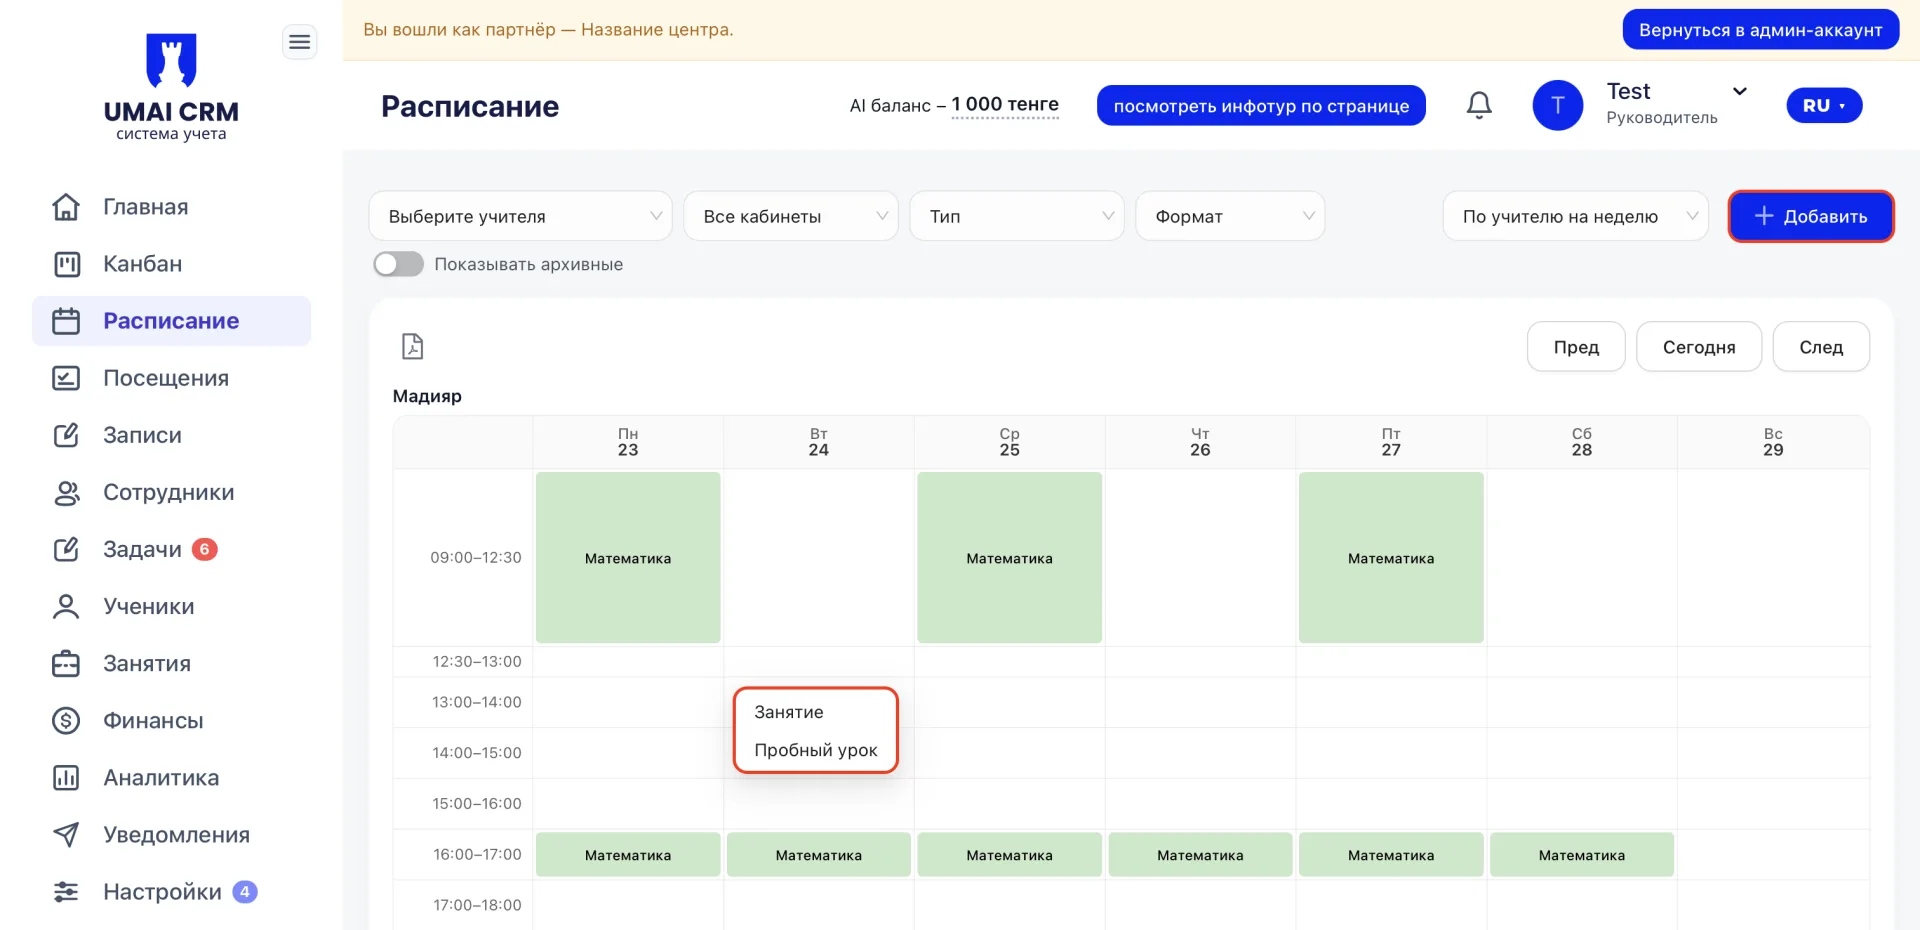
After clicking, a window opens where you can choose the type of event to add:
-
Class (add a series of Classes)
-
Trial lesson
Further filling of the Class parameters is performed the same way as in other schedule modes.
4. Viewing and editing a Class
Through them you can change Class parameters, update the list of Students, or adjust other settings.Any Class in the schedule is interactive.
When you click on a colored cell, the "Class Details" panel opens.
The panel displays:
-
Class title;
-
room;
-
days of the week;
-
time of conduct;
-
list of Teachers;
-
number and list of Students.
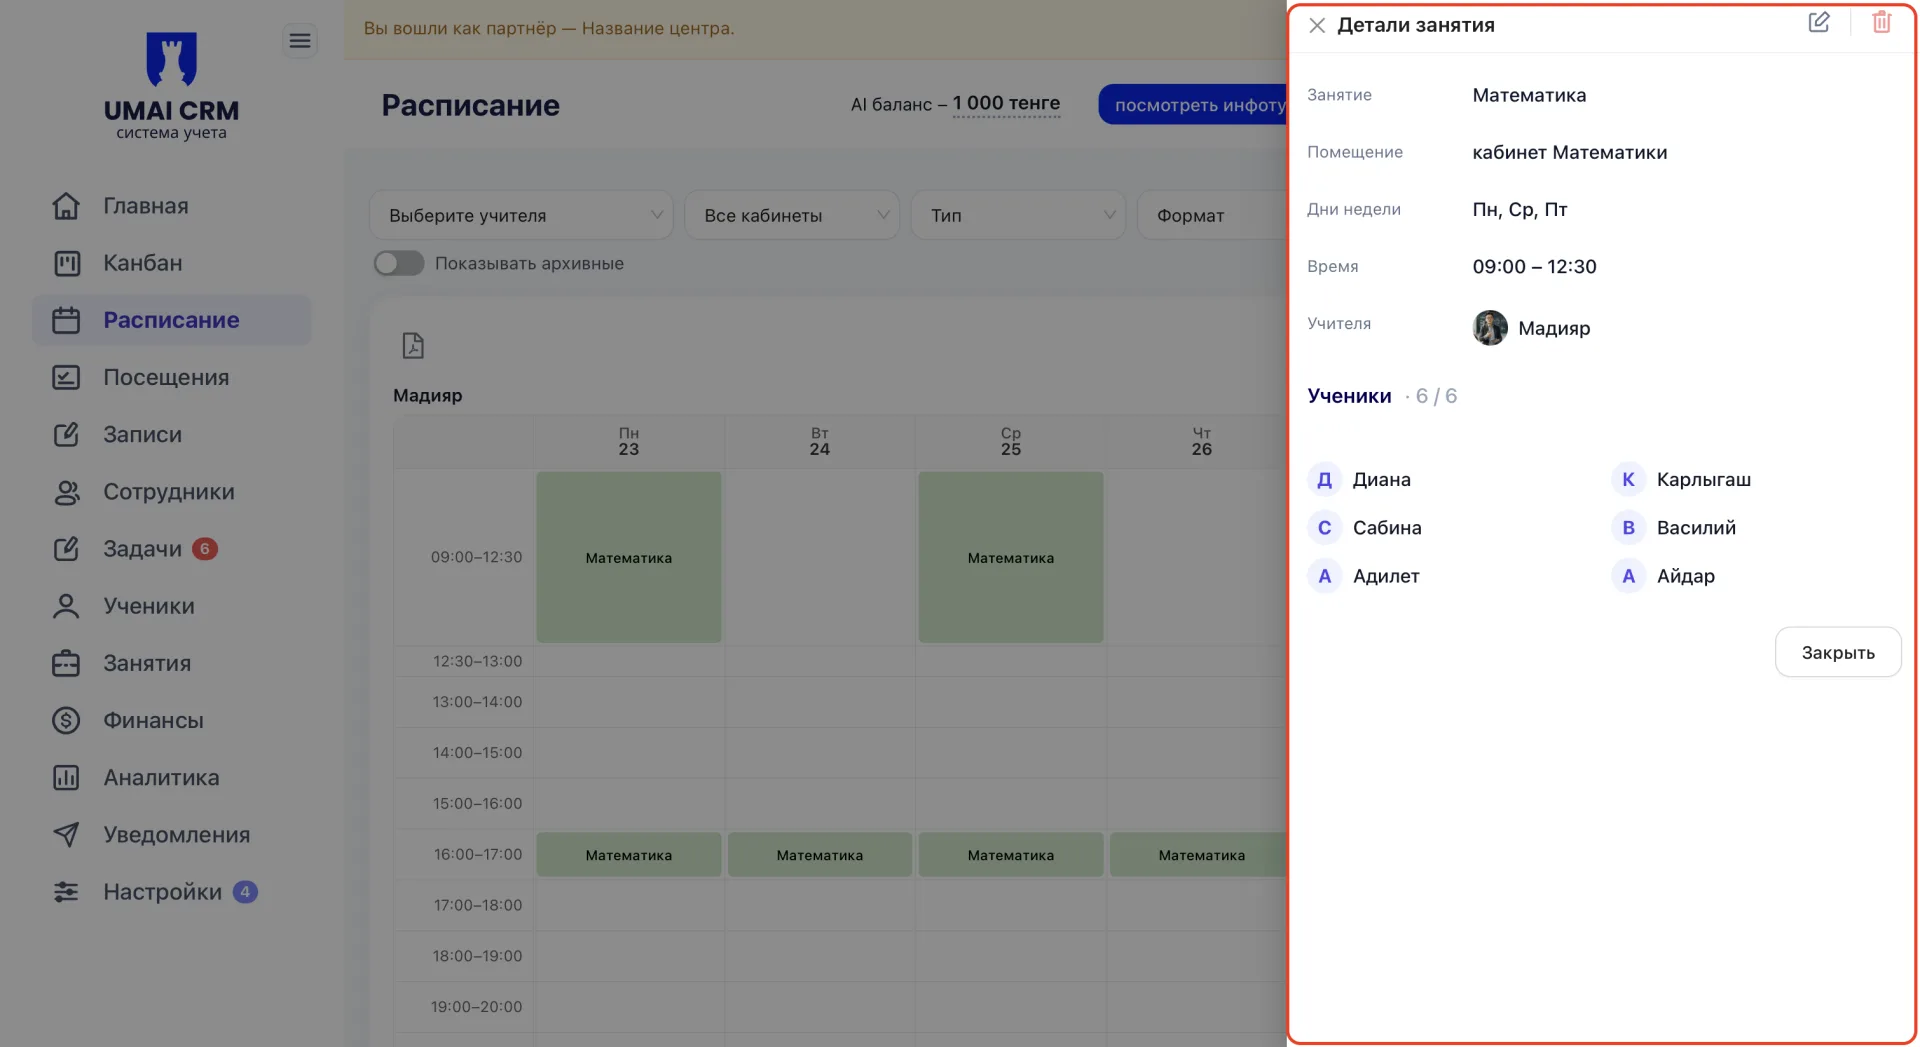
This allows you to quickly check Class parameters without navigating to other sections.
The top part of the panel contains edit actions.
Through them you can change Class parameters, update the list of Students, or adjust other settings.
Important to consider
- Changing the time or date of a Class affects Visits and deduction of Memberships.
- Deleting a Class excludes it from attendance calculations and reports.
- Assigning a Teacher affects their workload and display in filters.
- Time overlaps can lead to conflicts for a room or Employee.
In practice, the schedule becomes the control point of all educational activity. Any change made immediately affects attendance, Employee workload, and management metrics.