The section is used to plan and coordinate all Classes of the center. Groups and individual lessons are created here, Teachers are assigned, Students are added, and room occupancy is tracked.
Main blocks:
- Access to the section
- Main interface elements
- Creating Classes
- Viewing and editing a Class
1. Access to the section
The section opens via the sidebar menu "Schedule".
After navigating, you need to select the display mode "All Teachers for the Day (Все учителя на день)" in the right part of the top panel.
2. Main interface elements
Top control panel
The top part of the page is responsible for filtering and creating Classes.
Here you can:
- select a specific Teacher to see only their Classes and check their load;
- filter the Schedule by rooms to avoid room overlaps;
- specify the type and format of Classes;
- enable display of archived (completed) Classes;
- click "+ Add" to create a new series of Classes.
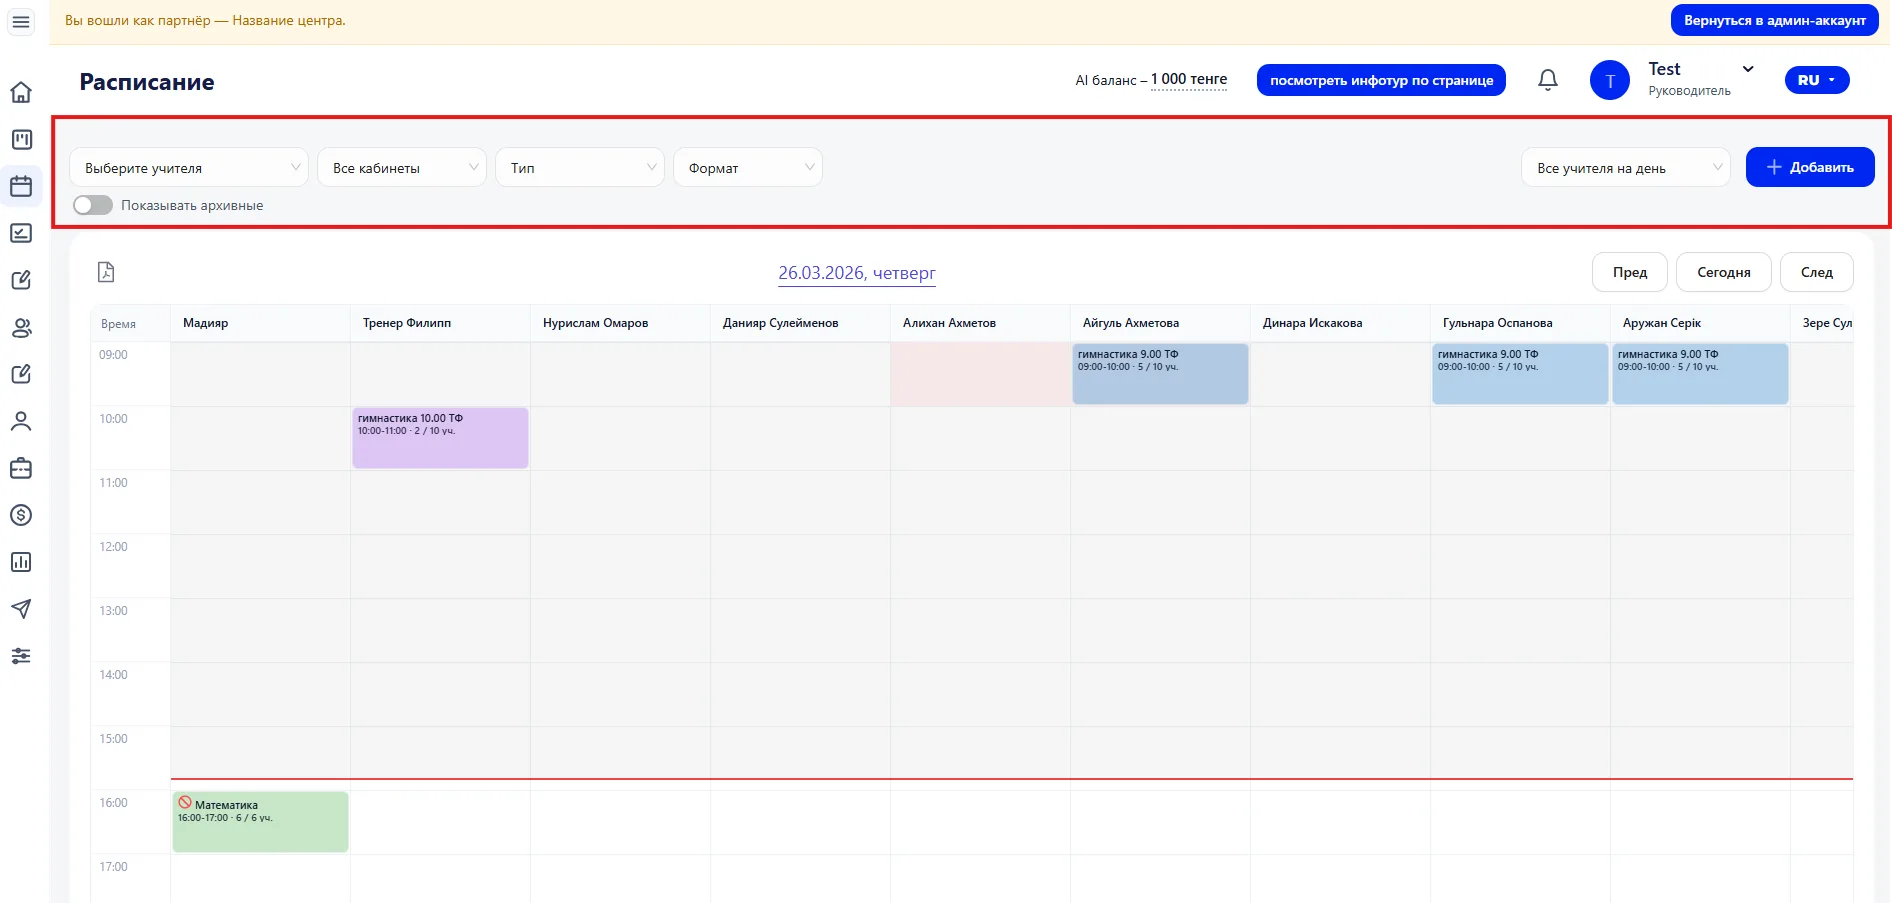
The panel helps you quickly focus on the needed part of the Schedule and check the center's workload.
Period navigation
Below are the date control elements.
The buttons allow you to move through the Schedule:
-
"Prev" — move to the previous day
-
"Next" — move to the next day
-
"Today" — return to the current date
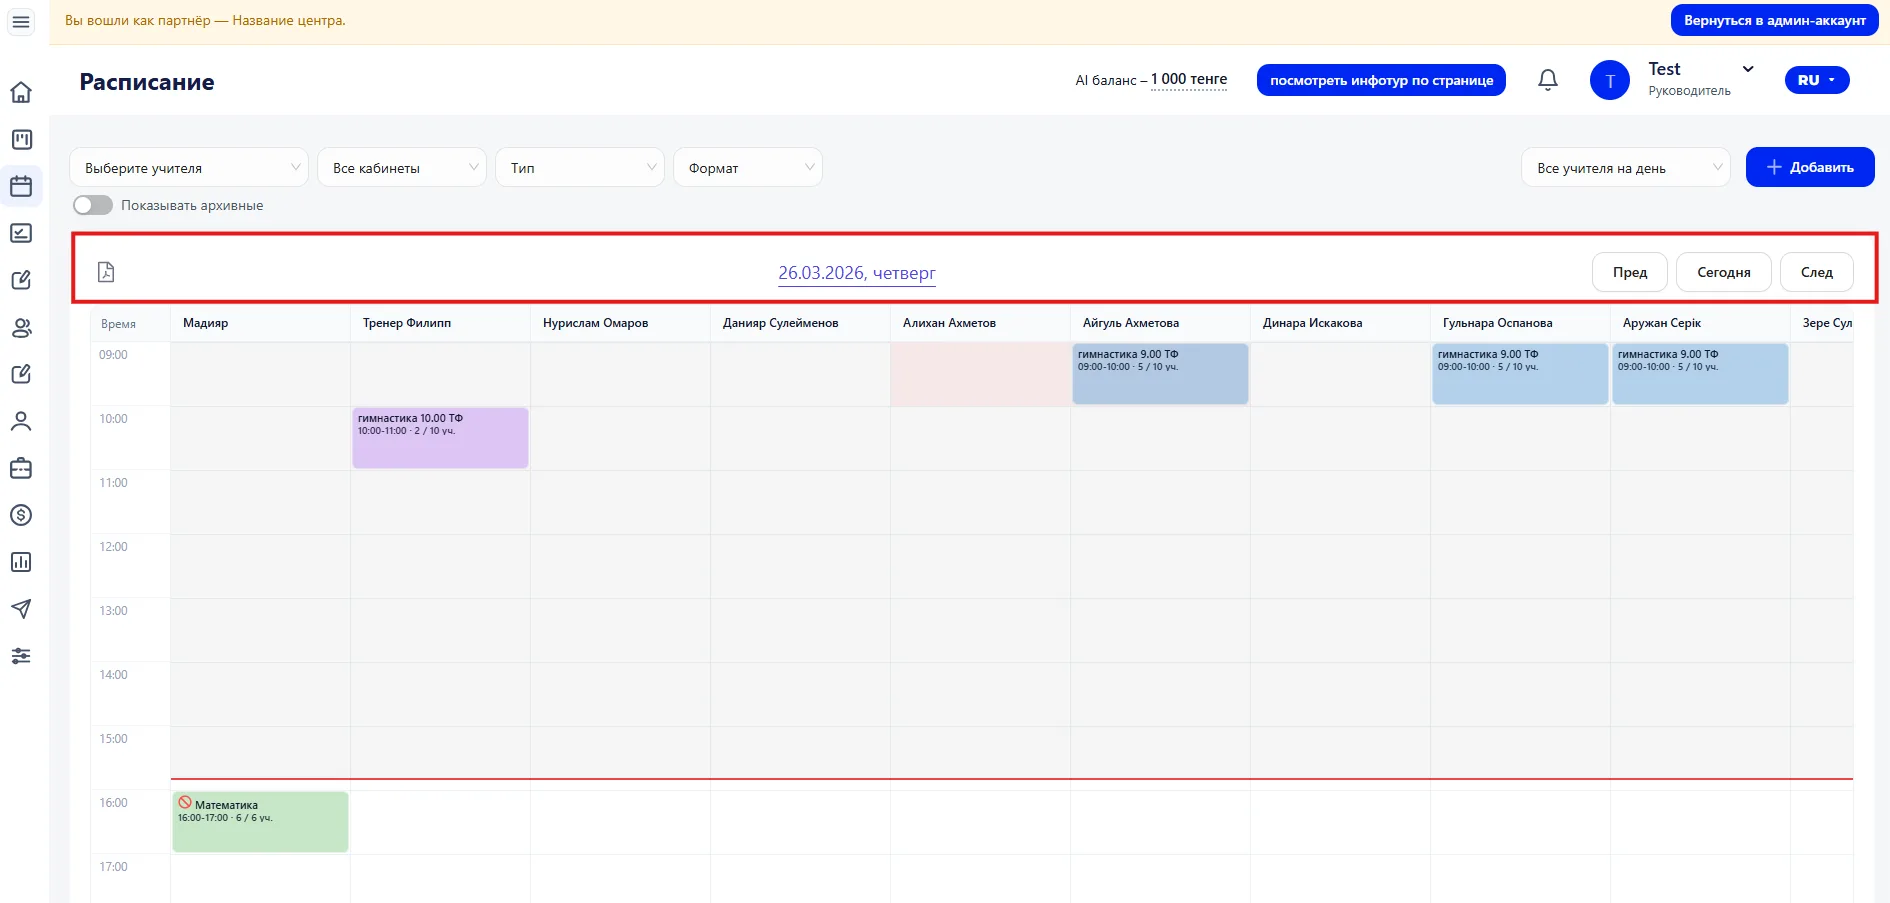
On the left there is a button with a sheet icon — through it you can download the Schedule in PDF format.
Schedule grid
The central part of the page contains the Schedule grid for the current day.
Time is displayed vertically (hourly scale), and Teachers are shown horizontally.
A red line indicates the current time, which helps quickly navigate the Schedule.
Each Class is displayed as a colored cell.
Inside the block the following are indicated:
Class time;
-
Class title;
-
additional information (for example, Teacher or group).
Color helps quickly distinguish different directions or groups.
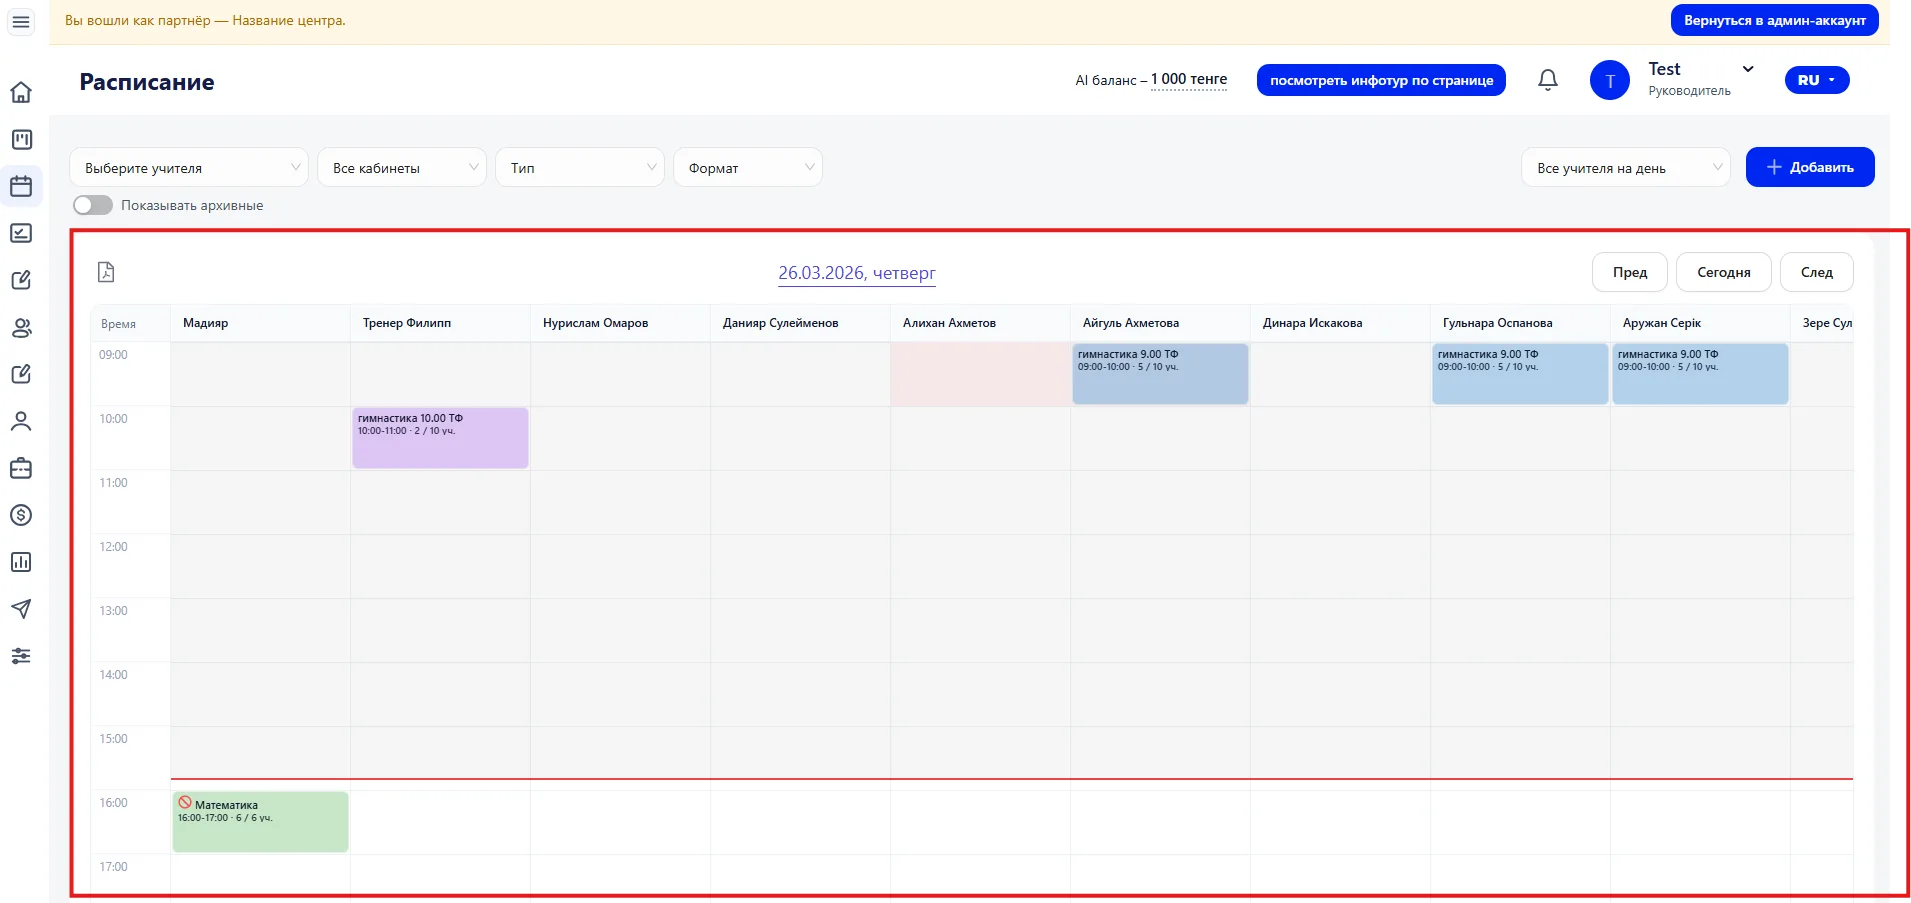
This display format allows you to:
-
see the Schedule density;
-
find free time slots;
-
check time overlaps;
-
assess the workload of Teachers and rooms.
If the day is overloaded — Classes can be redistributed.
If there are free gaps — add new groups.
3. Creating Classes
In the display mode "All Teachers for the Day (Все учителя на день)" there are two ways to add a Class:
- Using the "+ Add" button
- Clicking on an empty cell in the Schedule grid
- Class ( add a series of Classes).
- Trial lesson
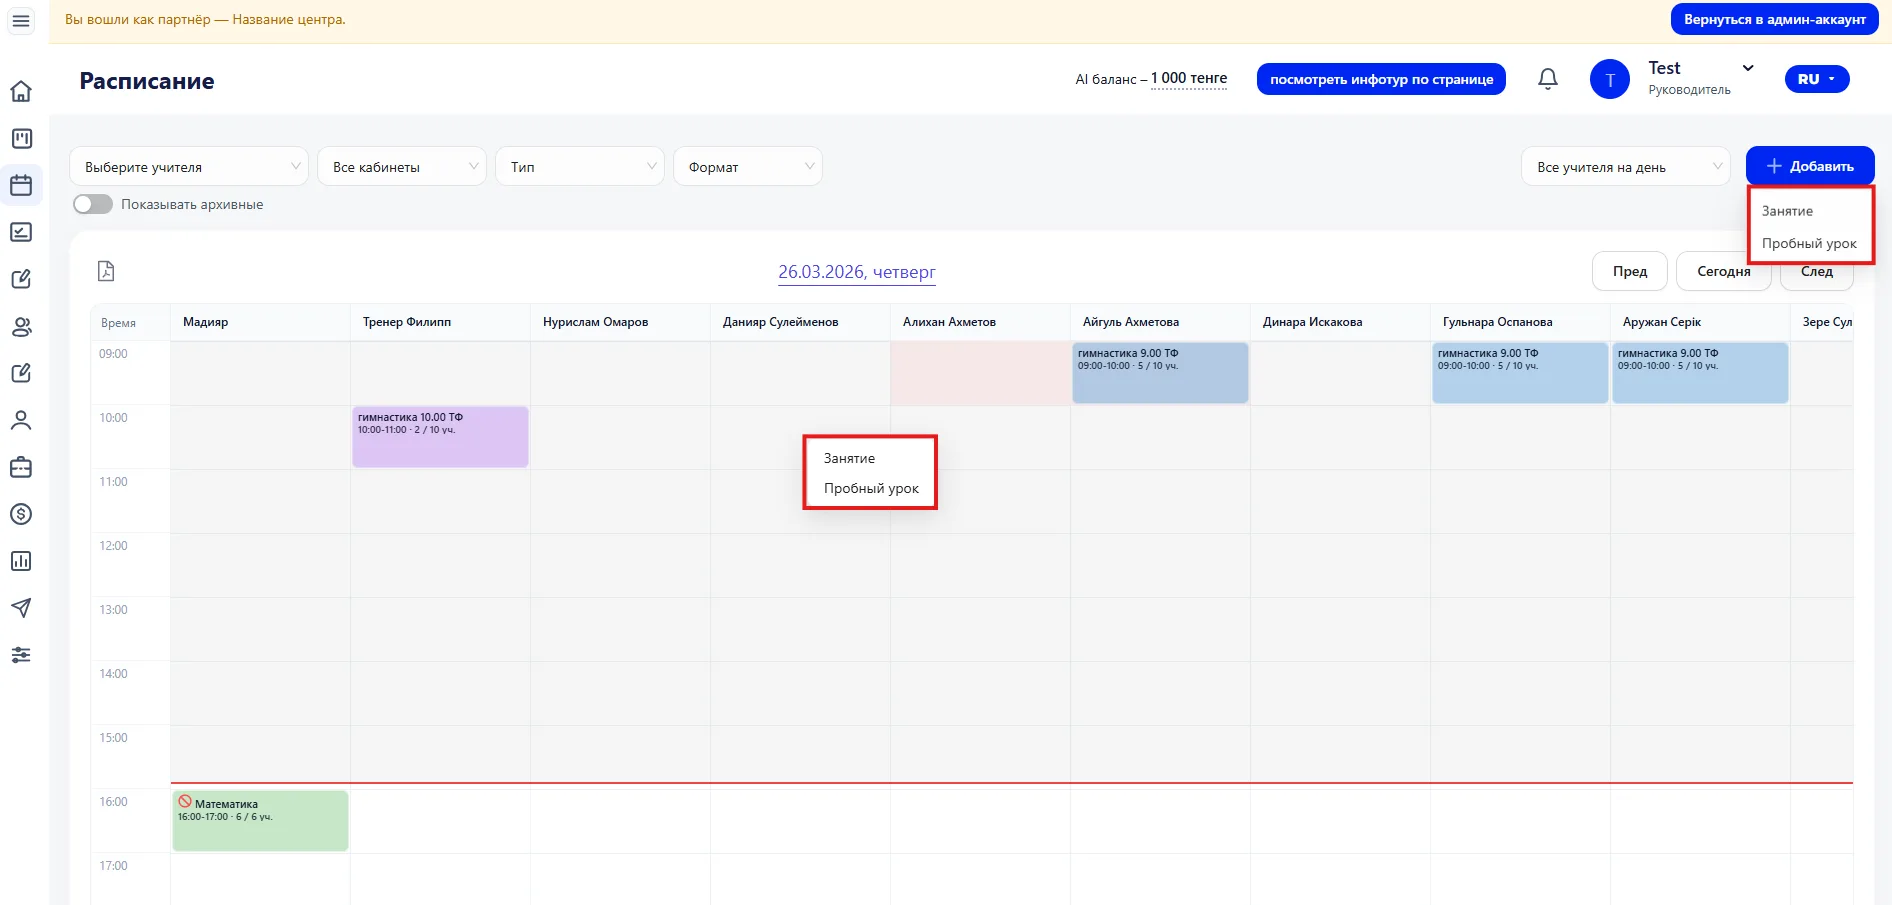
When selecting the "Class" option, the "Add series of Classes" window opens.
It consists of three tabs: "General", "Clients", "Teachers".
Tab "General"
Here the main parameters of the series of Classes are set:
-
selection of Class;
-
days of the week;
-
start and end time;
-
room;
-
schedule period.
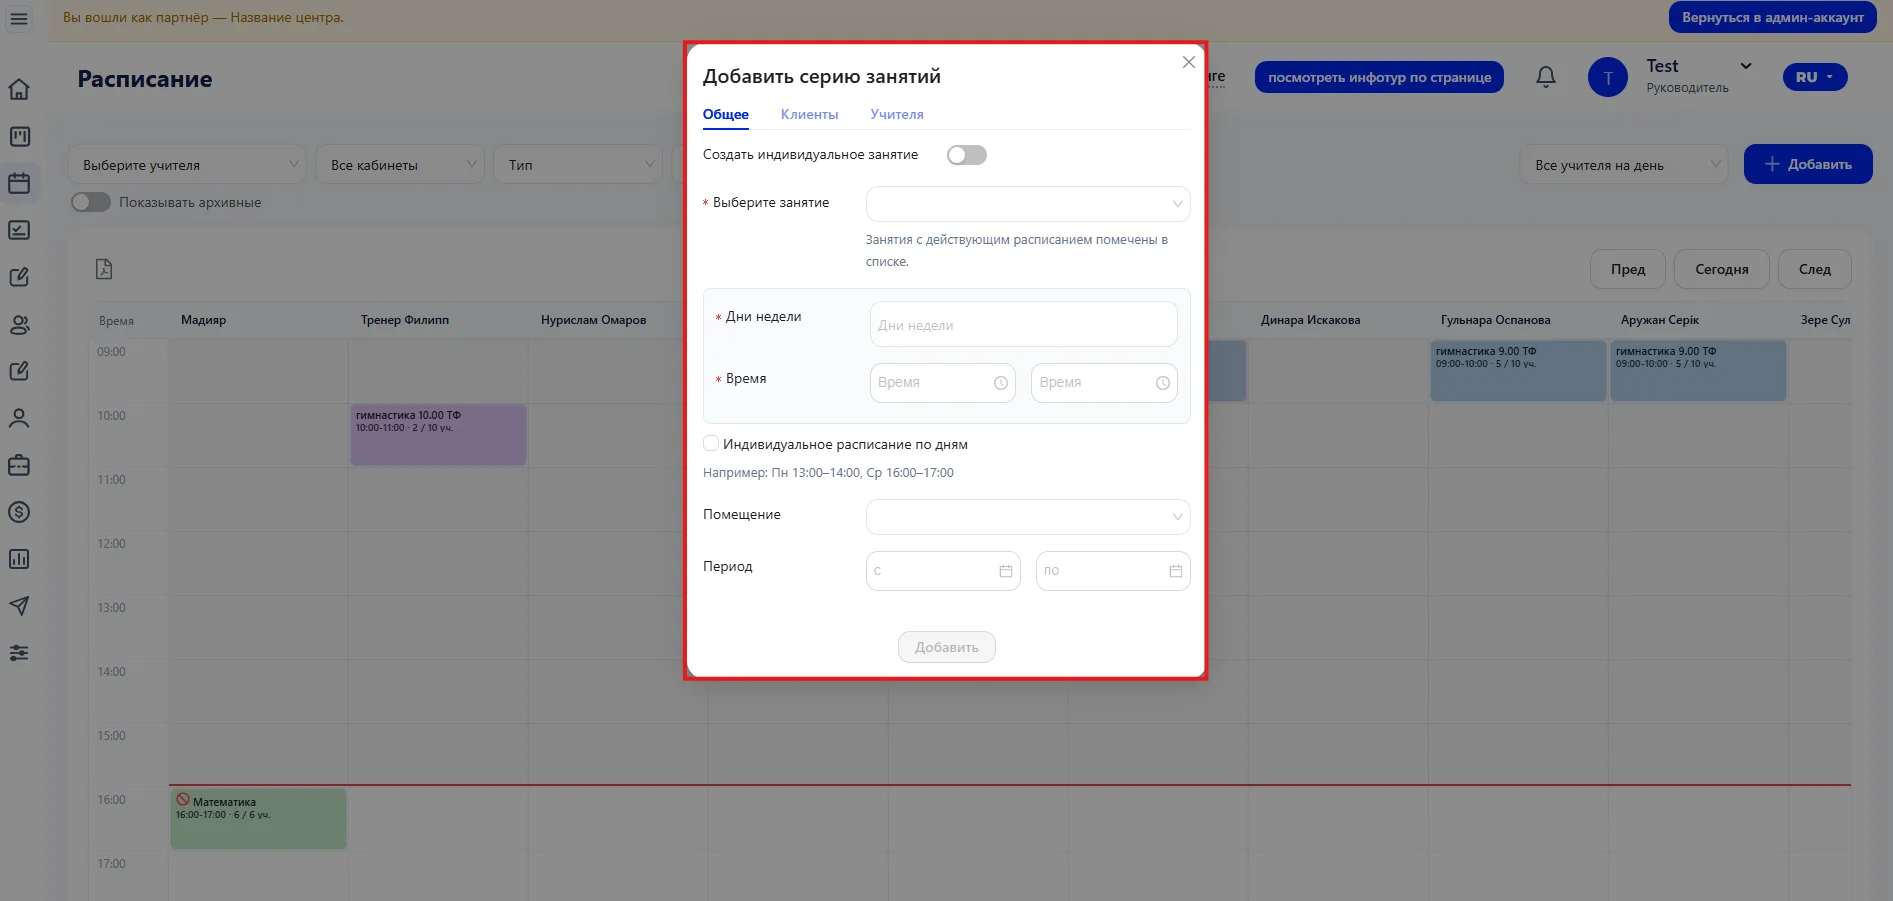
If necessary, you can enable individual Class mode.
In this case a group series is not created, but a single Class for a specific Student is created.
After saving, the system automatically creates Classes for the entire selected period and displays them in the Schedule.
Tab "Clients"
On this tab, Students who will attend the Classes are added.
It is enough to start typing a name or phone number, after which the system will suggest suitable options. After selection the Student is assigned to the Class.
This affects:
-
attendance tracking;
-
deduction of Classes from the Membership;
-
formation of financial reporting;
-
correctness of analytics.
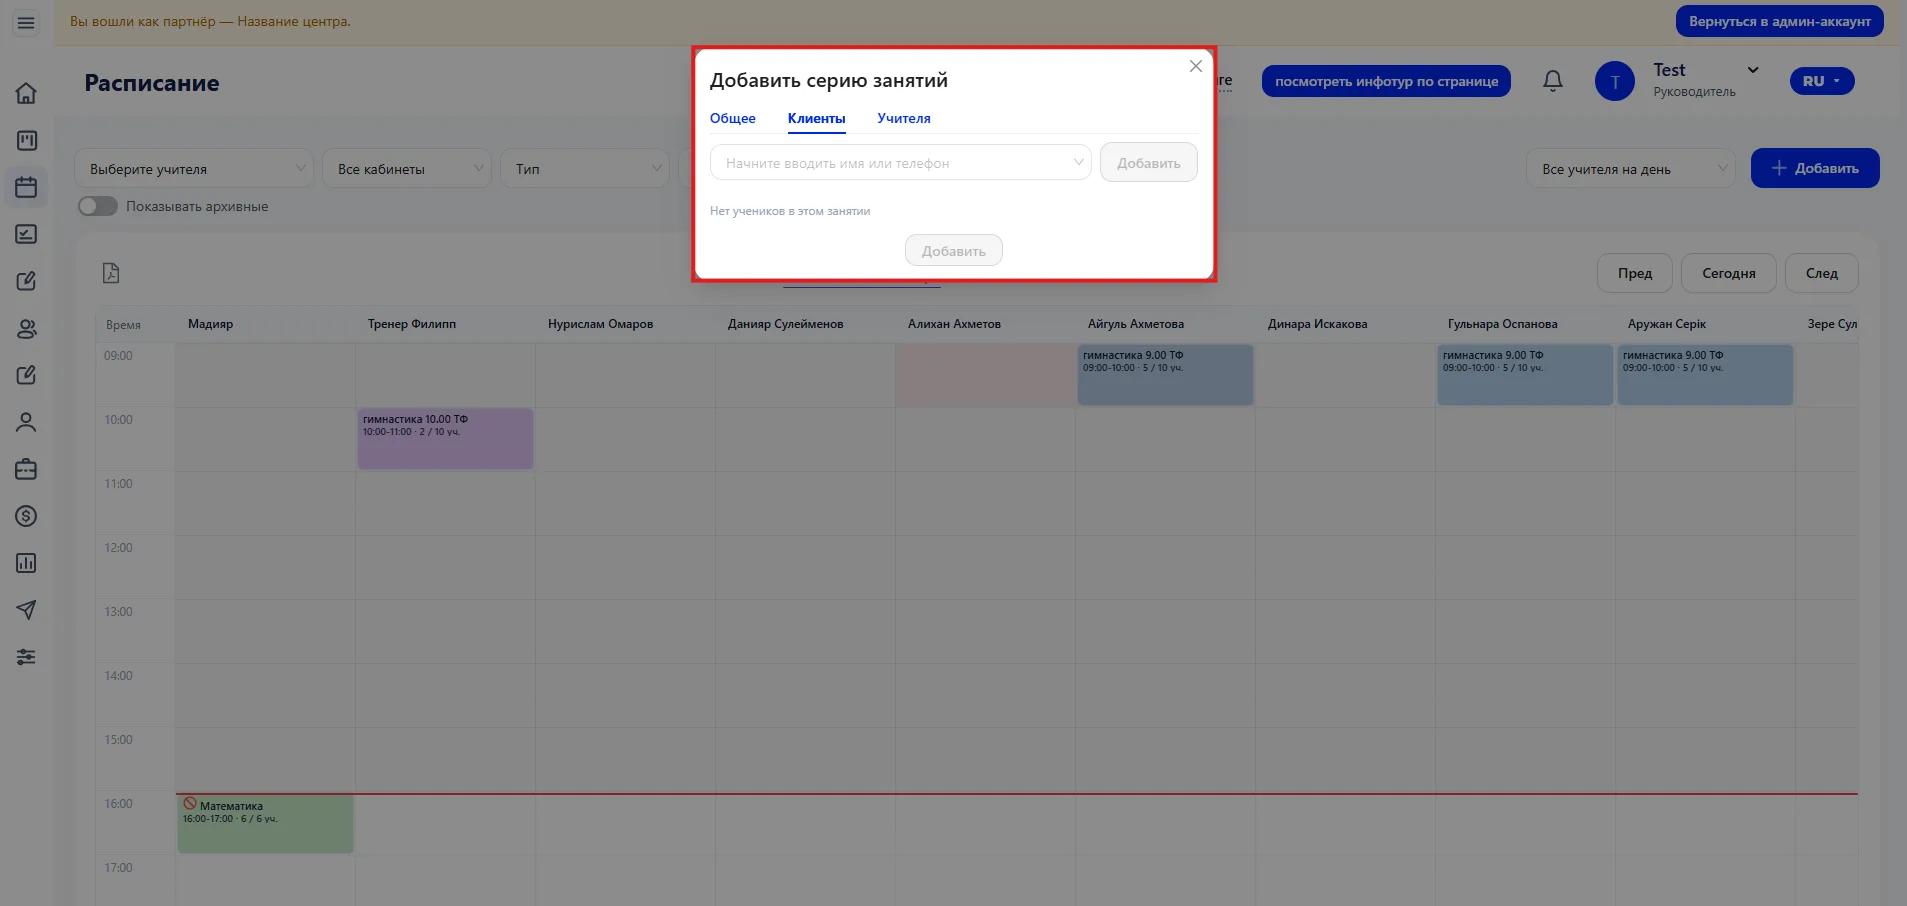
If a Student is not added to the Class, the system does not count their participation — neither in attendance, nor in Payments, nor in statistics.
Tab "Teachers"
On this tab a Teacher is assigned who will conduct the Classes within the selected series.
After saving, the data is immediately reflected in the system:
-
Classes appear in the Teacher's personal Schedule;
-
they are counted in their workload;
-
they are displayed when filtering by this Employee.
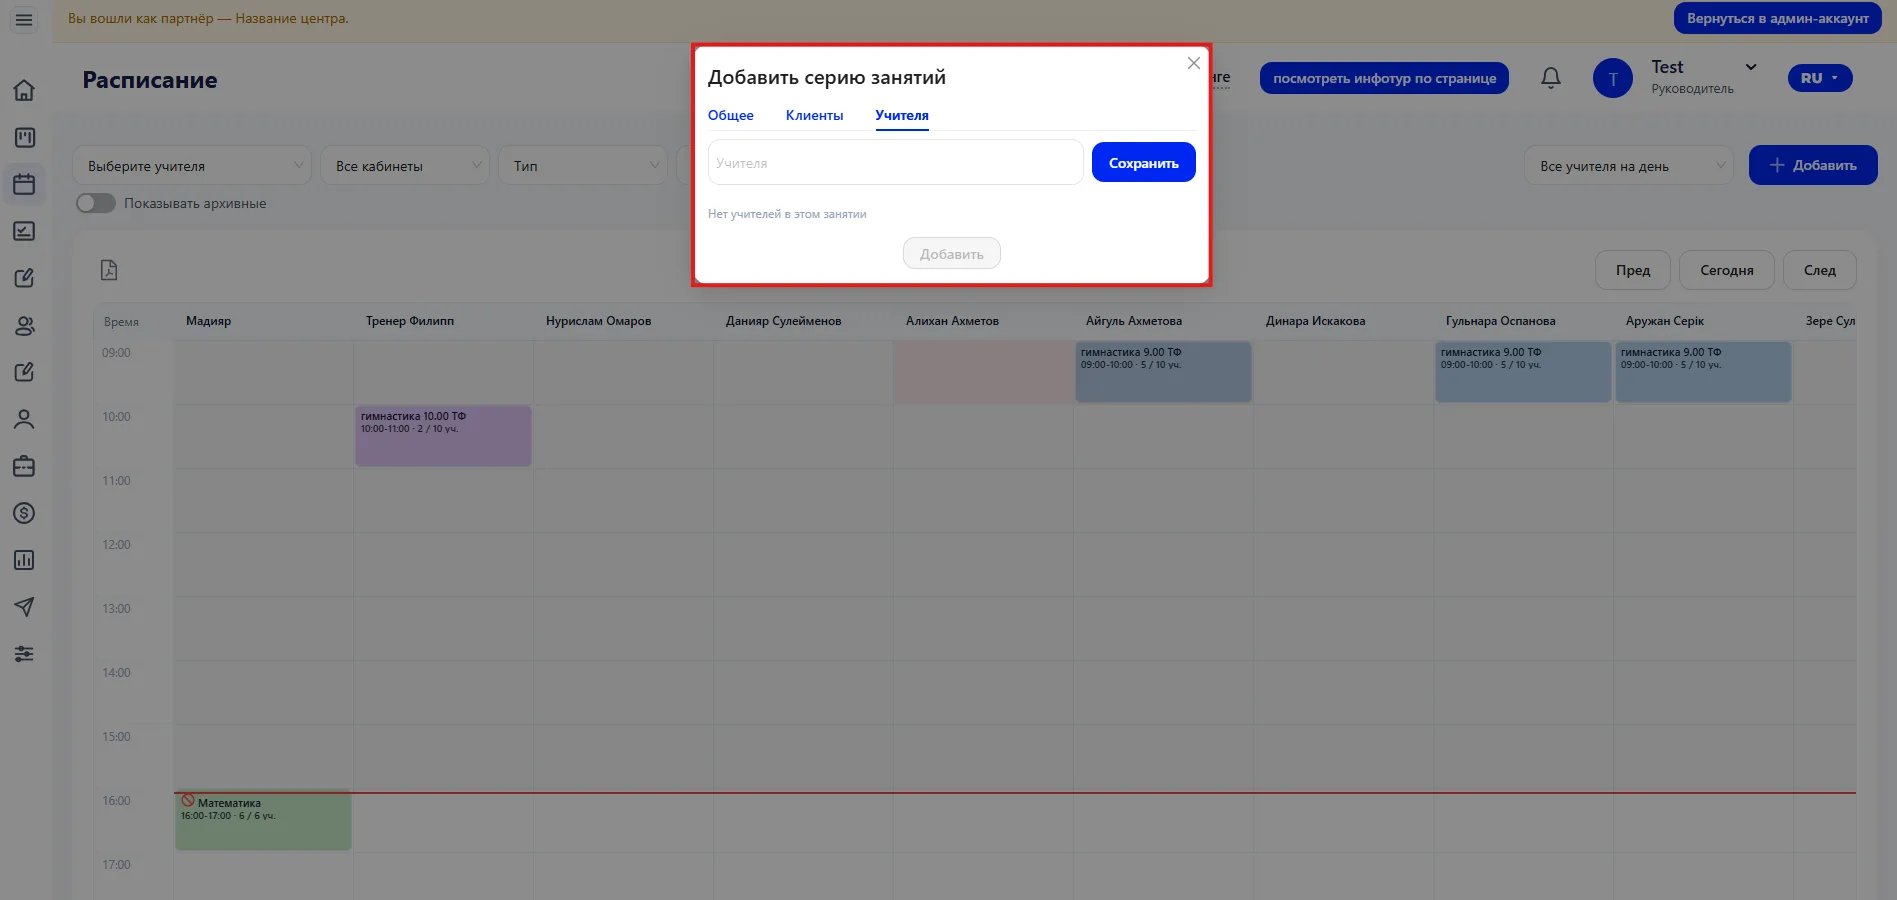
Correct assignment of a Teacher helps avoid time overlaps and control staff workload.
Adding a Trial lesson
If you select the "Trial lesson" option, a side panel opens on the right for filling in the data.
You need to specify the following information.
Main information
- Lead — selected from the list (Lead or an existing client)
- Status — one of the options: successful deal, unresolved, unsuccessful deal, did not take place.
- Full name
- Phone
- Date of birth
- Gender
In the "Class" block the parameters of the Trial lesson are specified:
- Class
- Time
- Date of visit
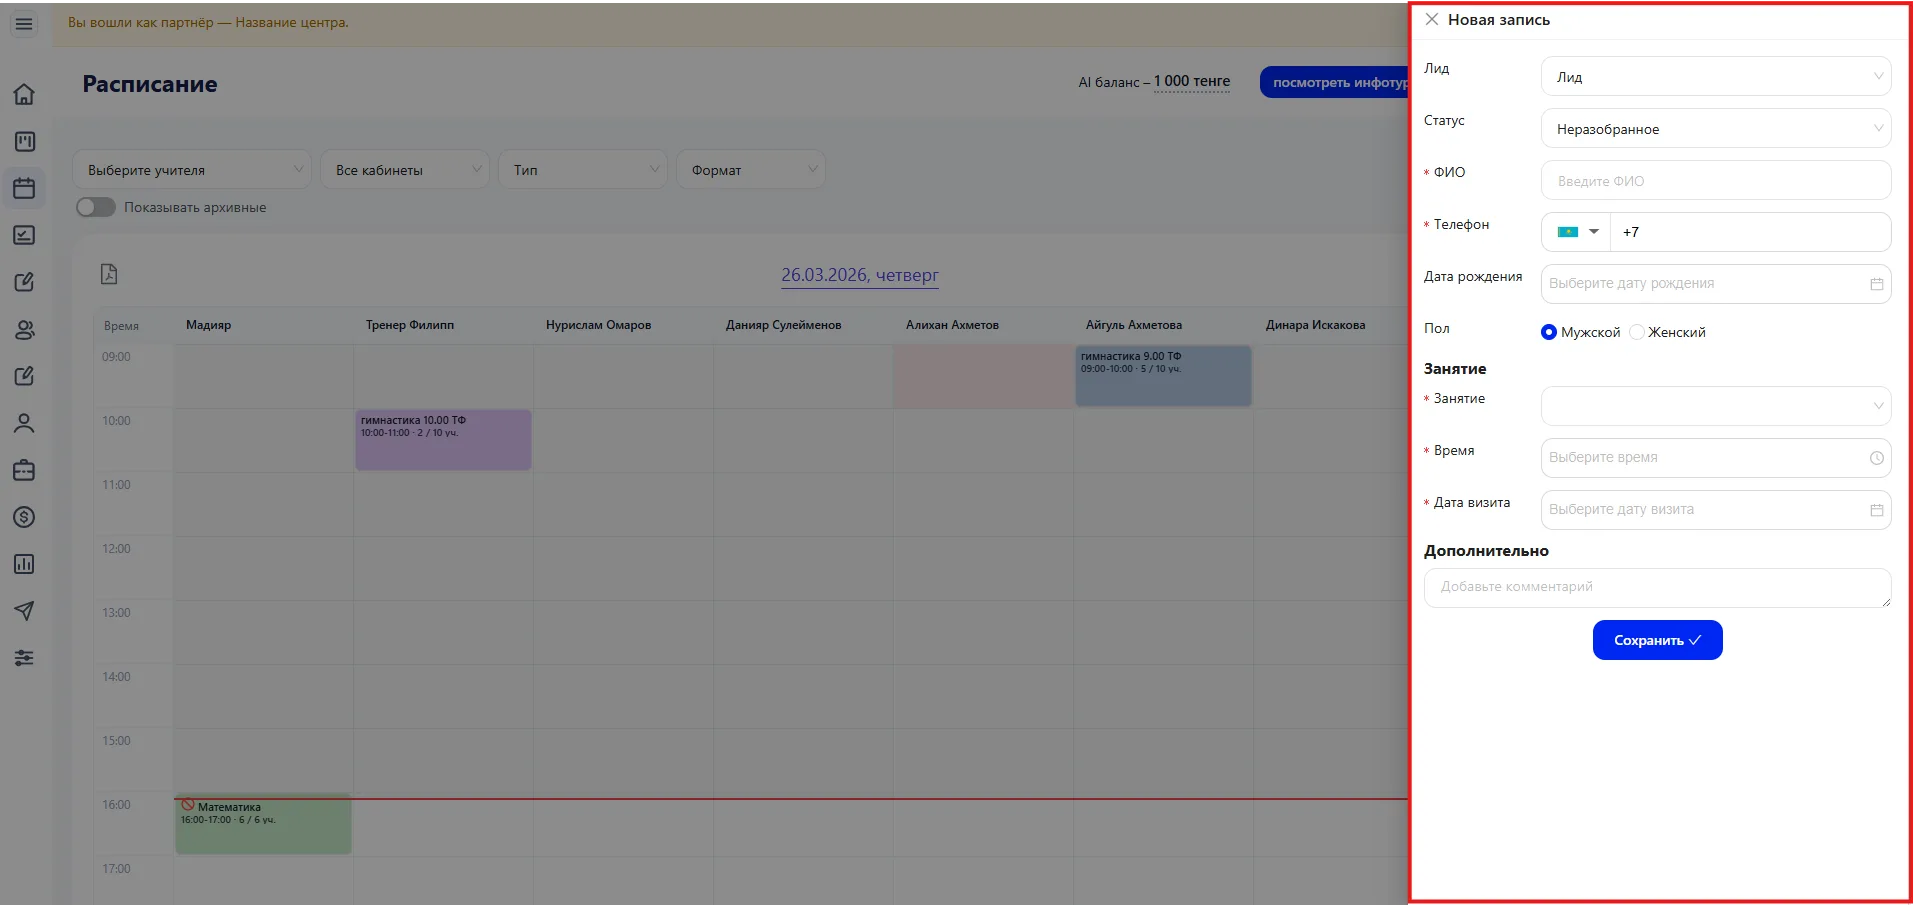
Additionally
In the "Comment" field you can leave additional information — for example client preferences or important details for the administrator and Teacher.
After saving the Trial lesson appears in the Schedule.
4. Viewing and editing a Class
Any Class in the Schedule is interactive.
When you click on a colored cell, the "Class details" panel opens.
The panel displays:
-
Class title;
-
room (if specified);
-
days of the week;
-
time;
-
list of Teachers;
-
number of Students.
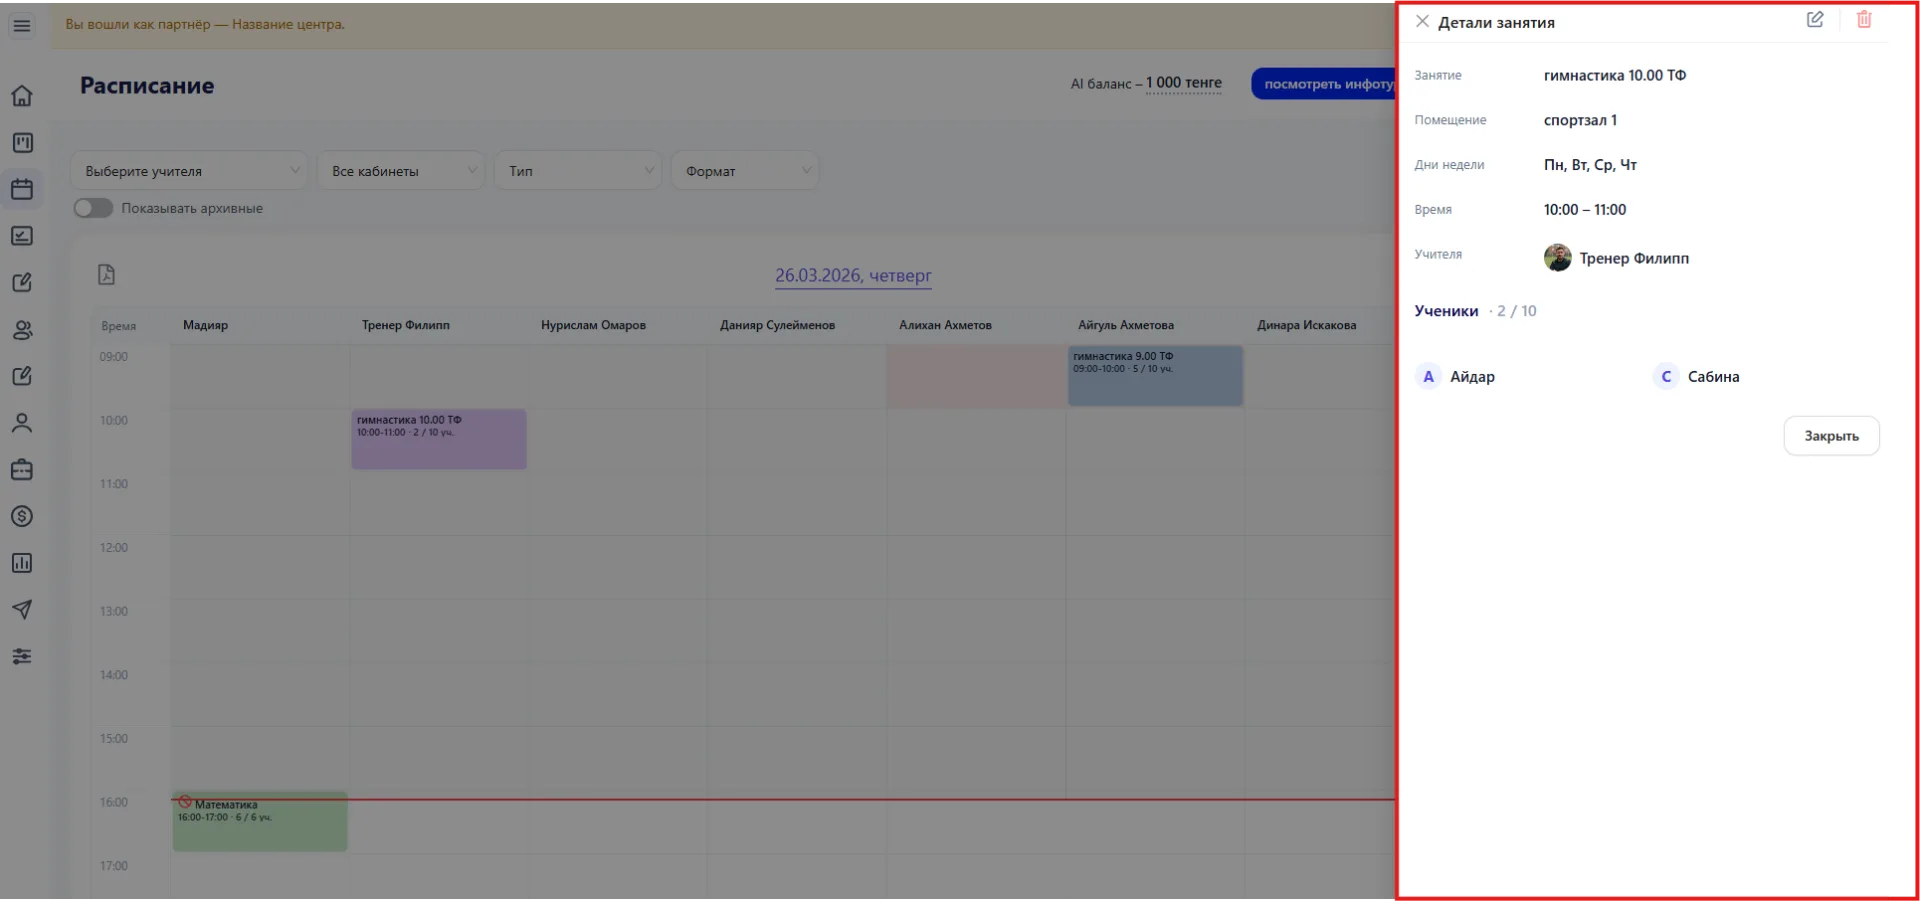
This allows you to quickly check the group's composition, workload and the parameters of a specific Class without navigating to other sections.
In the top part of the panel editing actions are available. Through them you can make changes to the Class parameters: correct data, update the Student list or change other settings.
Important to consider
- Changing the time or date of a Class affects attendance and deduction from Memberships.
- Deleting a Class excludes it from attendance calculations and reports.
- Assigning a Teacher affects their workload and display in filters.
- Time overlaps can lead to conflicts for a room or Employee.
In practice the Schedule becomes the control point for all educational activity. Any change made immediately affects attendance, staff workload and management metrics.