The Aisar section consolidates the center’s communication channels in one place. Here you connect WhatsApp, Instagram and other messengers that are later used for correspondence, mailings and automation. Incoming messages via Aisar can automatically create Leads in the Kanban (Канбан), and Employees get access to shared chats with clients.
Main blocks:
- Access to the section
- Initial Aisar account setup
- Adding a channel
- Connecting WhatsApp Connector
- Connecting Instagram
- Main WhatsApp channel for sending
- Webhook for the Kanban (Канбан)
- Channels that go into the CRM
- Linking users to AISAR
1. Access to the section
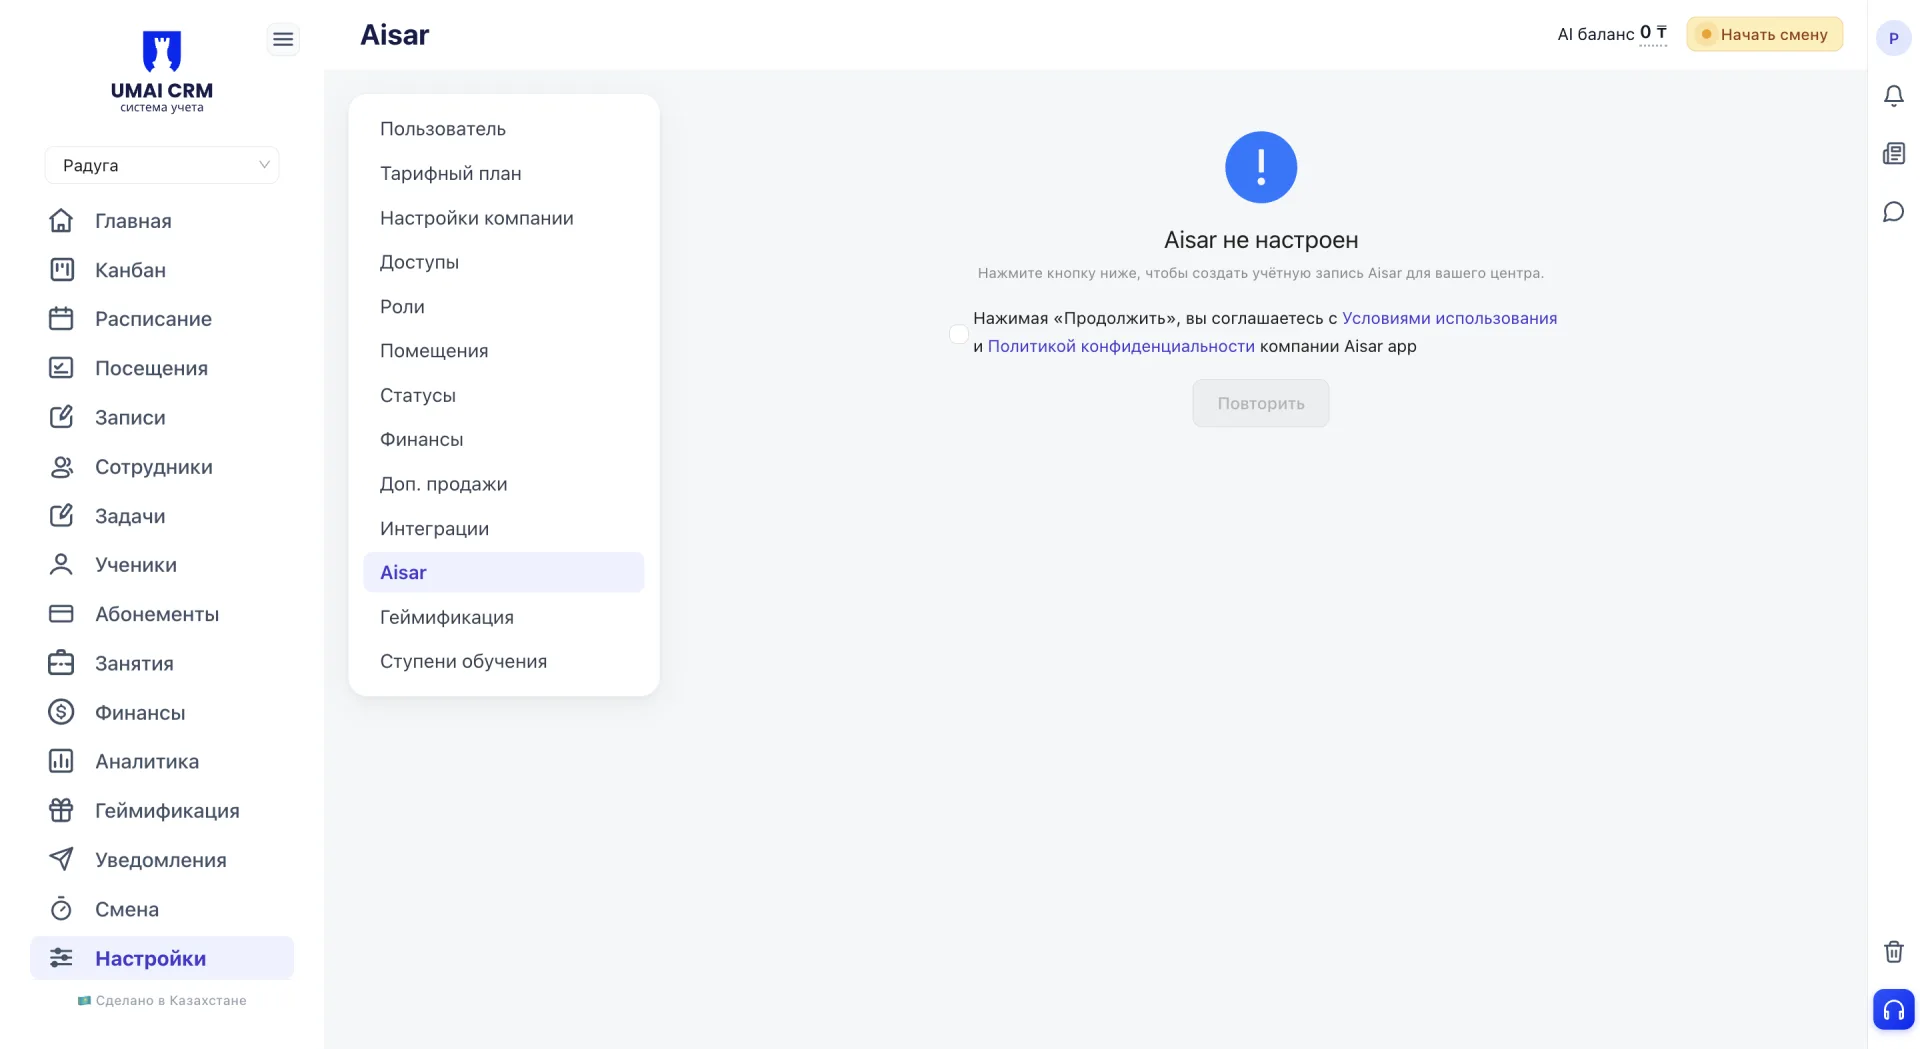
2. Initial Aisar account setup
If the Aisar module is opened for the first time, the system will prompt you to create an account for the center. A message "Aisar is not configured" will appear on the screen with a checkbox to agree to the terms of use and the Aisar app privacy policy.
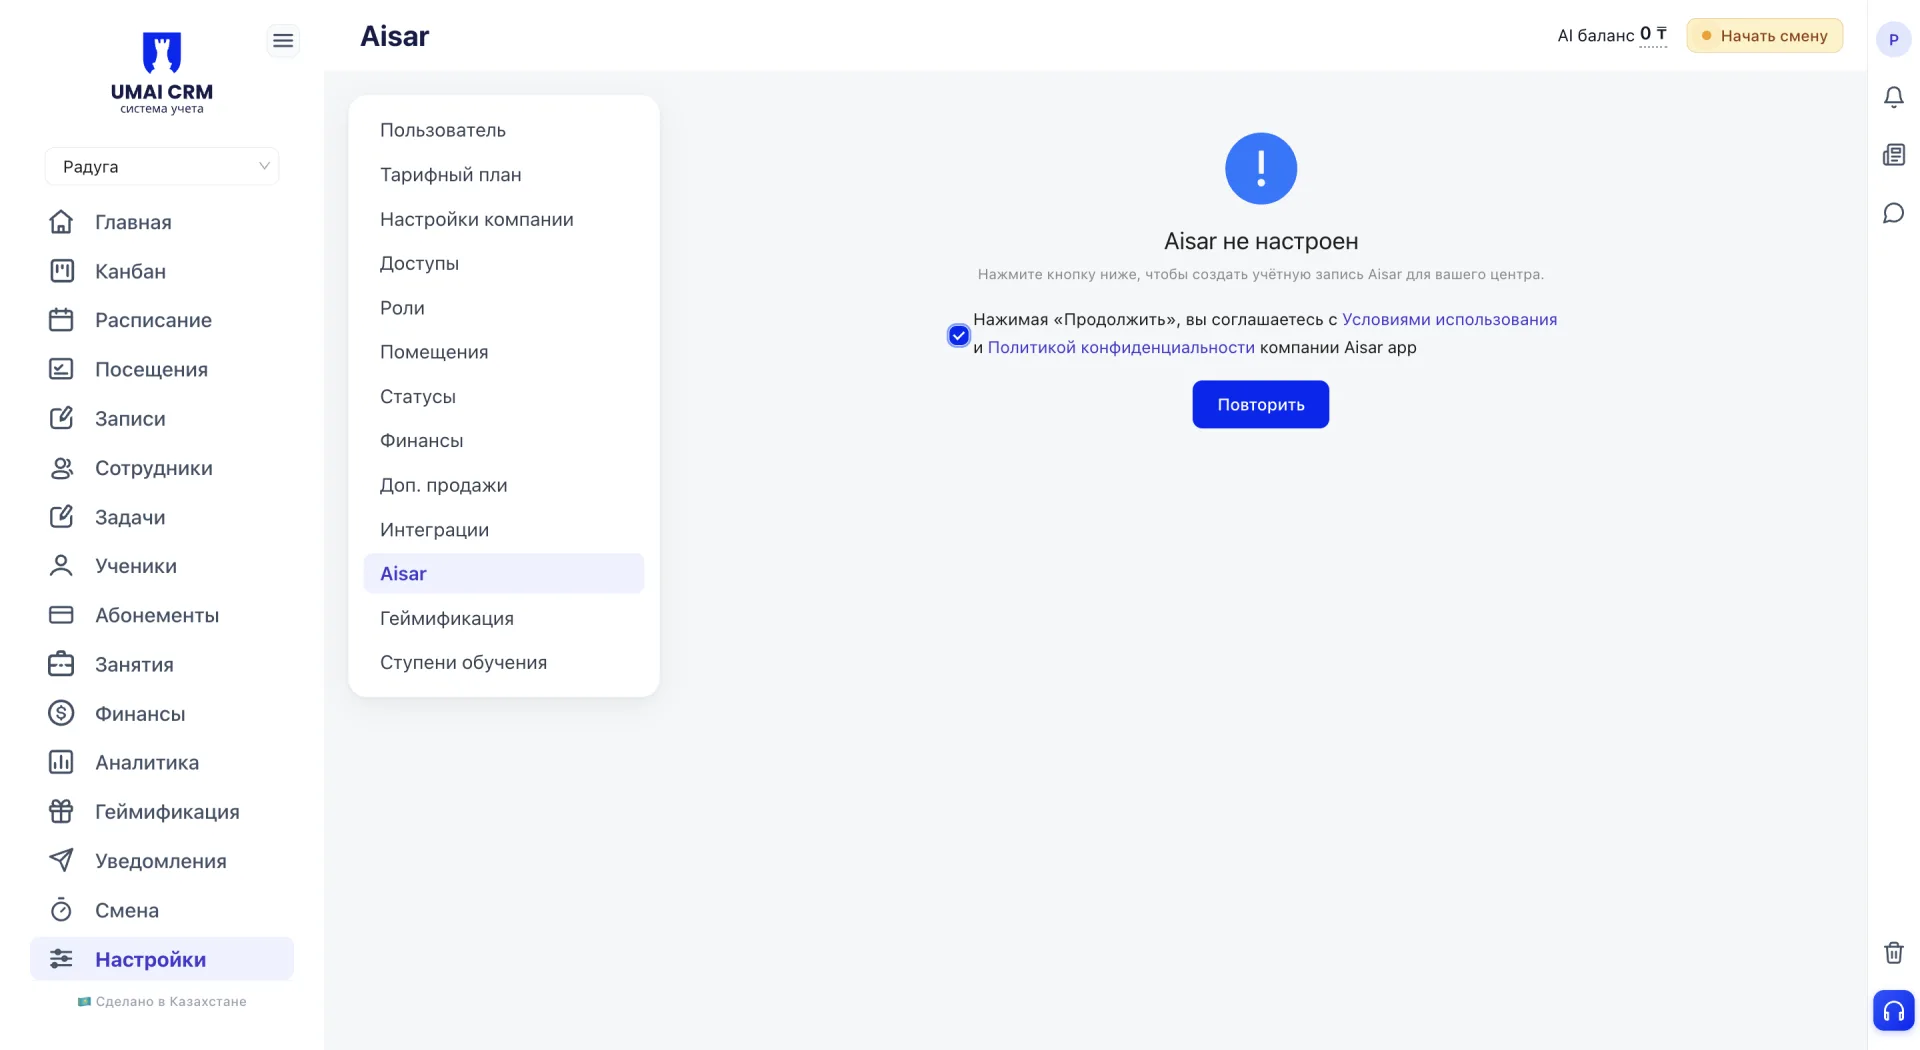
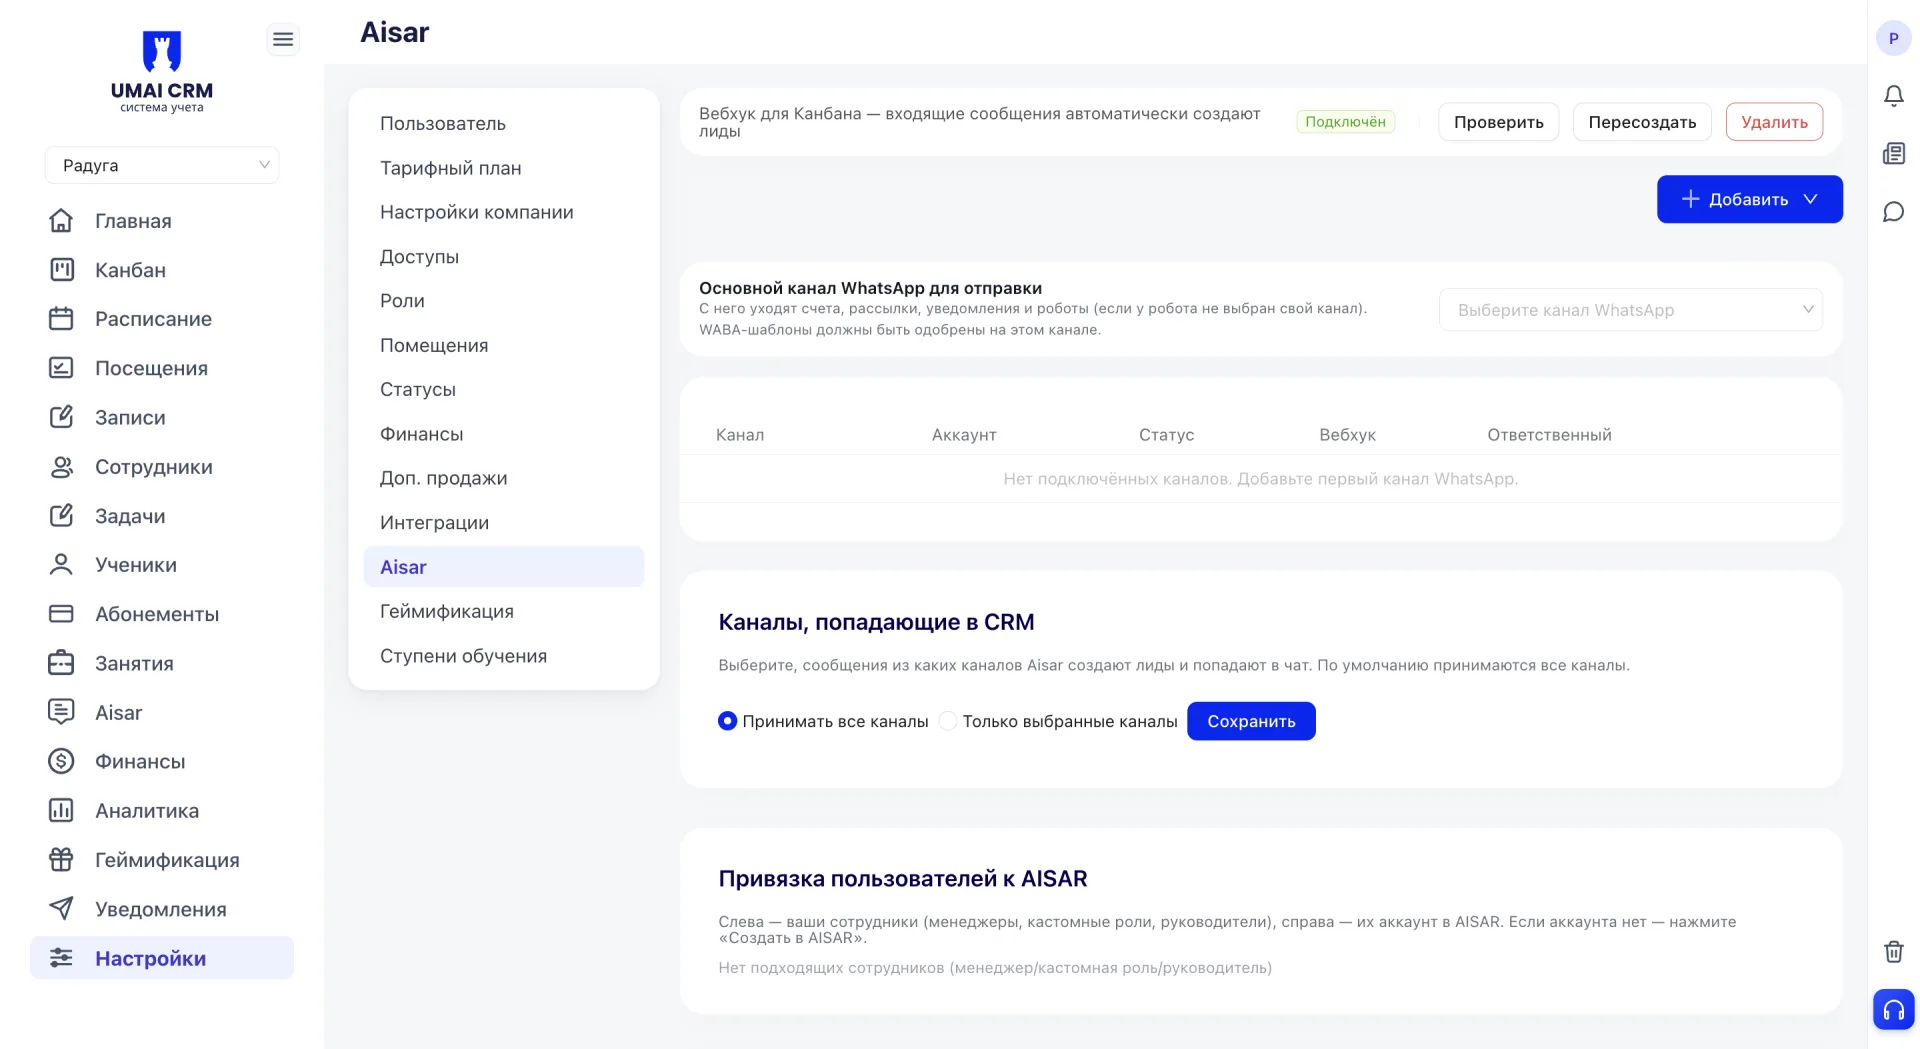
After checking the box click "Continue", the channels setup section will open where you can connect them.
3. Adding a channel
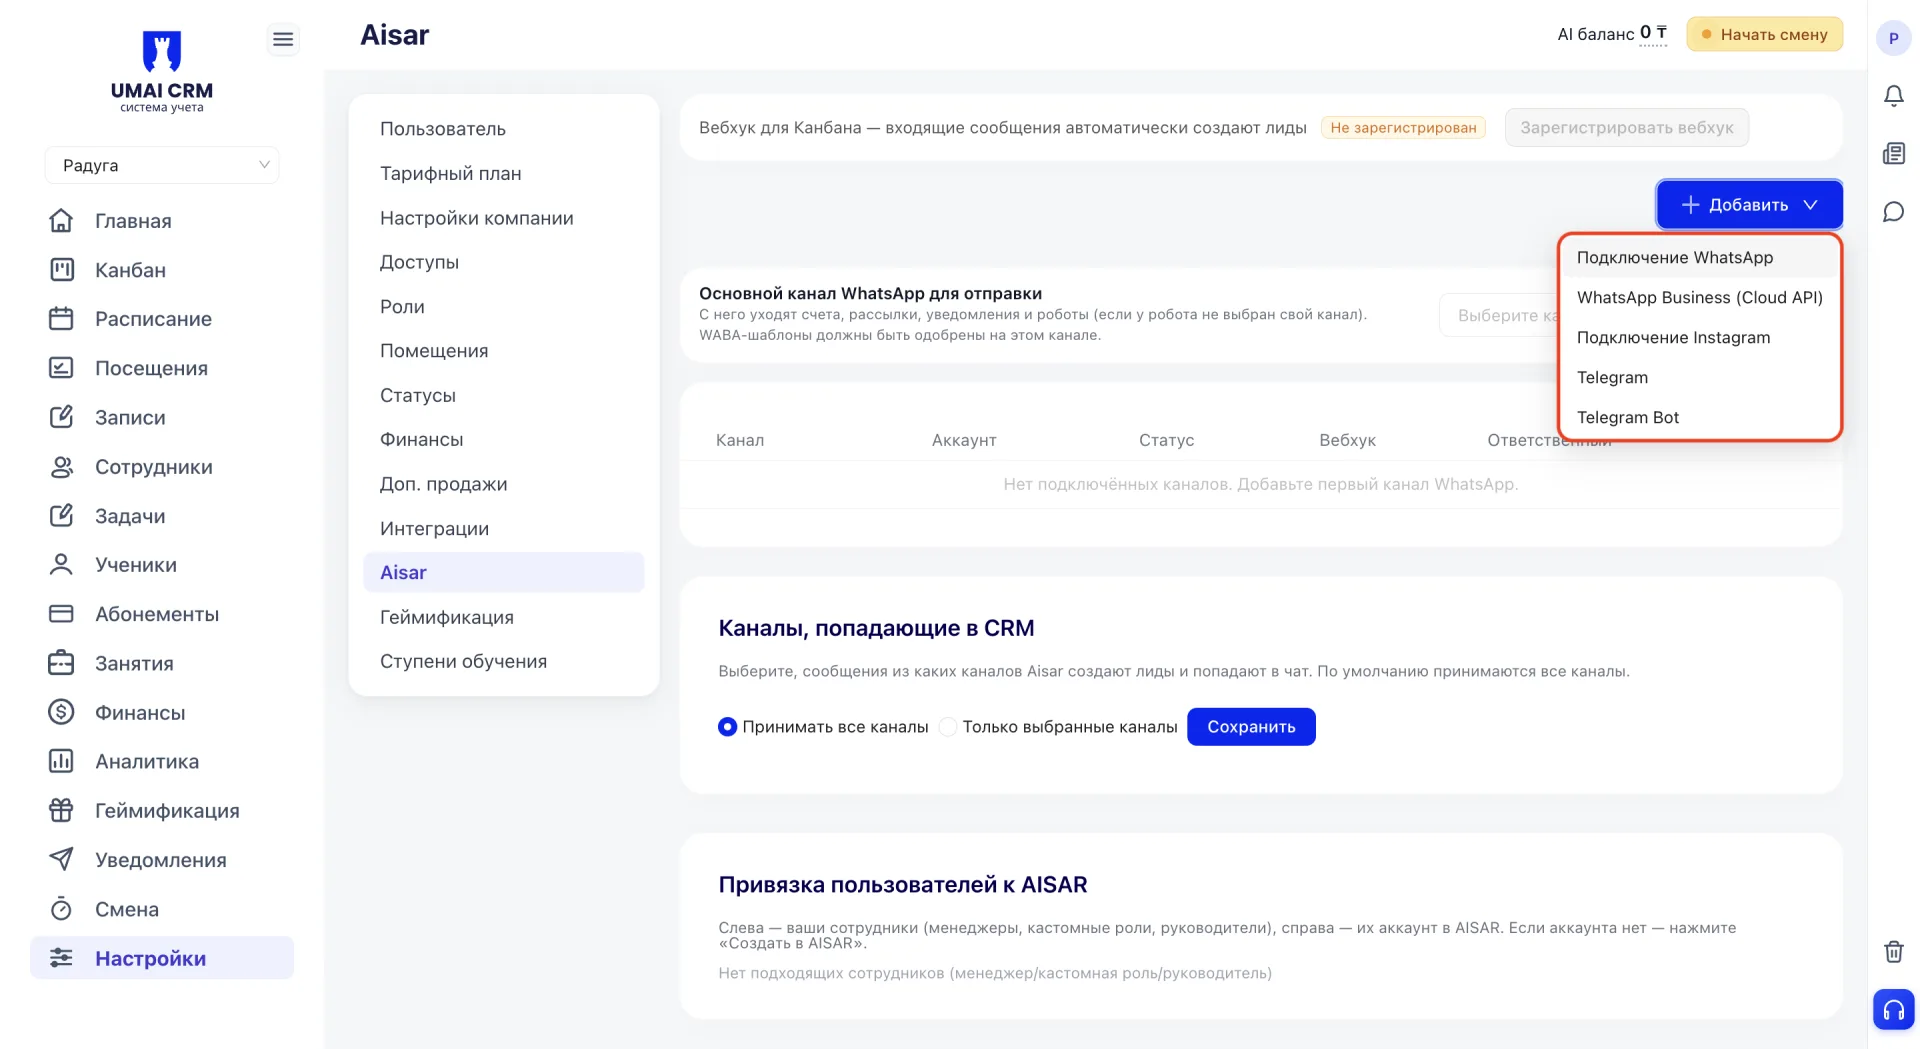
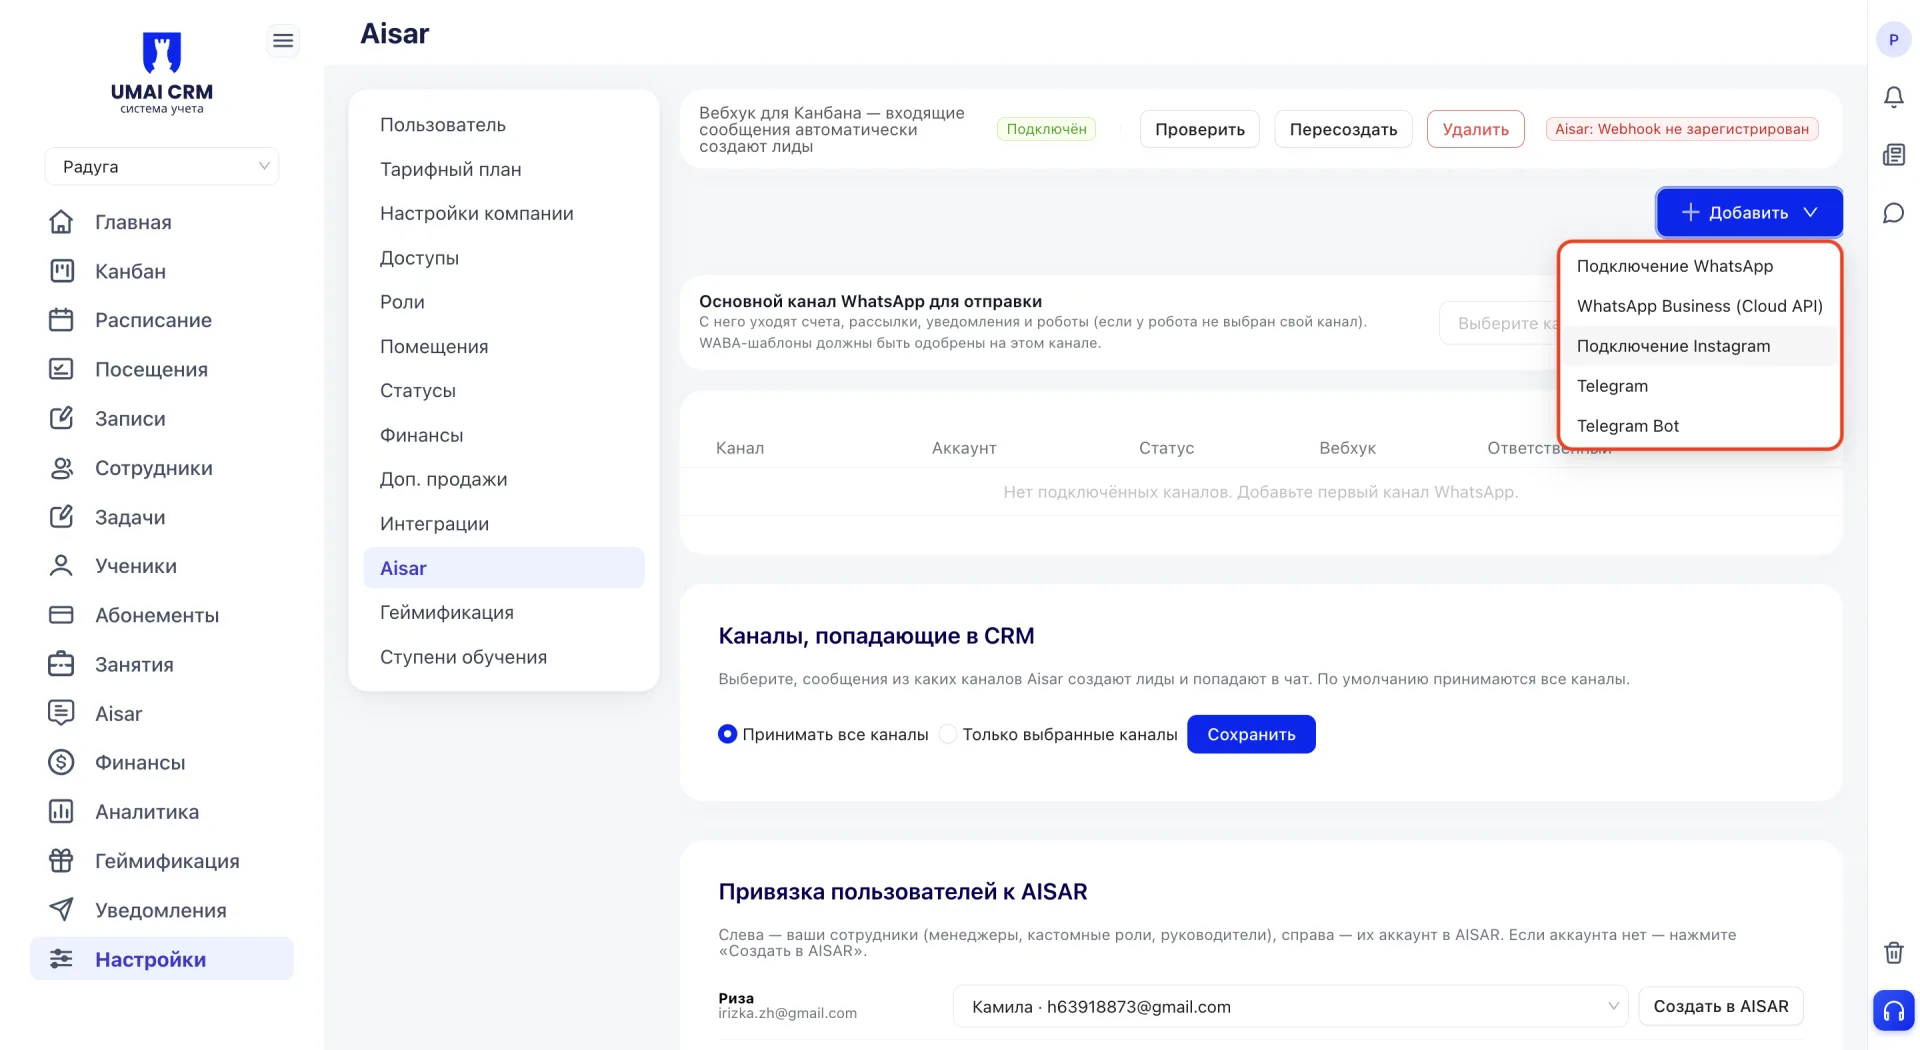
To connect a communication channel, click the "+ Add" button in the top right corner of the Aisar page. A list of available connection options will open. This article covers Connecting WhatsApp and Connecting Instagram.
4. Connecting WhatsApp
After selecting WhatsApp a window "Connect channel: WhatsApp" will open. It provides three connection stages: "Settings", "Security" and "Connection". The progress is displayed at the top of the window.
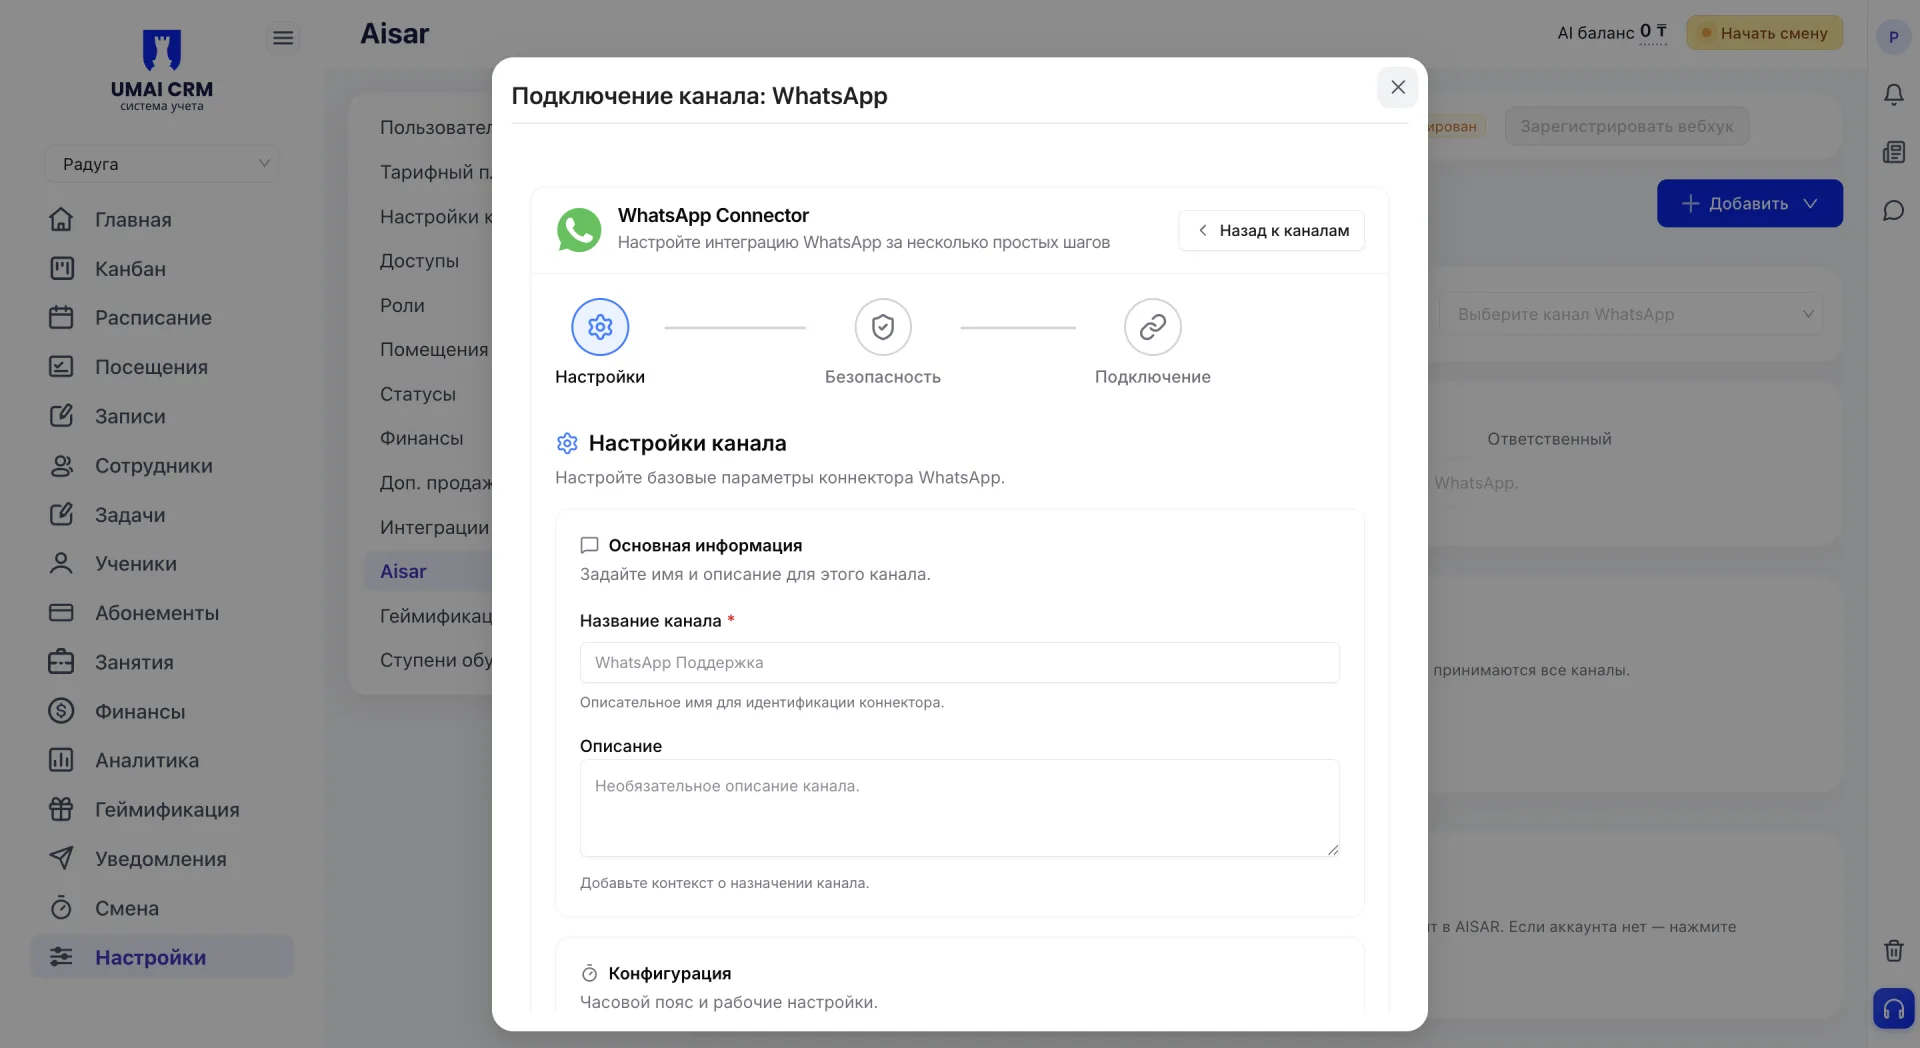
The current stage is highlighted in blue, and completed stages are marked with a check.
"Settings"
In the "Basic information" block specify the channel name — a required field used to distinguish this channel from others if multiple channels are connected. The "Description" field provides additional context about the channel’s purpose.
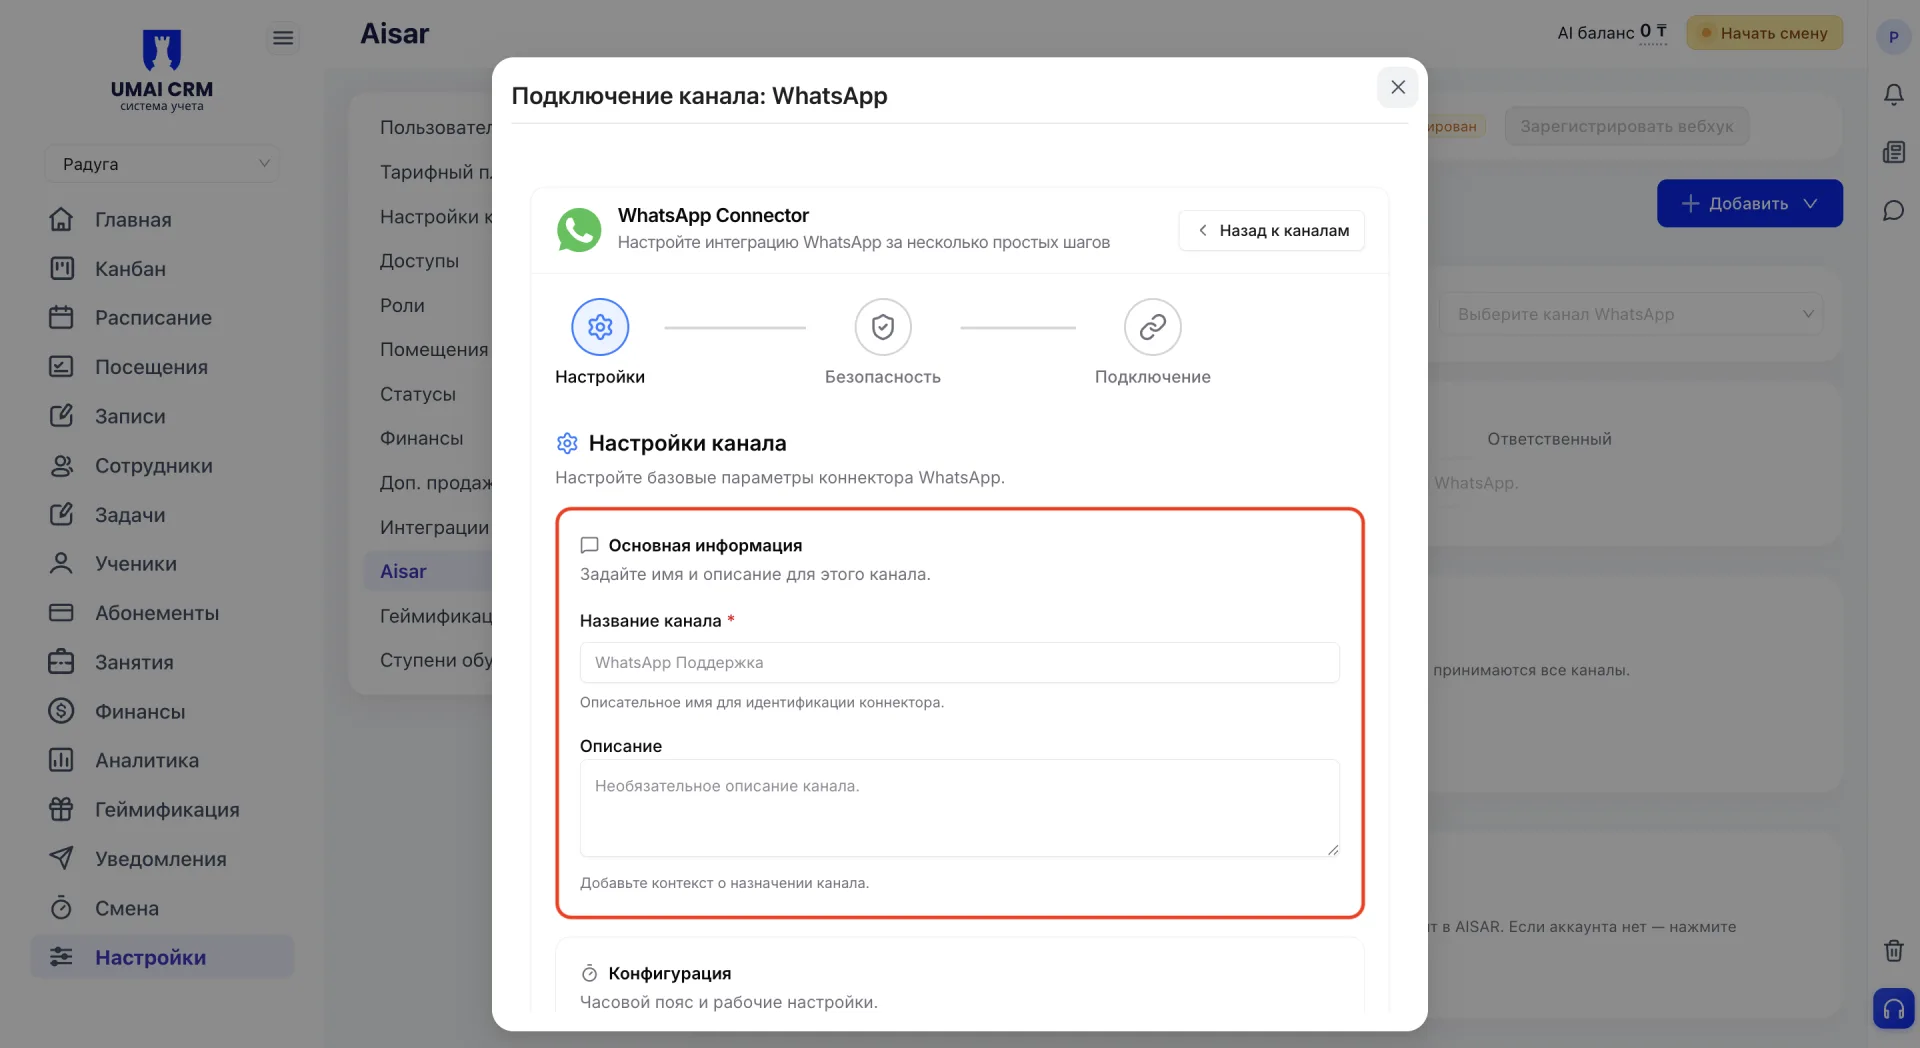
In the "Configuration" block set the channel’s time zone; it is used for scheduling and displaying time in the system. Below there is a checkbox "Set status to online" which will automatically set the channel to "online" after setup is completed.
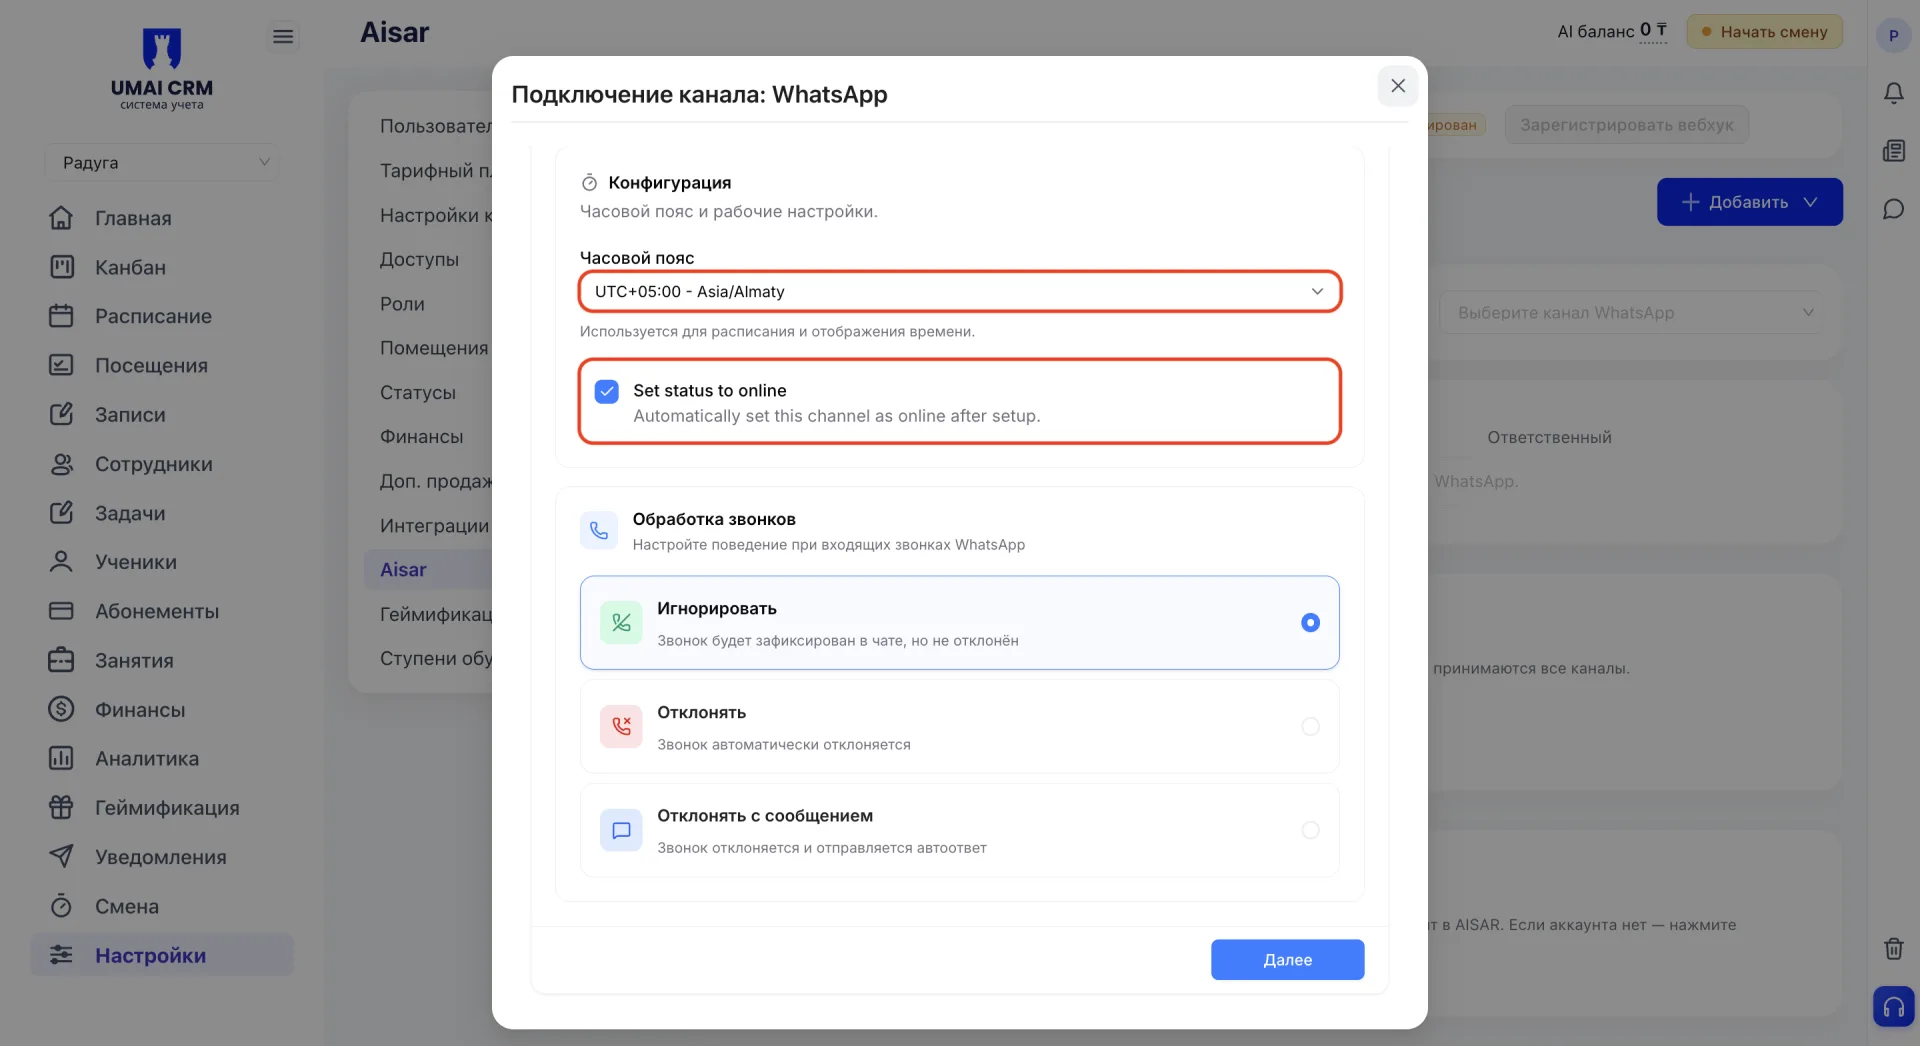
Next configure handling of incoming WhatsApp calls; three options are available:
- Ignore — the call is logged in the chat but not rejected.
- Reject — the call is rejected automatically.
- Reject with message — the call is rejected and an auto-reply is sent to the client.
Select an option with the toggle, and after completing the block click "Next".
"Security"
In the "Connector capabilities" block the following options are available:
- "Allow mass mailings" controls bulk sending of messages to multiple recipients at once.
- "Allow automation" enables use of automated processes, triggers and scheduled sending.
- "Allow incoming handling" enables processing of incoming messages and replying to clients.
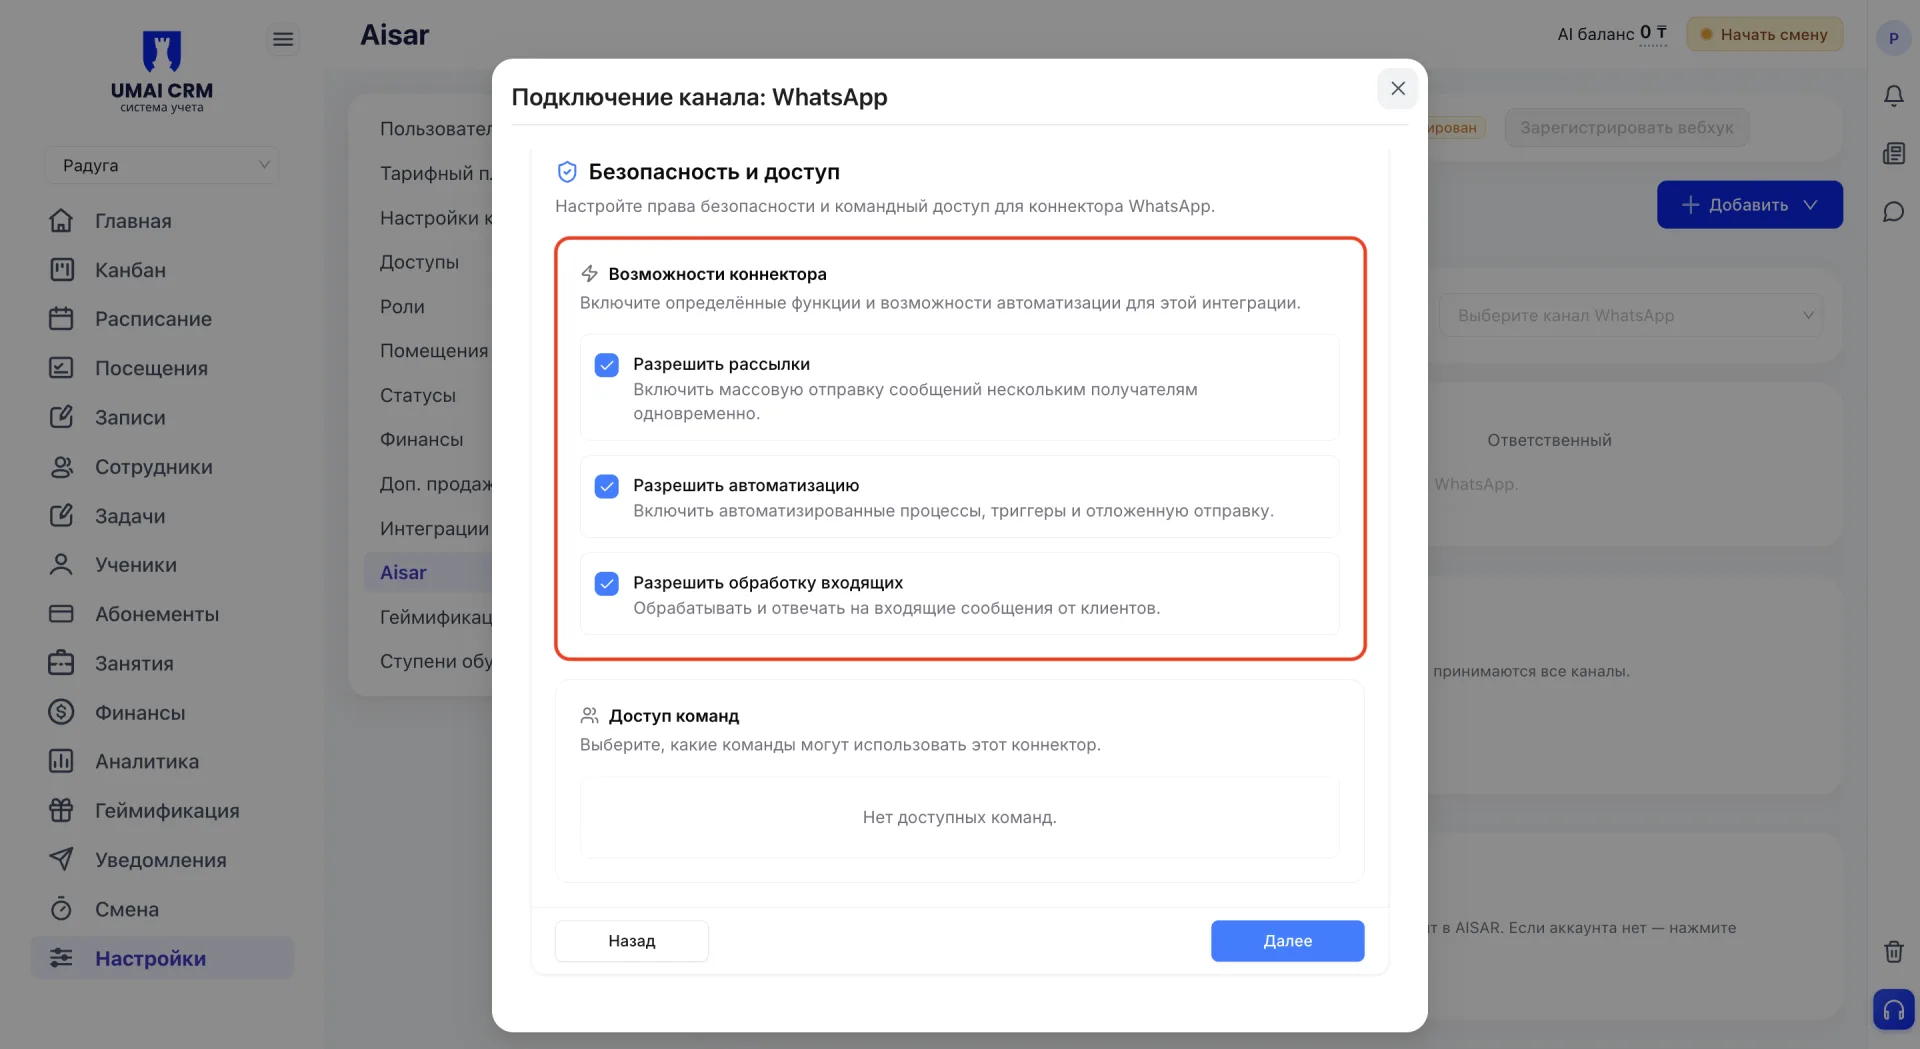
In the "Team access" block specify the teams that will have access to the connector. If no teams are available a message "No available teams" will be shown.
To proceed to the next stage click "Next". The "Back" button returns to the previous stage.
"Connection"
At this stage the WhatsApp device binding is performed. Two connection methods are available: "QR code" and "Pairing code". Switch between methods using the tabs at the top of the block.
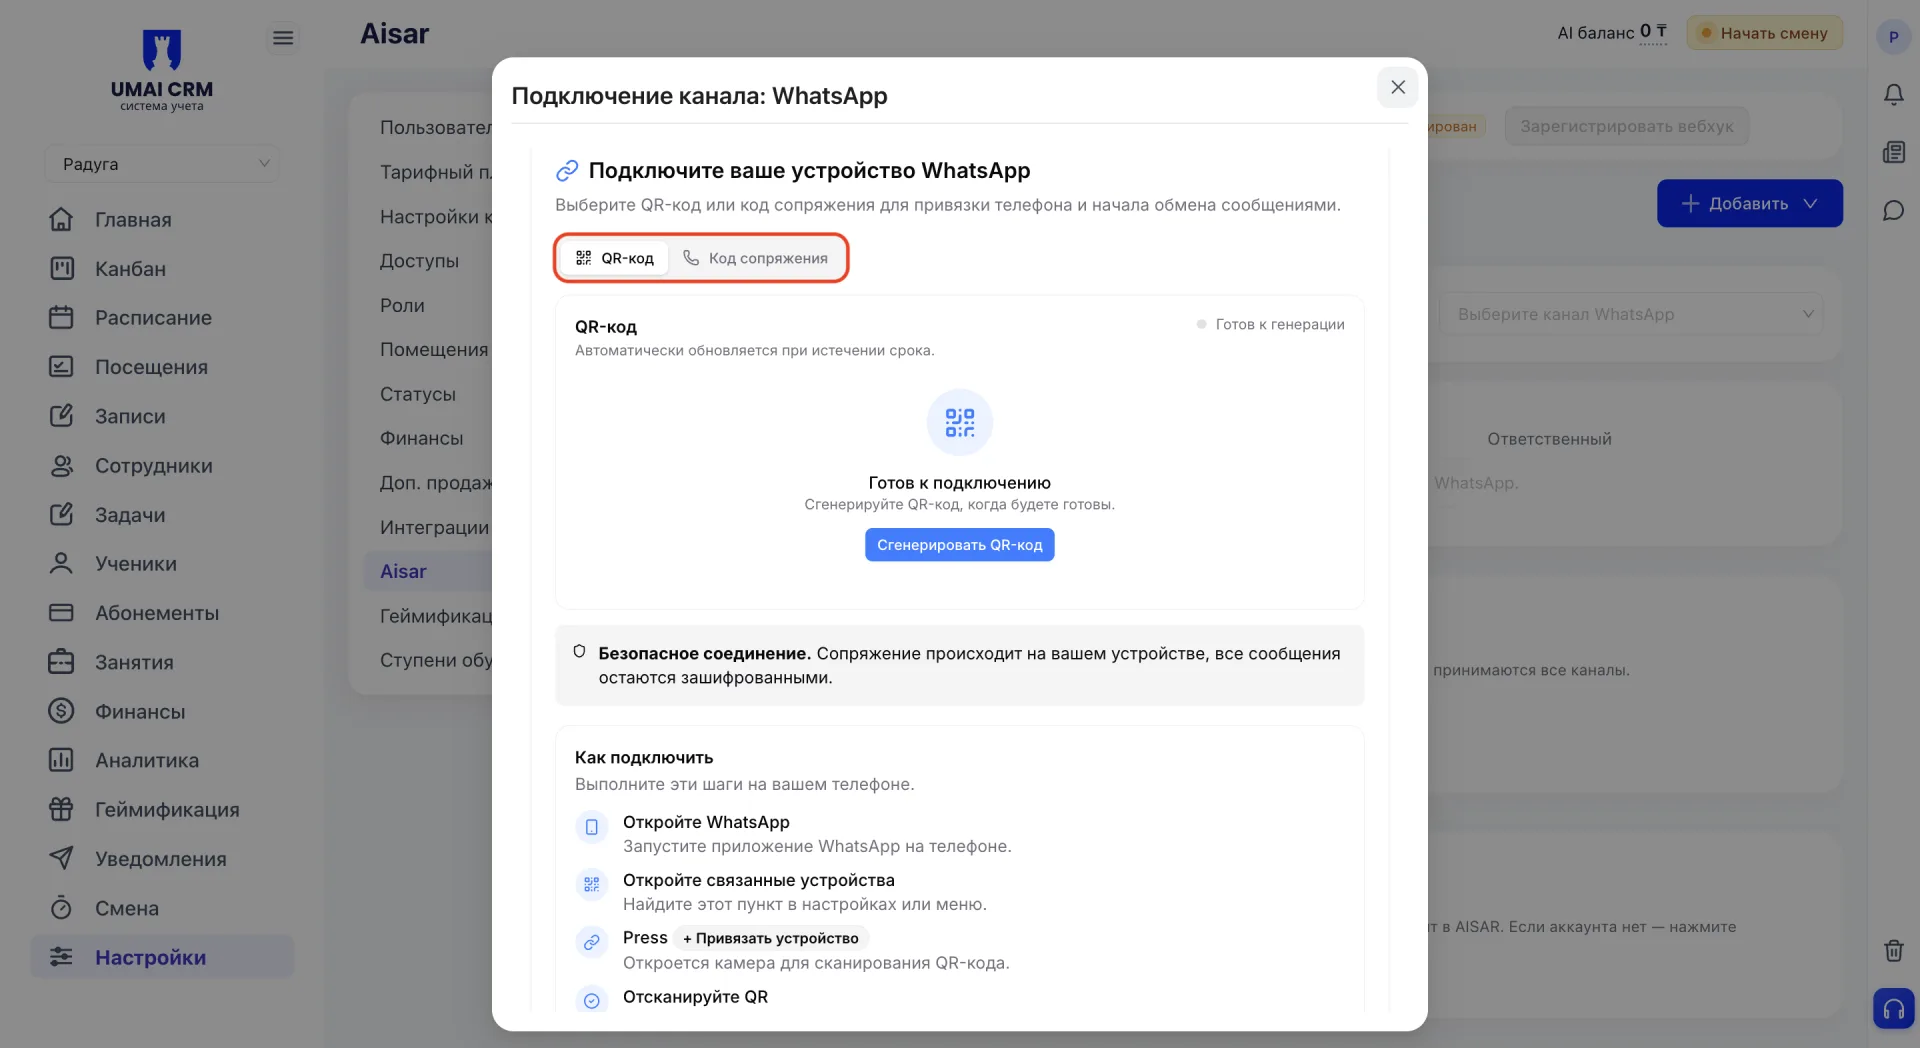
Connection via QR code
Click "Generate QR code". In the WhatsApp app on your phone open Linked Devices, choose "Link a device" and scan the displayed QR code.
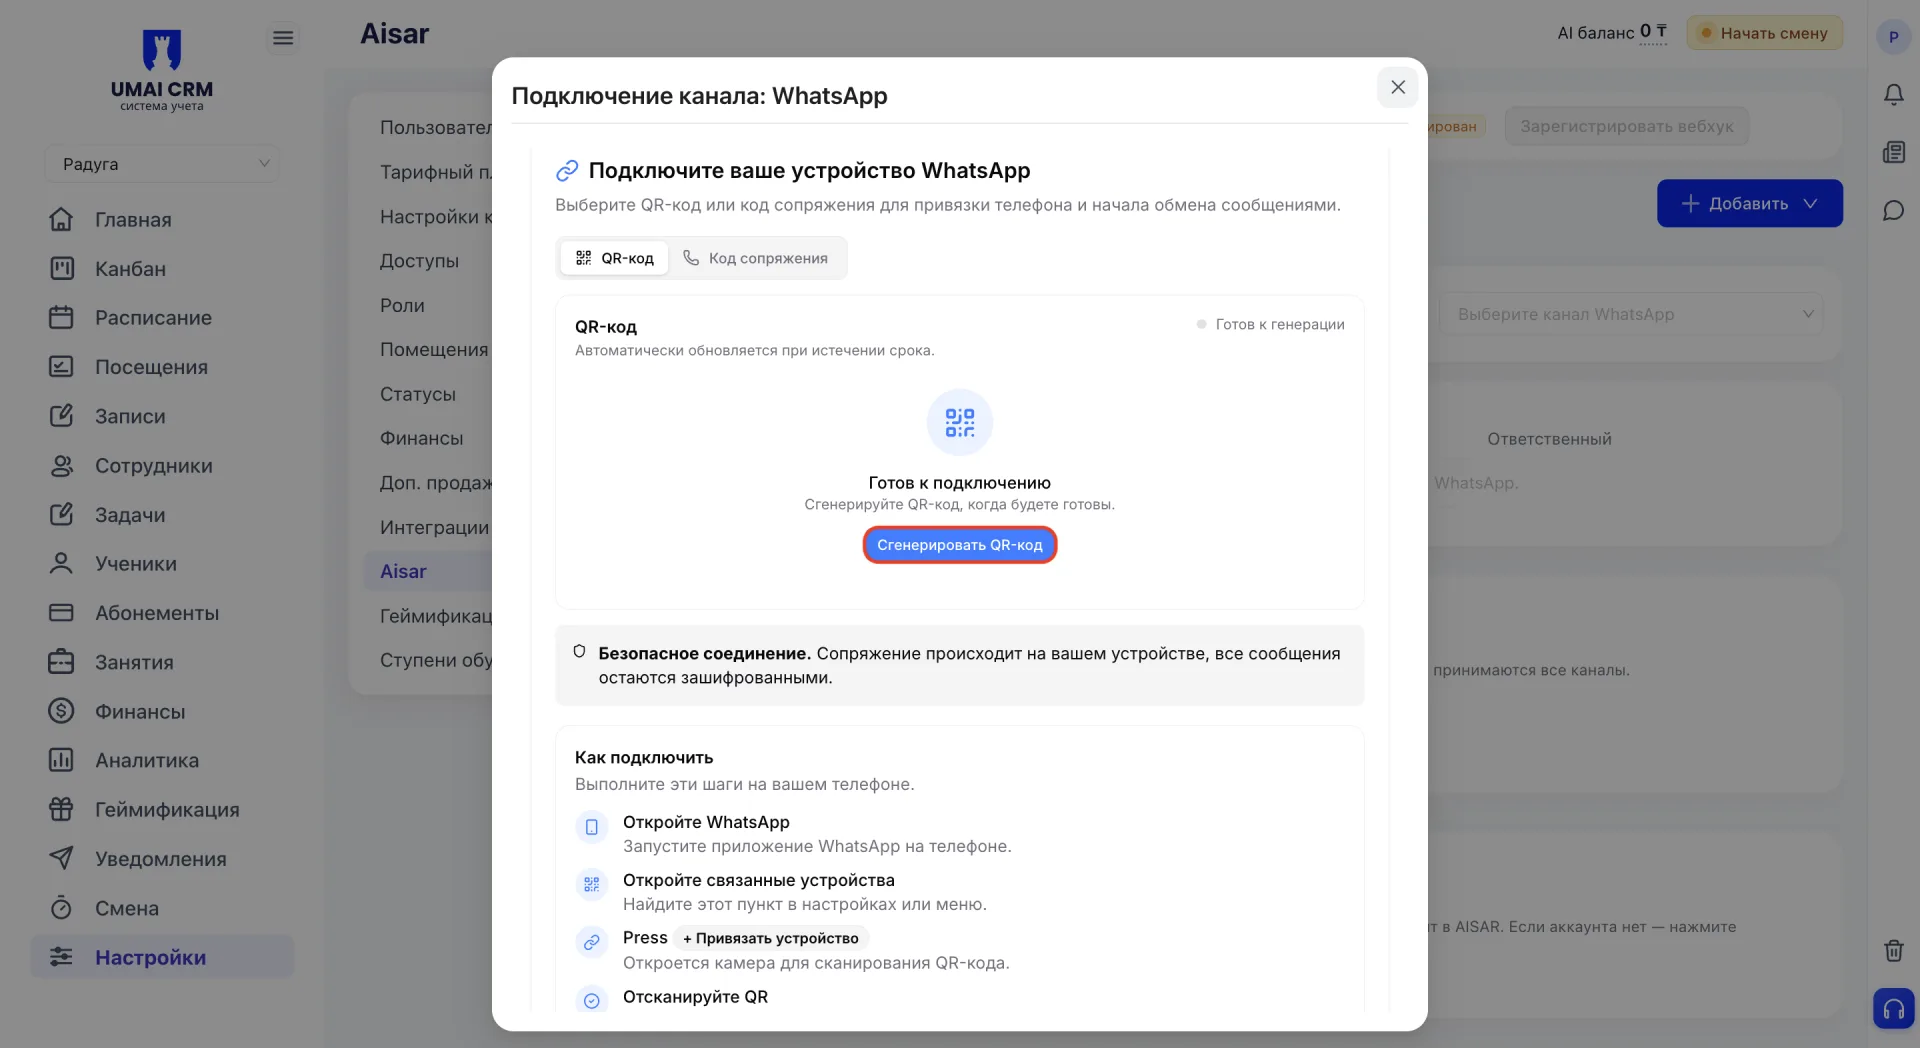
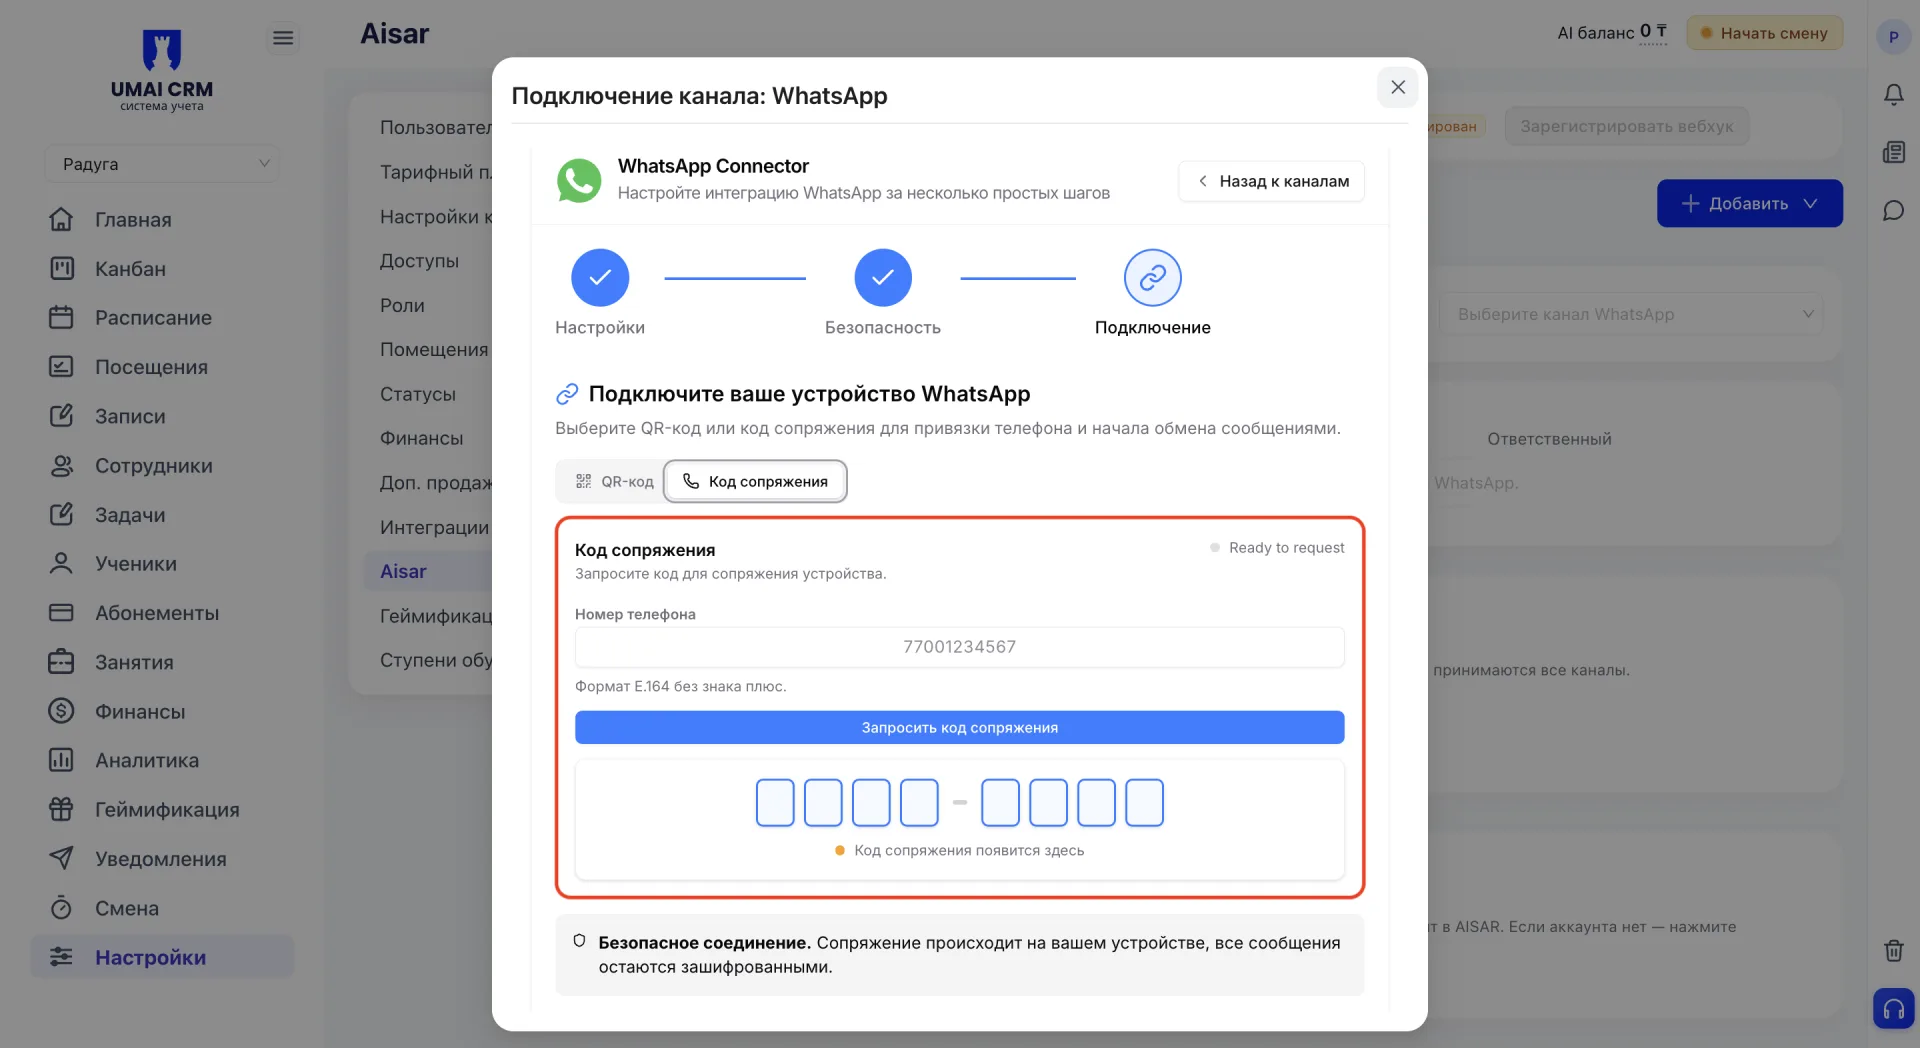
Connection via pairing code
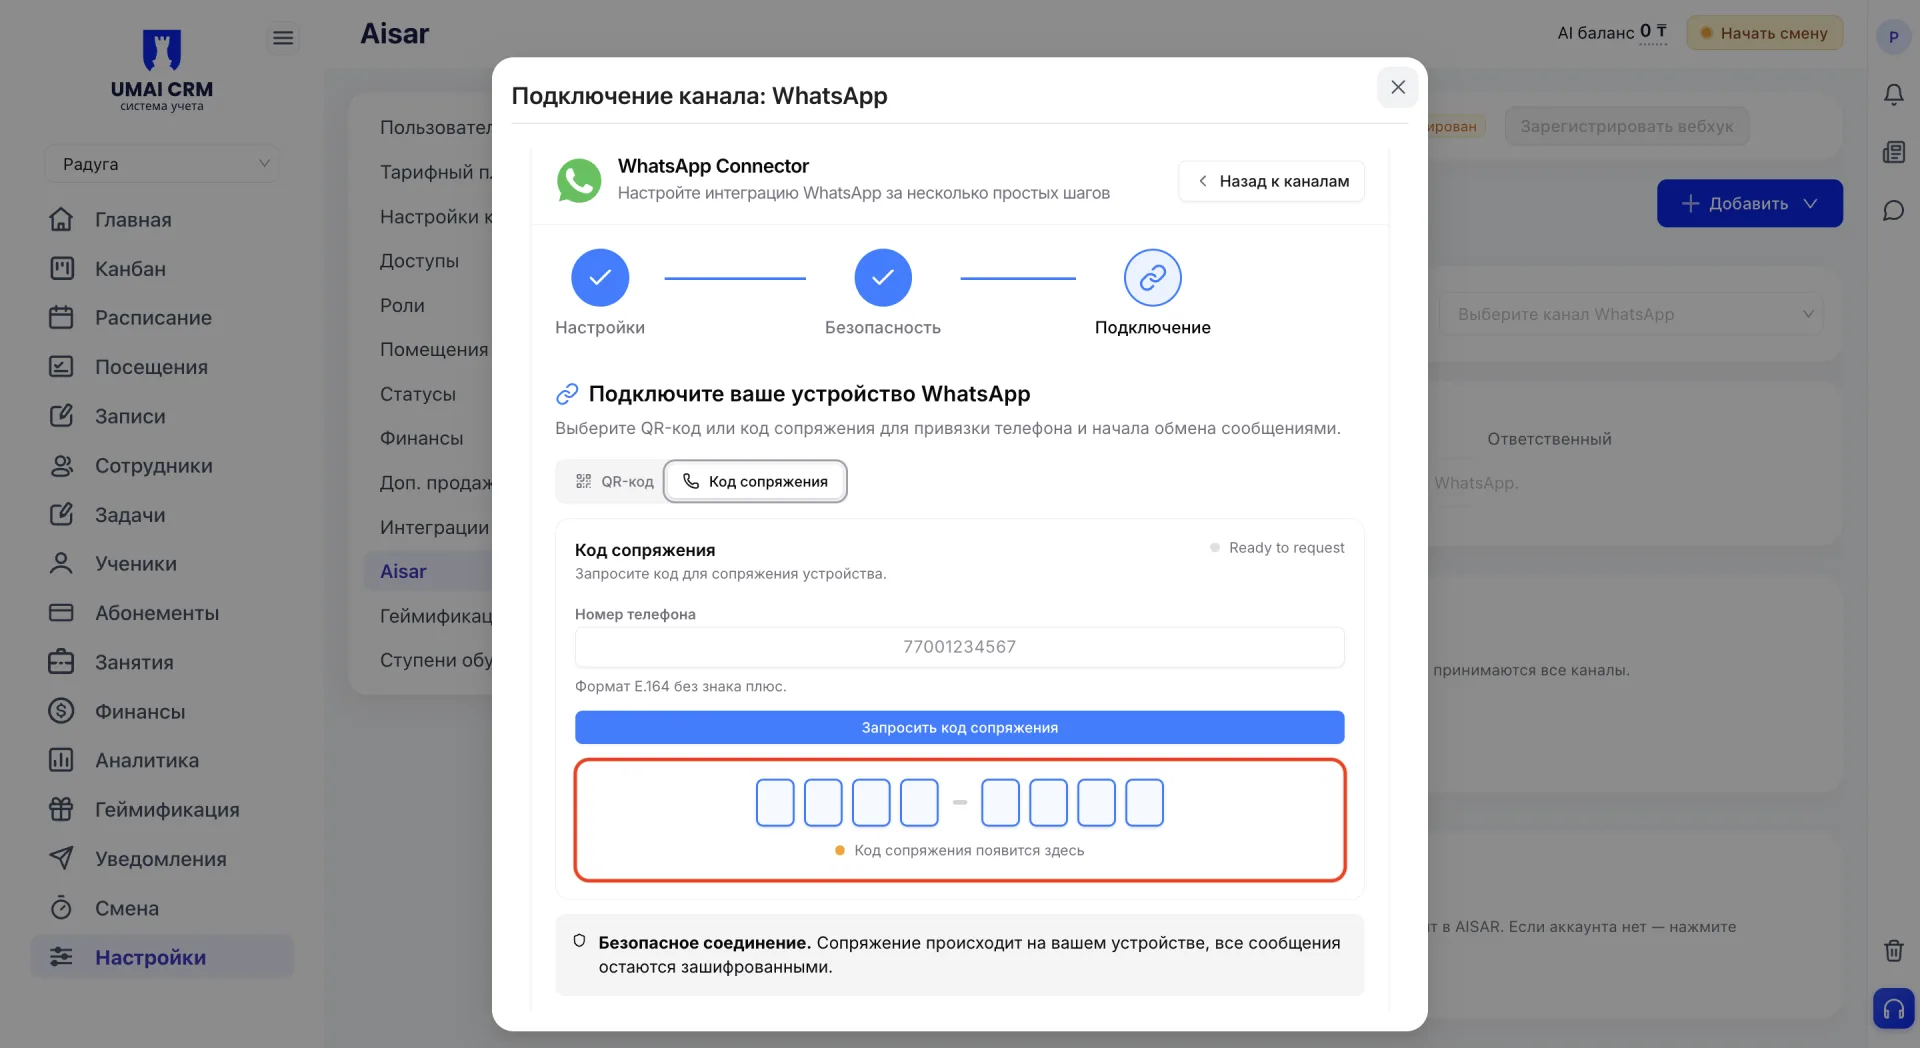
Go to the "Pairing code" tab, enter the phone number without the "+" sign, for example 77001234567, and click "Request pairing code". The system will generate an eight-character code.
In WhatsApp open Linked Devices, choose "Link a device", then "Link by phone number" and enter the received code.
Below the form you will see the "Secure connection" information. Pairing is done on the user’s device and messages remain encrypted.
In the "How to connect" block step-by-step instructions and additional requirements are provided. It is recommended to use the latest version of WhatsApp and a stable internet connection. When connecting via QR code camera access will be required, and when using the pairing code make sure the phone number entered is correct.
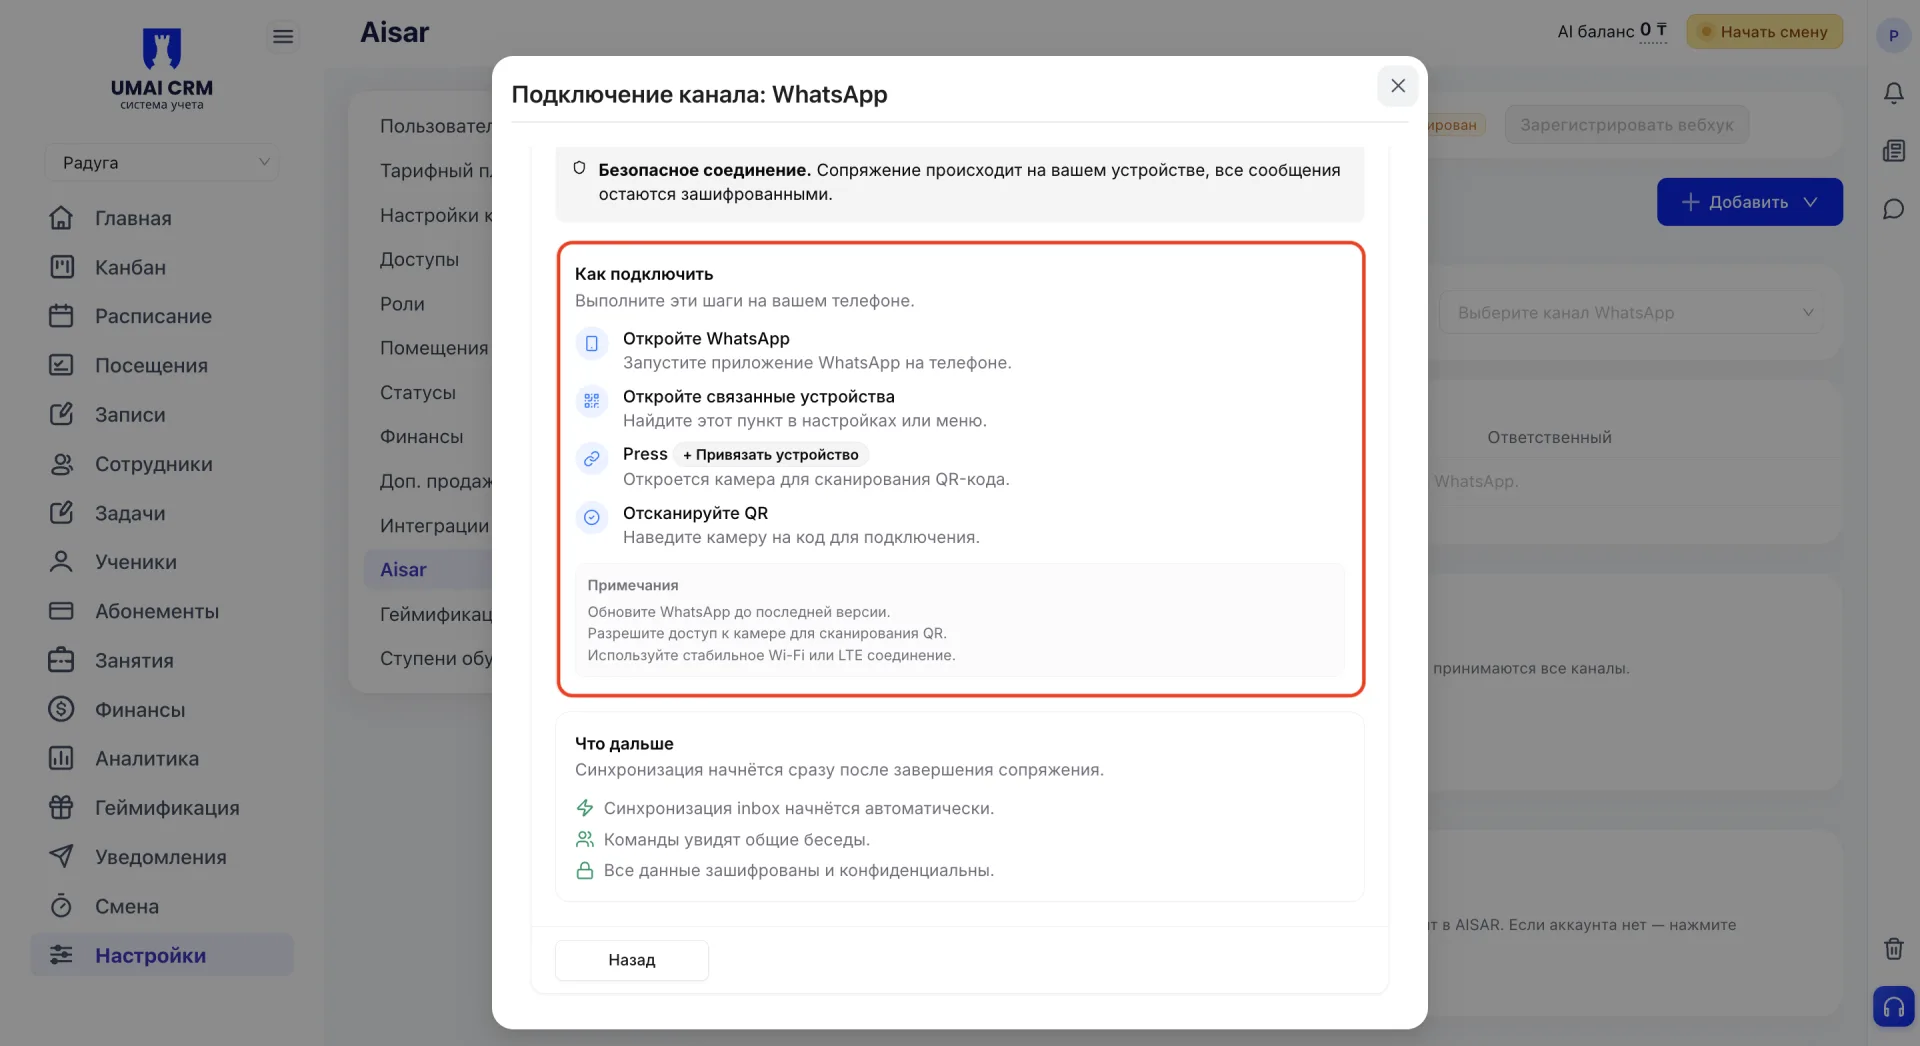
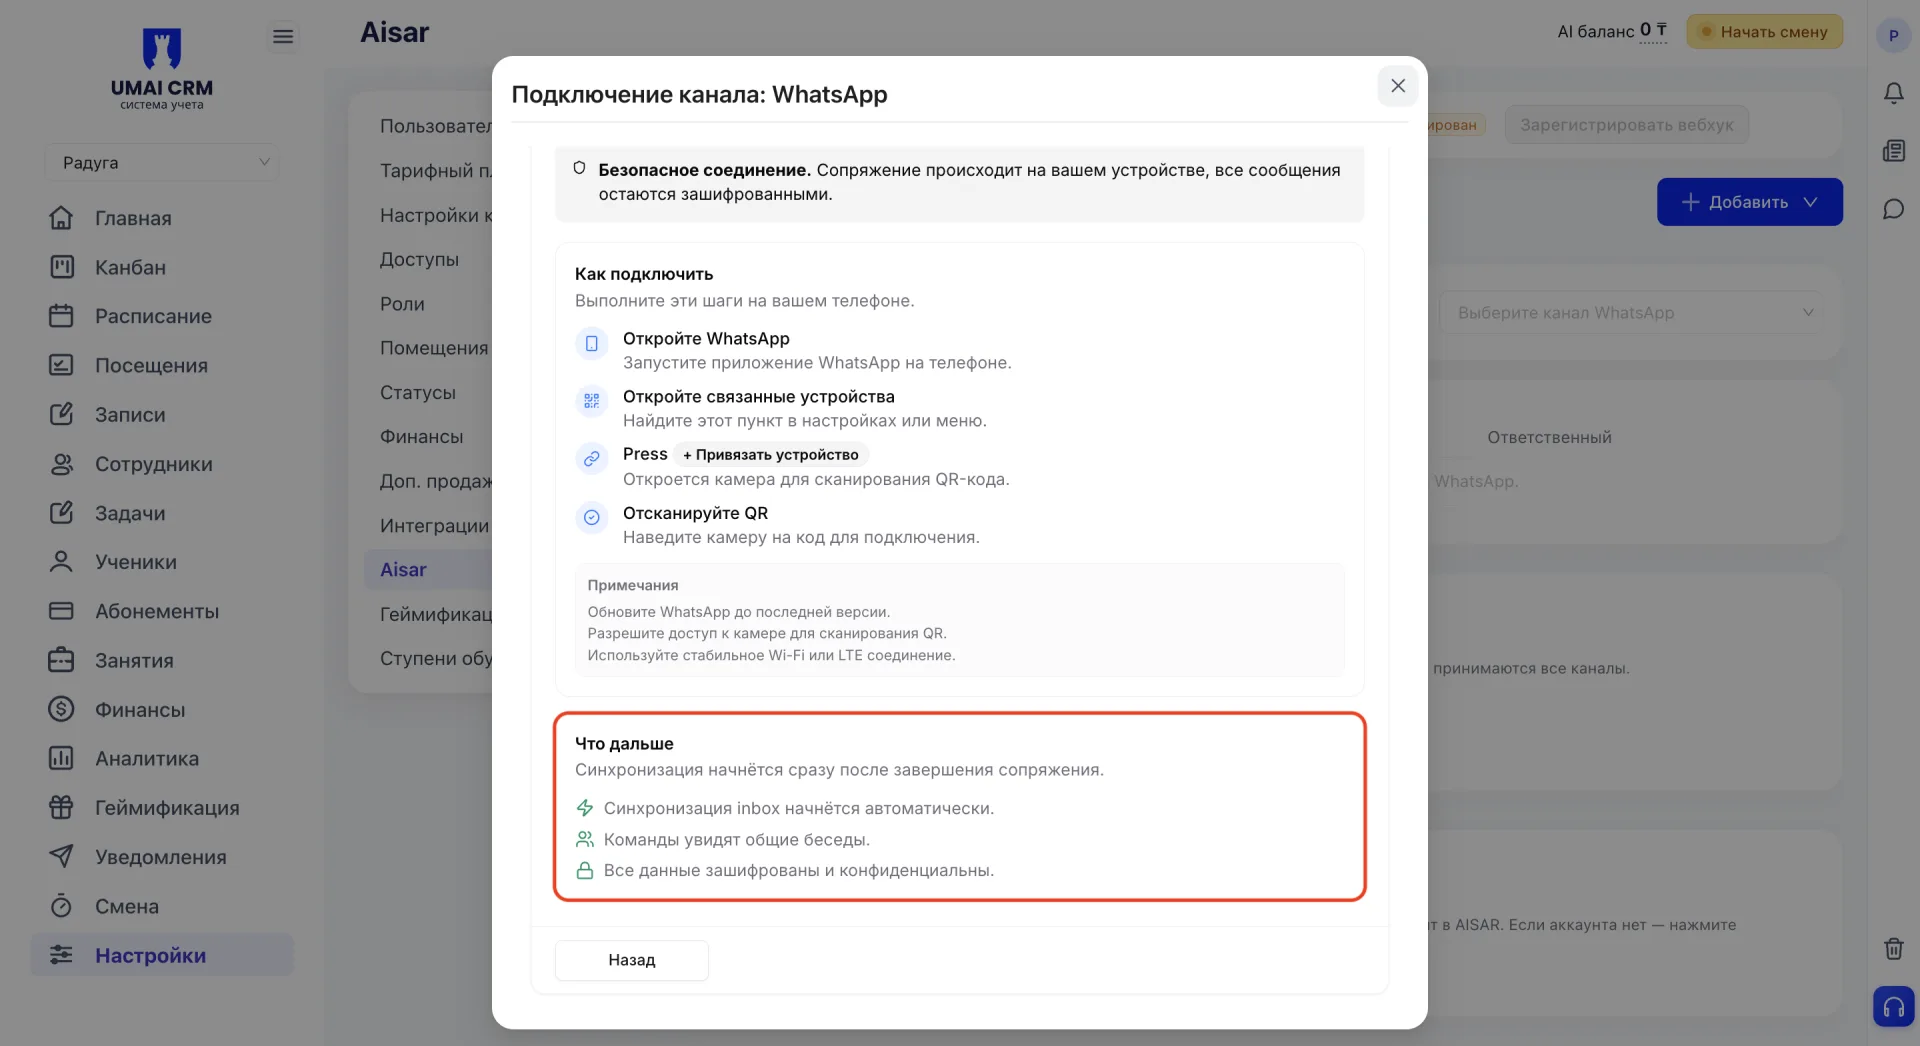
After binding the device the inbox synchronization will start automatically. The "What’s next" block indicates that teams will get access to shared conversations, and data will remain encrypted and confidential.
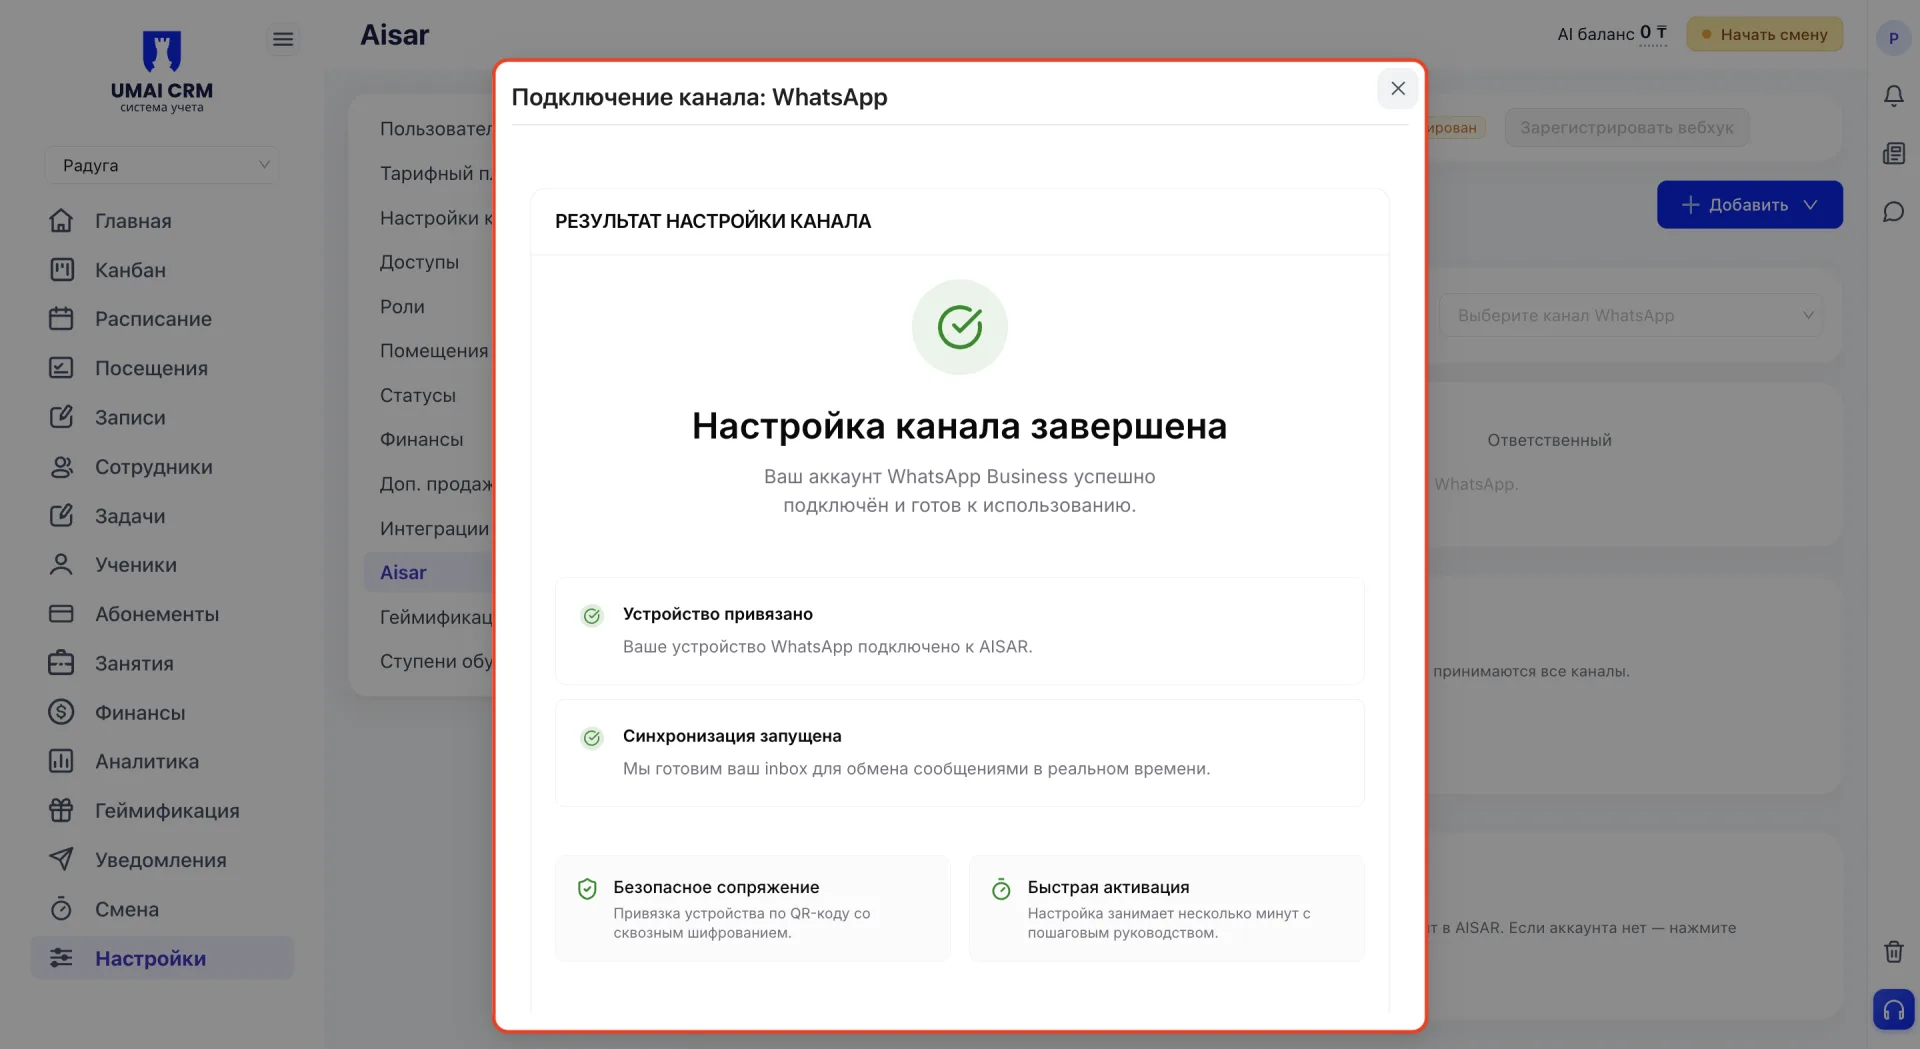
When the device is bound and synchronization starts, a "Channel setup completed" screen will appear with confirmation. The WhatsApp account is connected and ready to use.
5. Connecting Instagram
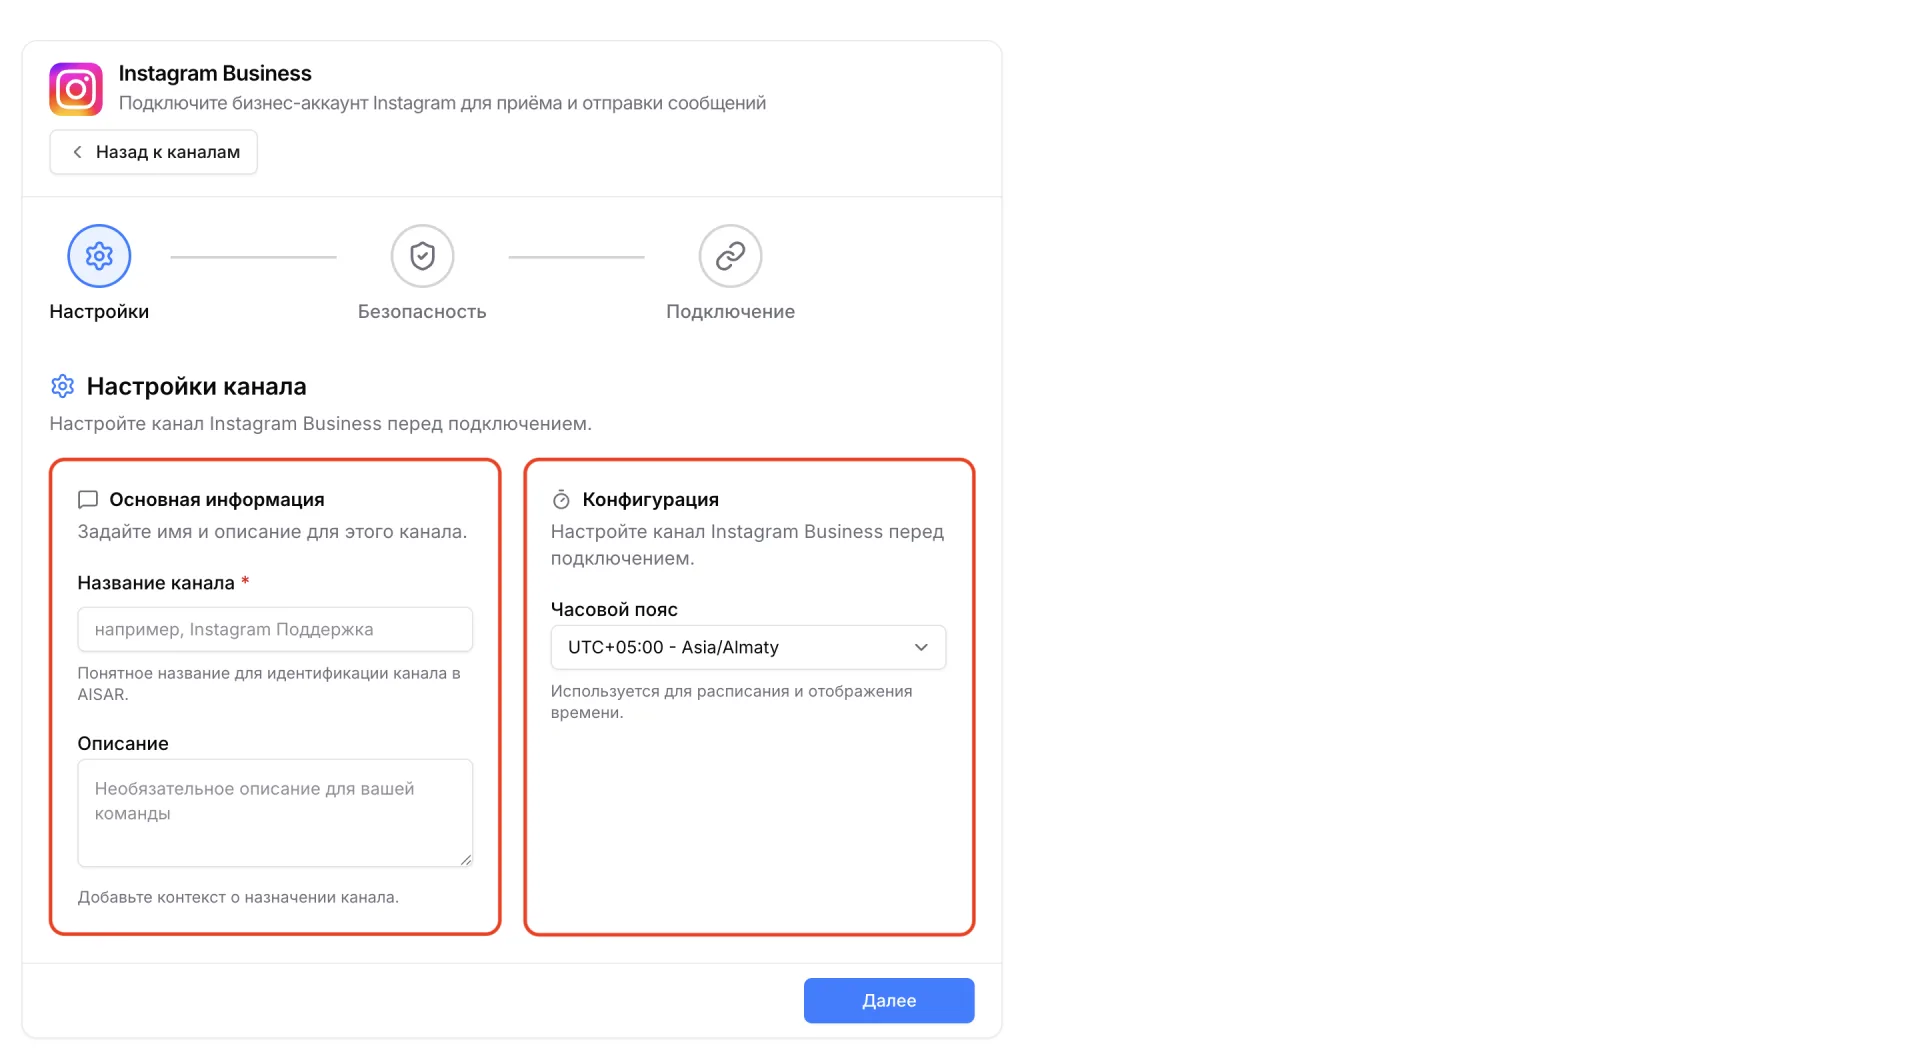
At the "Settings" stage specify the channel name, description and time zone. See the WhatsApp connection section for more details about the settings at this stage.
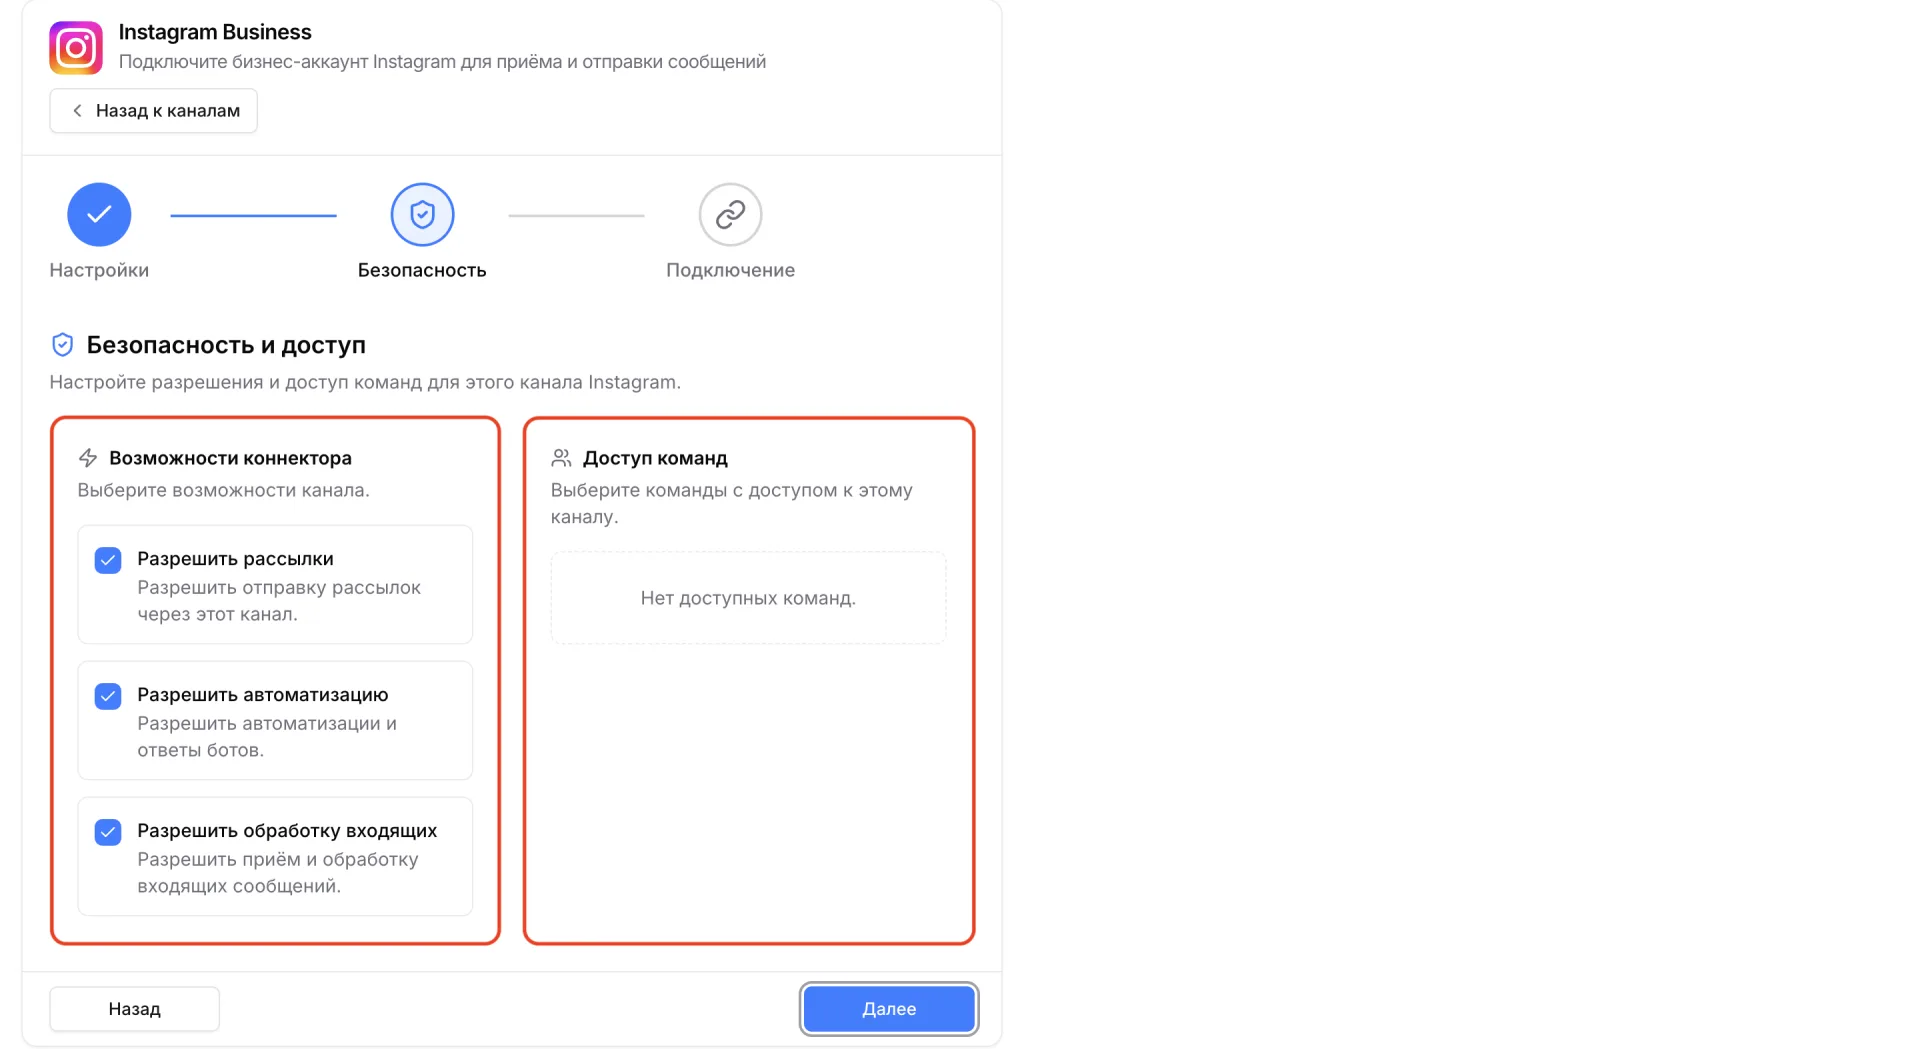
At the "Security" stage configure the channel capabilities and team access. The options "Allow mass mailings", "Allow automation" and "Allow incoming handling" are available. In the same block specify the teams that will have access to the channel.
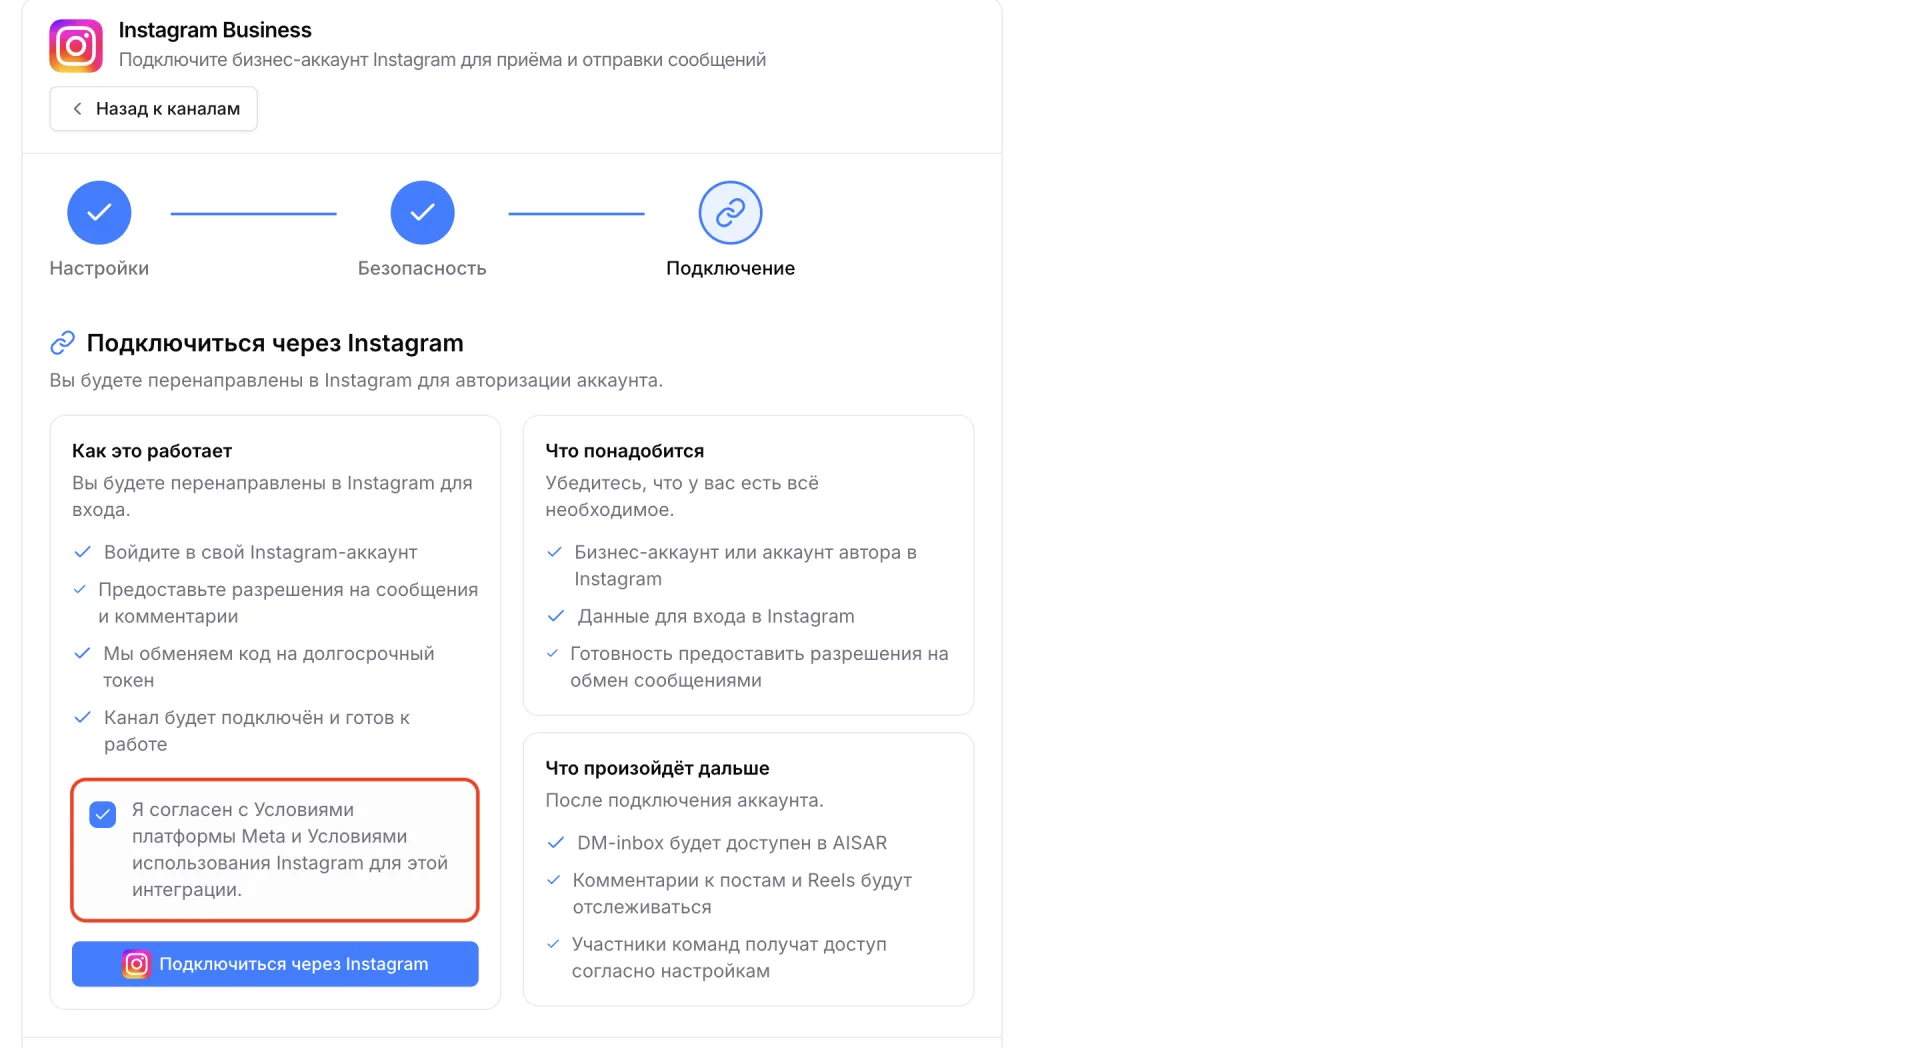
At the "Connection" stage you must confirm agreement with Meta platform terms and Instagram terms of use, then click "Connect via Instagram". An authorization page will open where you need to log into the account. If it has not yet been switched to a professional mode, Instagram will prompt to do this automatically. A professional account is required to connect to Aisar.
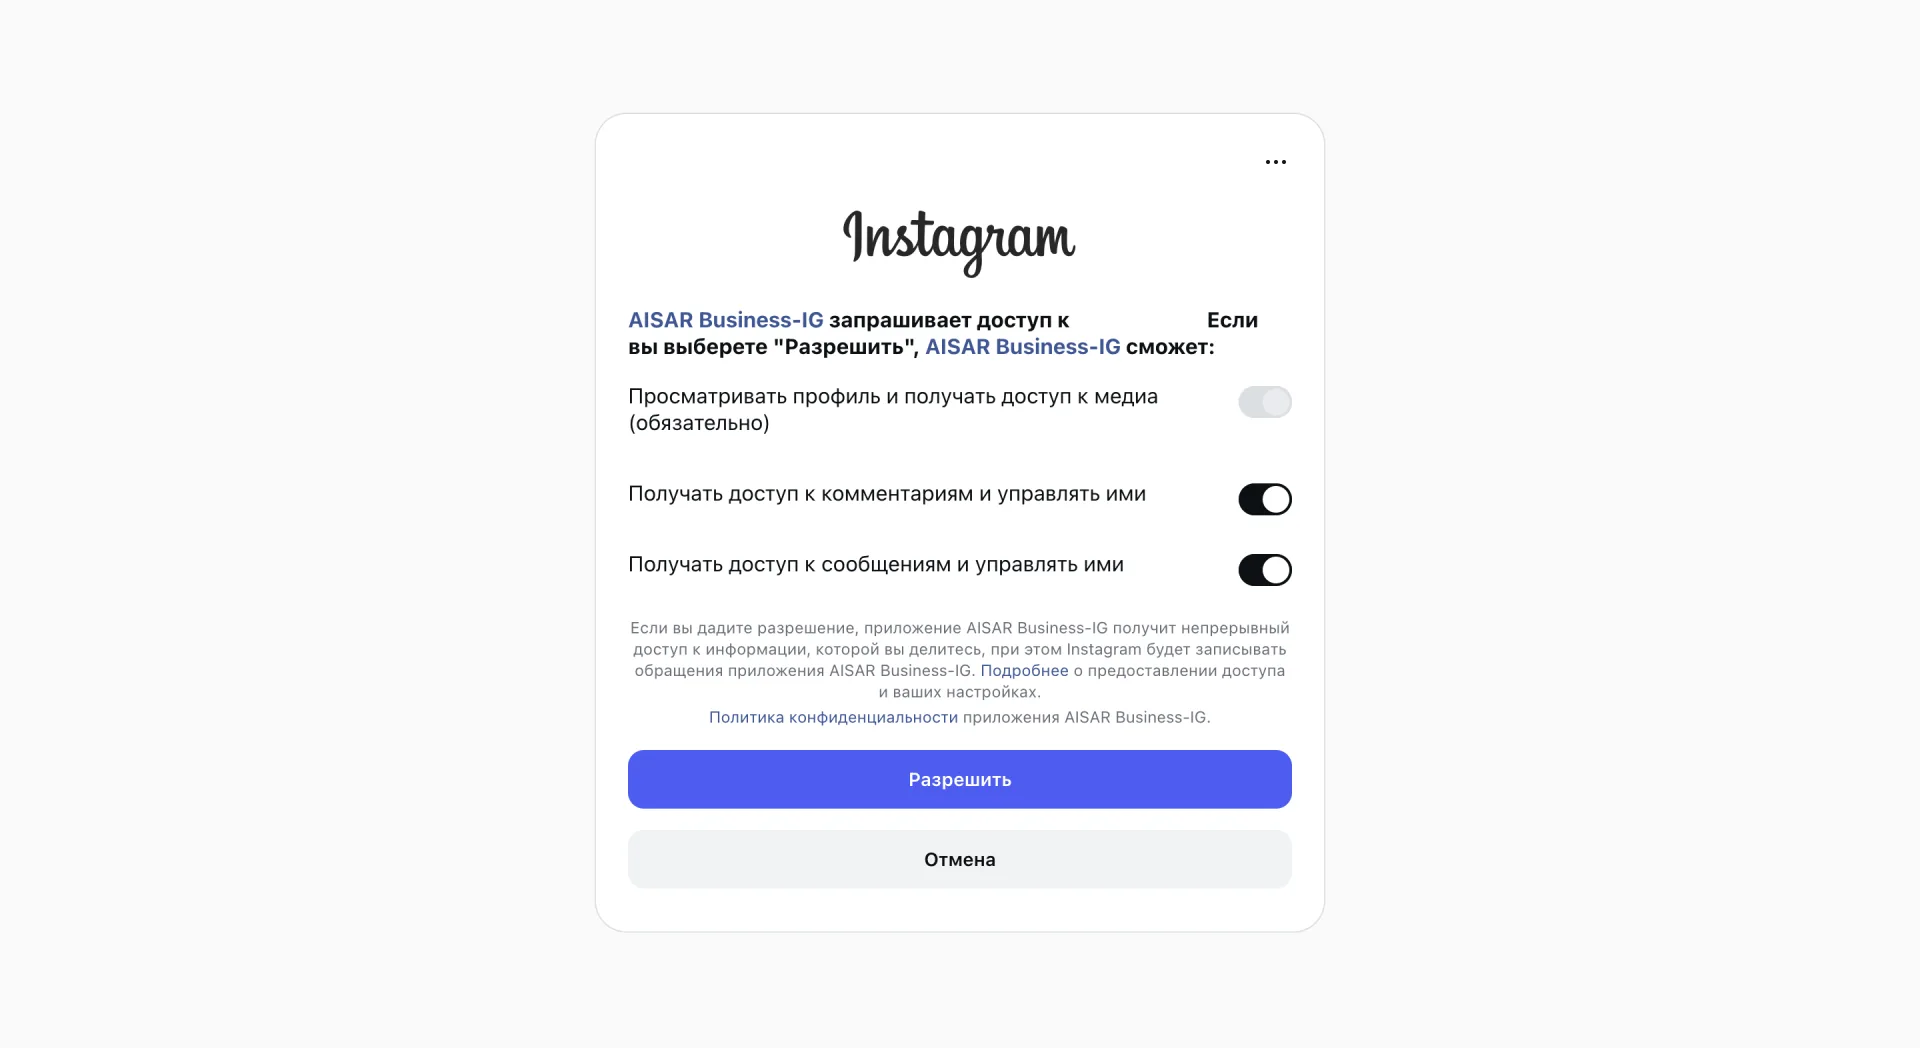
After login Instagram will request permissions for the AISAR Business-IG app to work with messages, comments and the profile. Confirm them with the "Allow" button. After that Direct messages, comments on posts and Reels will become available in Aisar according to the configured access rights.
Upon completion of the connection the system will return to the Aisar settings page. The connected channel will be displayed in the general list.
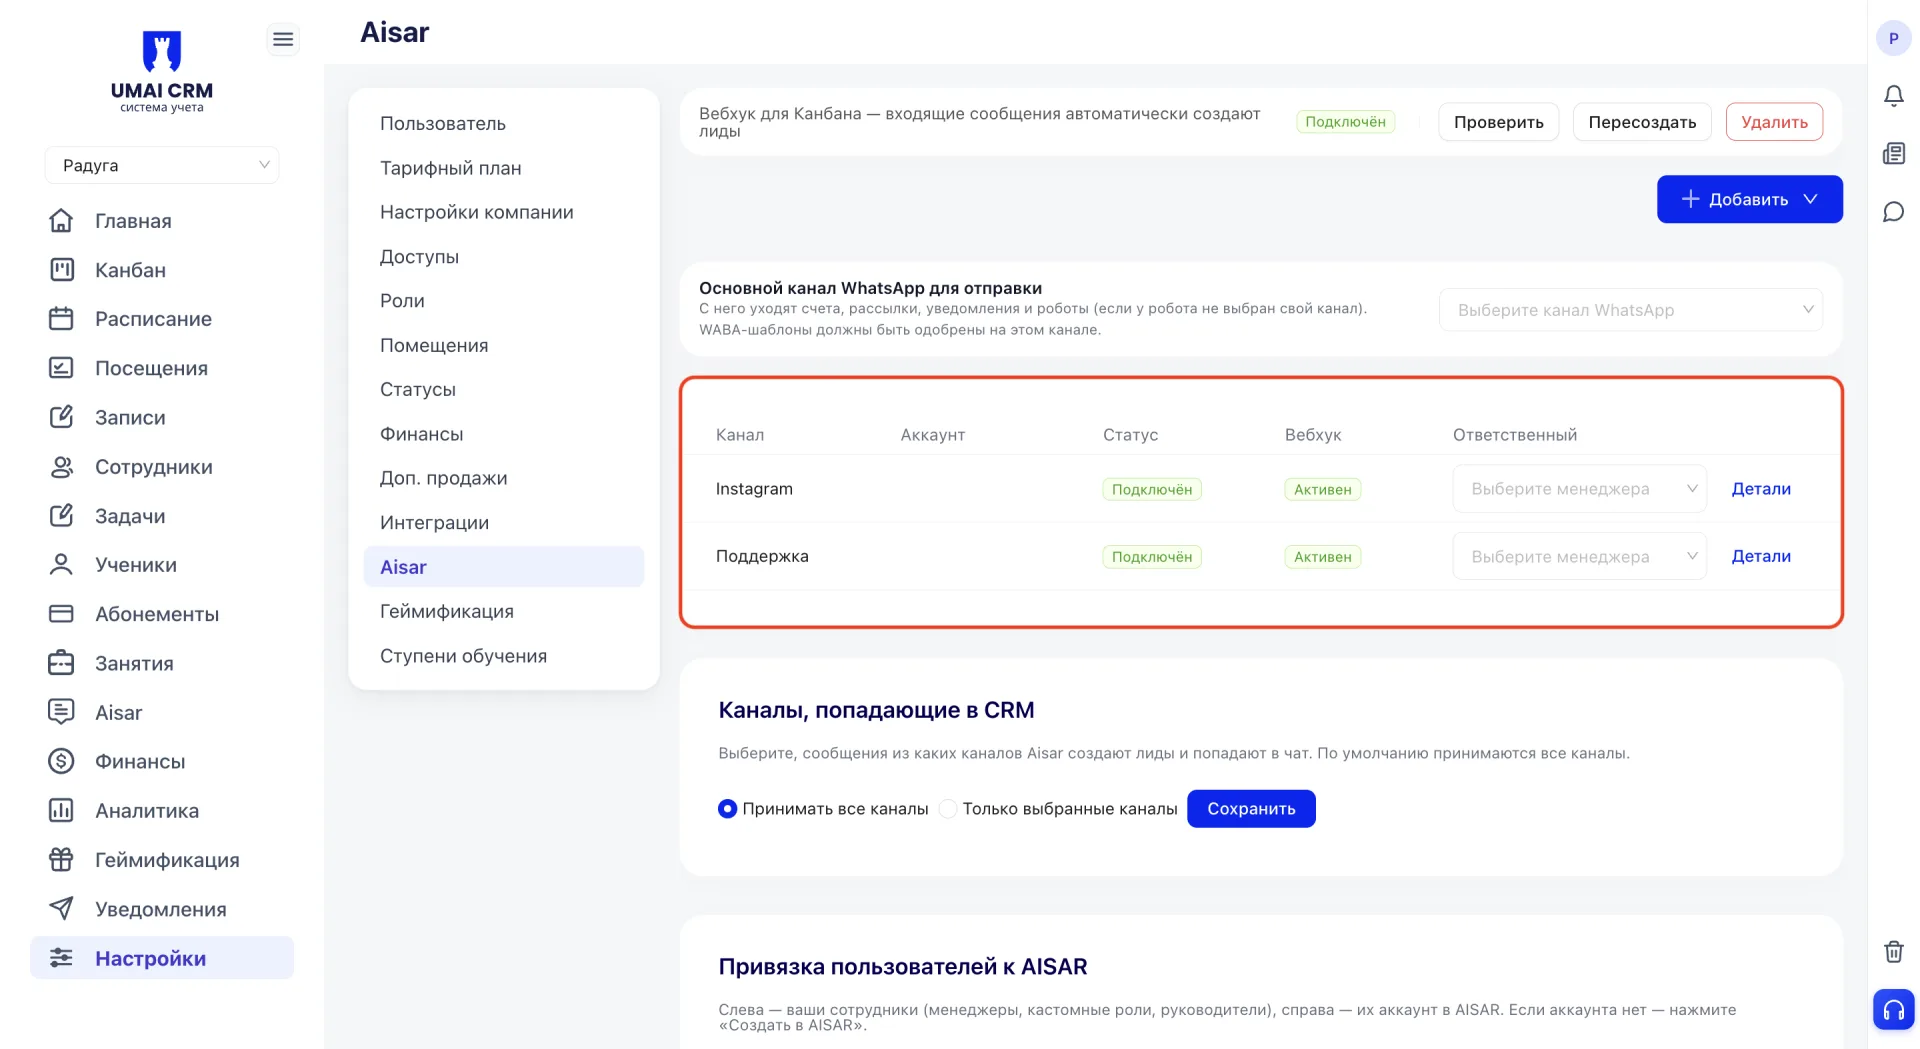
6. Main WhatsApp channel for sending
In the "Main WhatsApp channel for sending" block choose the channel that is used by default for outgoing messages. Invoices, mailings, notifications and messages from bots are sent from it if another channel is not specified for the bot.
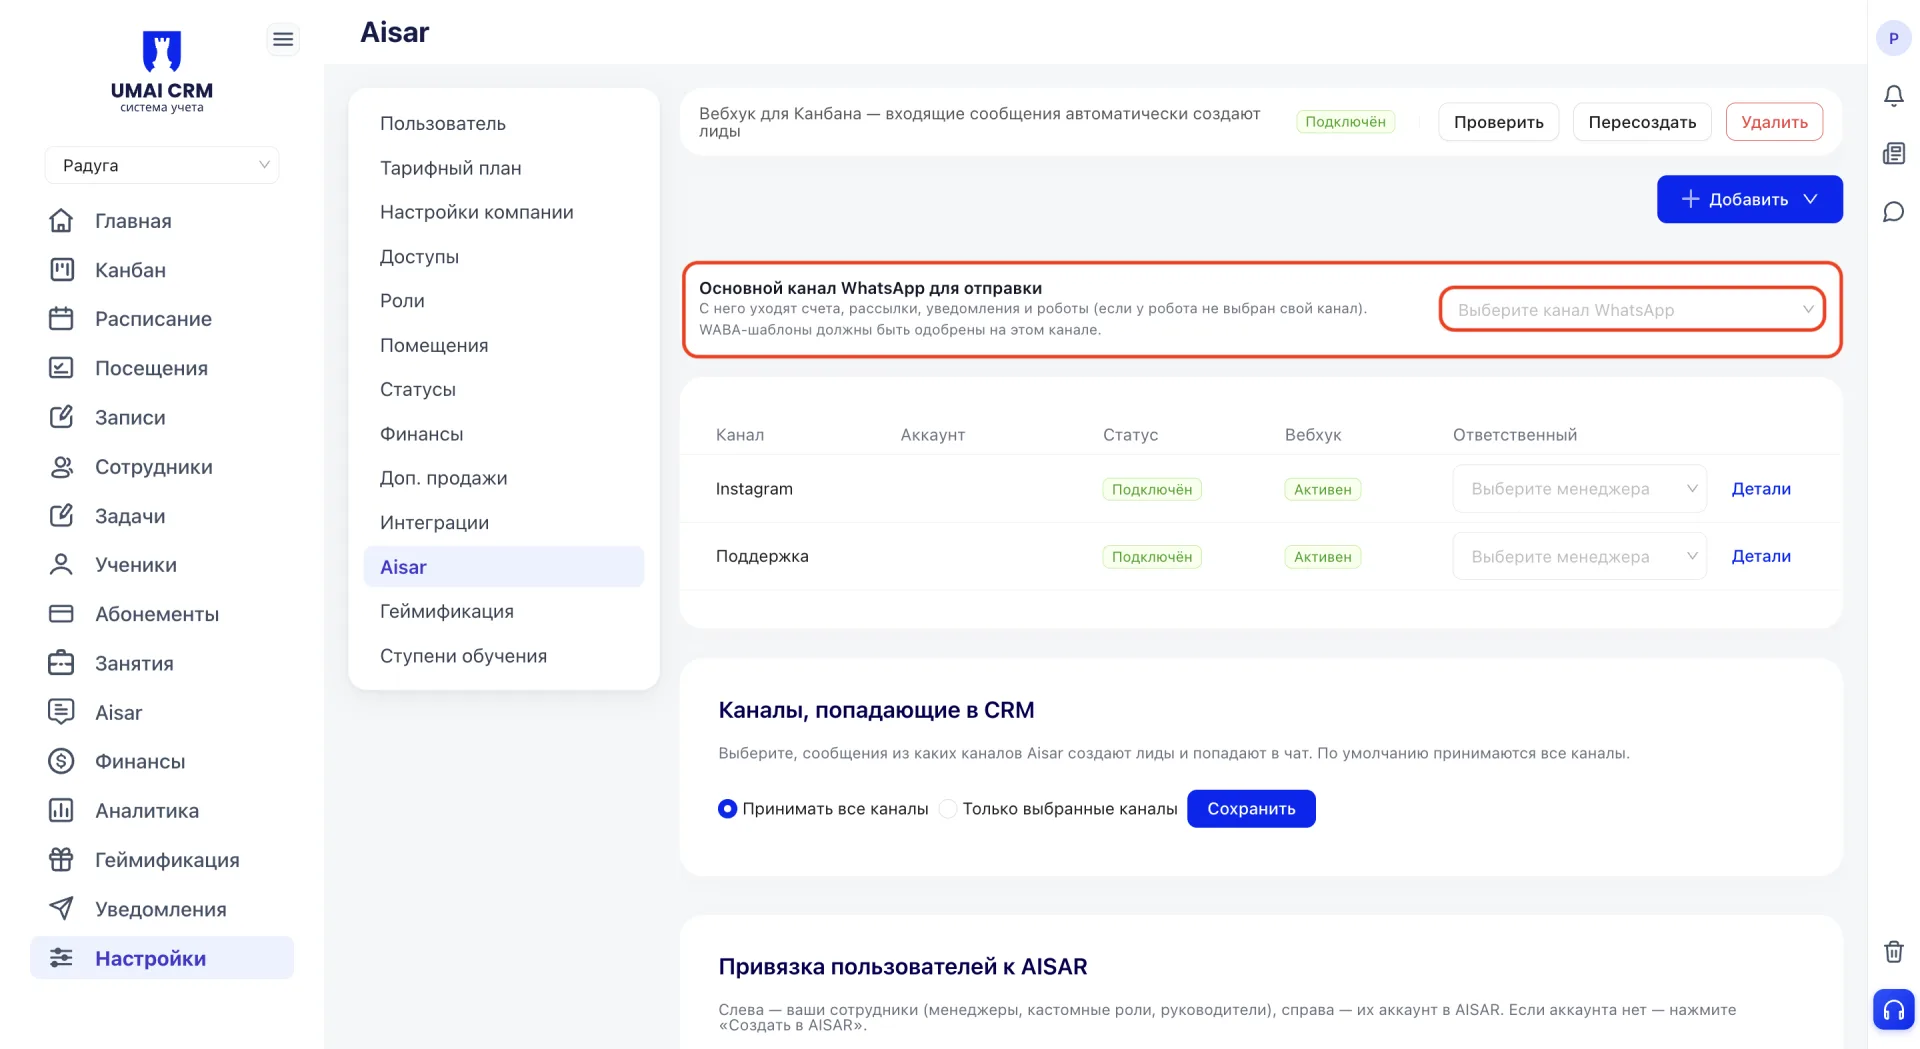
The dropdown shows all connected WhatsApp channels with their types. Only one channel can be selected as primary. WABA templates must be approved for the selected channel.
7. Webhook for the Kanban (Канбан)
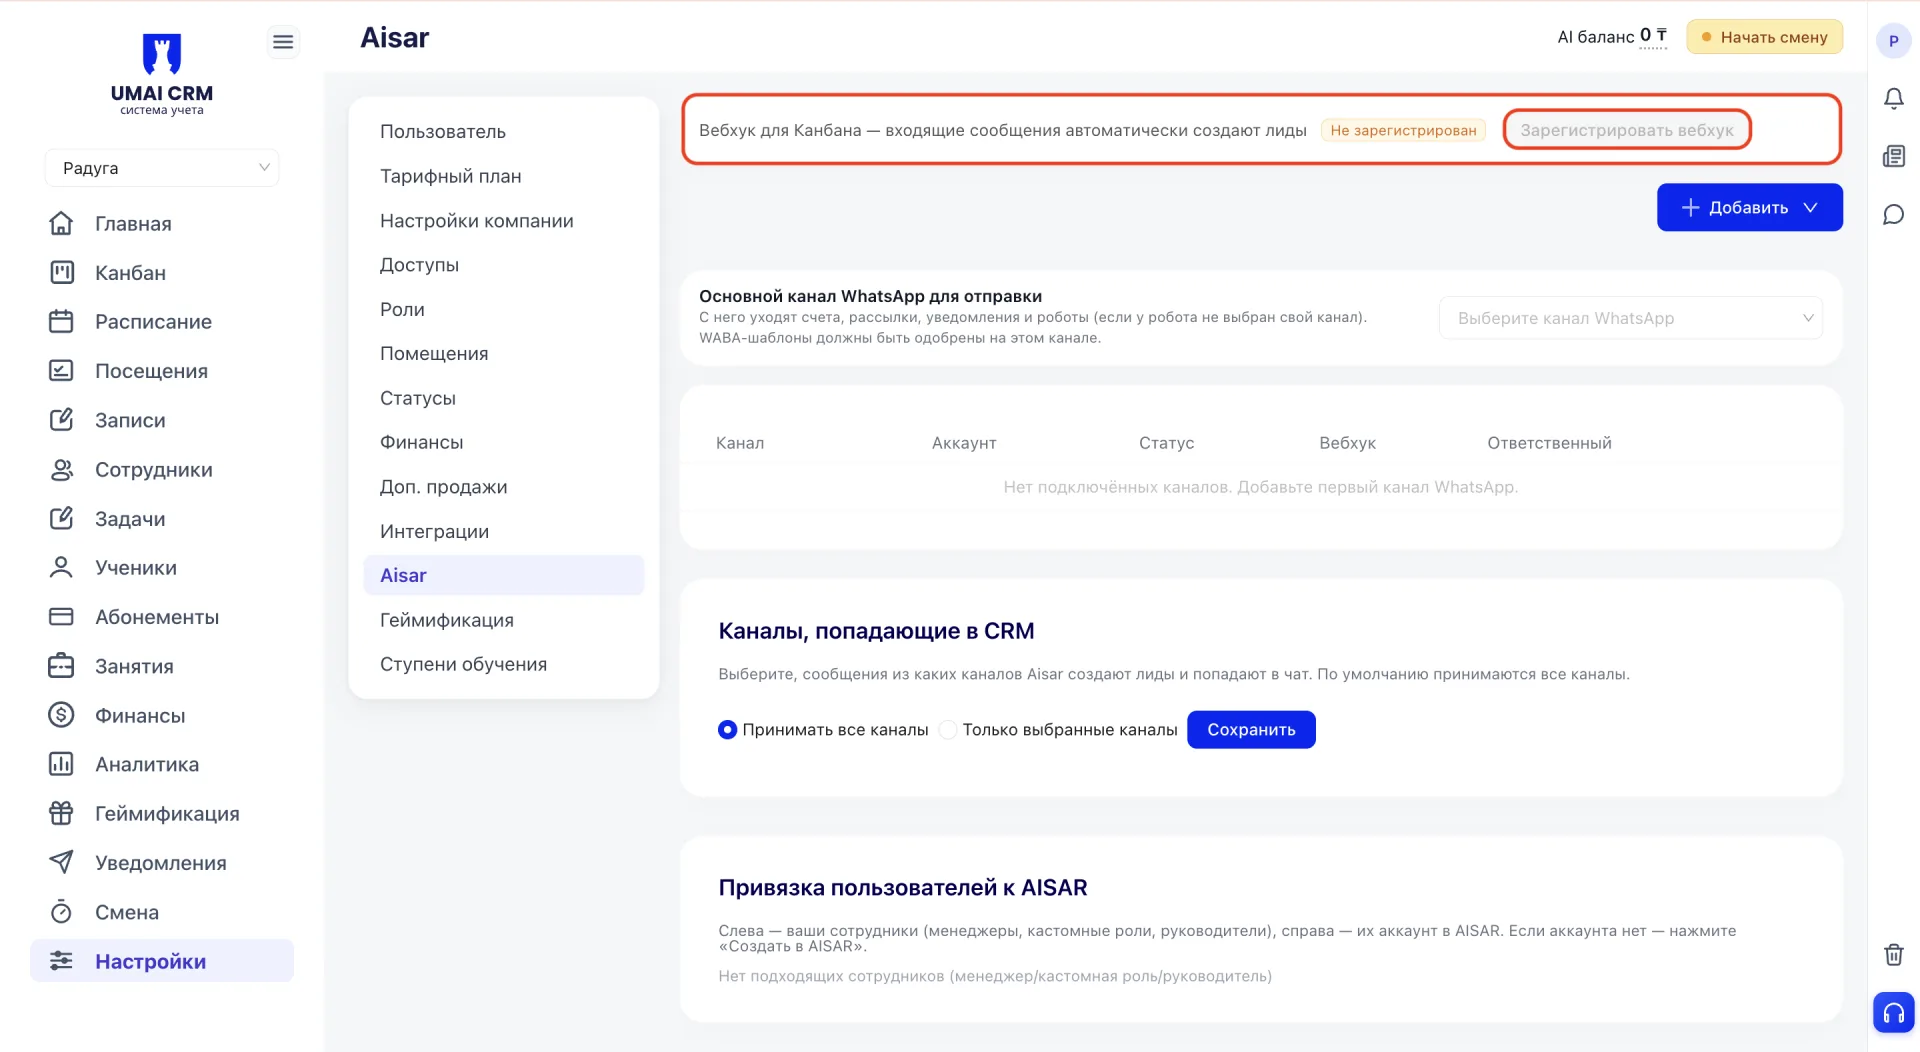
The webhook status for the Kanban (Канбан) is shown at the top of the Aisar page. It is responsible for automatic creation of Leads from incoming messages.
If the webhook is not yet registered, the description shows the status "Not registered" and a "Register webhook" button. Click it to enable automatic Lead creation.
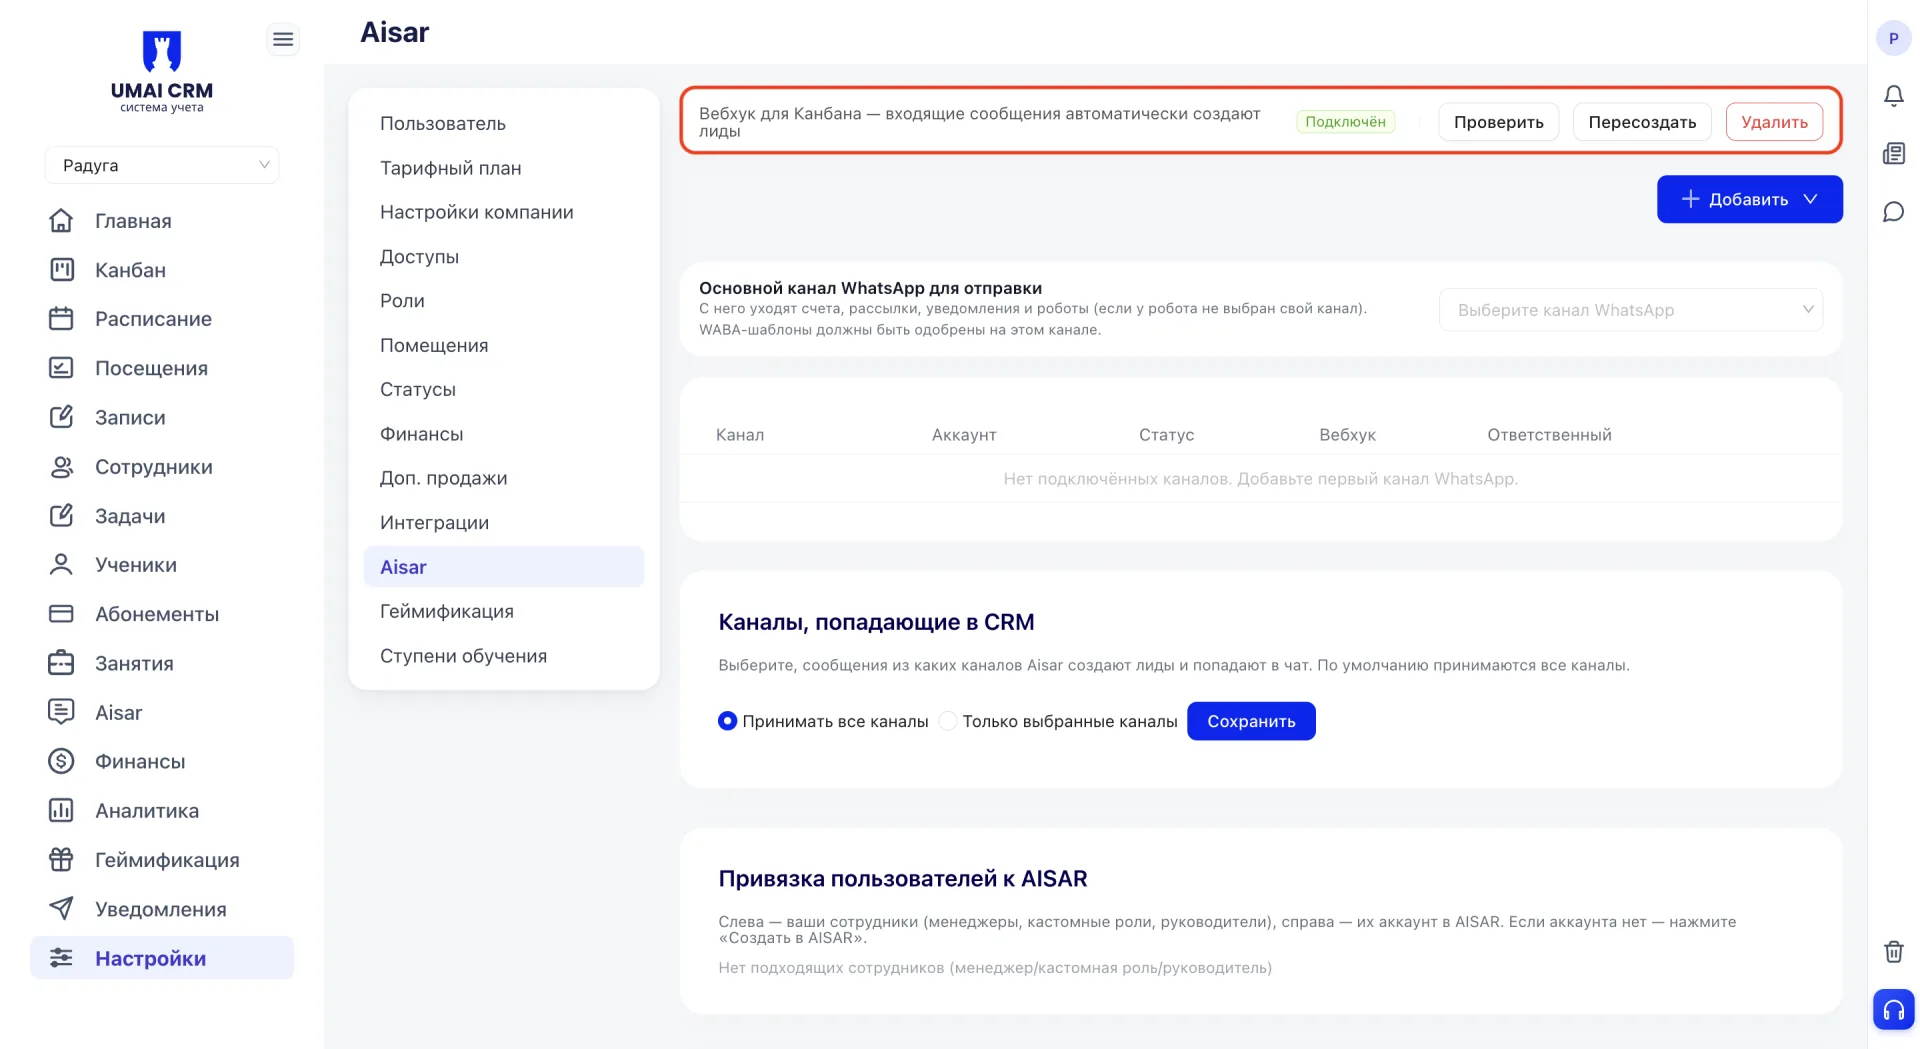
After registration the status will change to "Connected". Instead of the registration button three actions will appear. "Check" allows you to test the webhook. "Recreate" creates the webhook again if you need to refresh the connection. "Delete" disables the webhook.
If the webhook is registered but some added channels are not connected to it, a warning "Some channels are not connected to the webhook. Messages from them will not come into the CRM" will appear under the status and a "Connect all" button. Click it to connect the remaining channels.
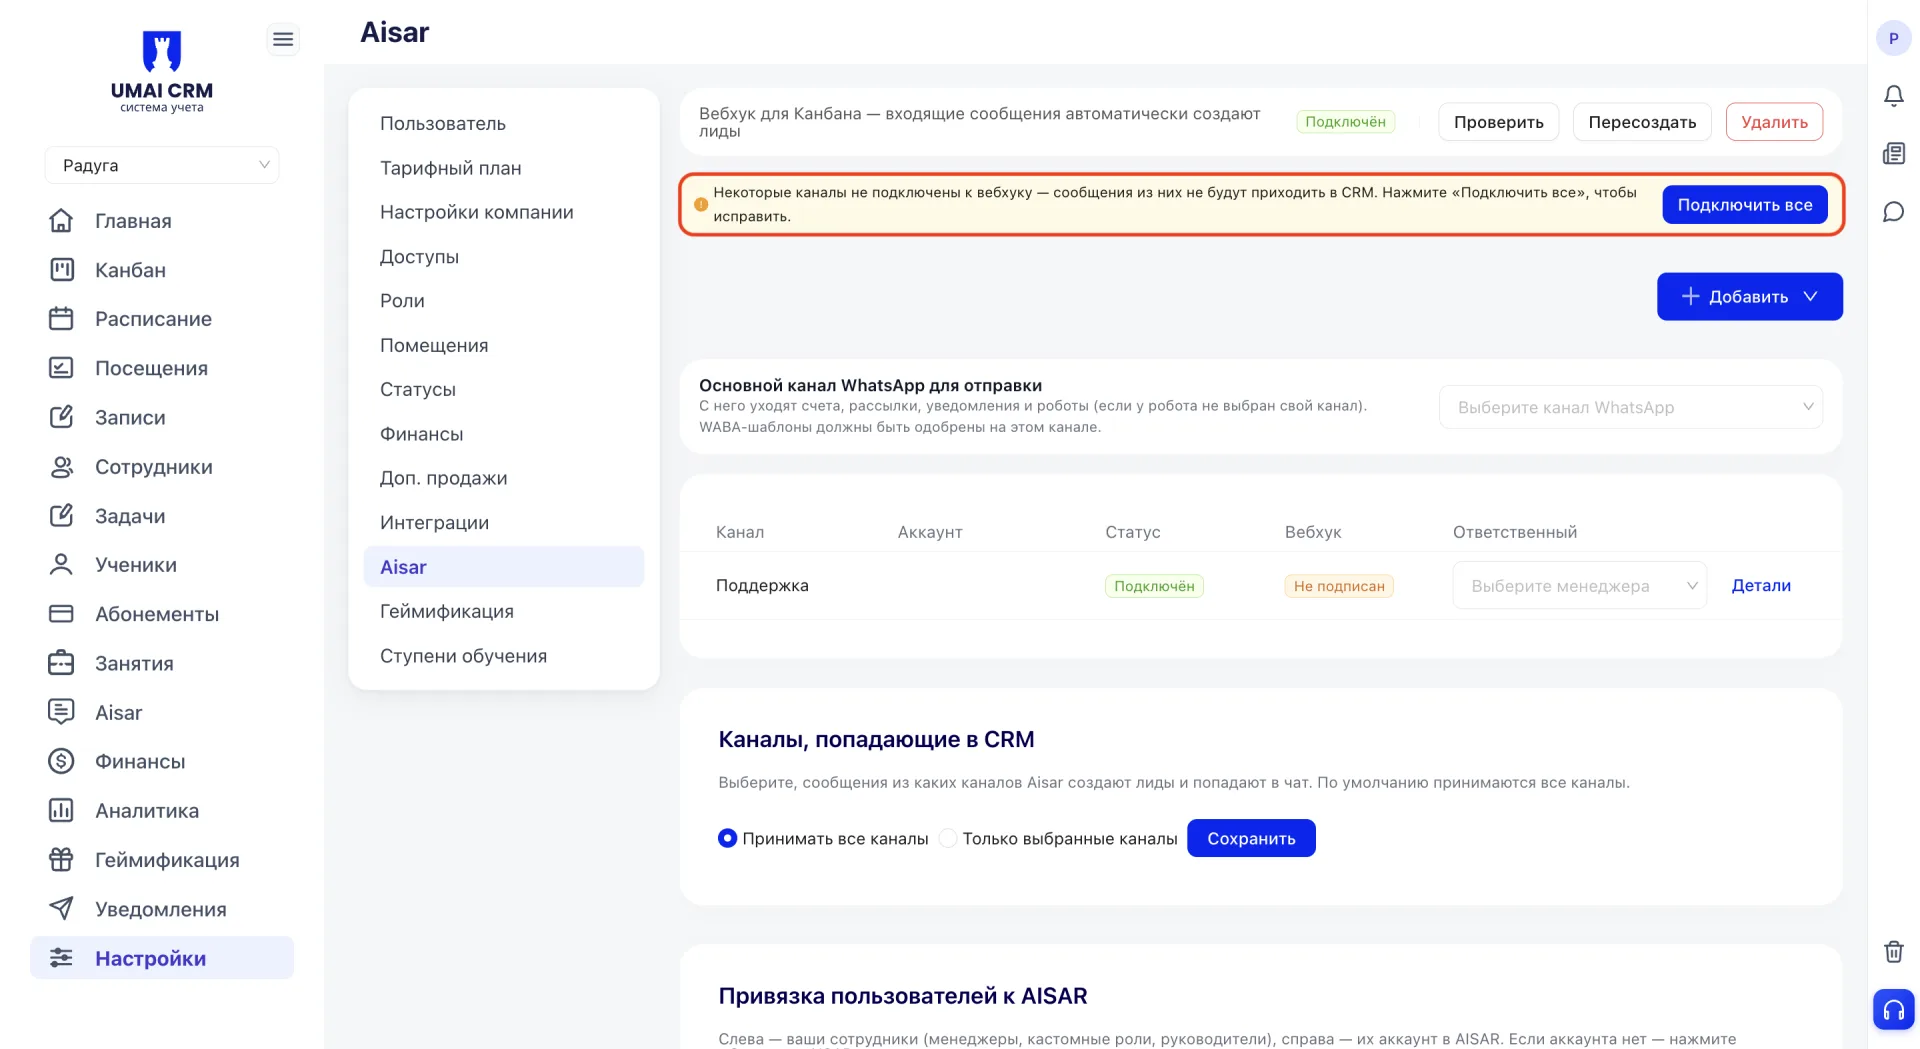
The webhook status is also shown in the channels table in the "Webhook" column. Before a channel is connected the status displays "Not subscribed". After connection it changes to "Active". While a channel’s webhook is not active, incoming messages from it will not automatically create Leads in the system.
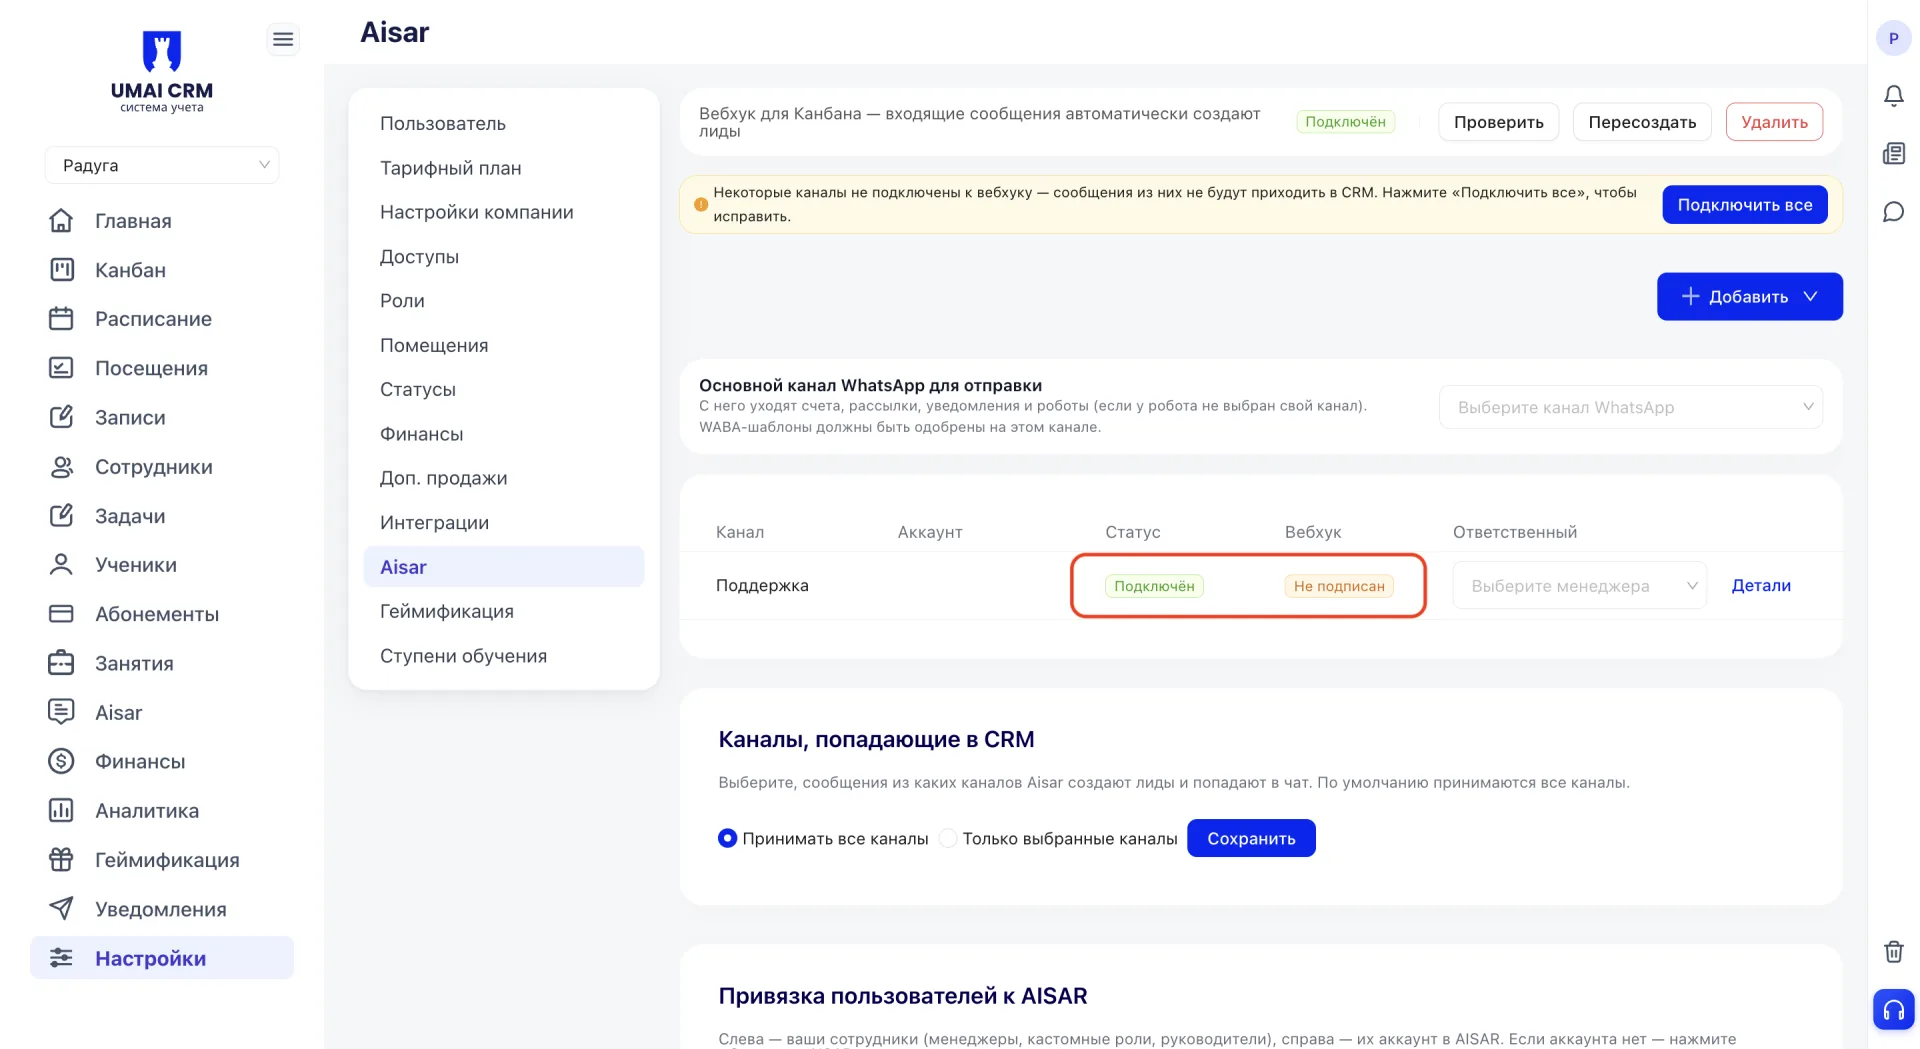
In the same table, in the "Responsible" column, you can assign a manager for each channel who is responsible for handling incoming messages from that channel. The Responsible is selected from a dropdown of Employees who are already linked to AISAR (linking is described in block 9).
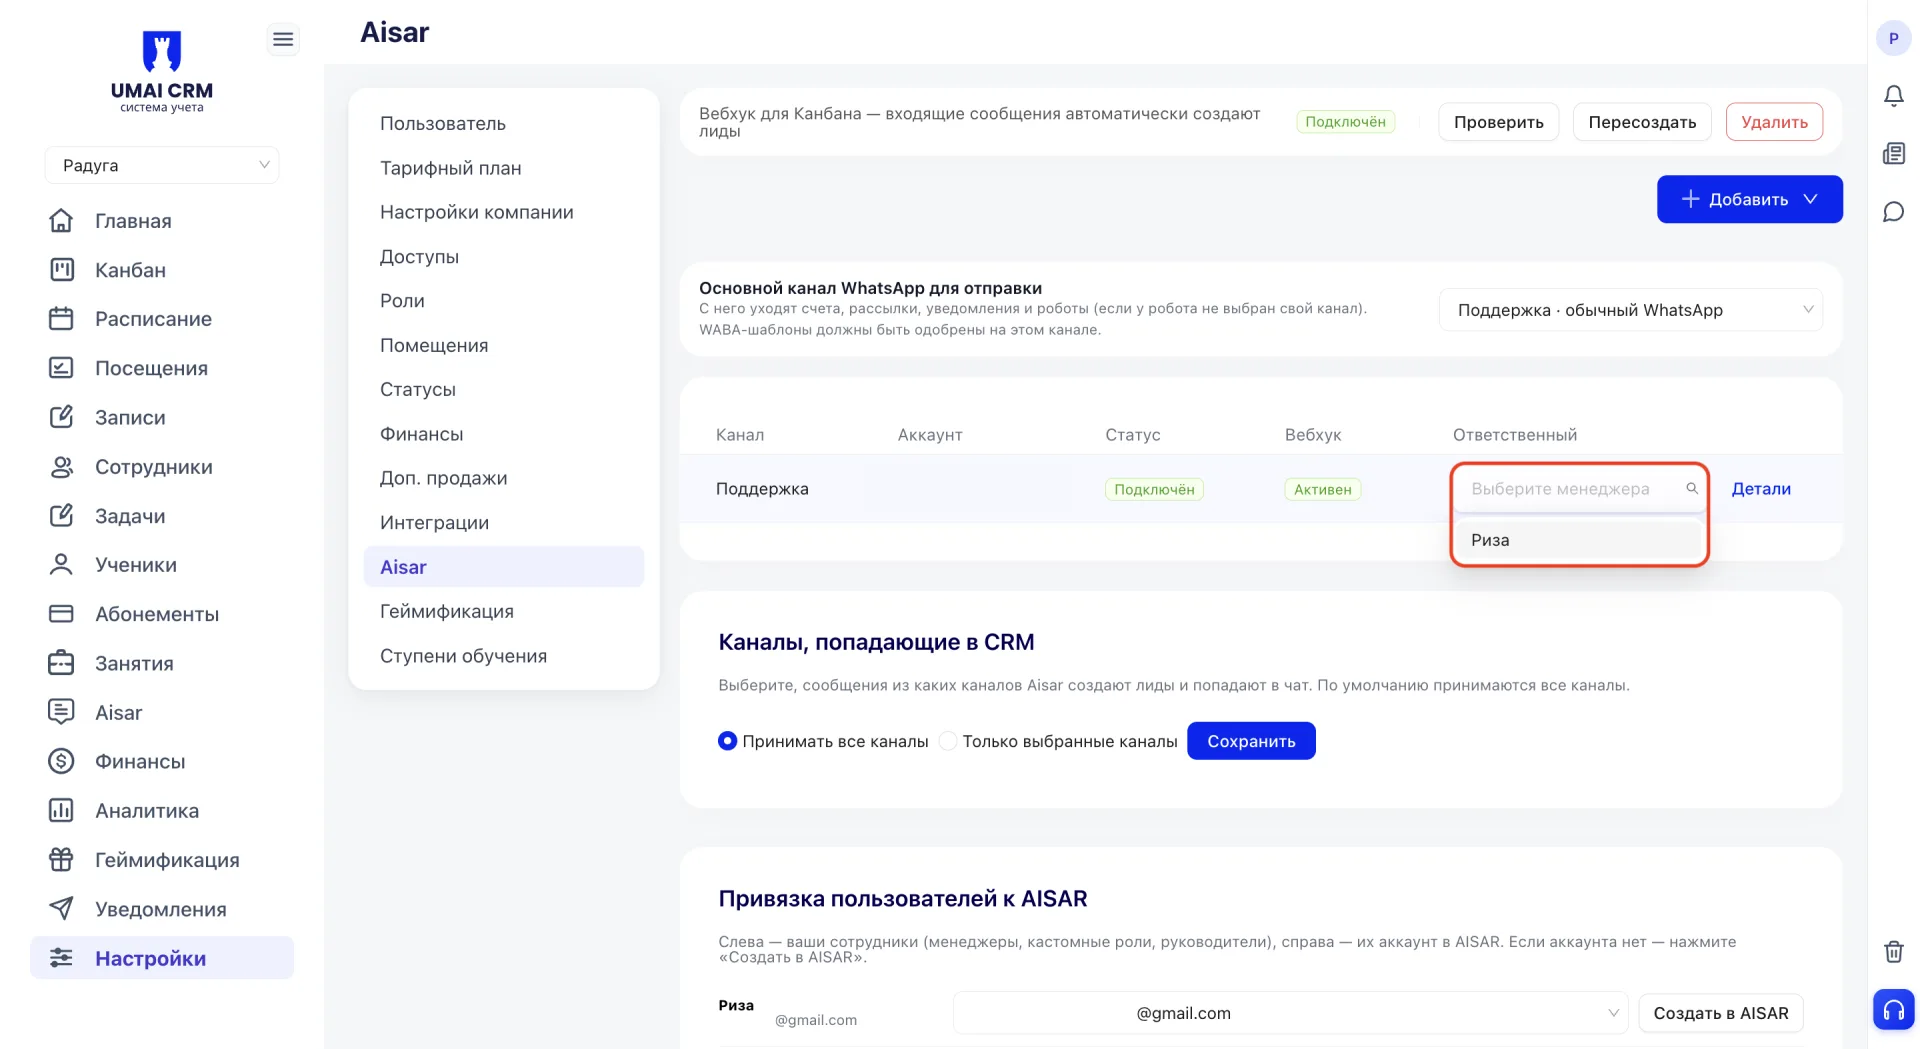
The "Details" link opens additional information about the channel.
8. Channels that go into the CRM
In this block select the Aisar channels whose messages create Leads and enter the system’s shared chat.
Two modes are available:
- Accept all channels — messages are accepted from all connected channels. This mode is enabled by default.
- Only selected channels — messages are accepted only from channels that are selected separately.
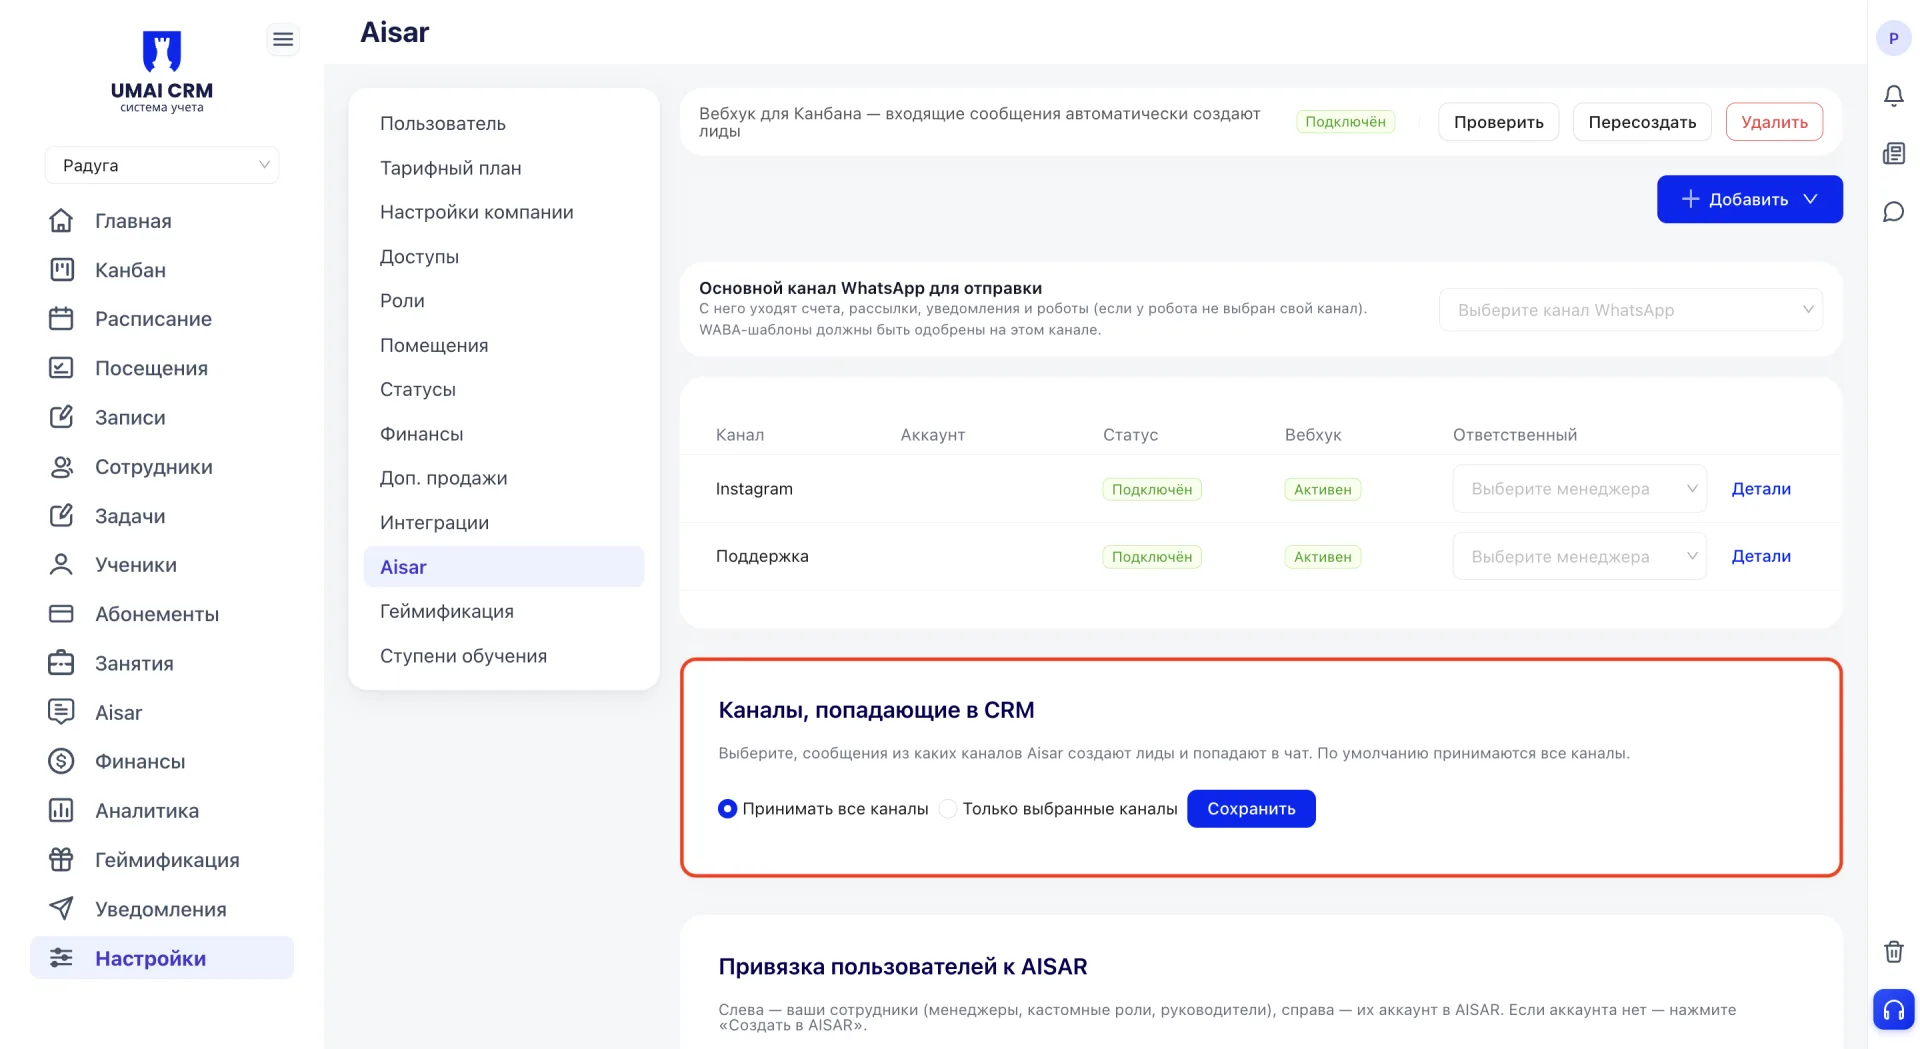
After choosing the required mode click "Save".
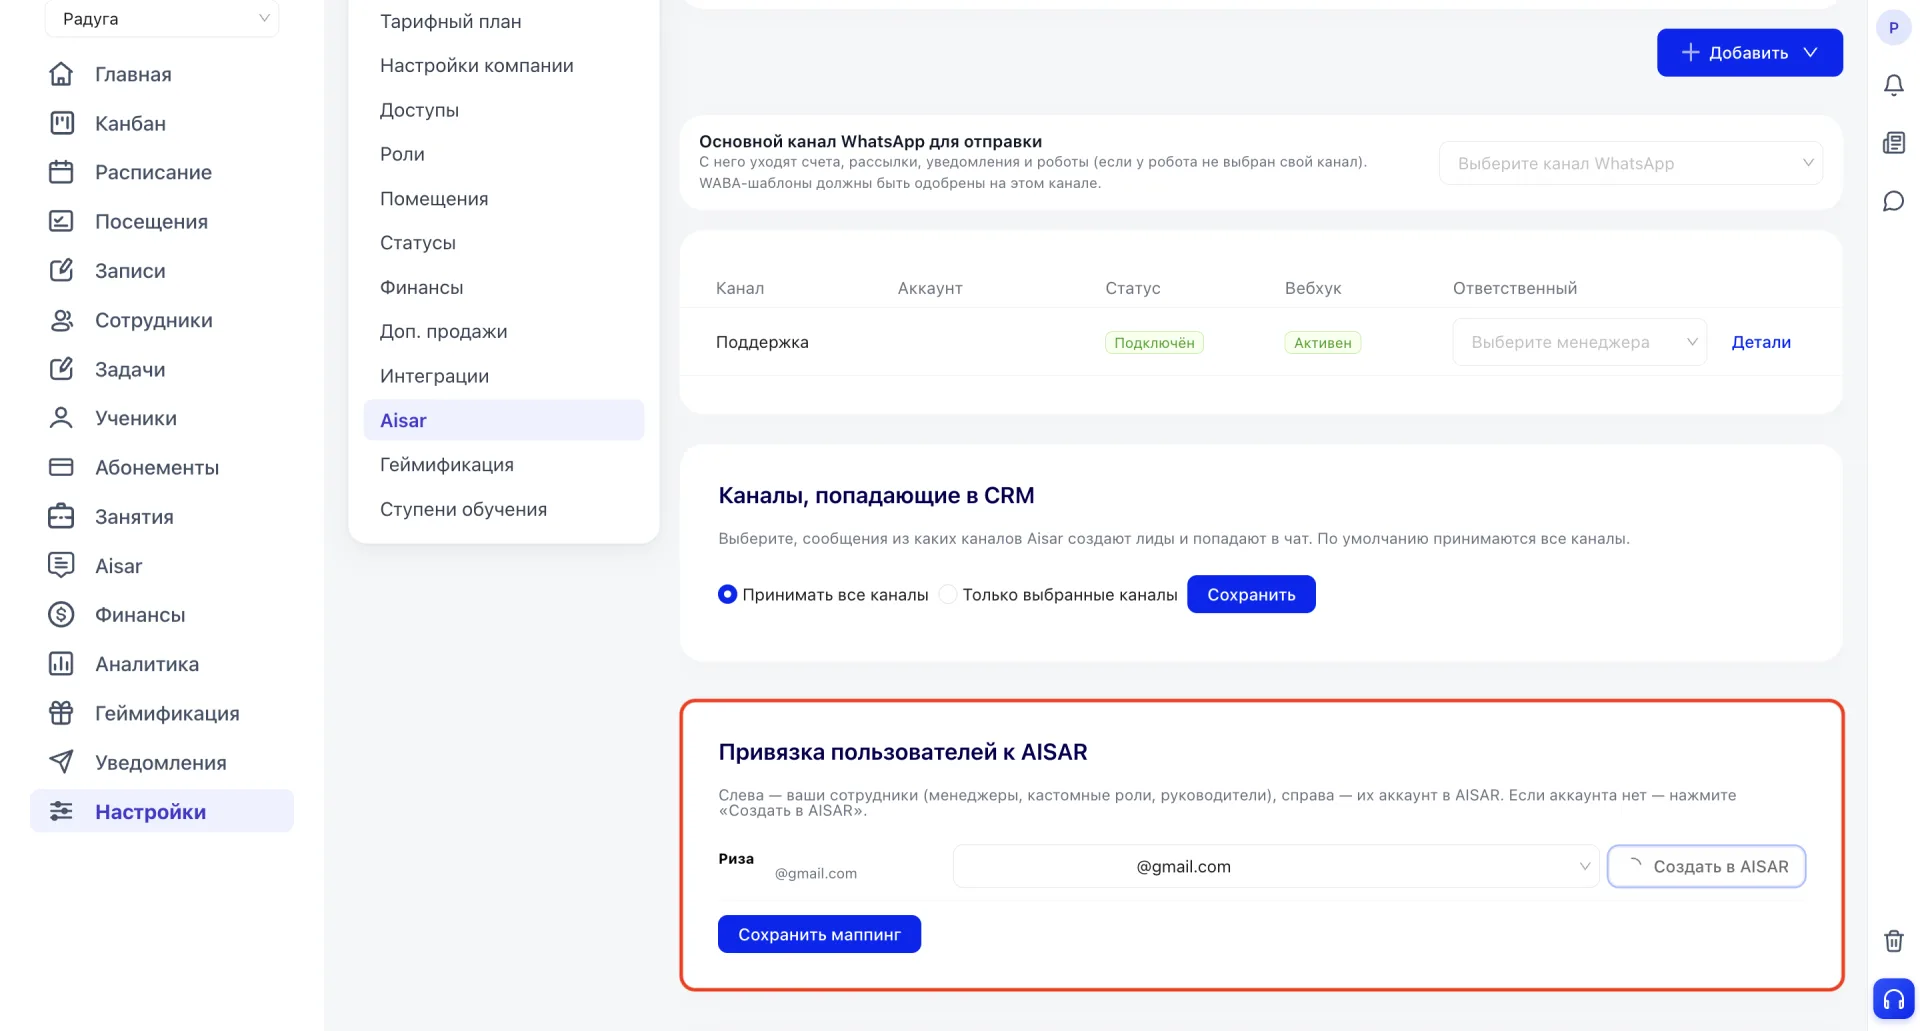
9. Linking users to AISAR
- on the left the system Employees with roles manager, custom role or leader;
- on the right their corresponding accounts.
If an Employee does not yet have an account, you can create it in this block using the "Create in AISAR" button next to their name.
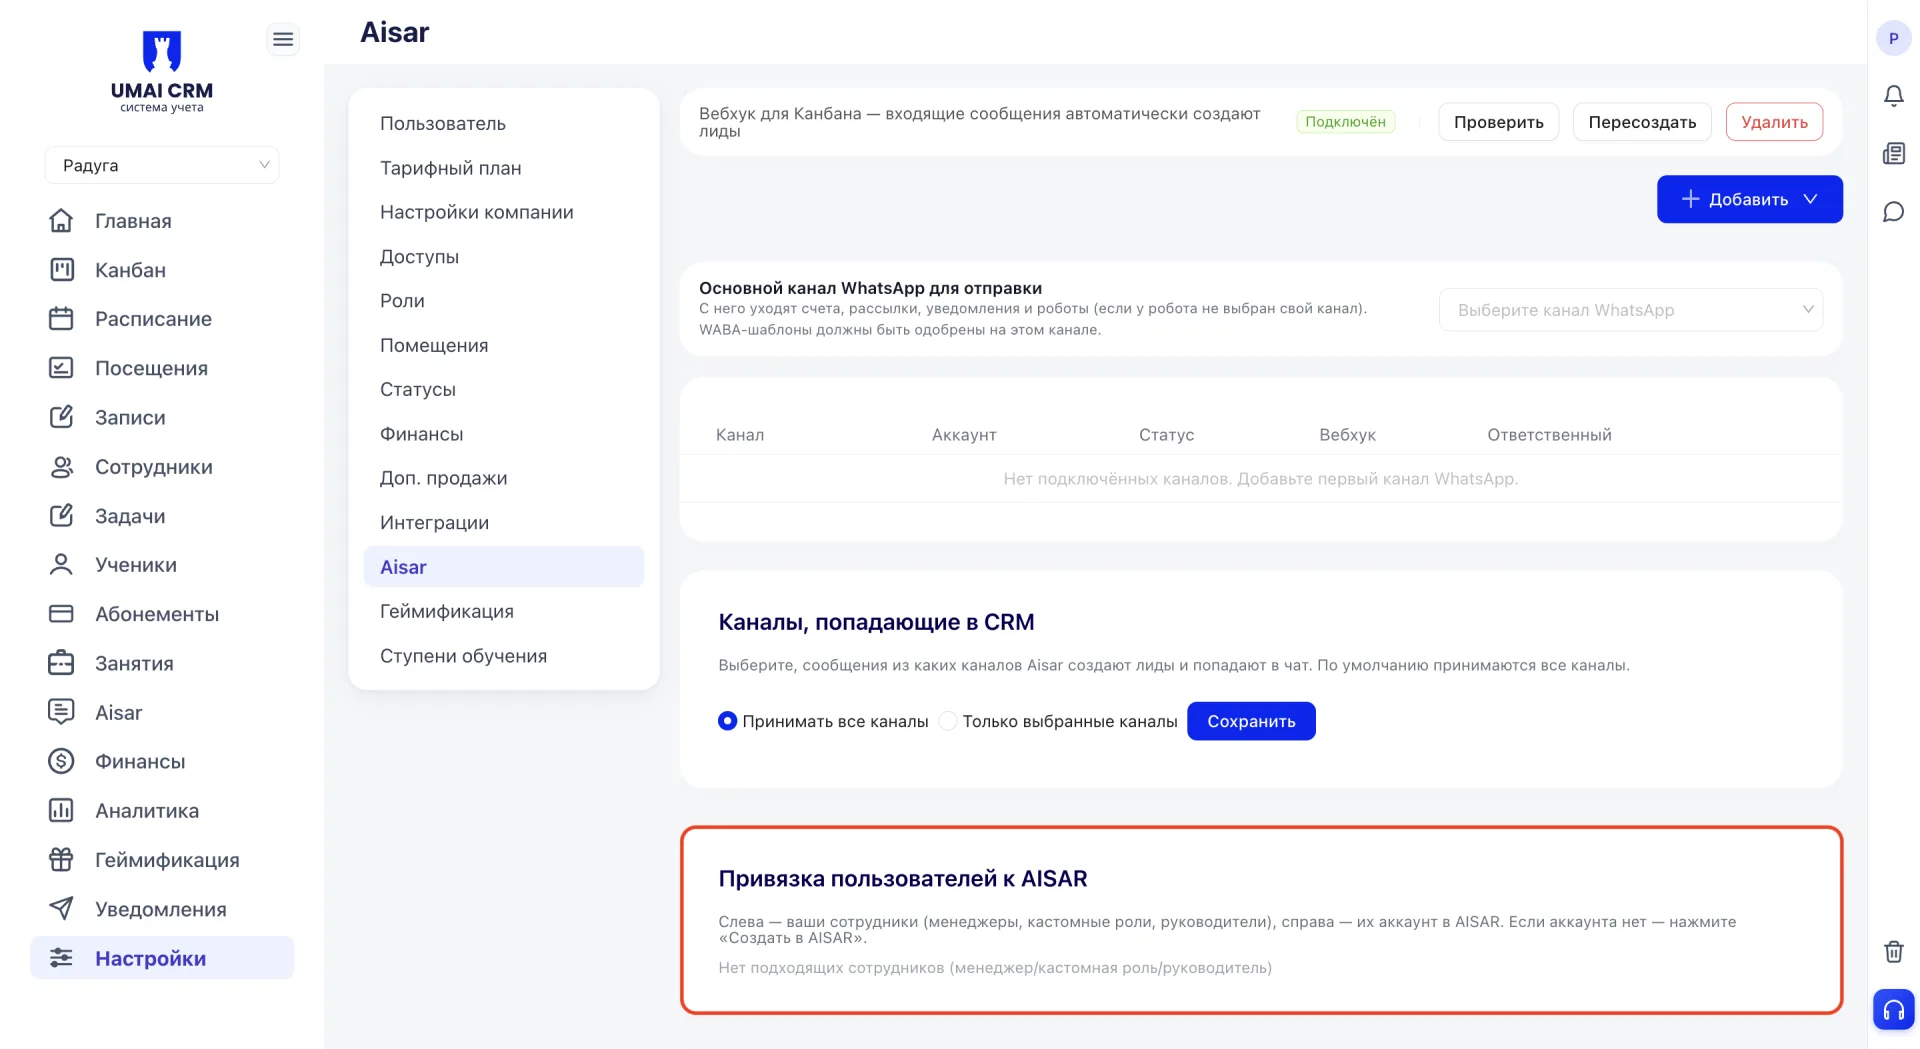
If there are no suitable Employees a message "No suitable employees (manager/custom role/leader)" will be displayed.
Important to note:
- The main WhatsApp channel for sending is used to send invoices, mailings and notifications, and also for bot operations if no other channel is specified for the bot. WABA templates must be approved specifically for this channel.
- While a channel’s webhook is not active, incoming messages from that channel do not automatically create Leads, even if the channel itself is connected and its connection status is "Connected".
- For correct operation it is recommended to link a separate AISAR account to each Employee rather than using one shared account.
- A professional mode Instagram account is required to connect to Aisar.