The "By status" view is used to see Classes according to their current state. This format helps quickly assess which Classes are scheduled, which have already taken place, and also to see canceled or missed lessons.
Classes are distributed into separate columns depending on their status, which makes working with the Schedule more visual and convenient for monitoring the educational process.
Main blocks:
Access to the section
Main interface elements
Creating Classes
Viewing and editing a Class
1. Access to the section
The section is opened via the side menu "Schedule".
After navigating, you need to select the display mode "By status" on the right side of the top panel.
In this mode Classes are shown for the selected date and are distributed by status.
2. Main interface elements
Top control panel
At the top of the page are the filtering and schedule management elements.
Here you can:
select a specific Teacher;
filter Classes by rooms;
specify the Class type;
select the Class format;
enable display of archived Classes;
download the schedule as a PDF;
click the "+ Add" button to create a new Class.
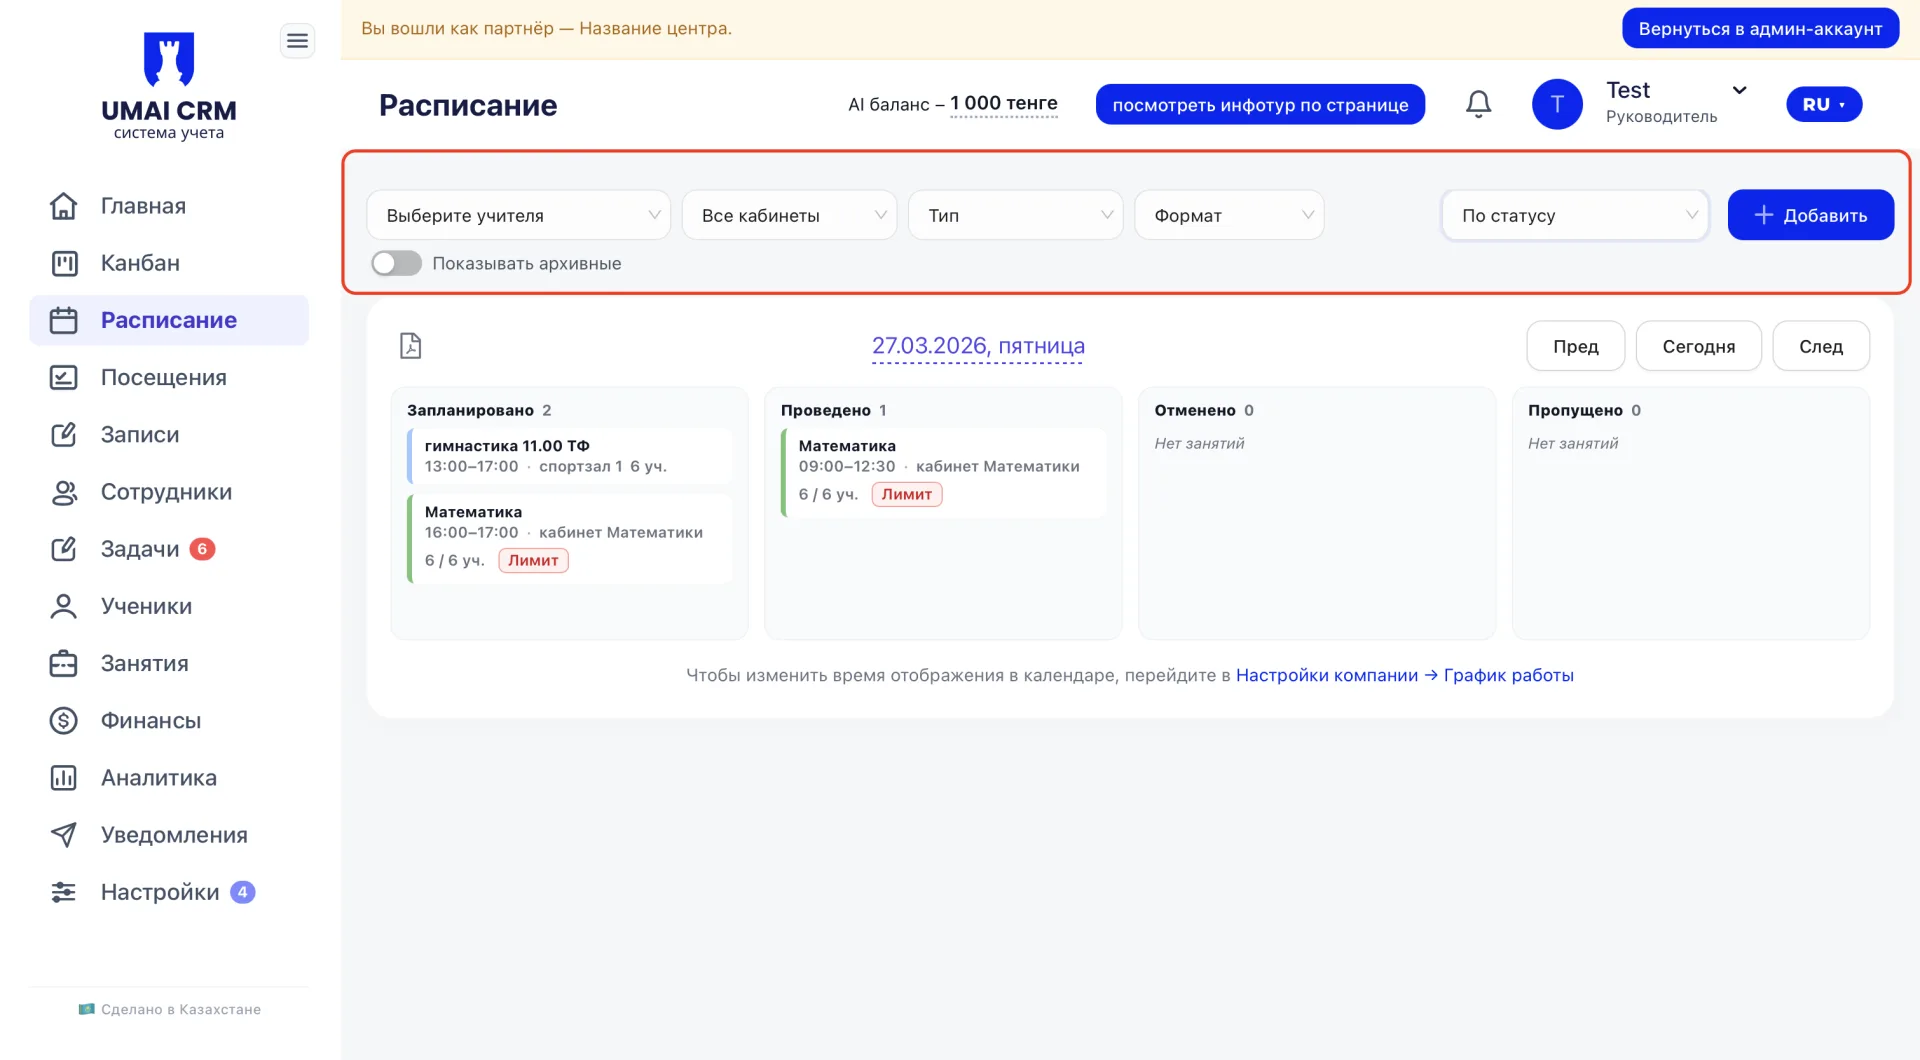
These tools help quickly configure the schedule display and work only with the needed data.
Period navigation
The selected date is shown in the central part of the page.
On the right are navigation buttons:
"Prev" — go to the previous day
"Today" — return to the current date
"Next" — go to the next day
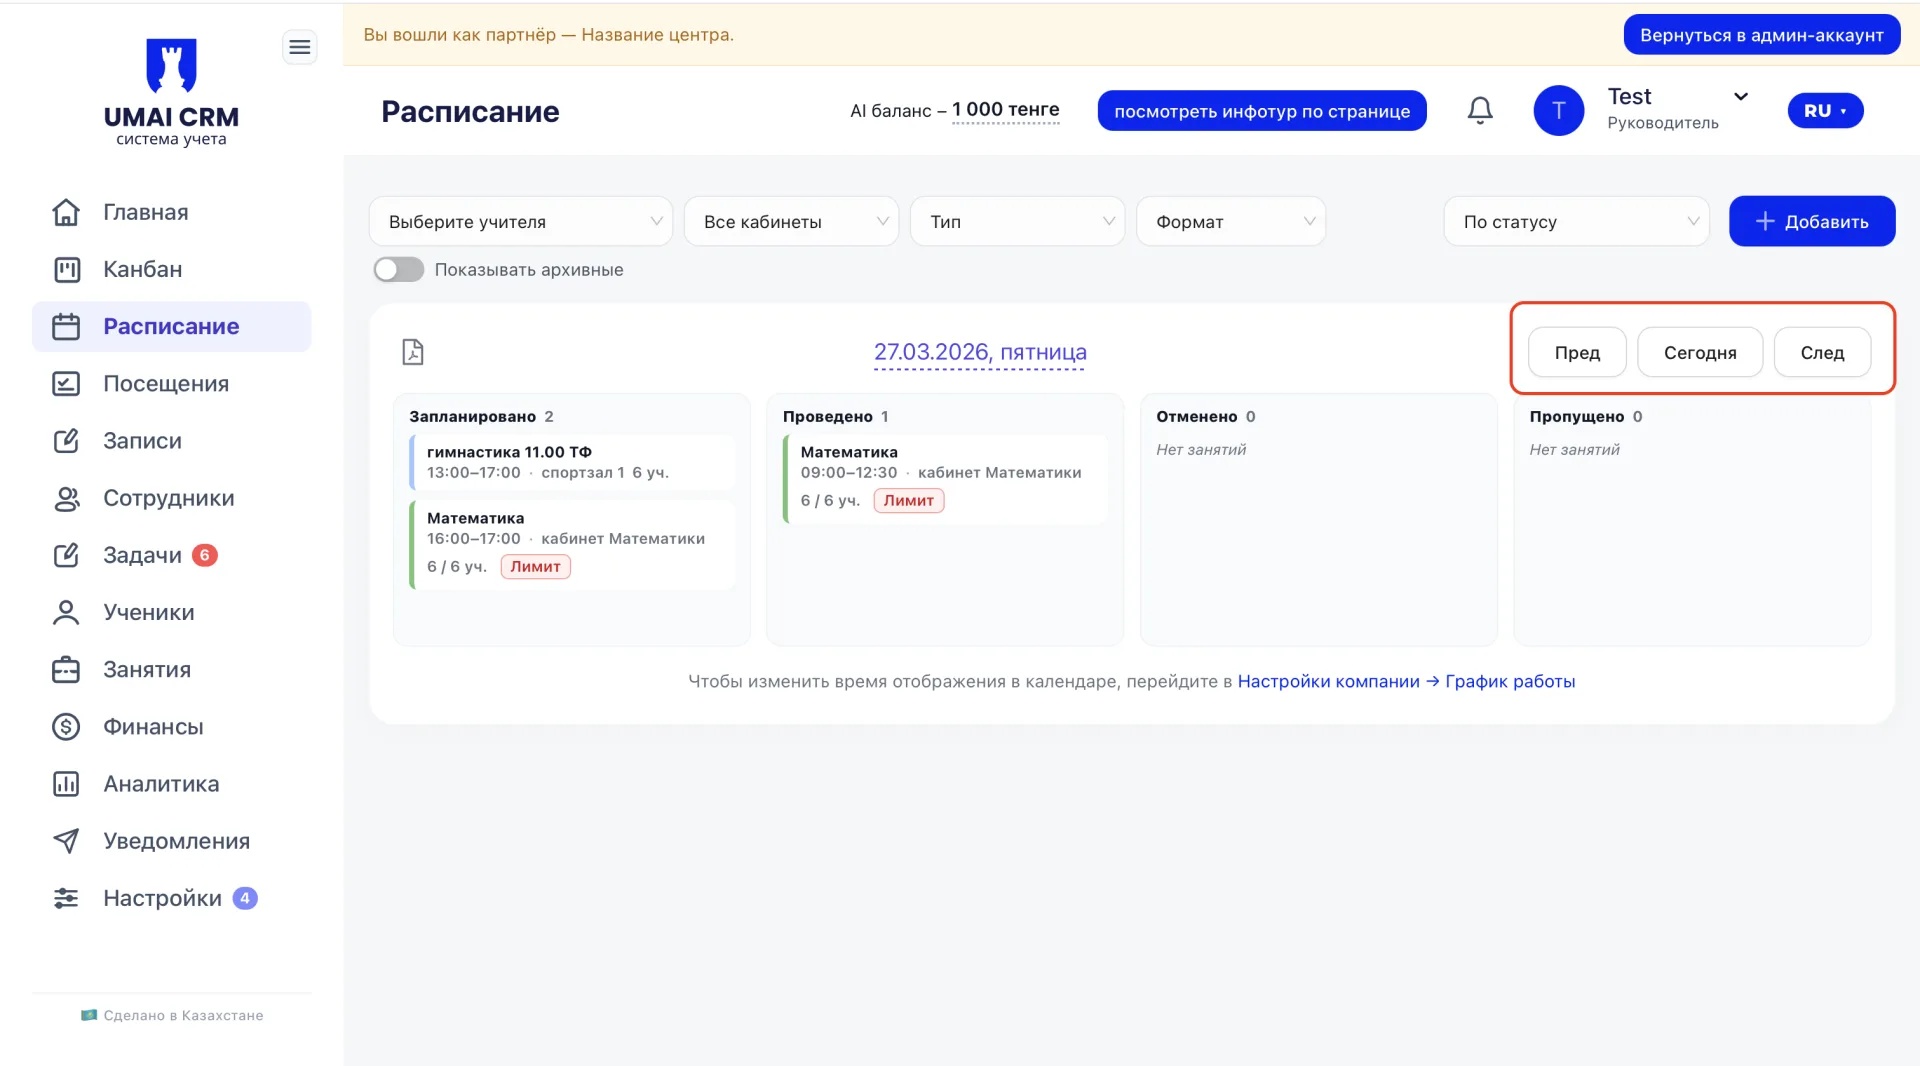
This allows you to quickly switch between days and view Class statuses for different dates.
The main part of the page is divided into several columns, each corresponding to a specific Class status. The system uses the following statuses:
- Planned – Classes that have not yet taken place.
- Completed – finished Classes.
- Canceled – canceled Classes; if there are none, the system shows "No Classes".
- Missed – Classes that did not take place; if there are none, "No Classes".
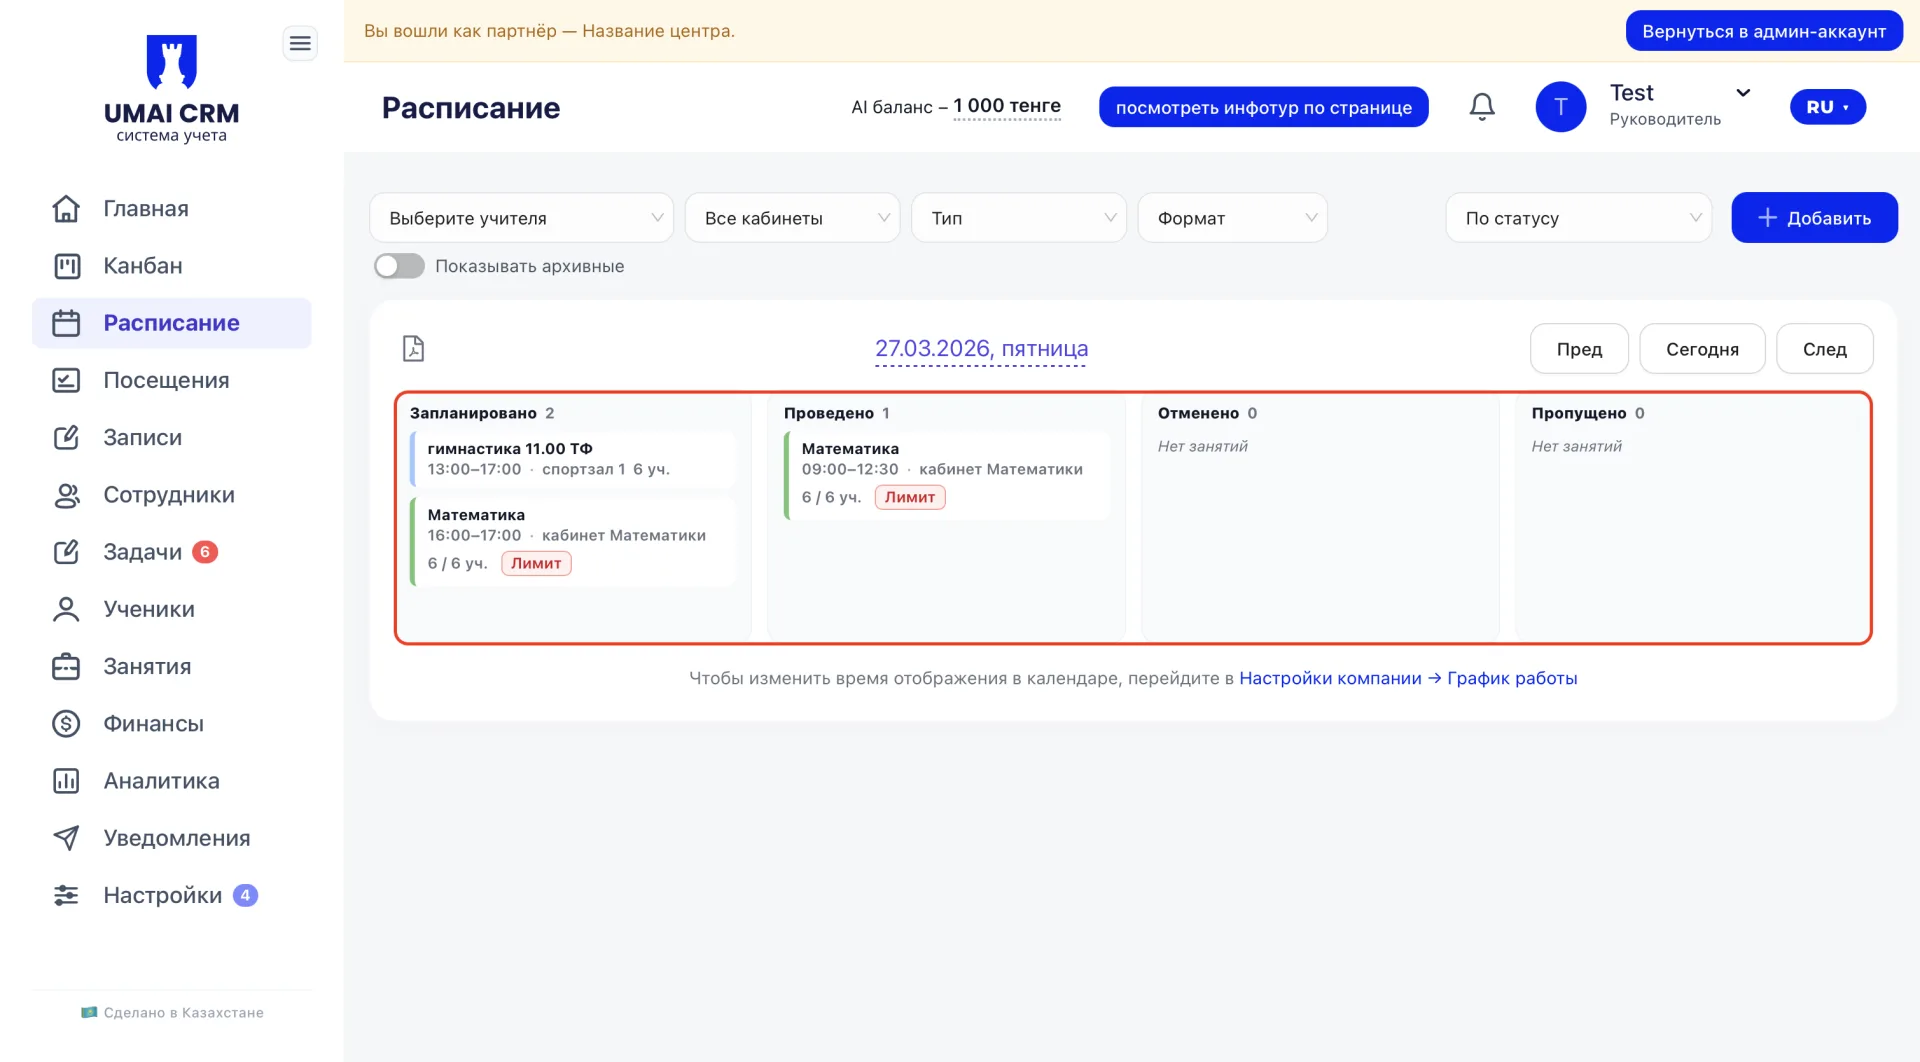
The Class card shows: title, time, room, number of Students, and a colored line for quick identification of the direction.
3. Creating Classes
Adding new Classes is done using the "+ Add" button located on the right side of the top panel. After clicking, a window opens to choose the event type:
- Class;
- Trial lesson.
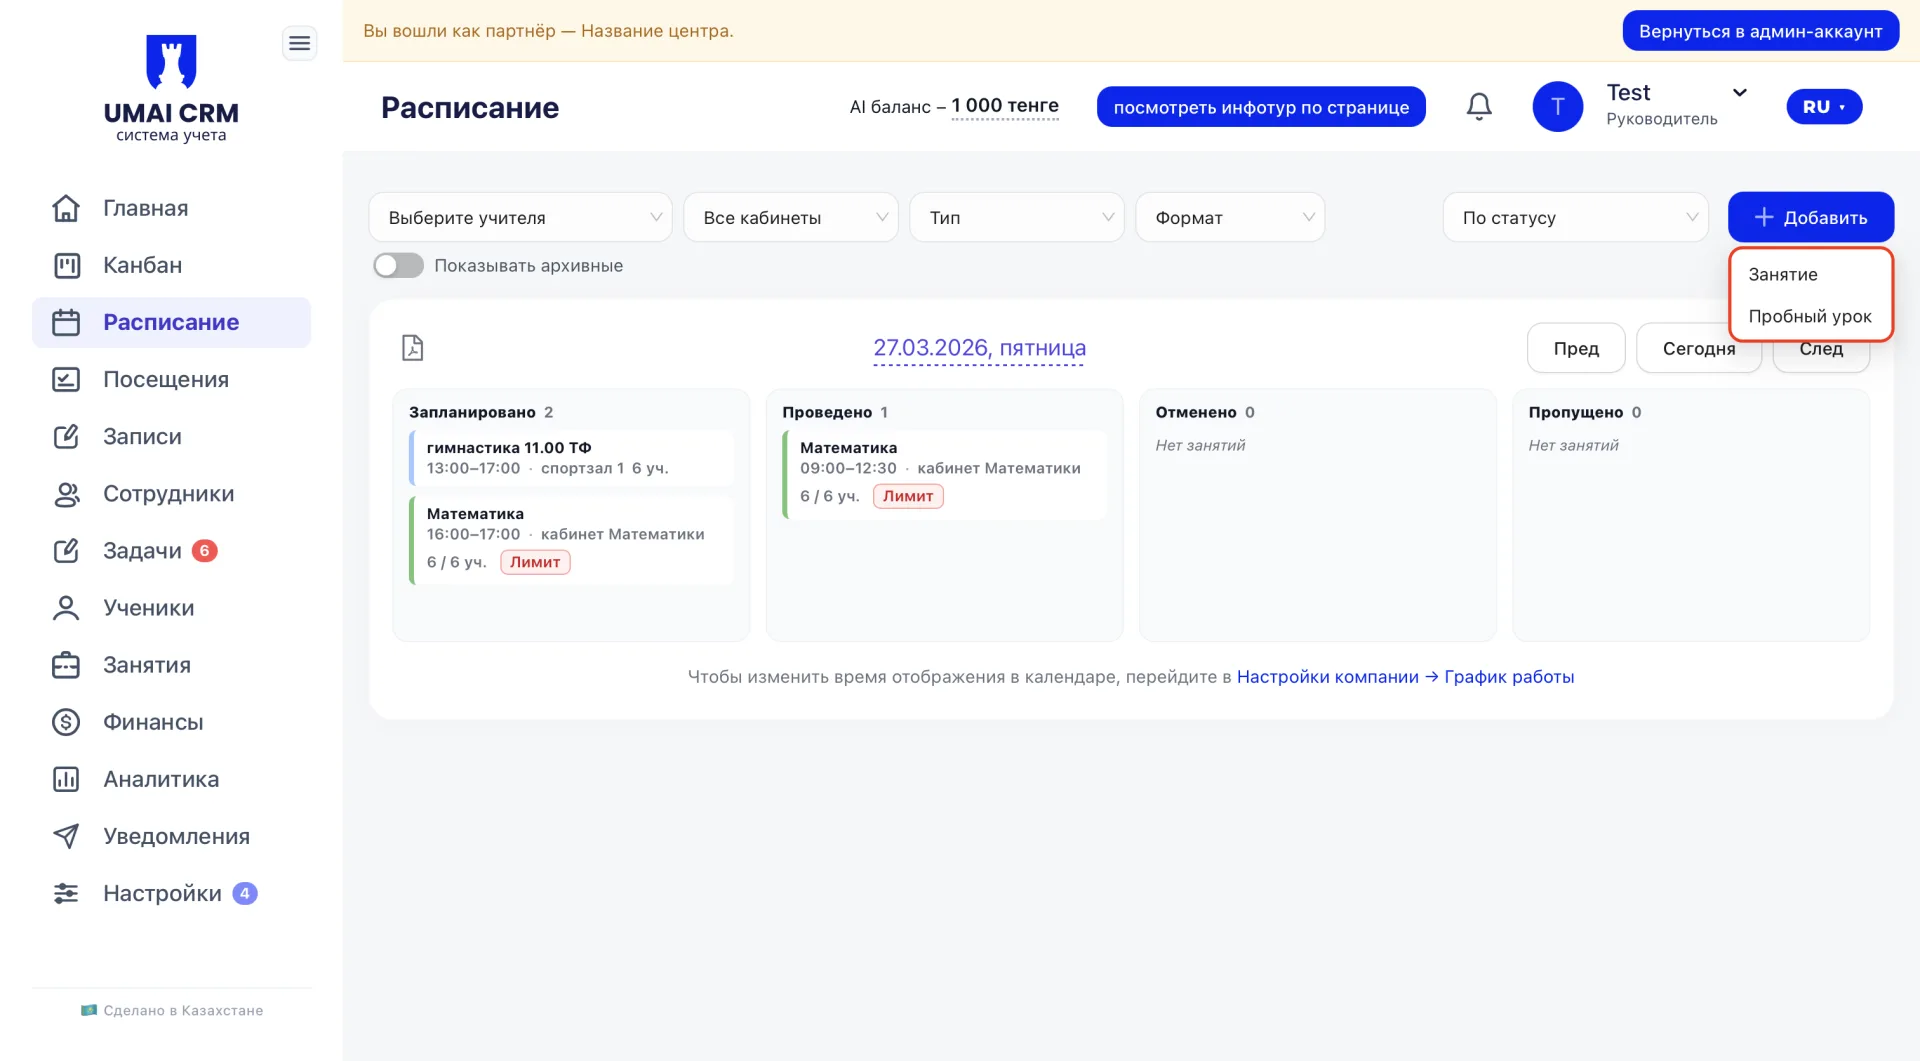
Further filling of parameters is done the same way as in other Schedule modes.
4. Viewing and editing a Class
Class cards are interactive.
Clicking on a card opens a panel with detailed information about the Class.
In the panel you can see:
- Class title;
- room;
- days of the week;
- time of the session;
- list of Teachers;
- number and list of Students.
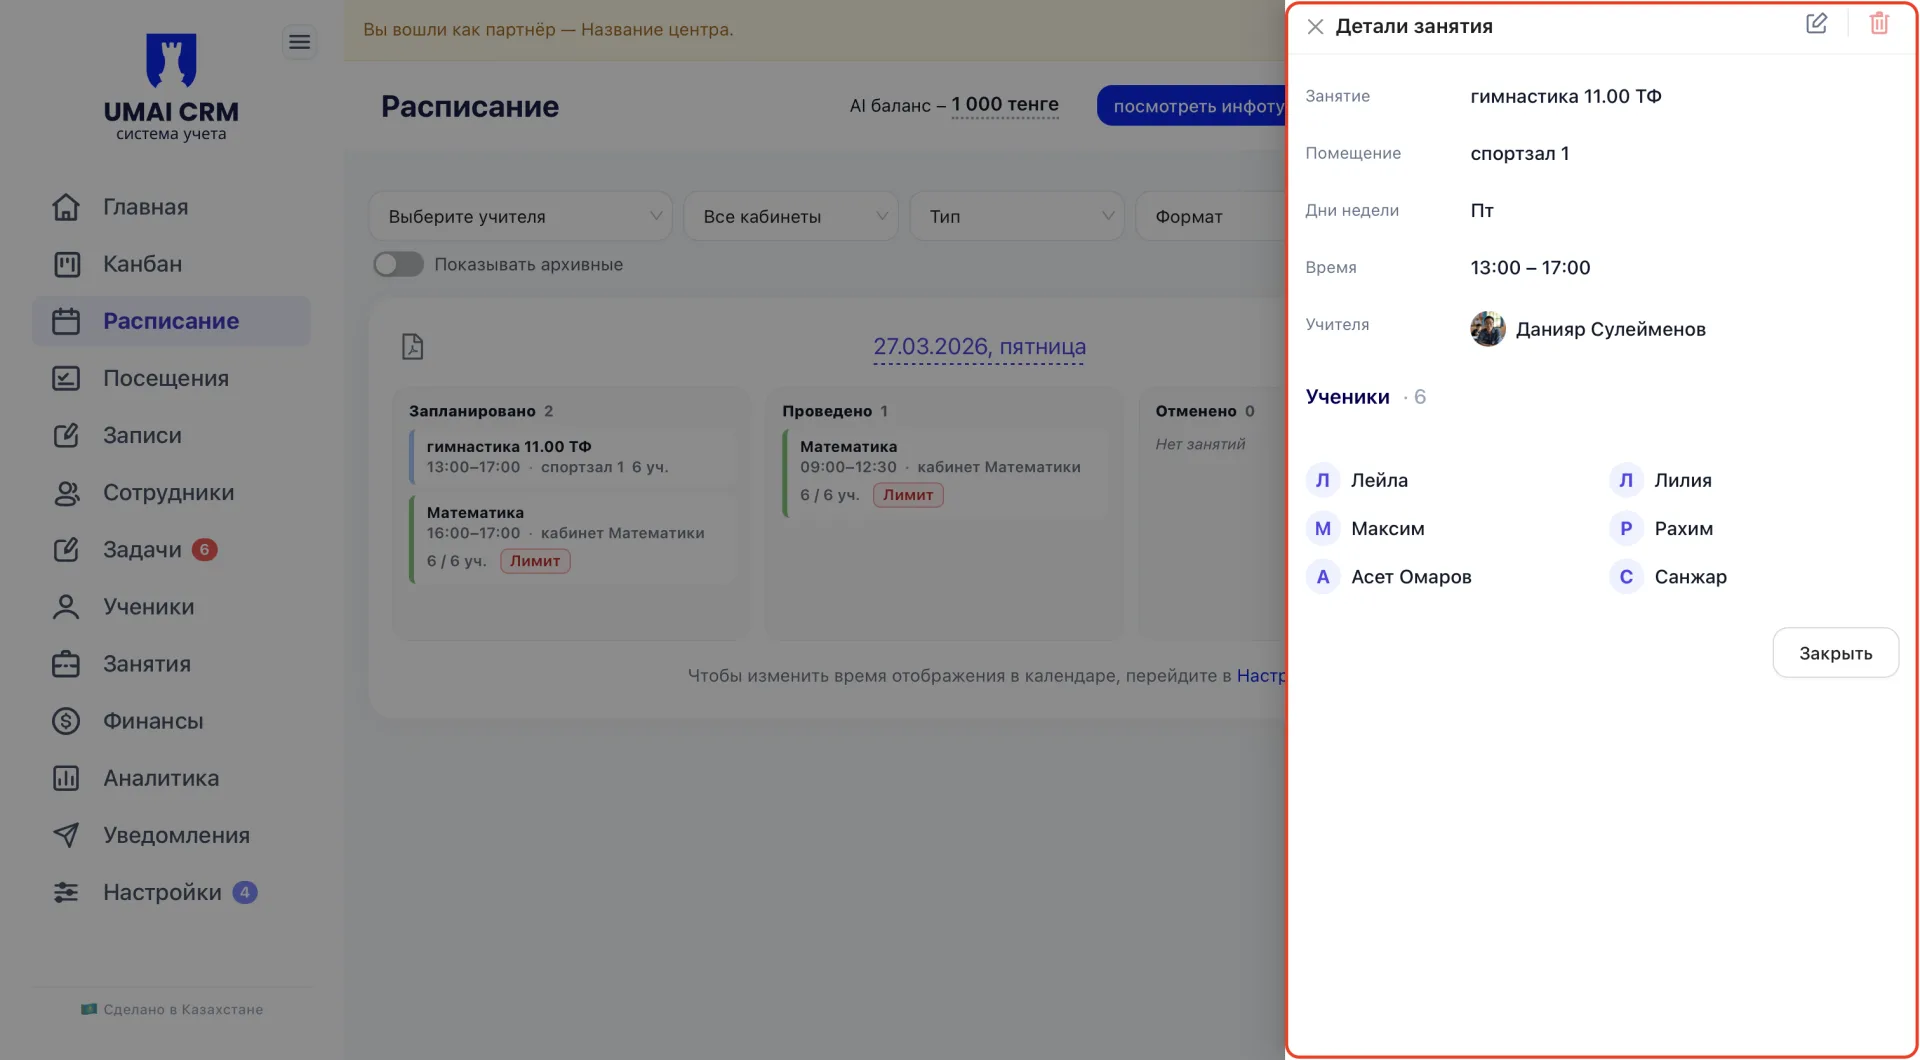
Using the controls at the top of the panel, you can edit Class parameters, change the Students composition, or make other changes.
Important to note
Completed Classes are included in Visits and Finance reports.
Canceled Classes are excluded from attendance calculations.
Missed Classes may indicate unheld or unmarked Classes and require verification.