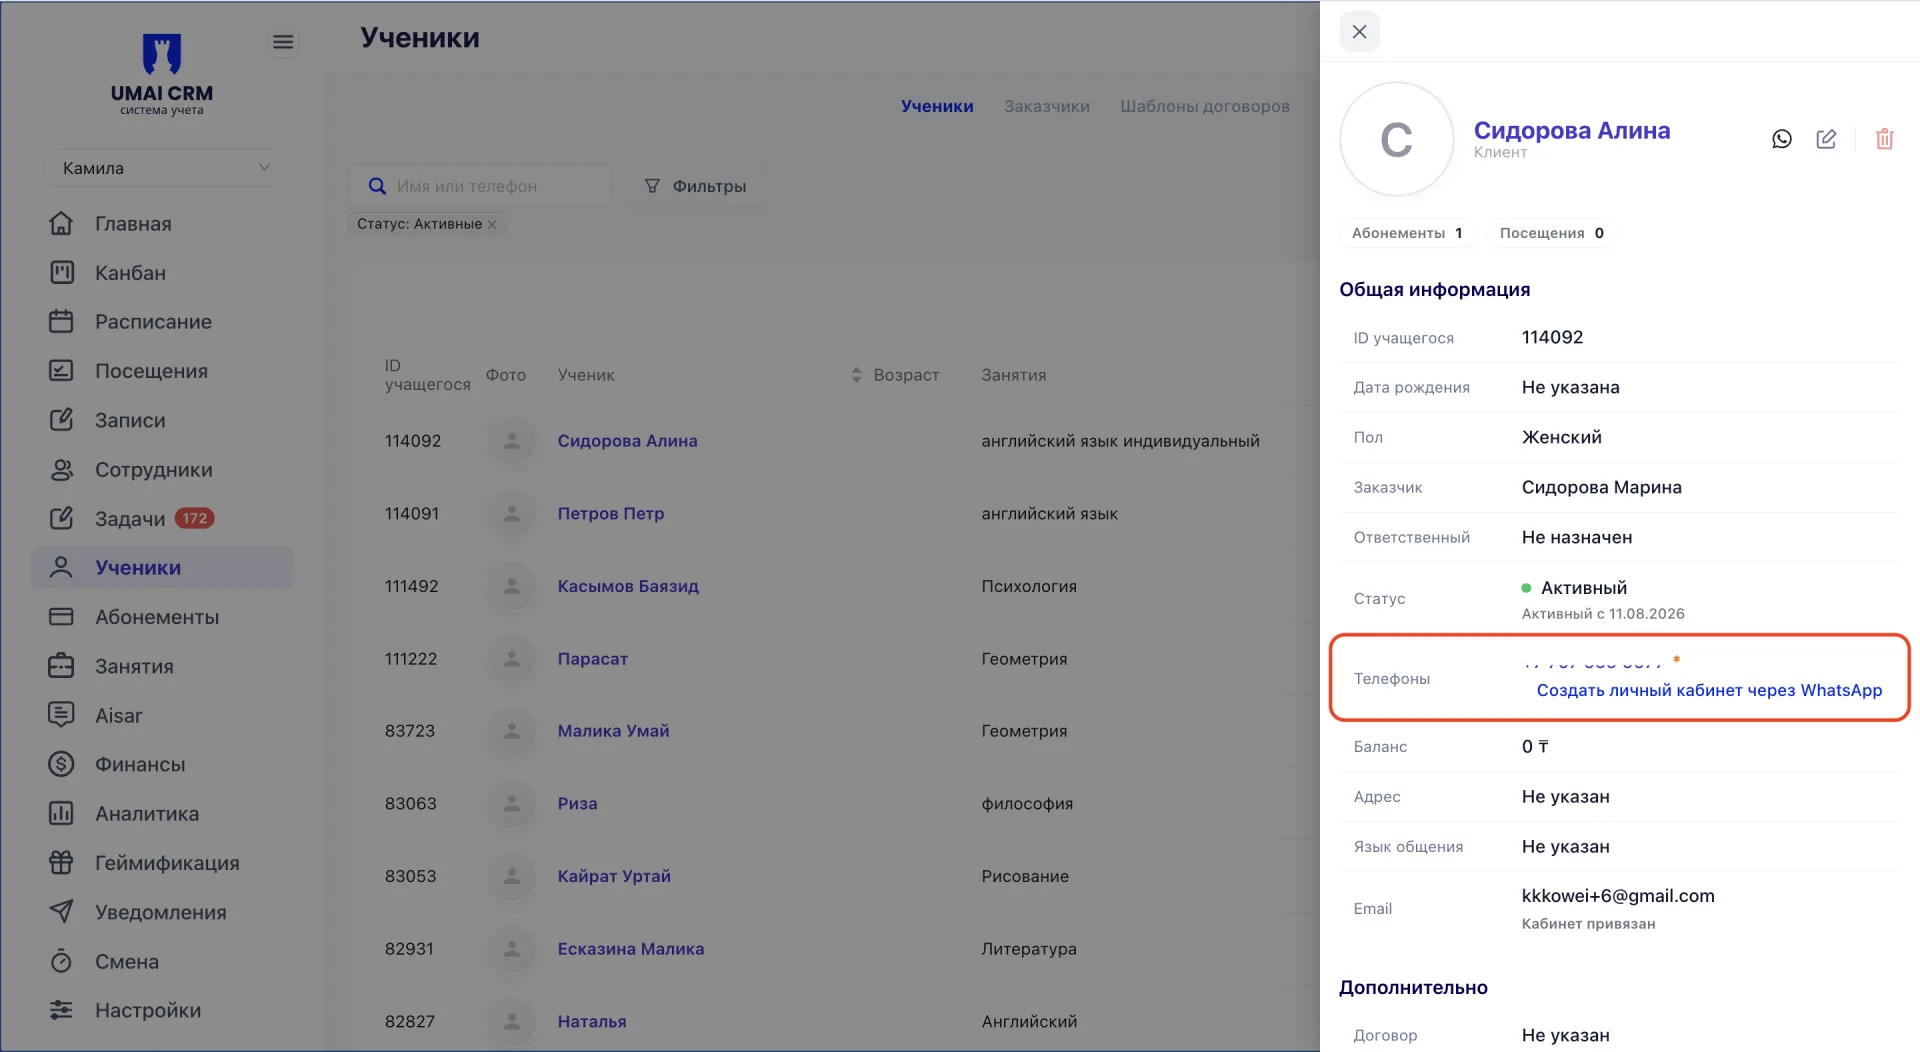
An invitation allows a student to register in the mobile app and get access to their personal account. Before sending, check that the student’s phone number or email in the card is correct.
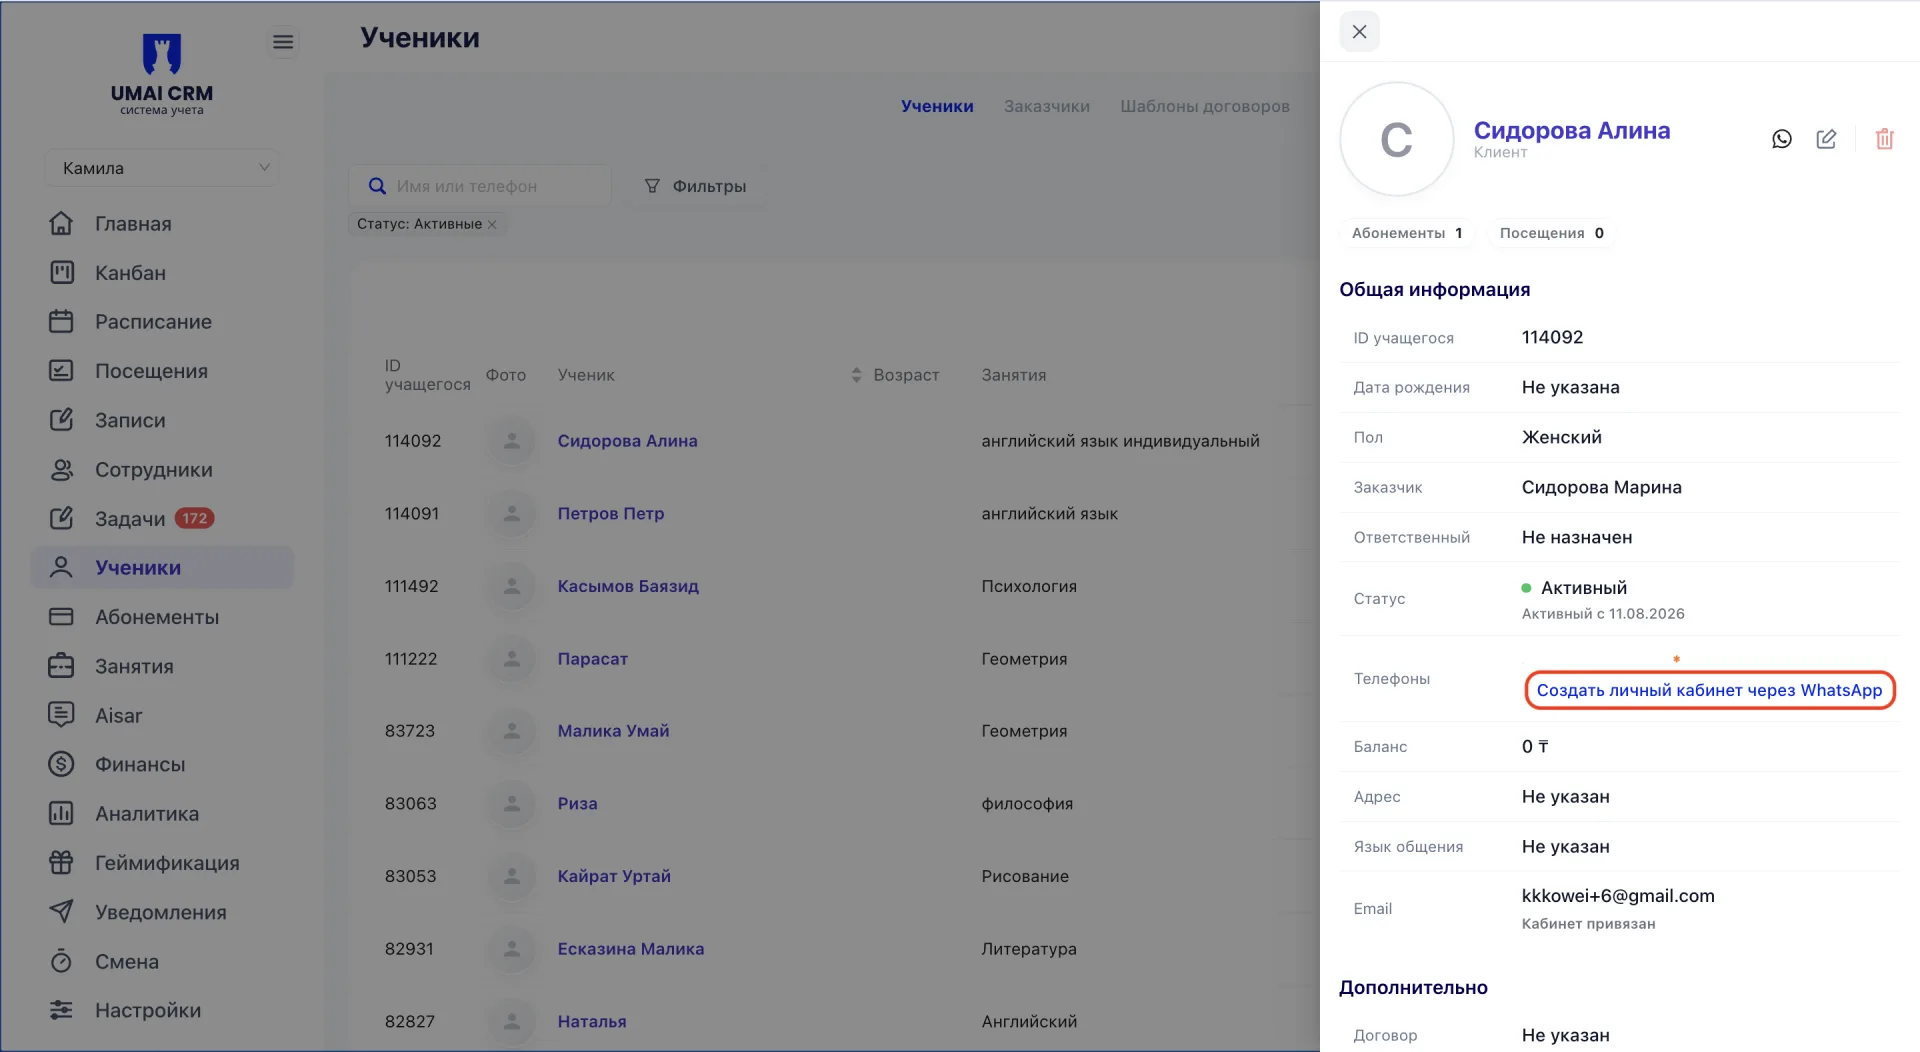
The method of sending depends on whether the WhatsApp integration is connected. If WhatsApp is connected, the invitation is sent to the student’s phone number. If not, the invitation is sent to the email.
Sending an invitation via WhatsApp
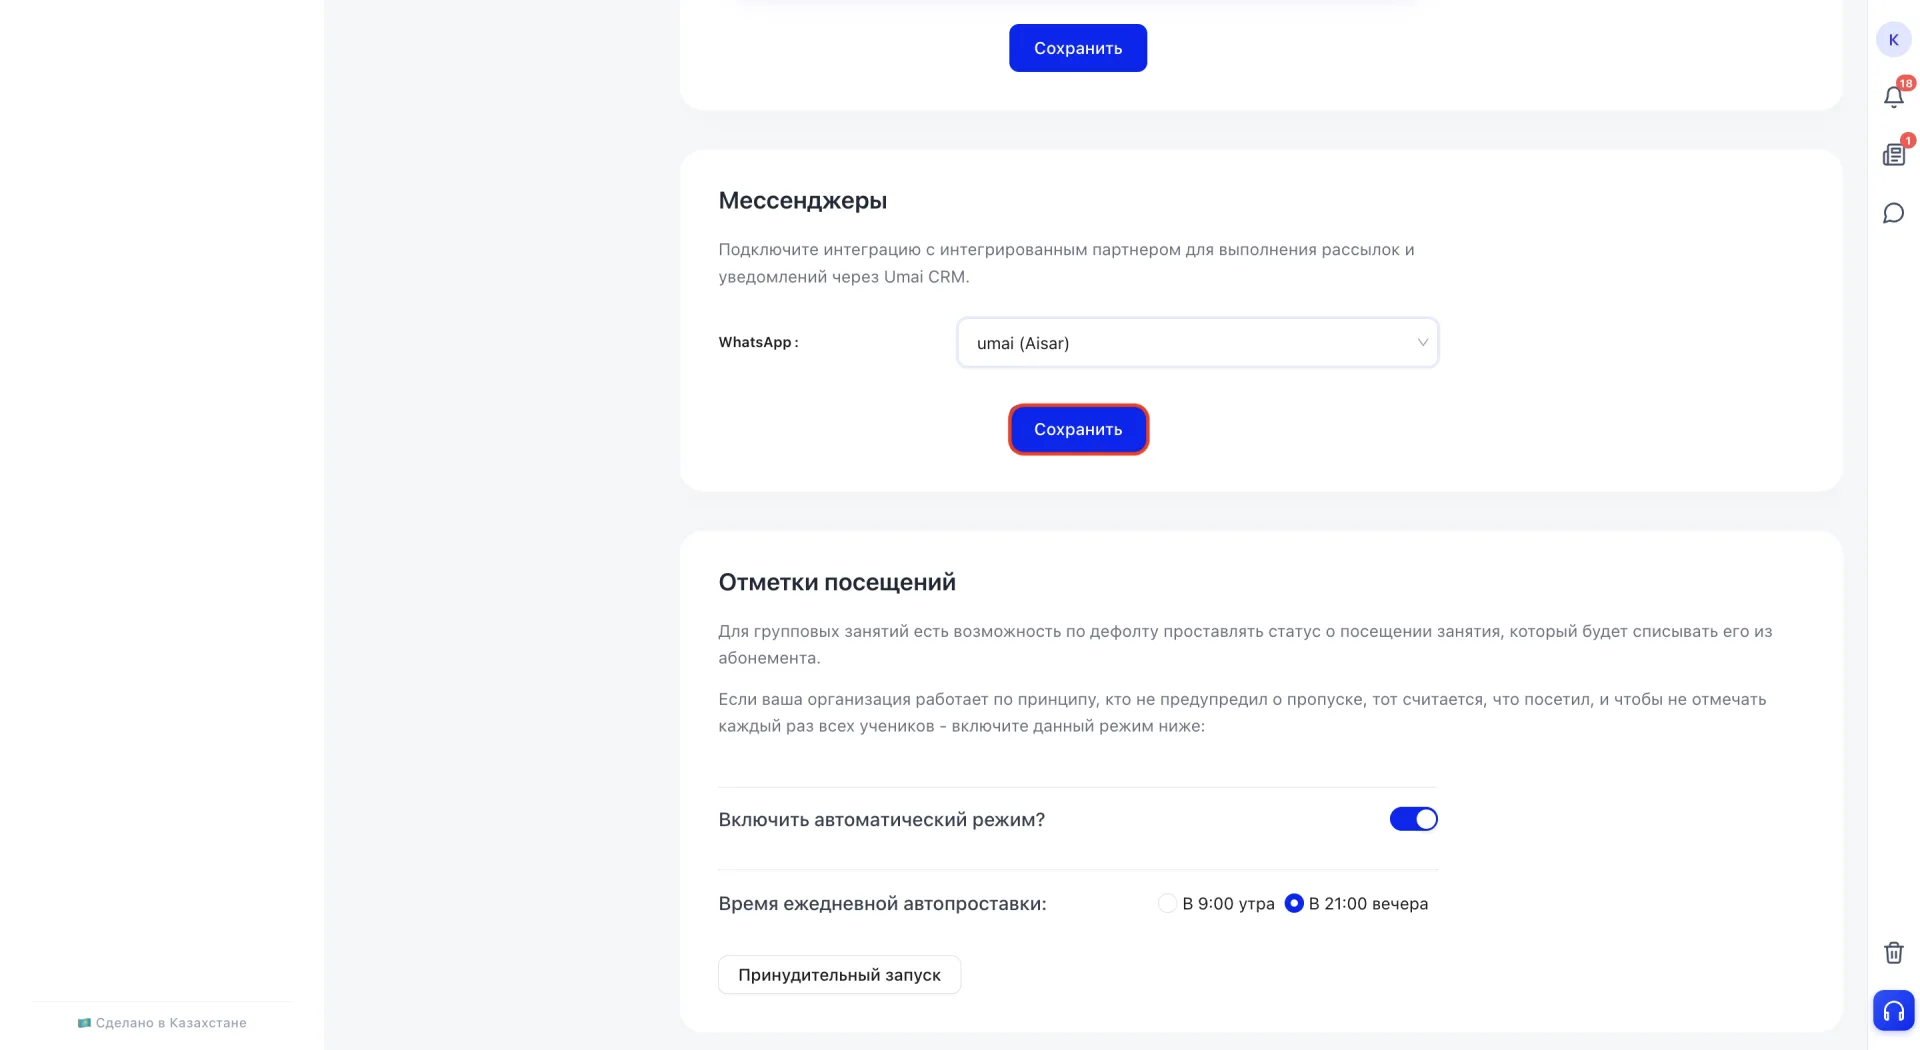
Before sending invitations to students, you need to select the WhatsApp channel once from which messages with confirmation codes will be sent.
How to select the WhatsApp channel
1. Open the section “Settings (Настройки)”.
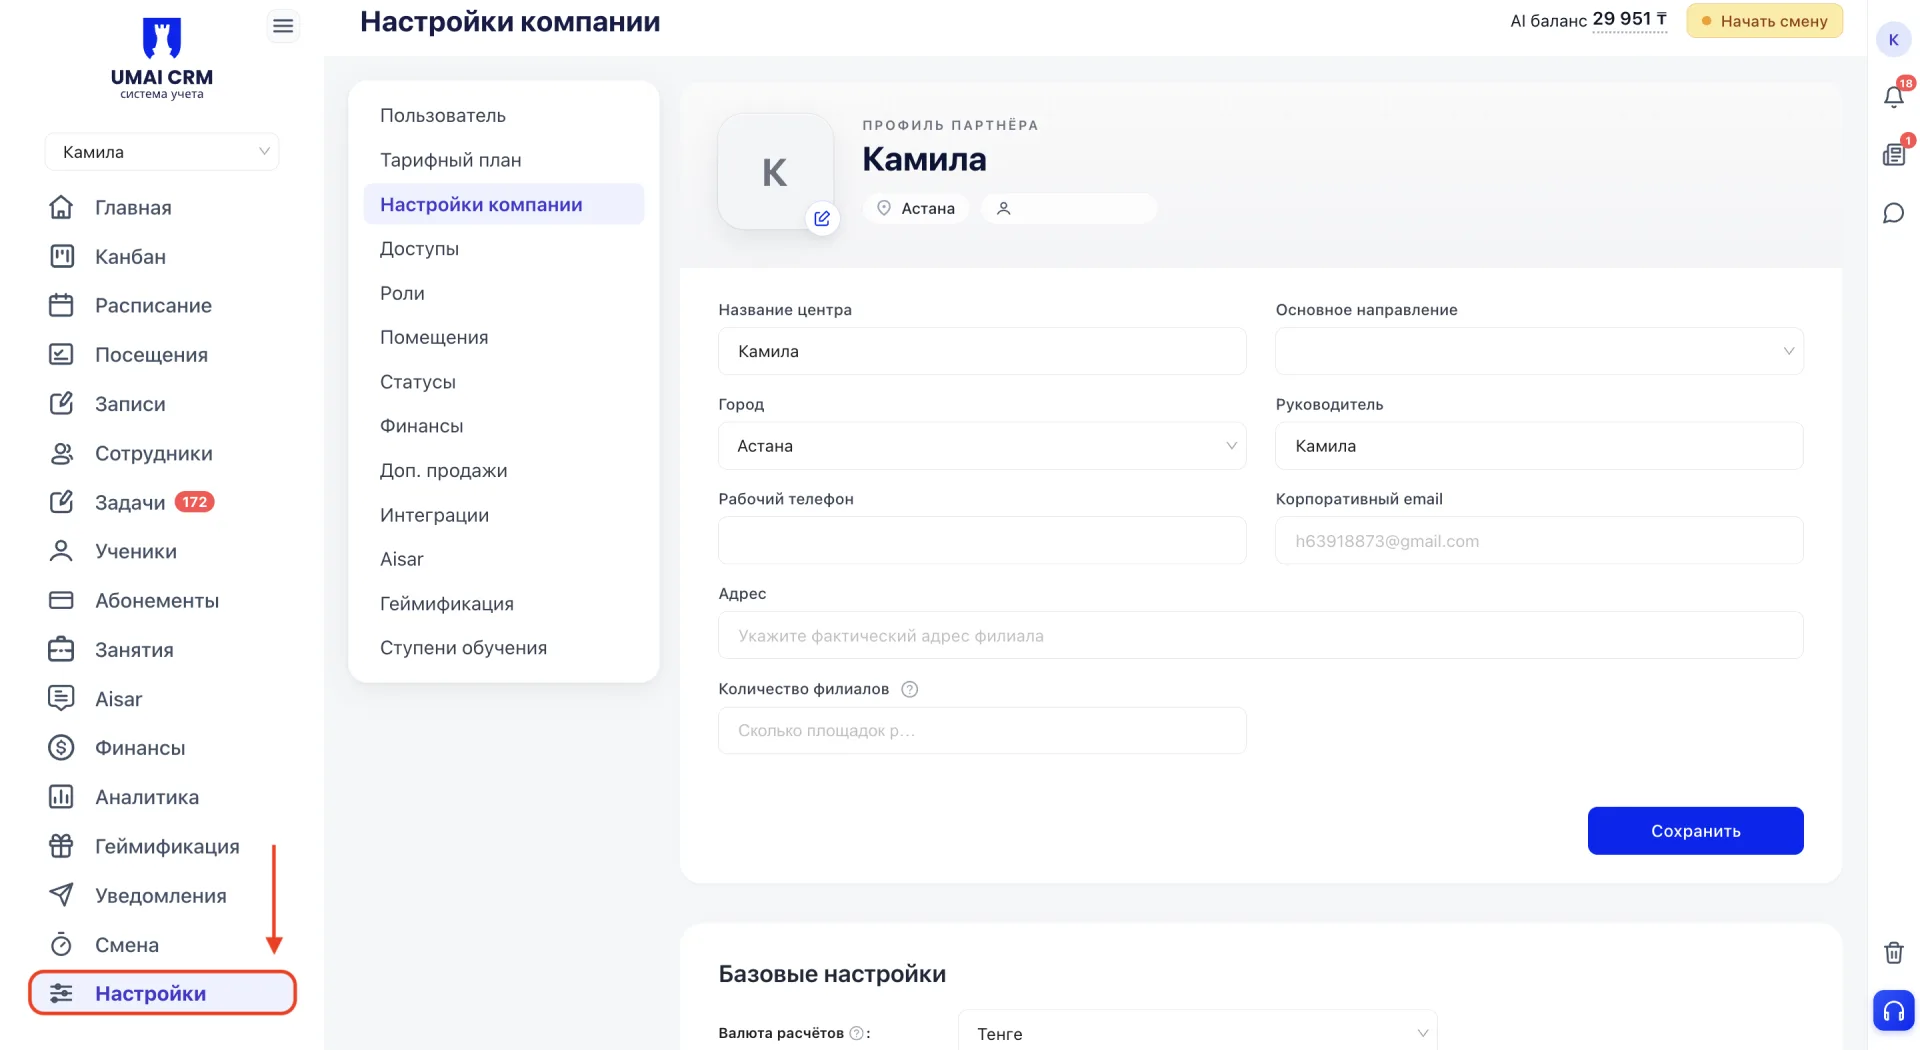
2. Go to the tab “Company settings (Настройки компании)”.
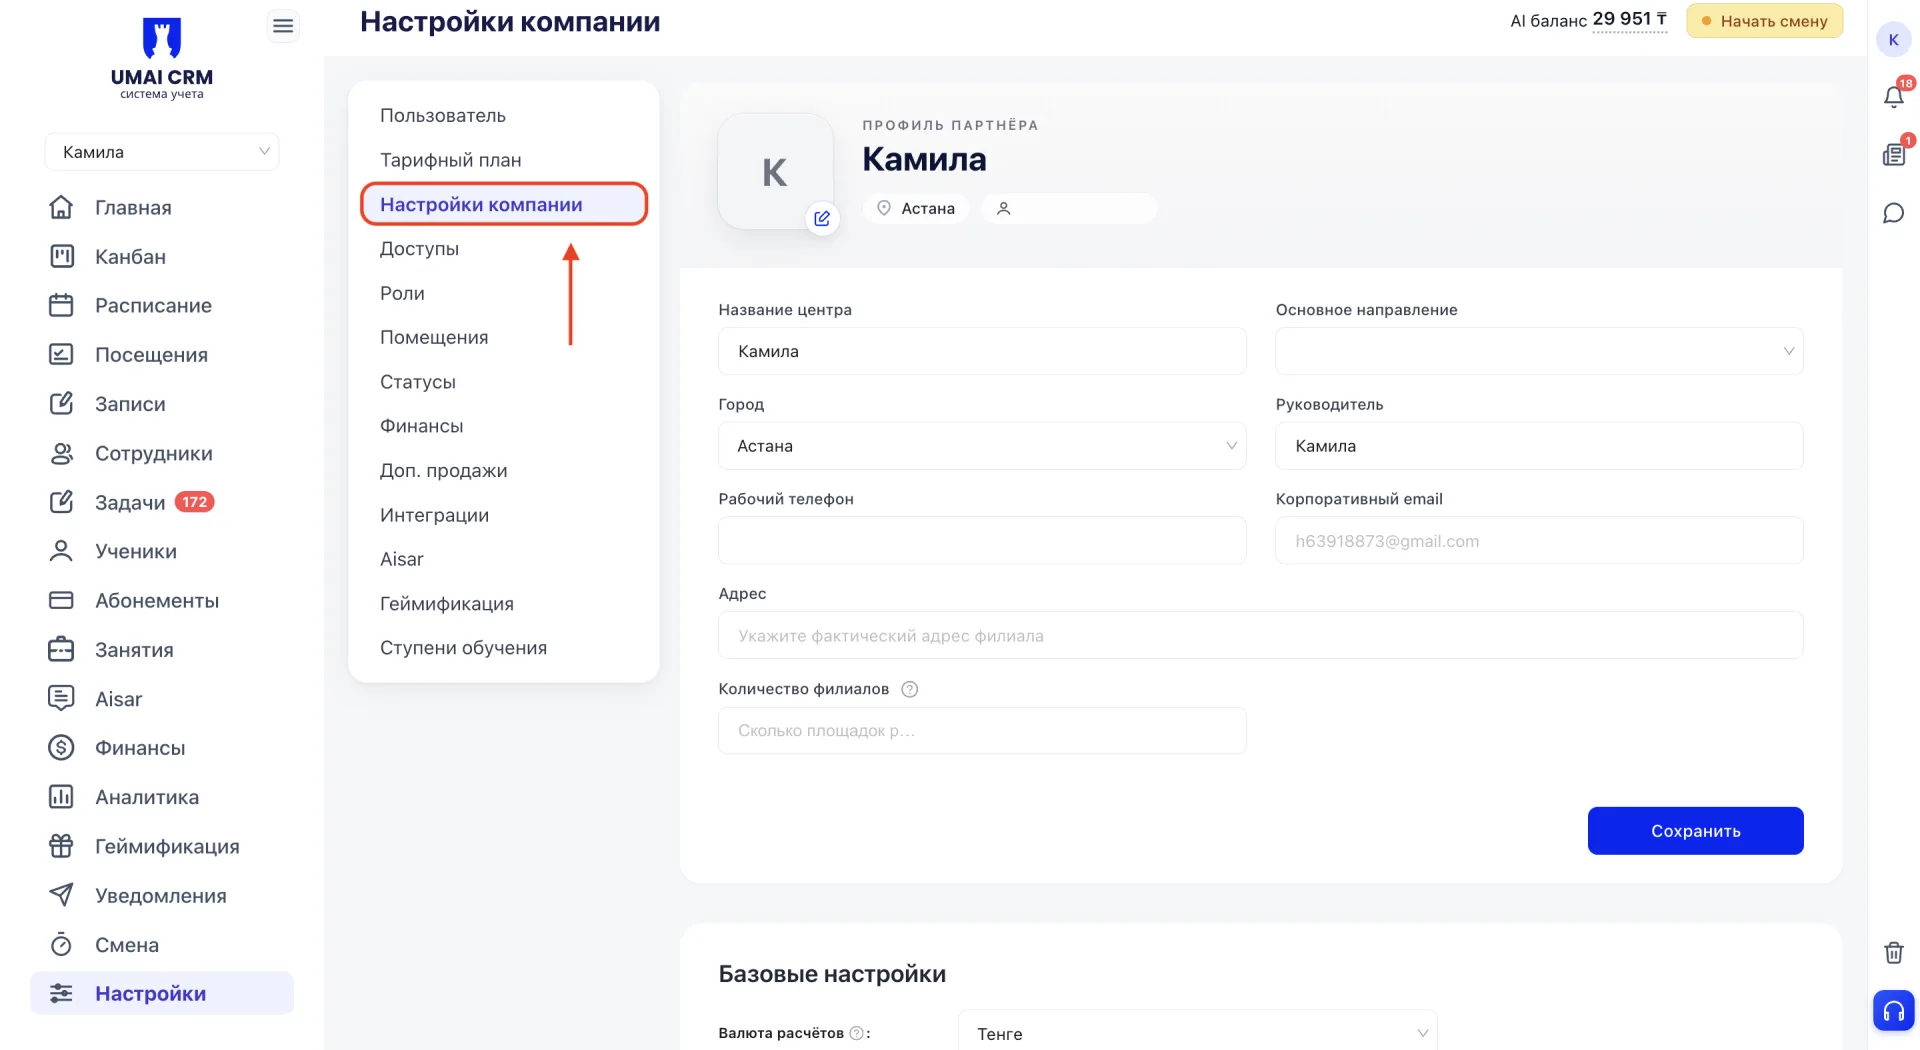
3. Scroll the page down to the section “Messengers (Мессенджеры)”.
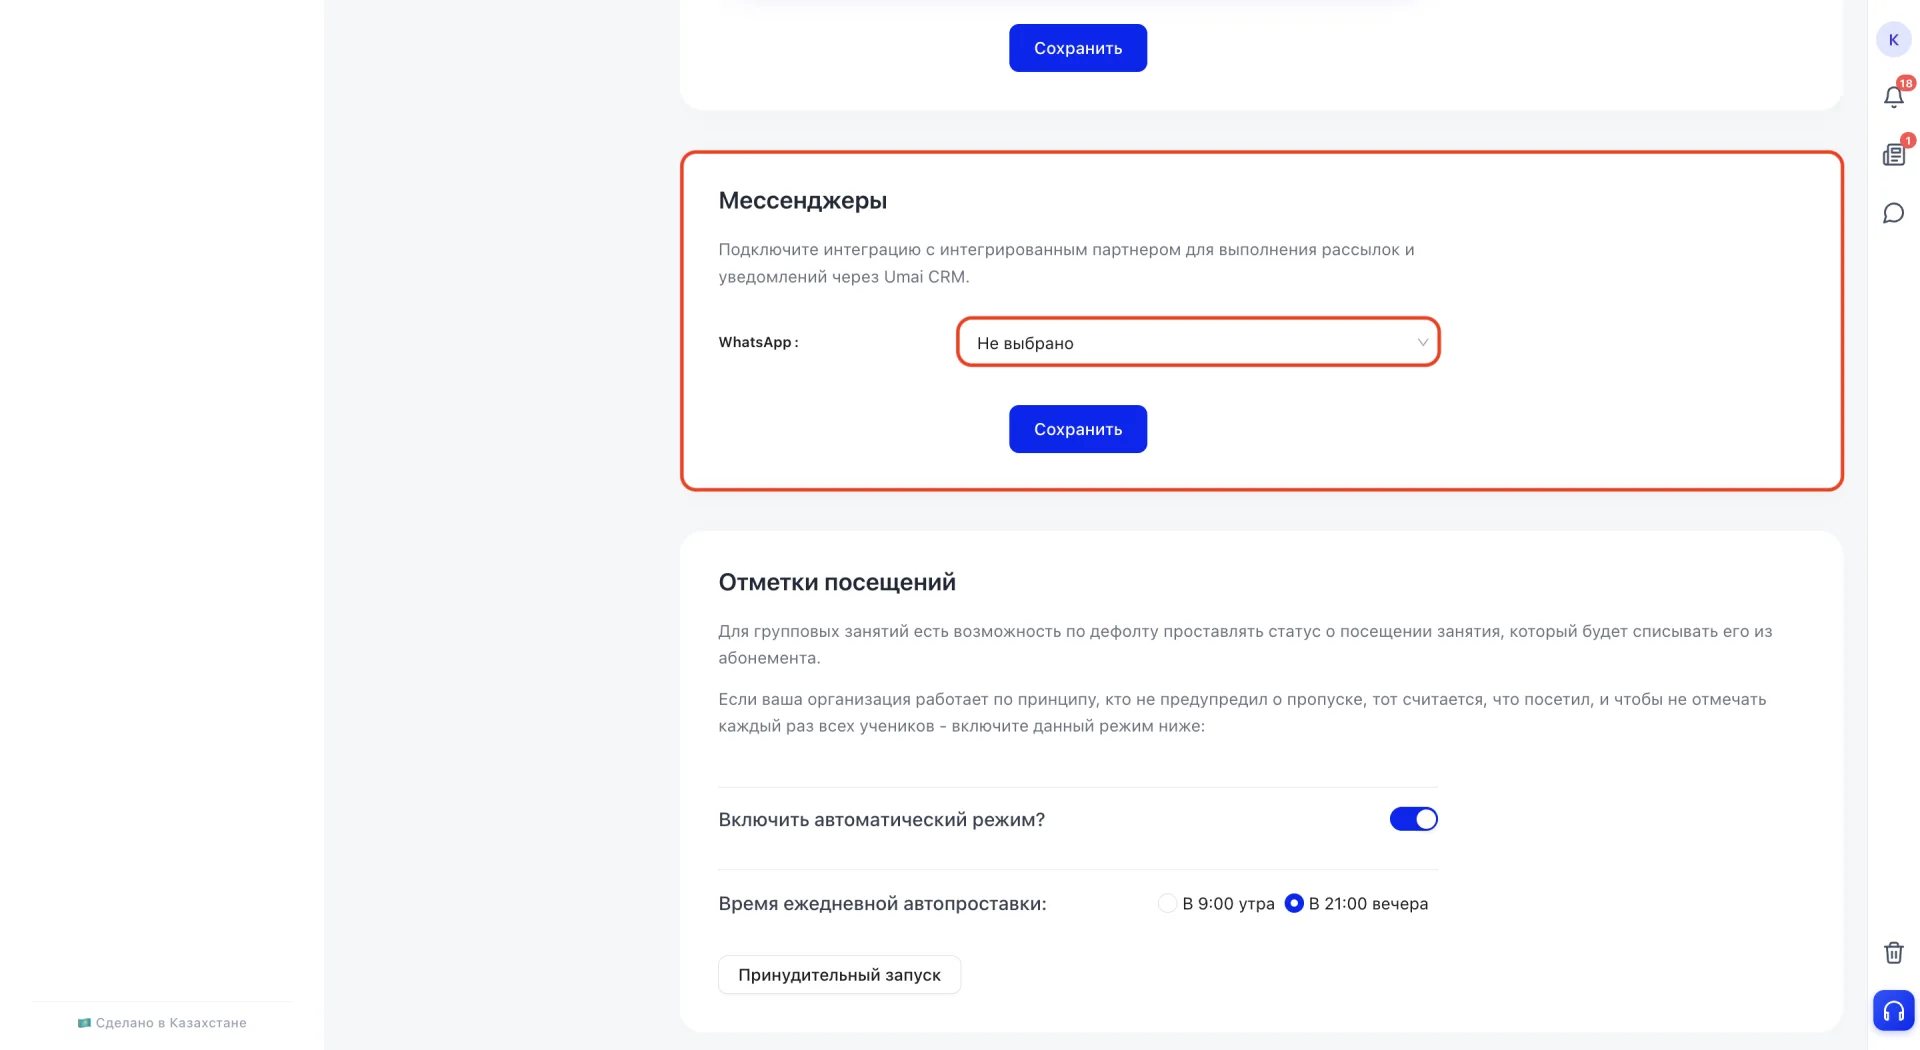
4. In the WhatsApp field, select the connected Aisar channel.
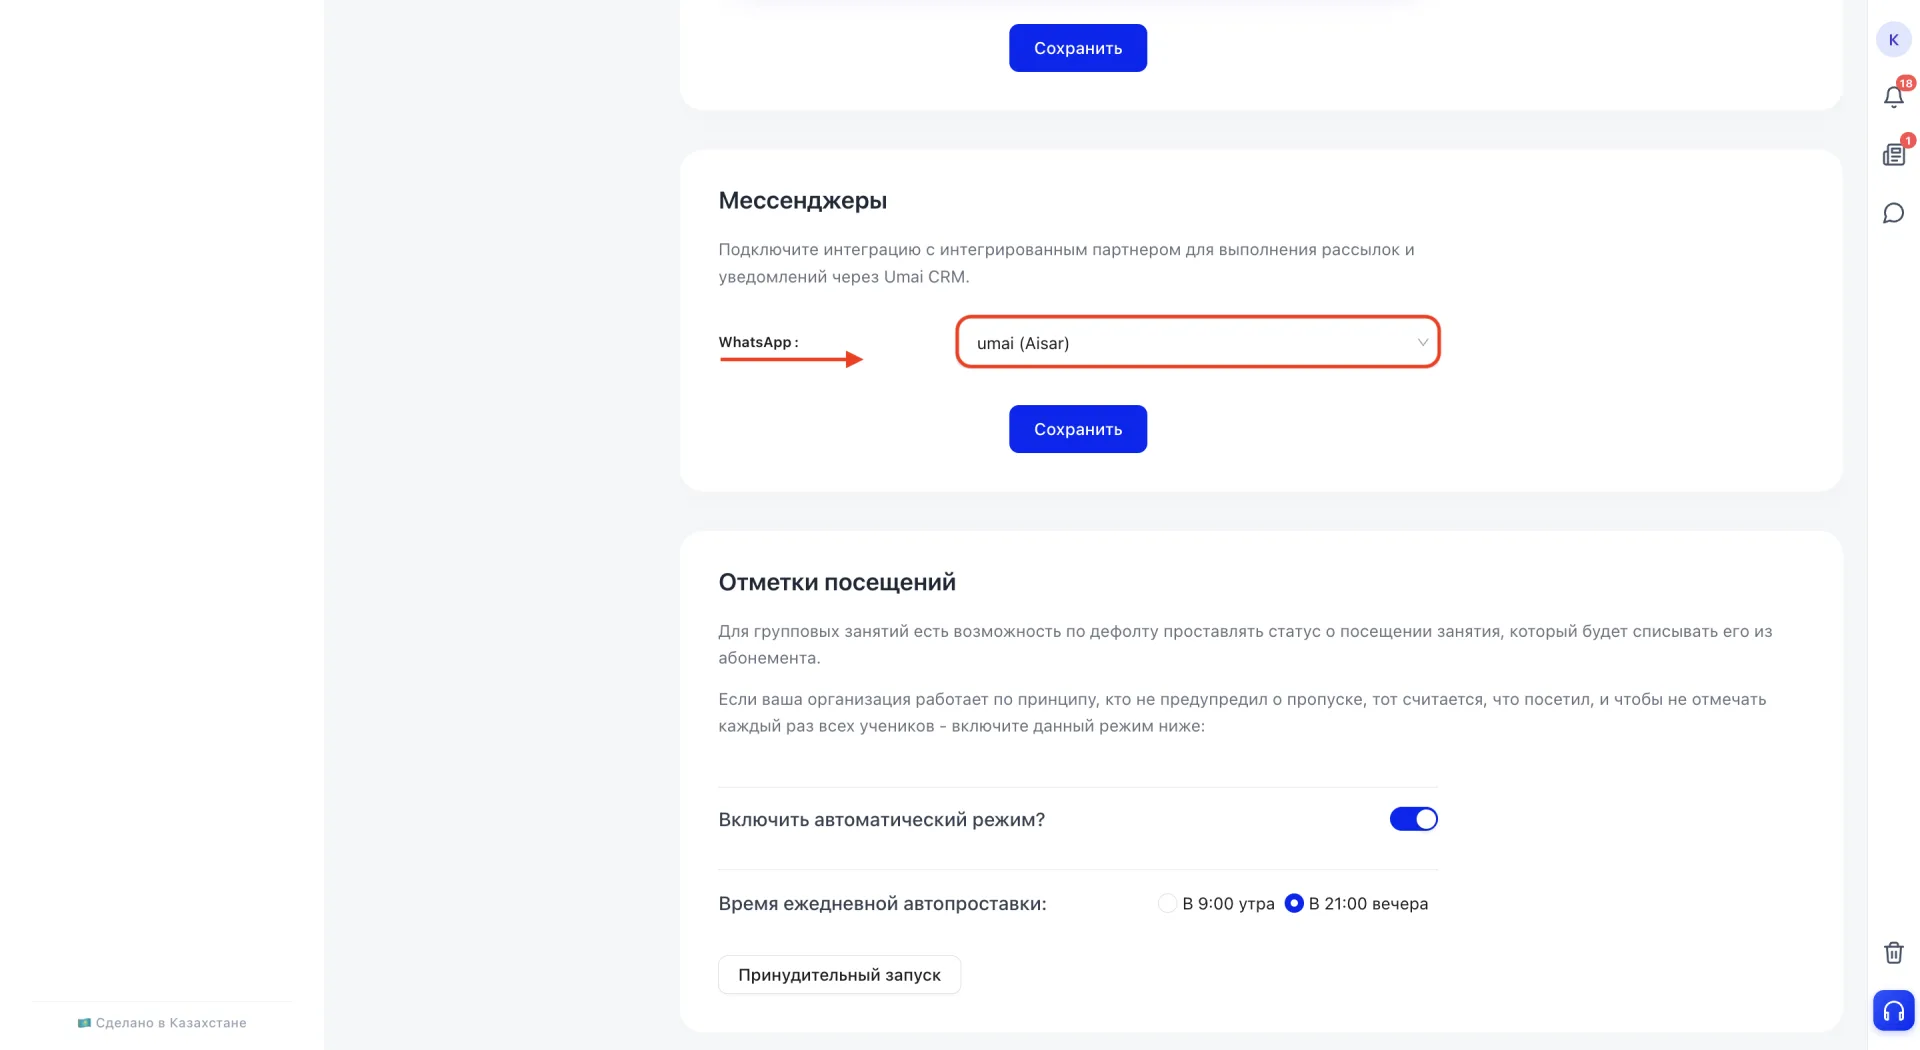
5. Click “Save”.
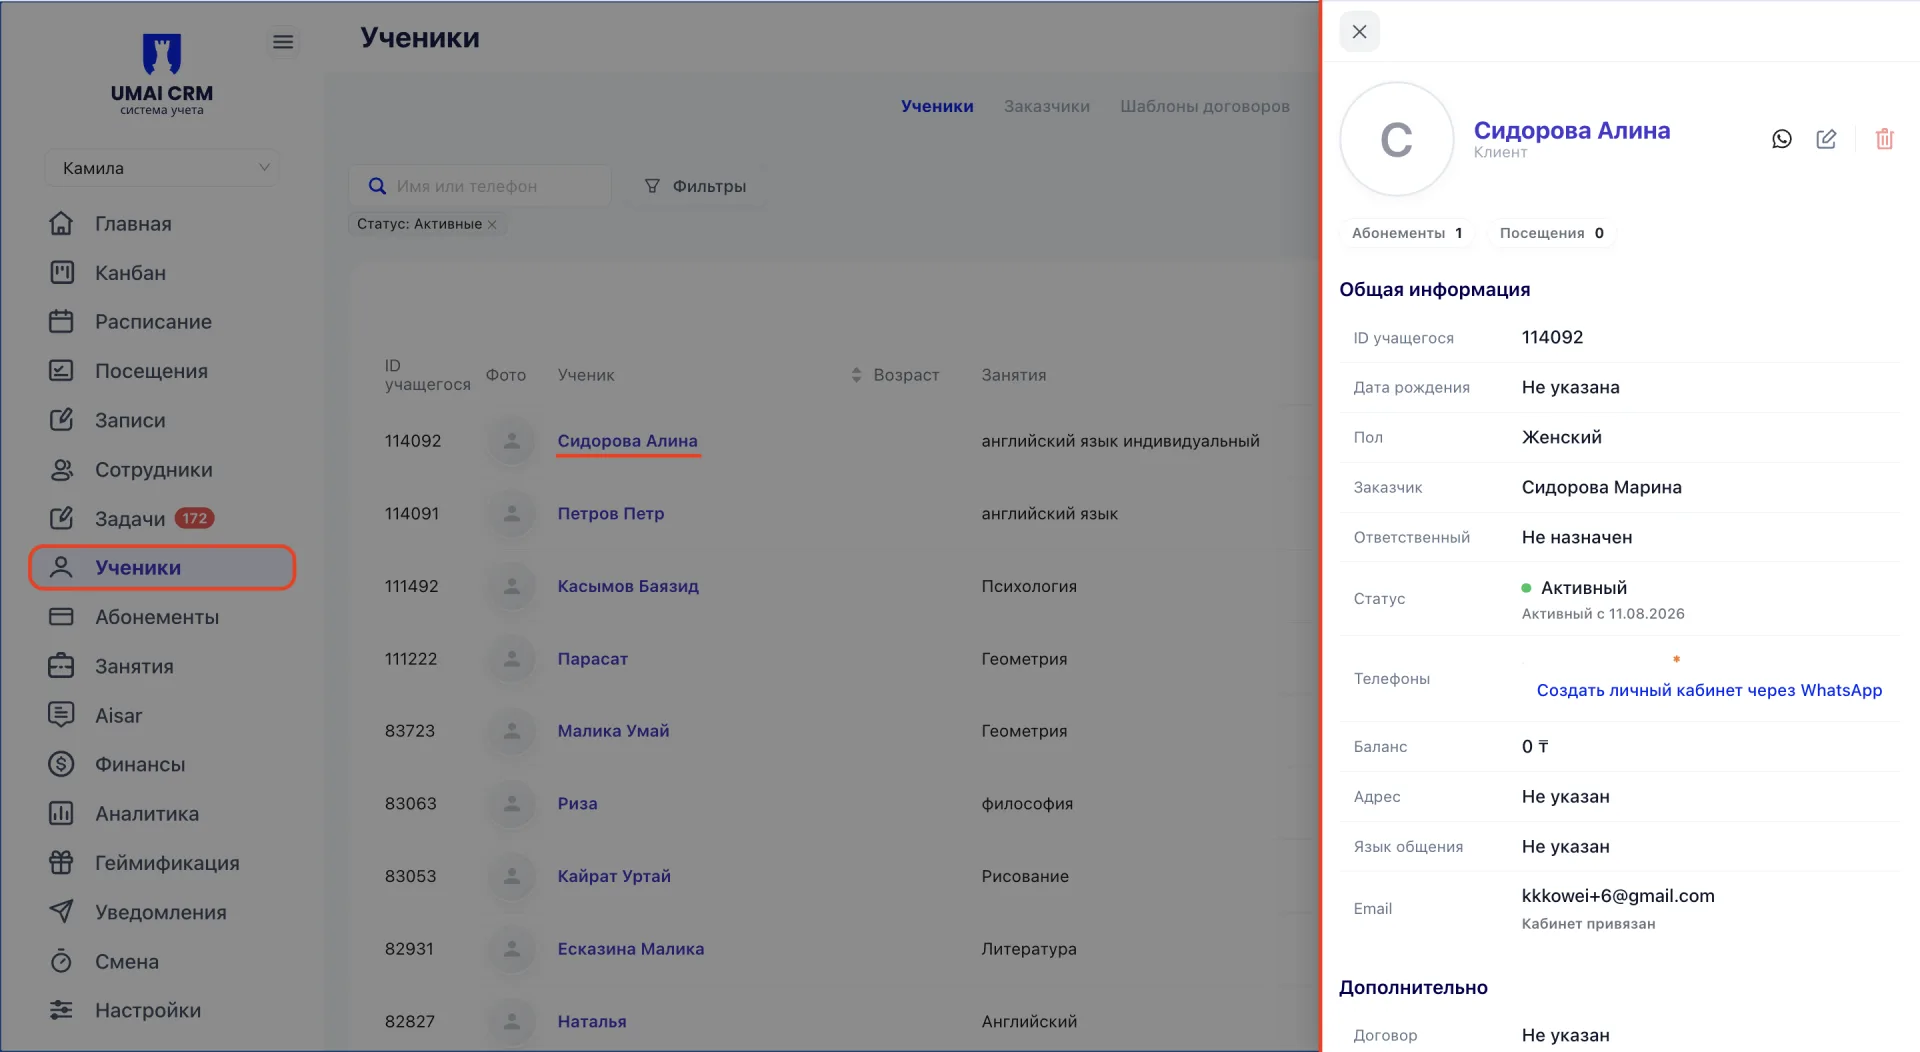
How to send an invitation to a student
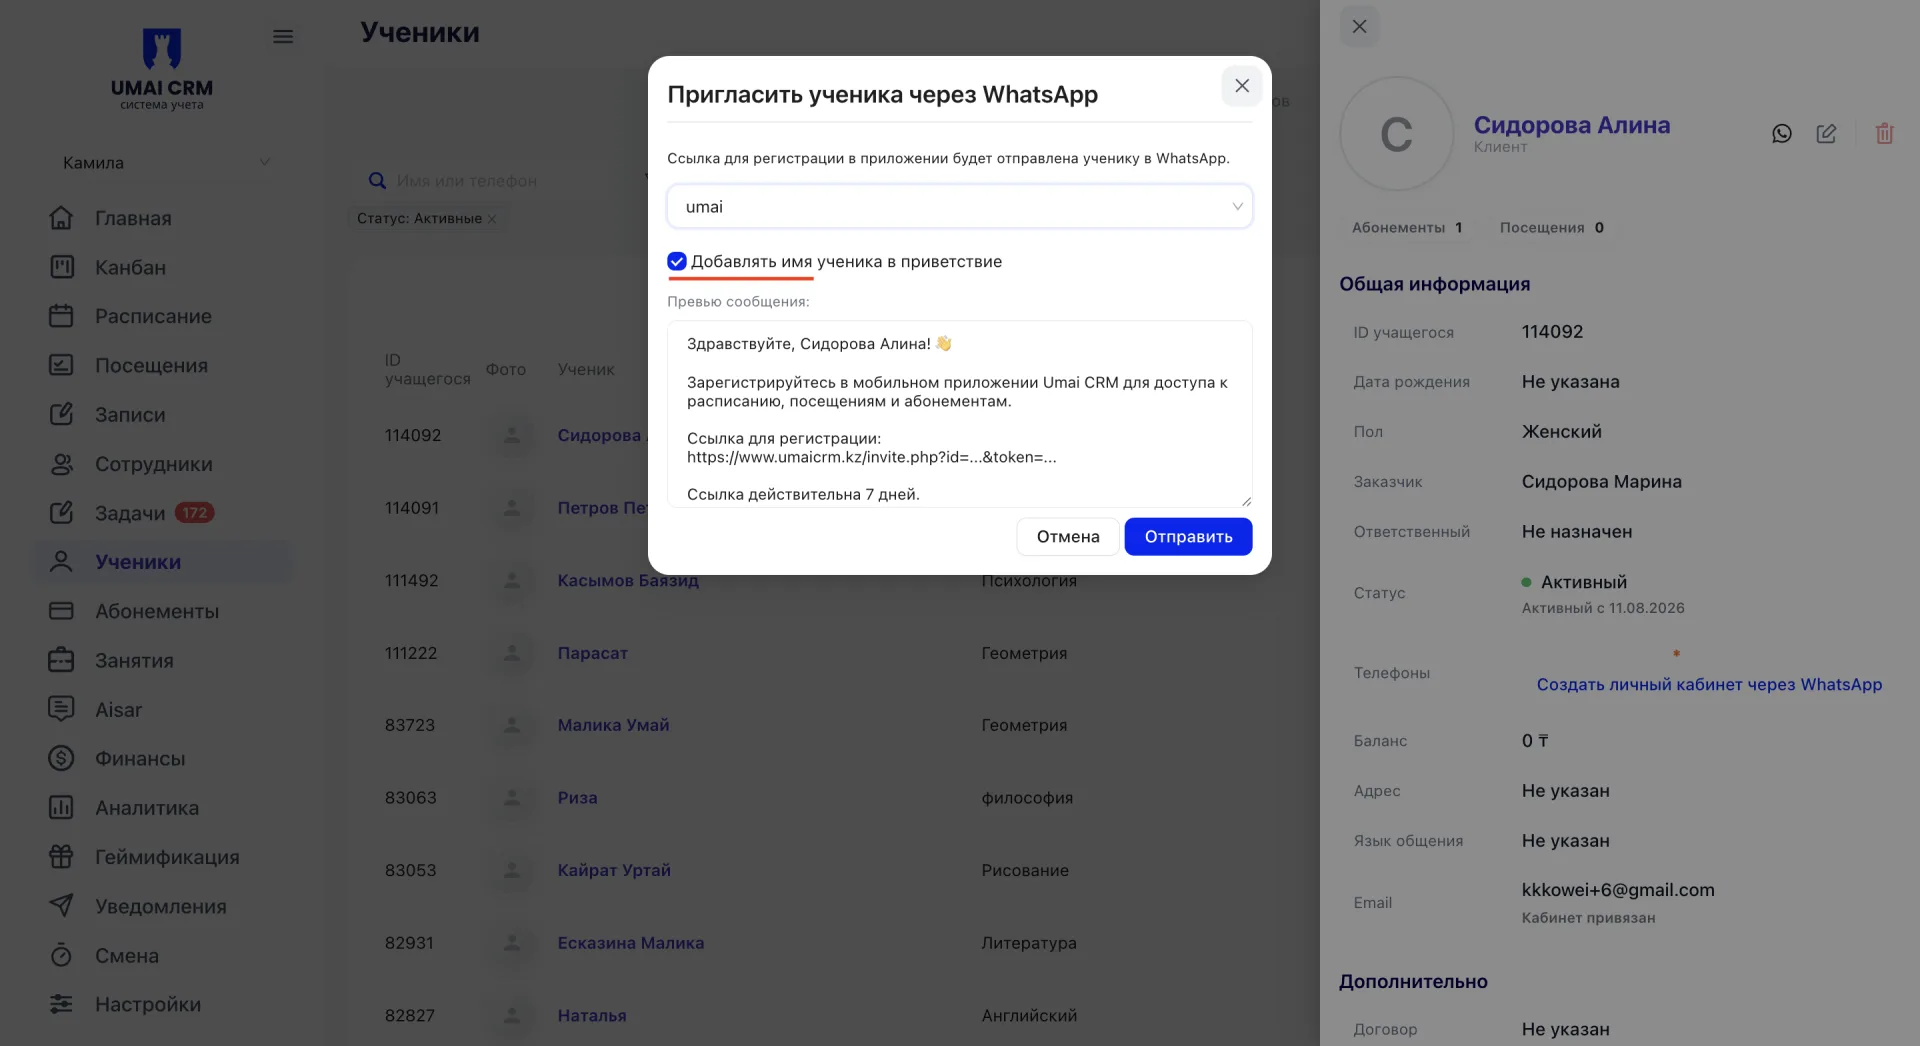
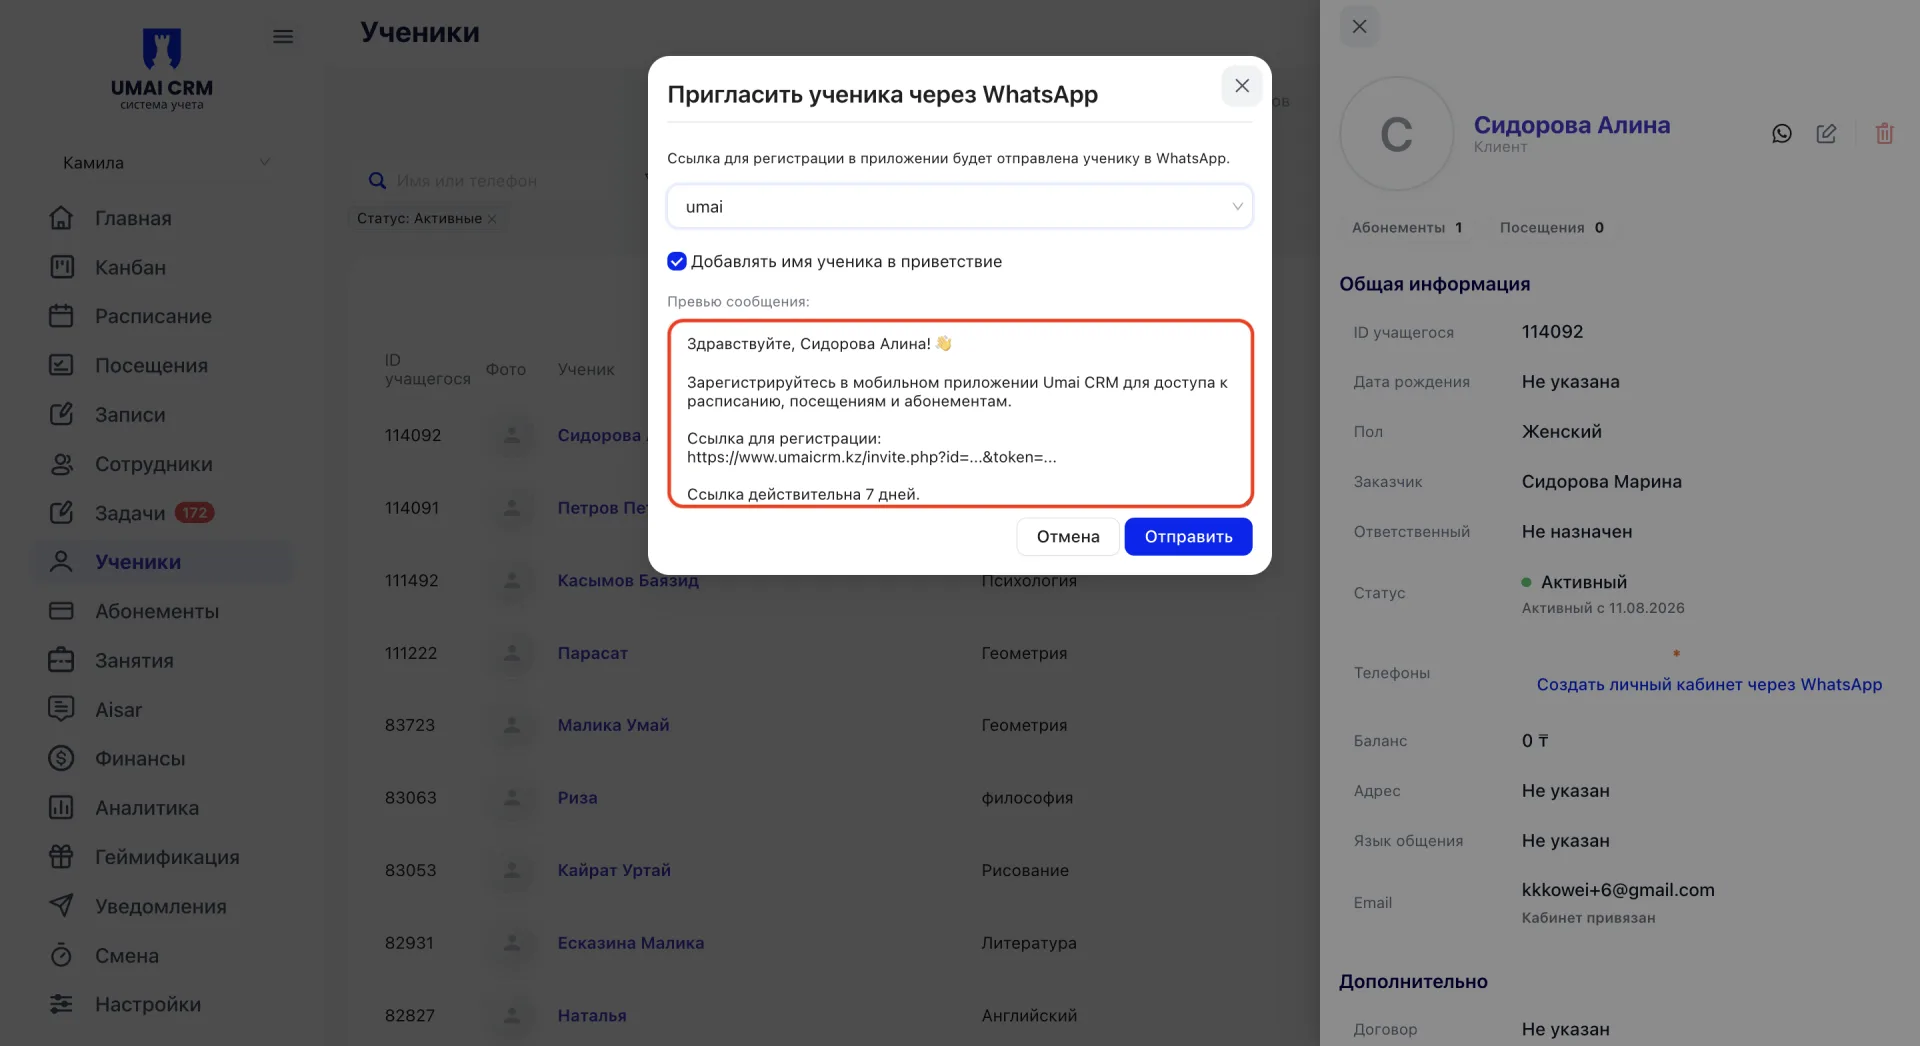
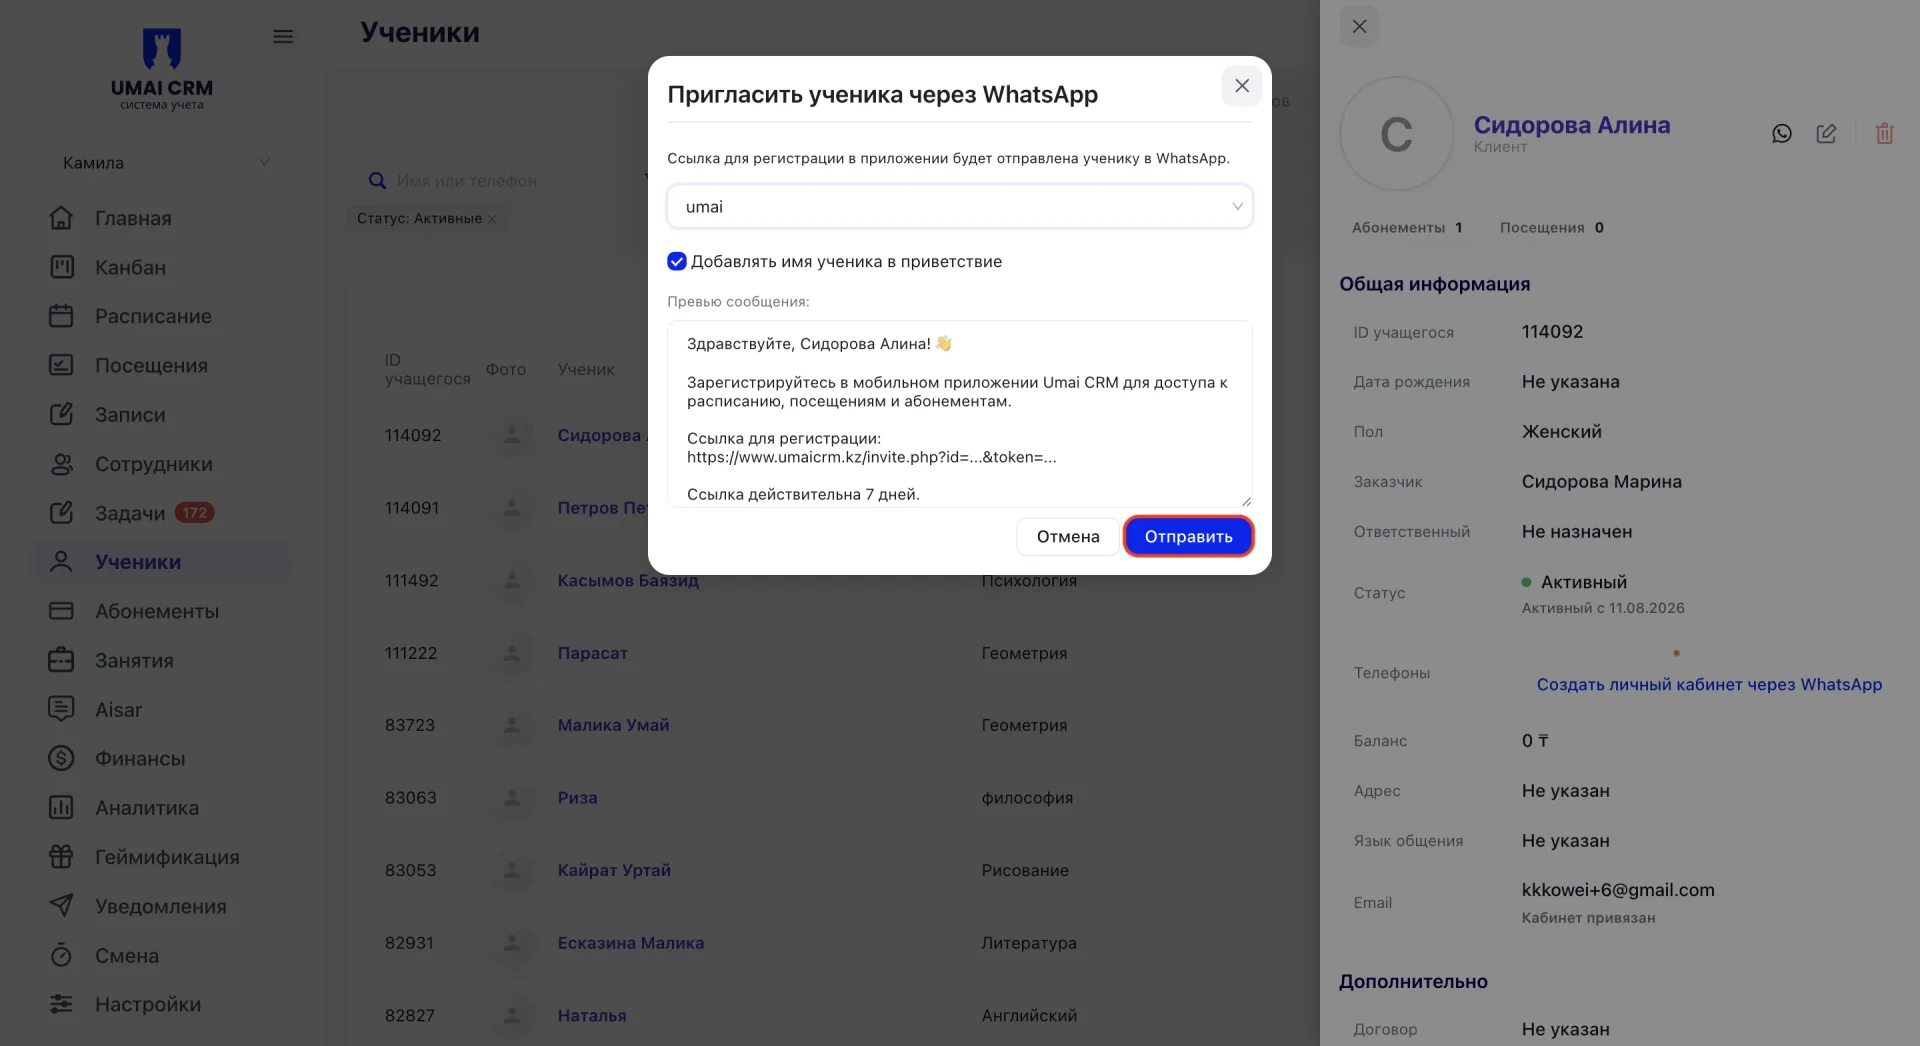
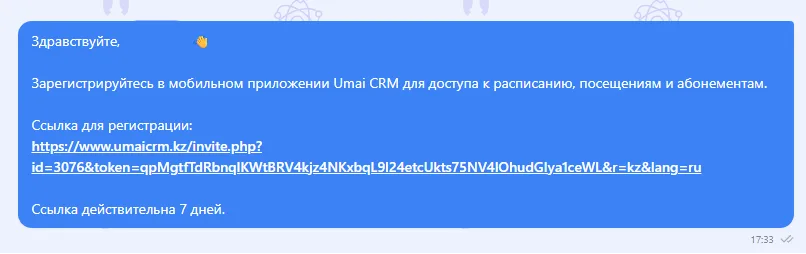
Sending an invitation by email
1. Open the section «Students» and click the name of the required student. The student card will open on the right.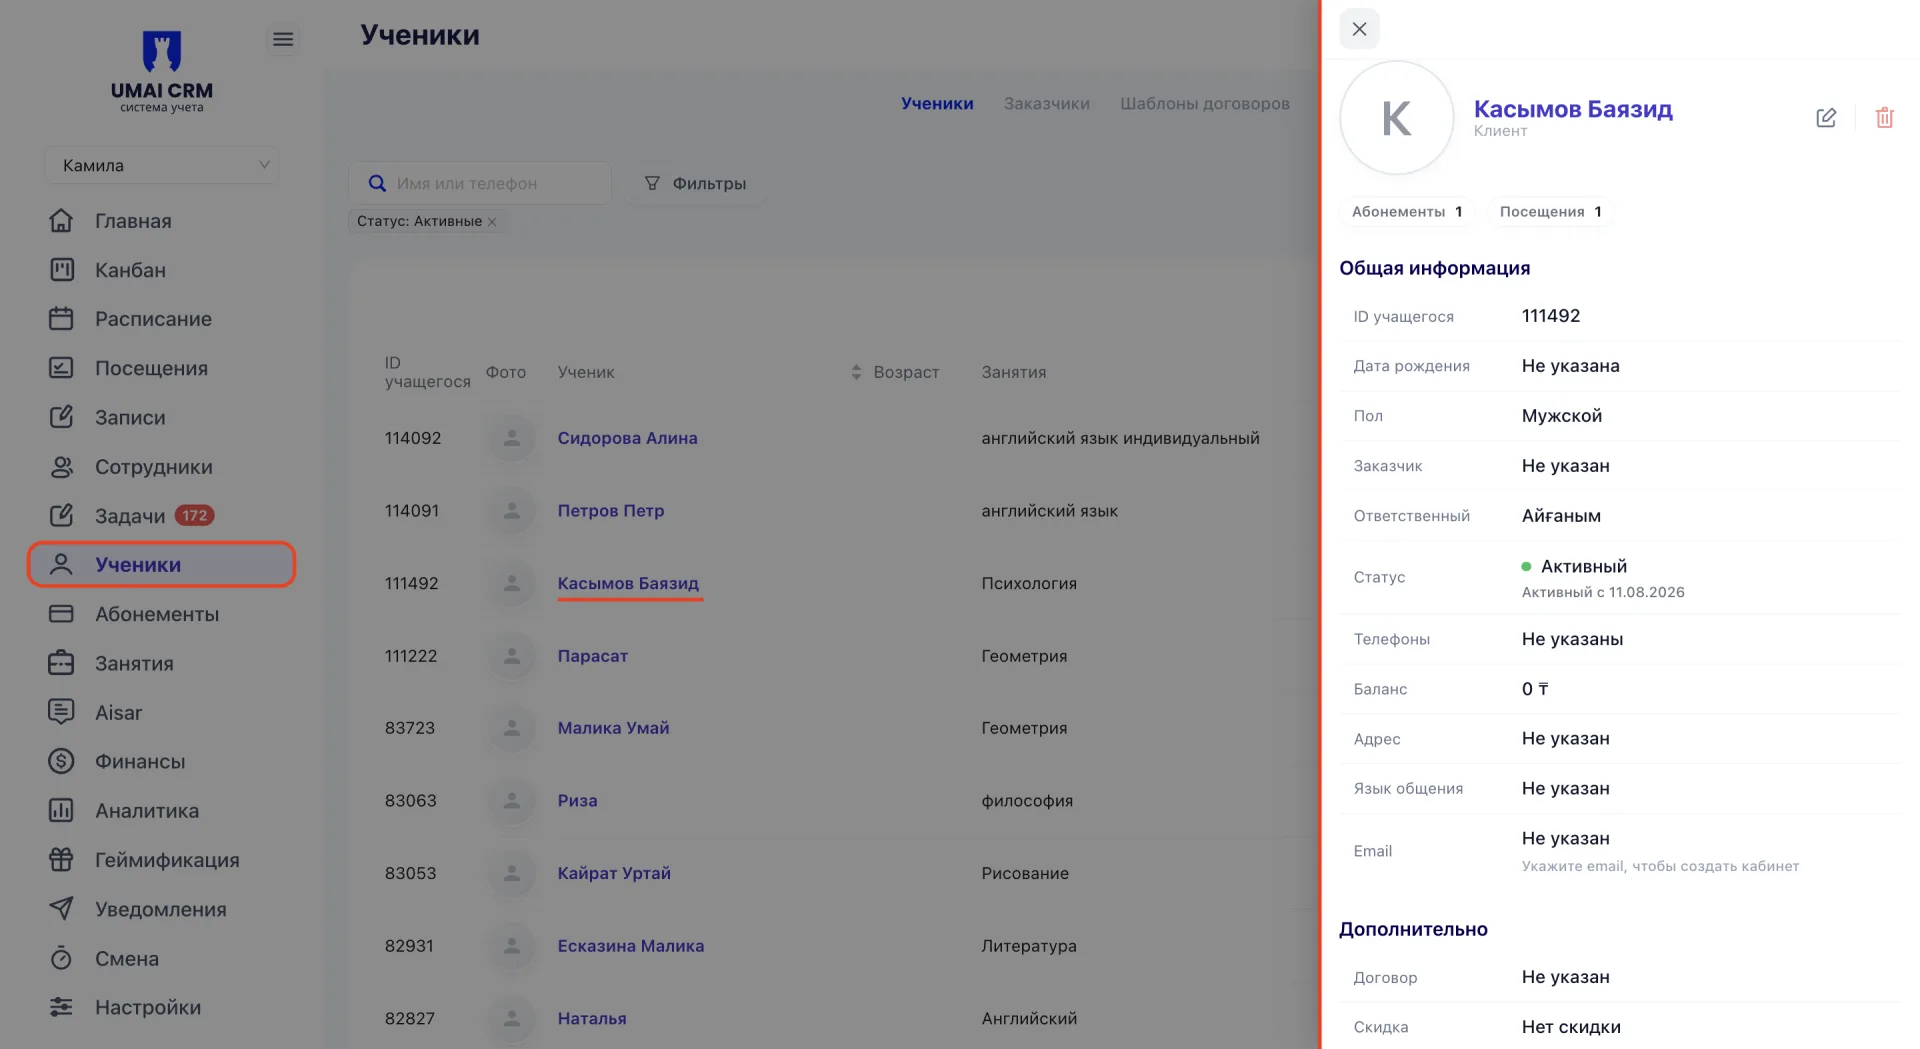
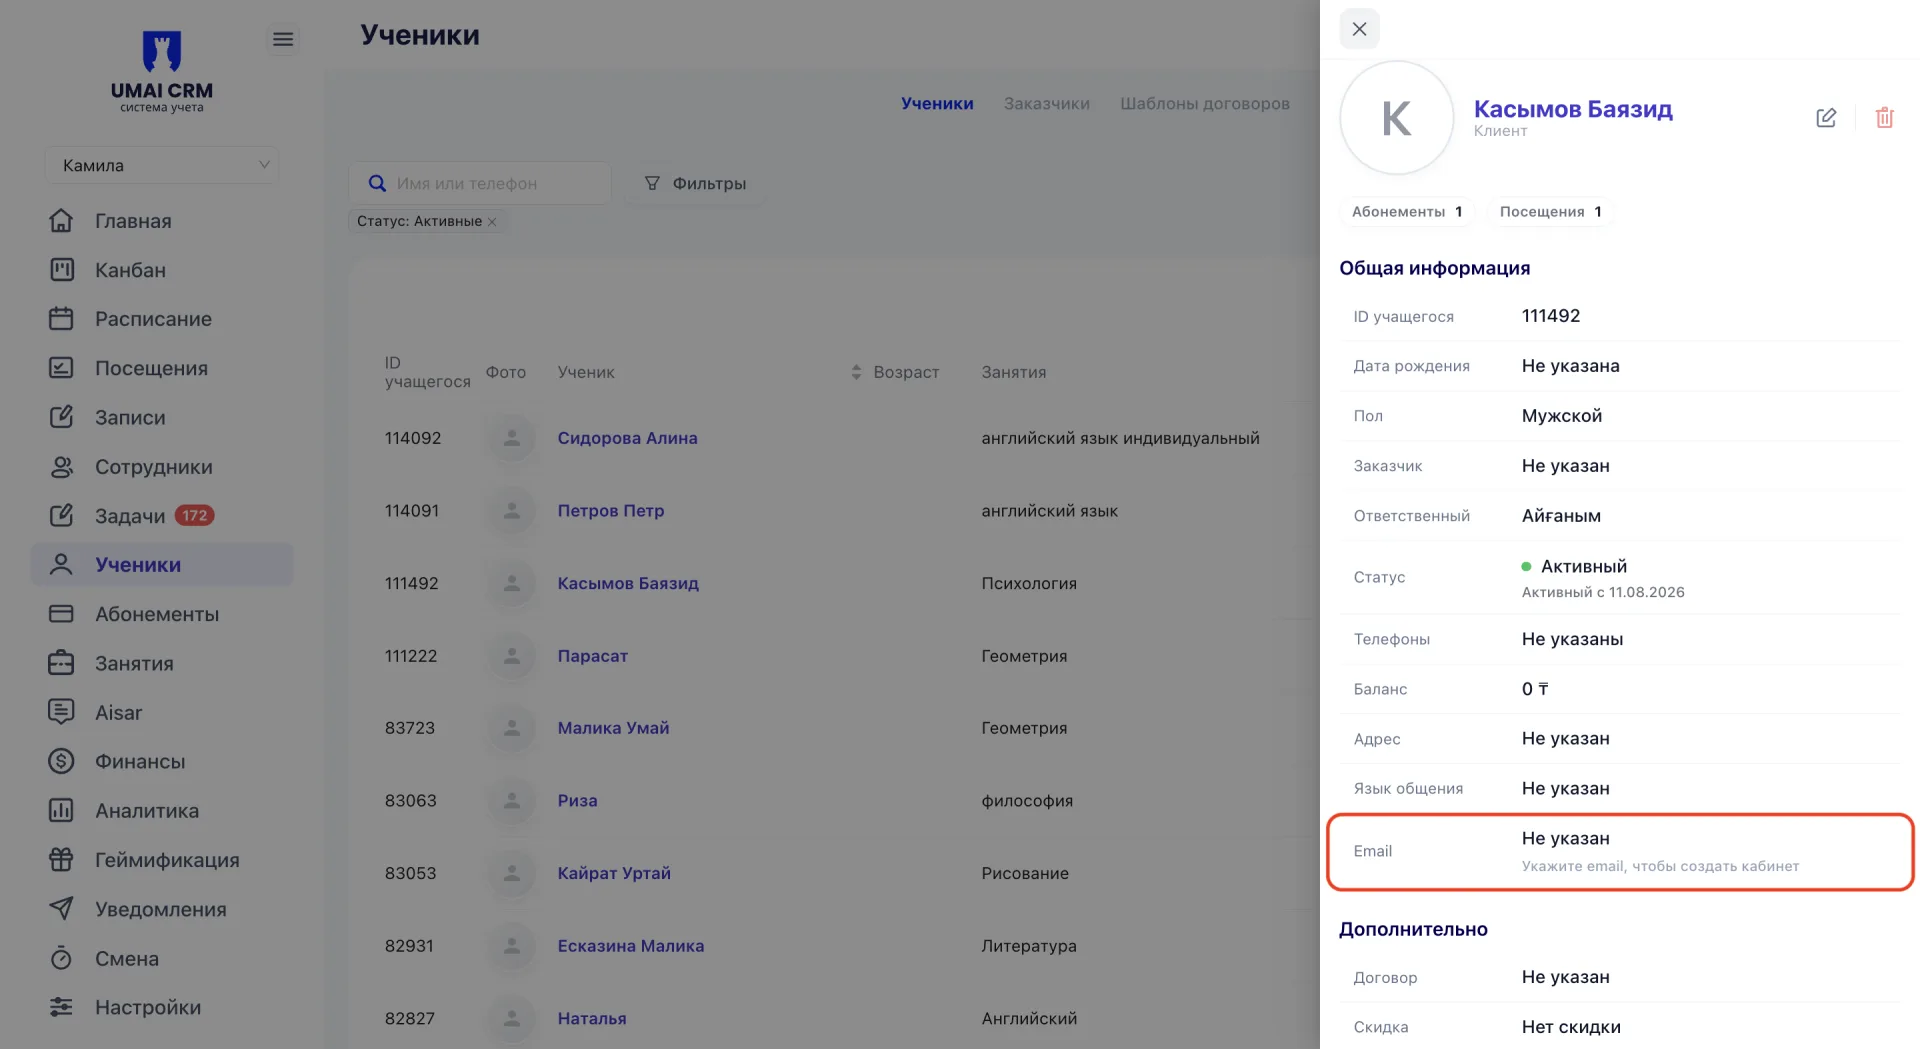
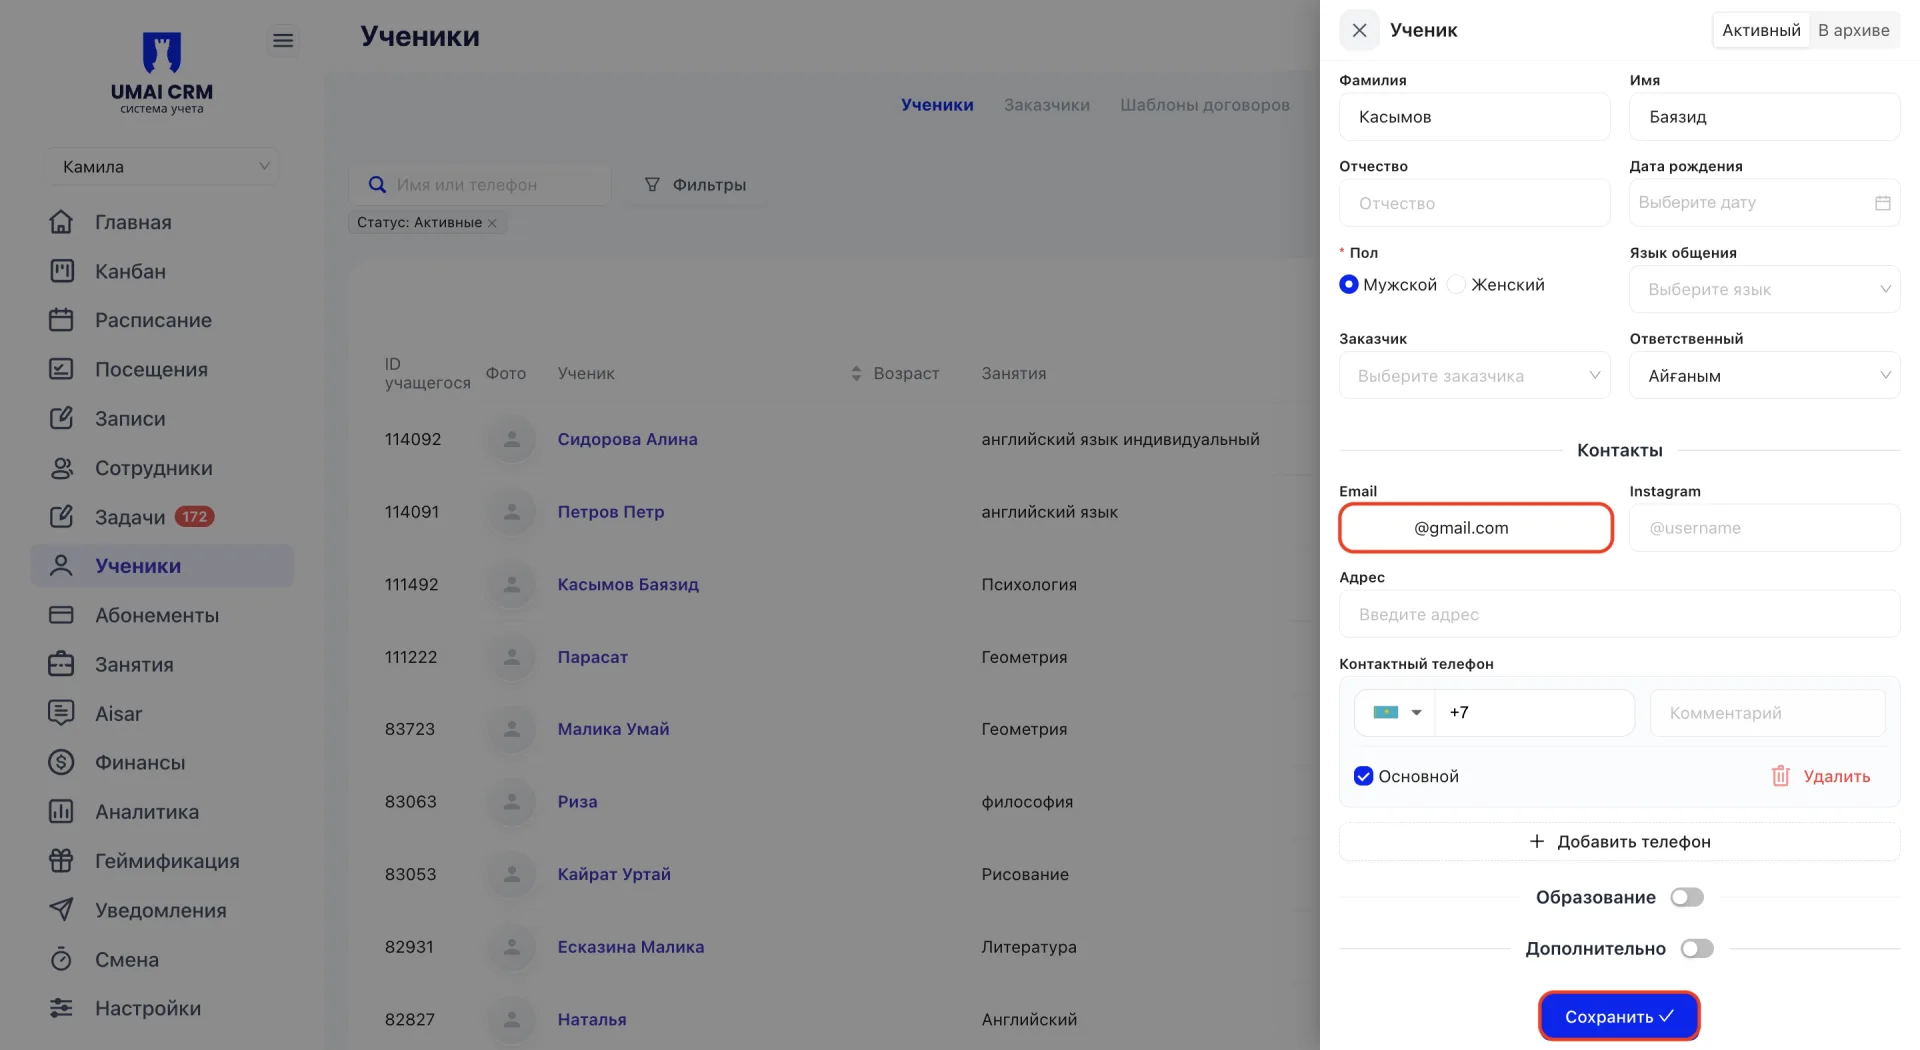
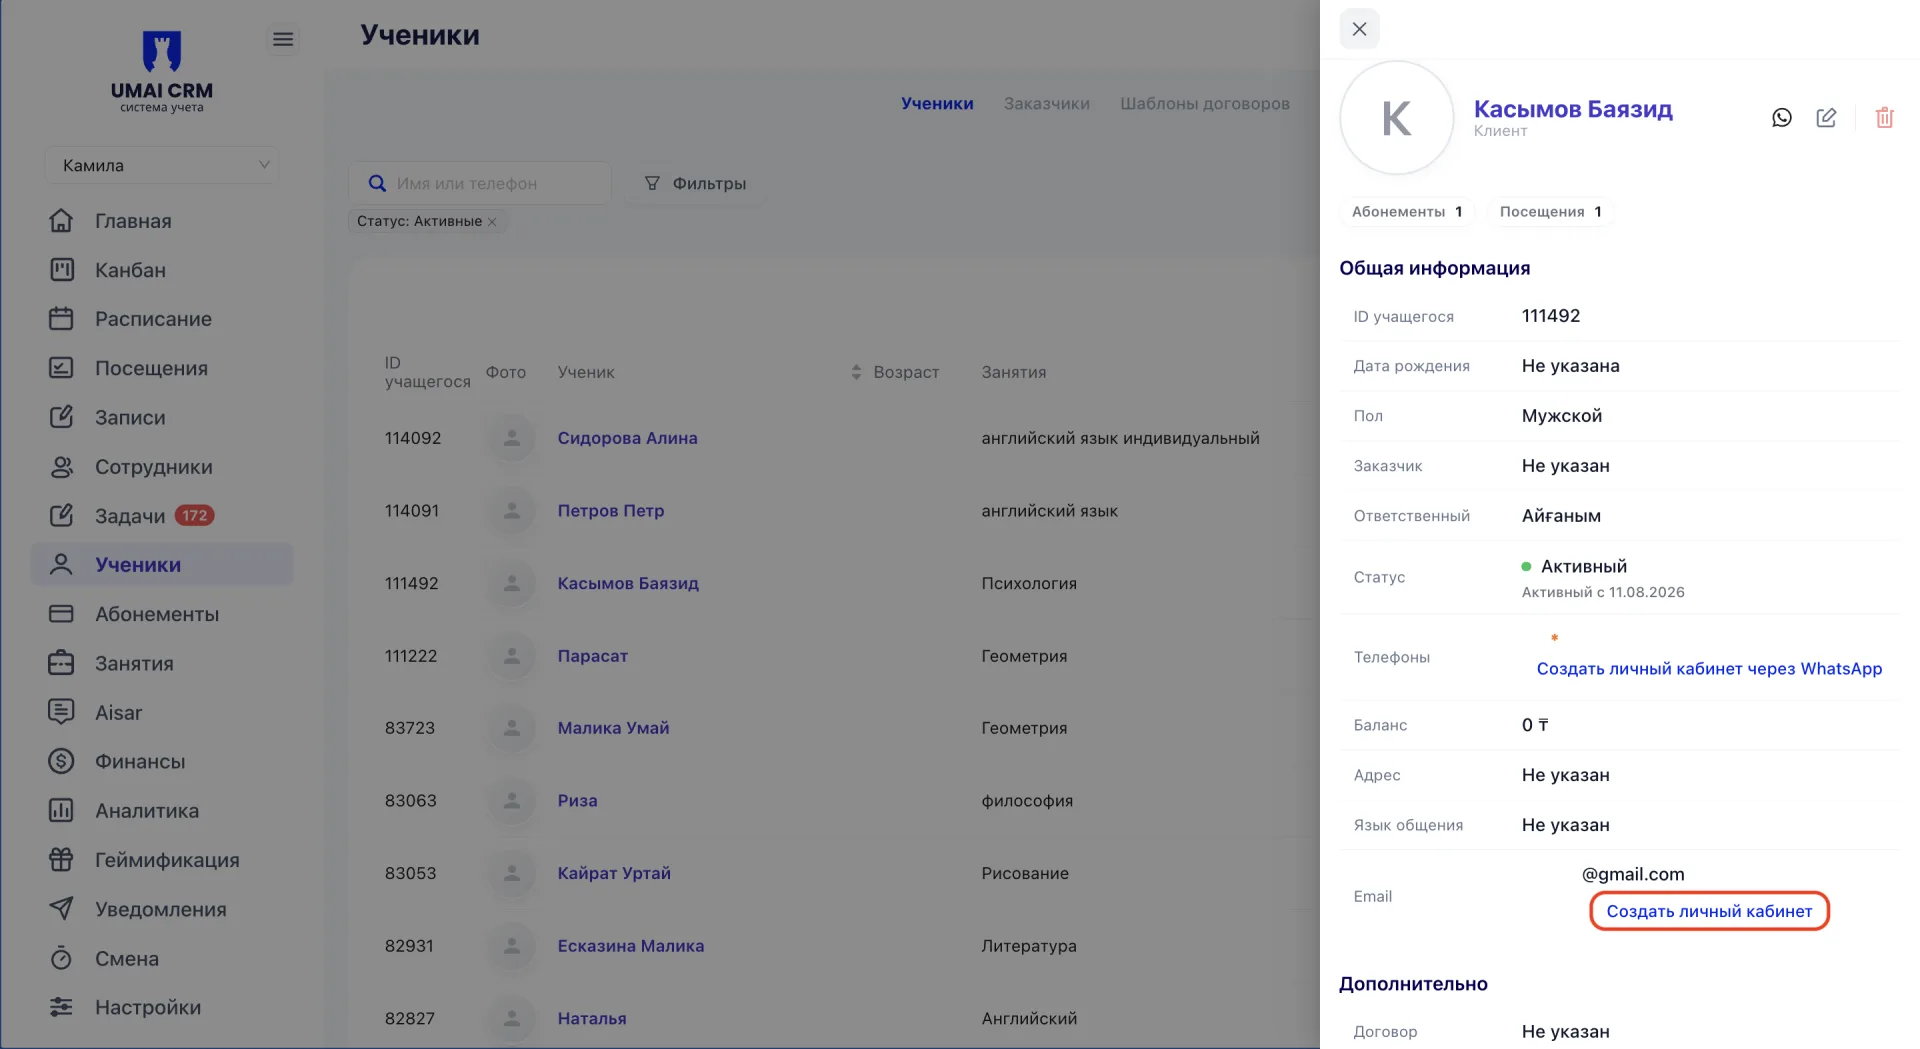
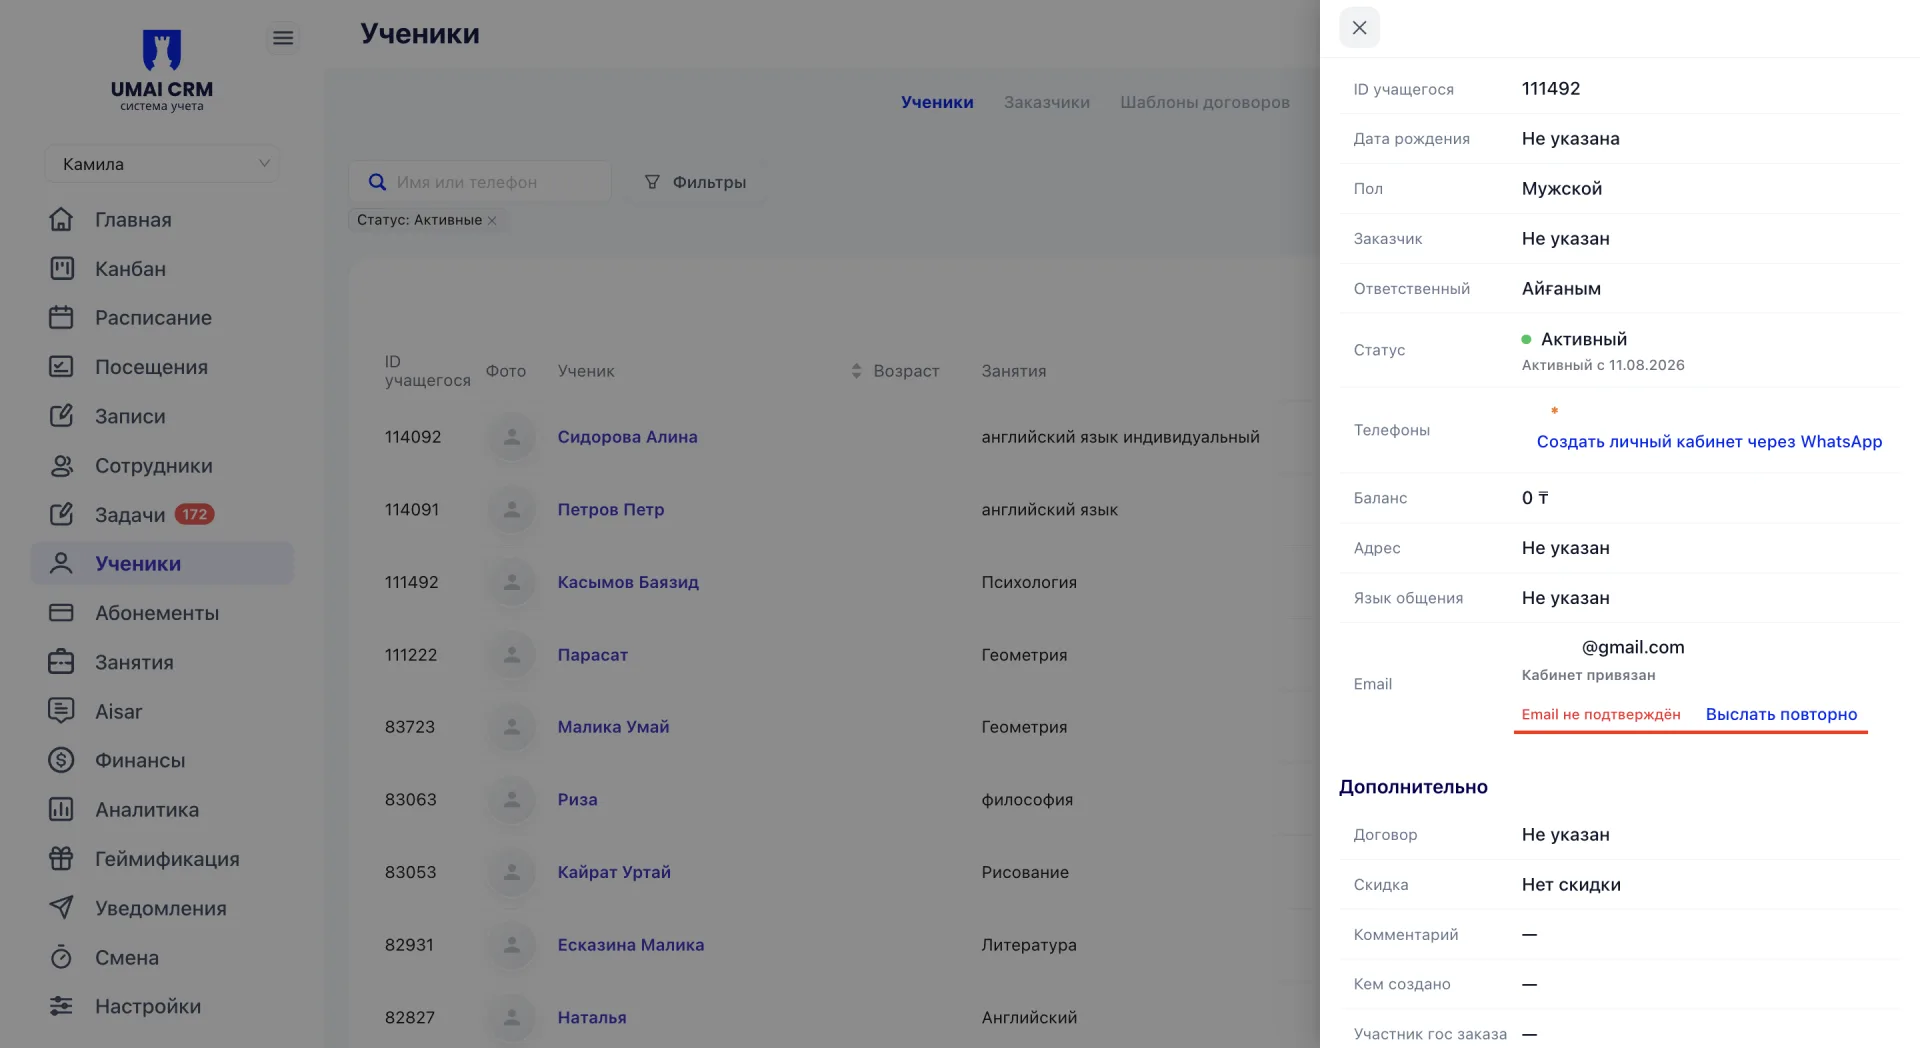
After sending the invitation, the status “Account linked” will appear in the student’s card. Until the student follows the link and activates the account, the status will display “Email not confirmed”.
Important to note:
- You can choose only one WhatsApp channel to send confirmation codes; messages with the code will come to students from that number.
- Without a selected and saved WhatsApp channel it is not possible to send an invitation via WhatsApp. If the window displays the message “No channels. Connect in settings”, first select a channel in the section “Company settings (Настройки компании)”, tab “Messengers (Мессенджеры)”.
- The link for registration via WhatsApp is valid for 7 days.
- Before sending the invitation, check the correctness of the phone number or email in the student’s card.