
Main blocks:
- Access to the section
- Tab «Employees»
2.1 Employees table
2.2 Search and filtering
2.3 Adding an employee
2.5 Actions in the table
3. Tab «Templates»
3.1 Templates table
3.2 Adding a template
3.3 Actions in the table
4. Tab «Work schedule (График работы)»
4.1 Working with the table
4.2 Adding a work schedule
1. Access to the section
The section is located in the left sidebar menu under «Employees».
After navigating, a page with the list of system employees will open. At the top of the page there are three tabs:
- Employees
- Templates
- Work schedule (График работы)
Each tab contains a separate list and tools for working with the corresponding data.
2. Tab «Employees»
The tab contains a list of all center employees. Each employee has their own card, which stores contact details, information about position, documents, and other work parameters.
2.1 Employees table
By default the «Employees» tab opens, showing the list of all system employees.
The table presents the main data:
- Photo — the employee's photo from their card. Helps quickly visually identify the employee.
- Employee — the employee's full name provided when creating the card.
- Phones — the employee's contact numbers.
- Email — the email address.
- Date of birth — used to display age and for additional filtering.
- Gender — specified in the employee card.
- Status — shows the employee's state in the system, for example Active or In archive.
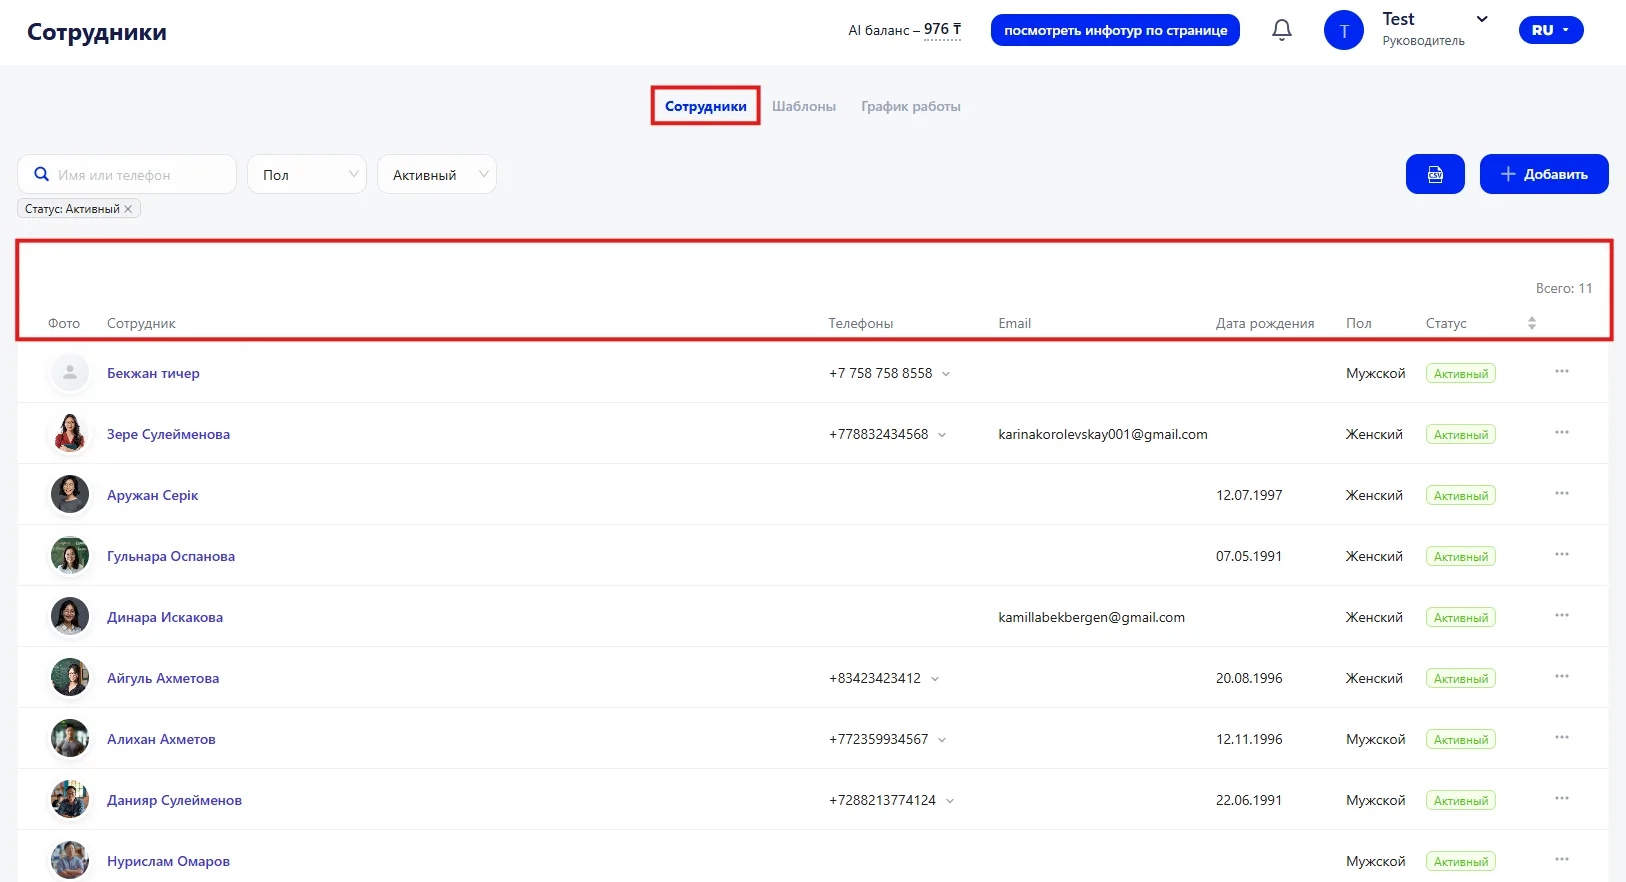
On the right there is a column with employee management buttons, through which you can open the employee card, view brief information, or delete the record.
2.2 Search and filtering
In the upper part of the page there are tools for searching and filtering the employee list.
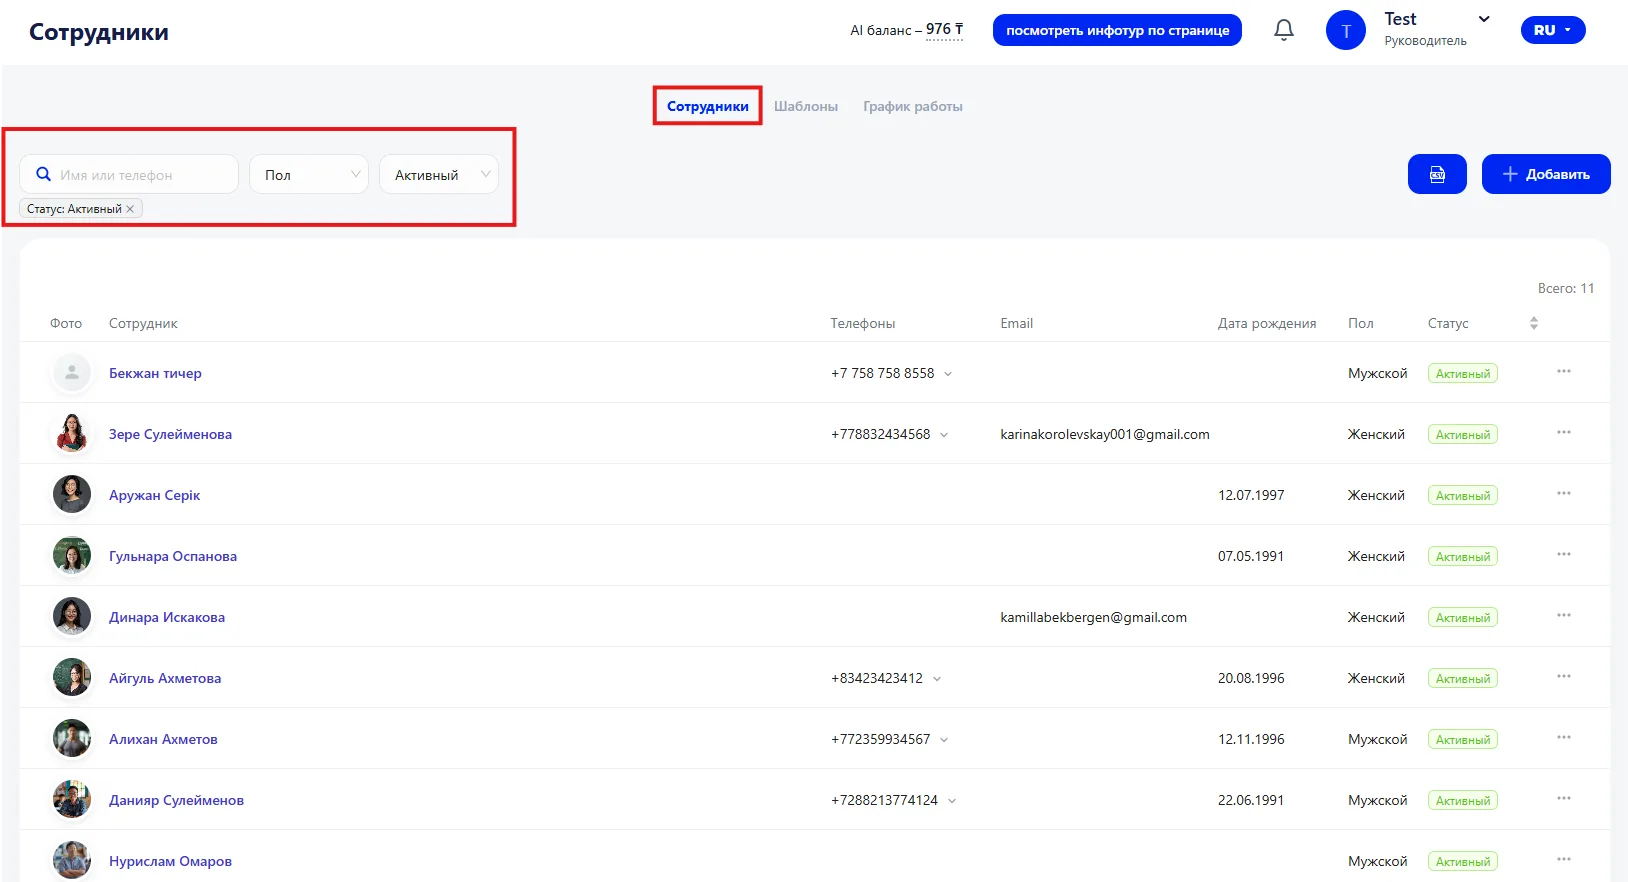
Search
Allows you to find an employee by name or phone number.
Filters
Open a panel of additional parameters for displaying the list. Filtering is available by the following parameters:
- Gender — male or female
- Status — active or in archive.
After selecting parameters, the employee list updates automatically.
2.3 Adding an employee
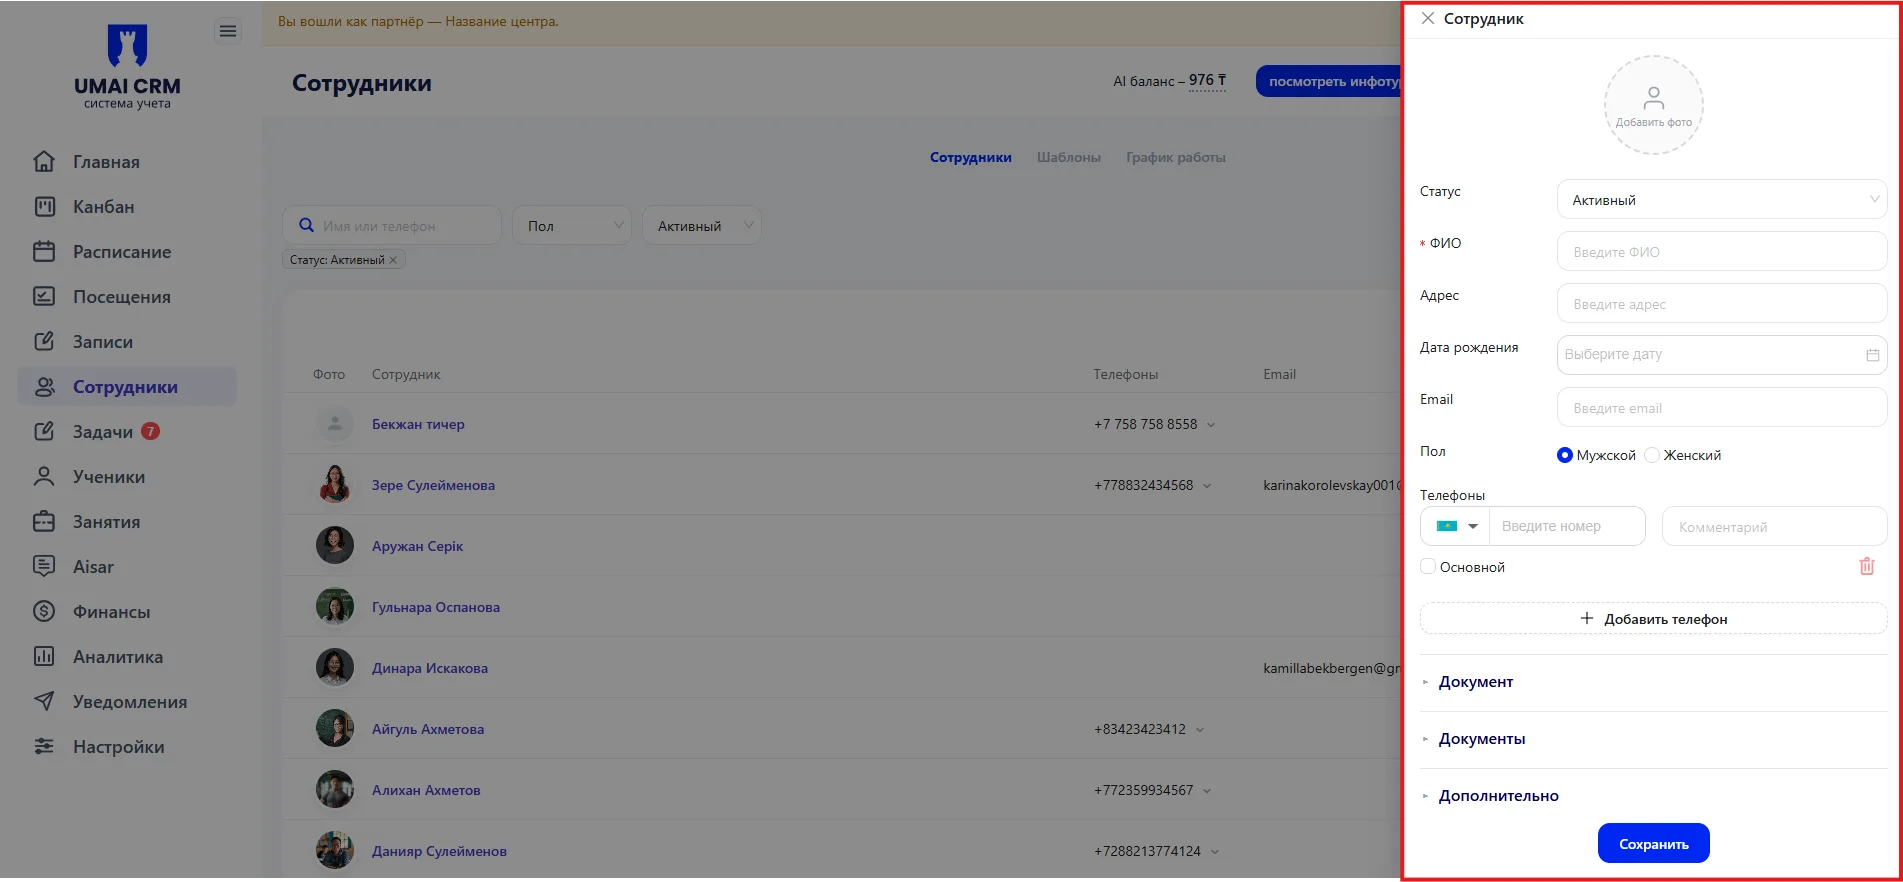
To add a new employee, click the «+ Add» button. The employee creation form will open.
The form requires filling in the following data blocks:
Main information
This block contains the basic information about the employee:
- Status;
- Full name;
- Address;
- Date of birth;
- Email;
- Gender;
- Phone.
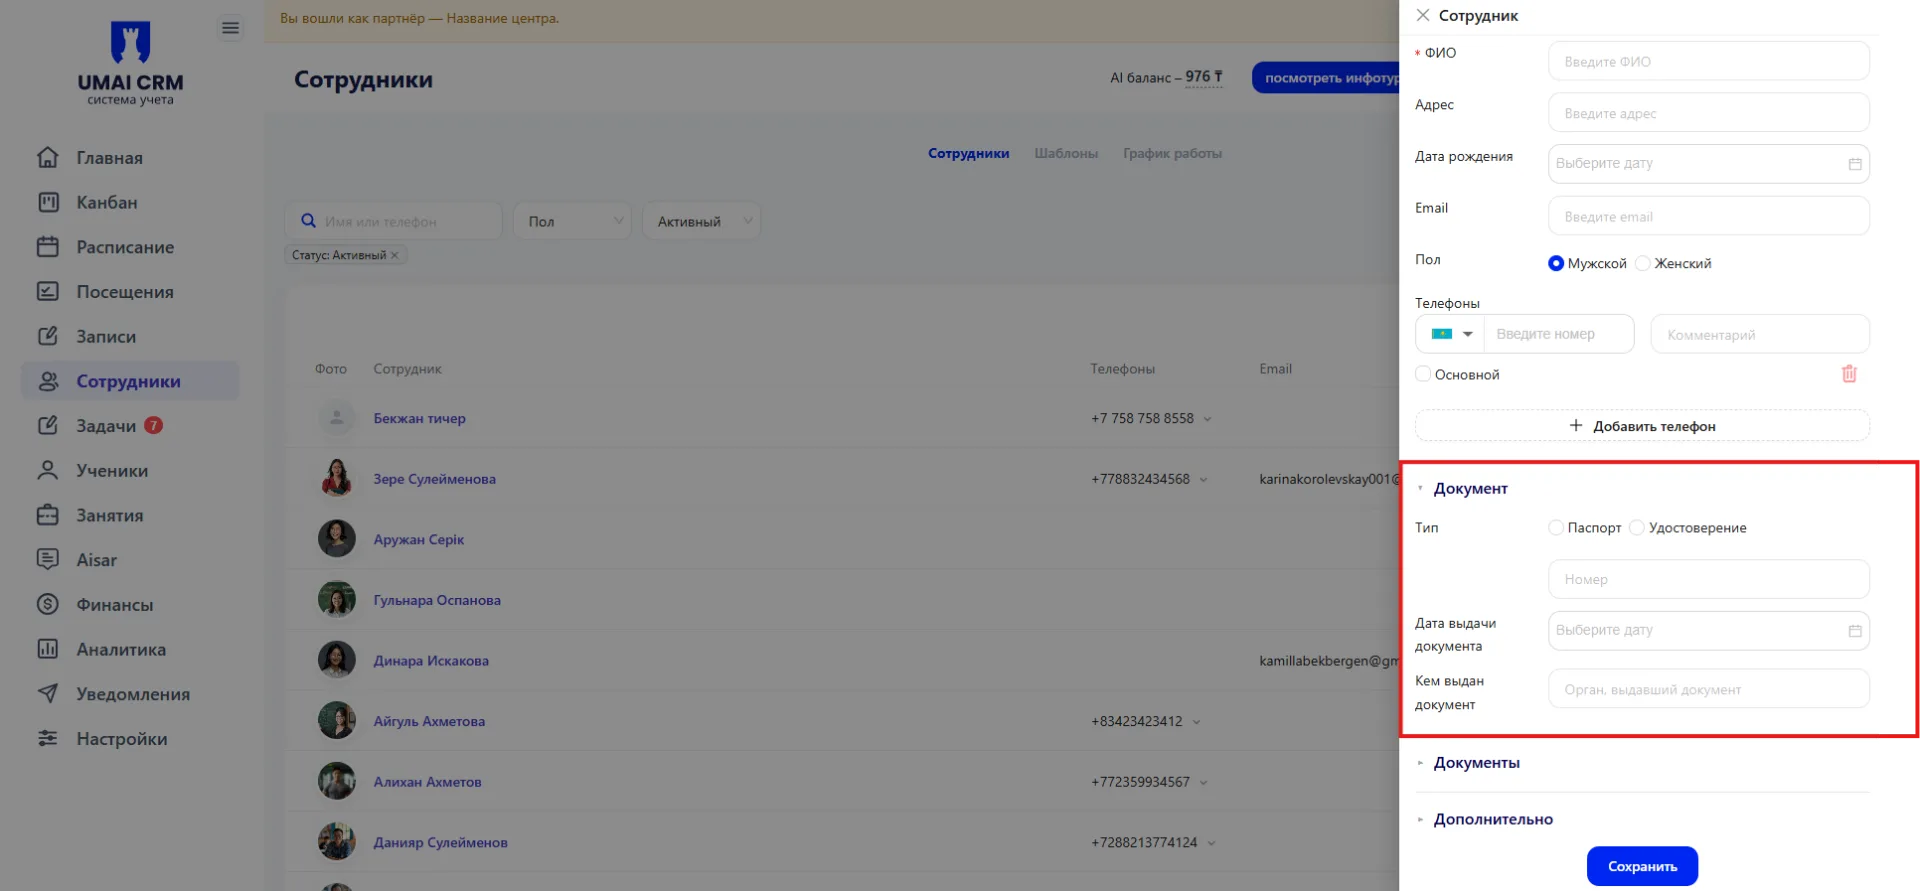
Document
The section specifies the identification document data:
- Document type (passport or ID);
- Document issue date;
- Issuing authority.
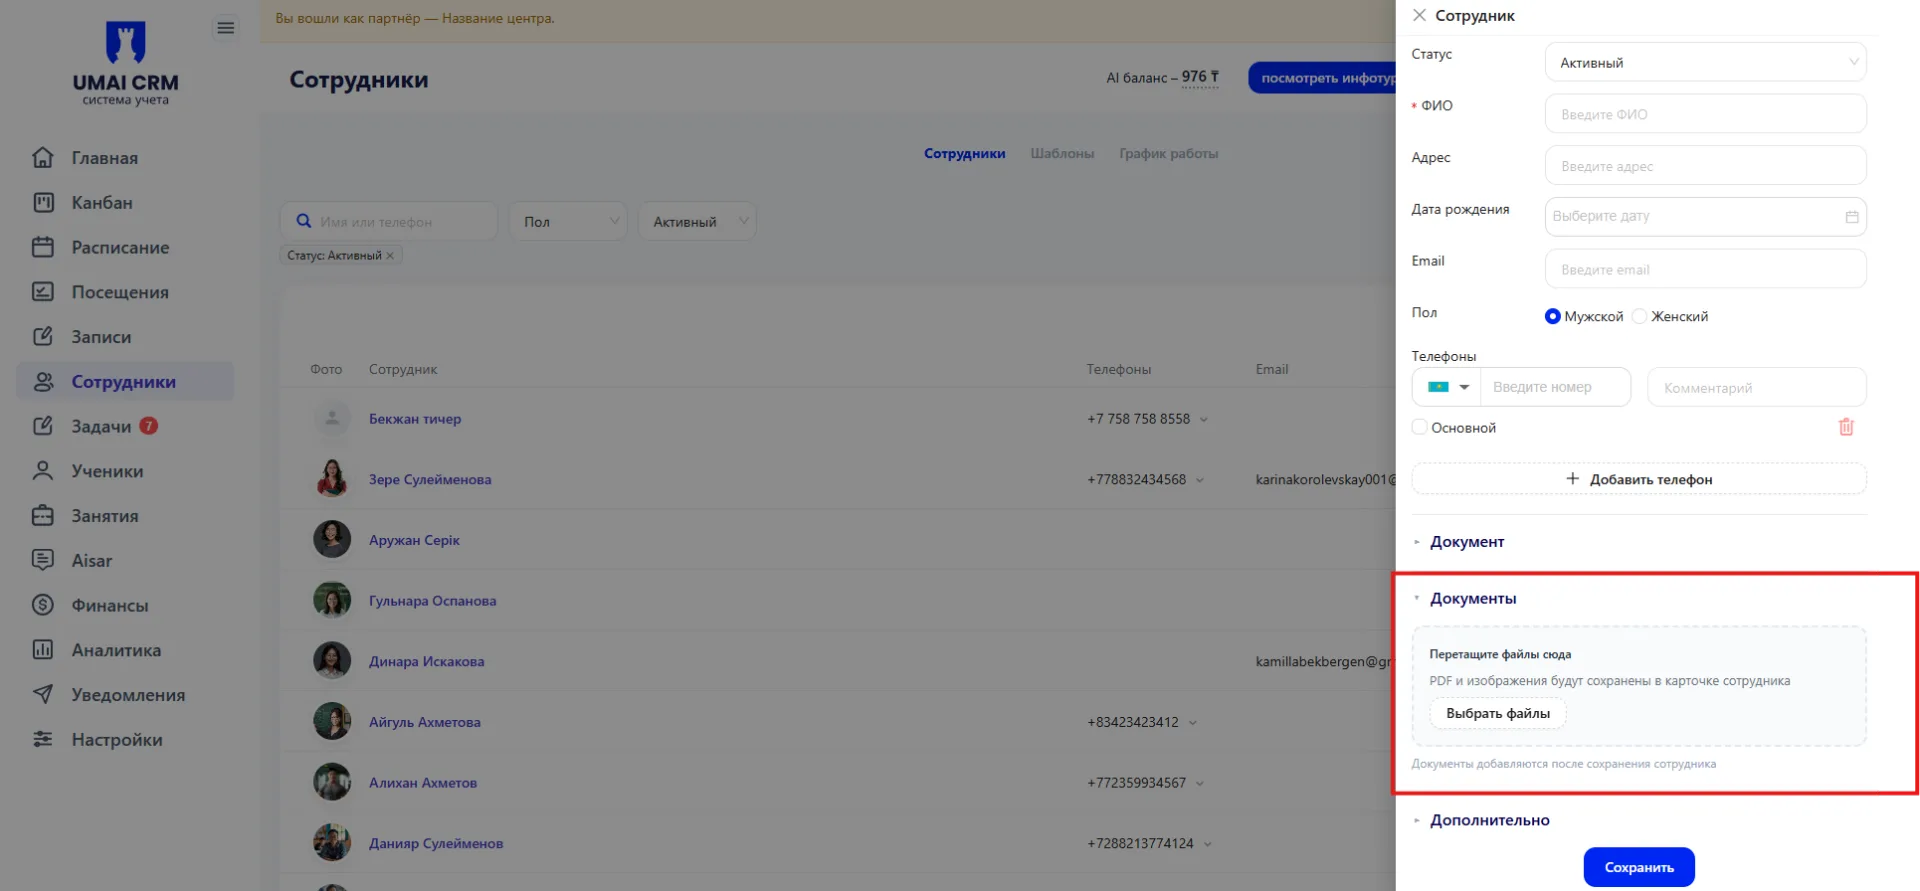
Documents
In this section you can upload files related to the employee.
Files are uploaded in PDF format.
Additional
Here you specify additional data about the employee:
- Position;
- Specialization;
Next to the specialization field there is a settings button that allows you to add new specialization options.
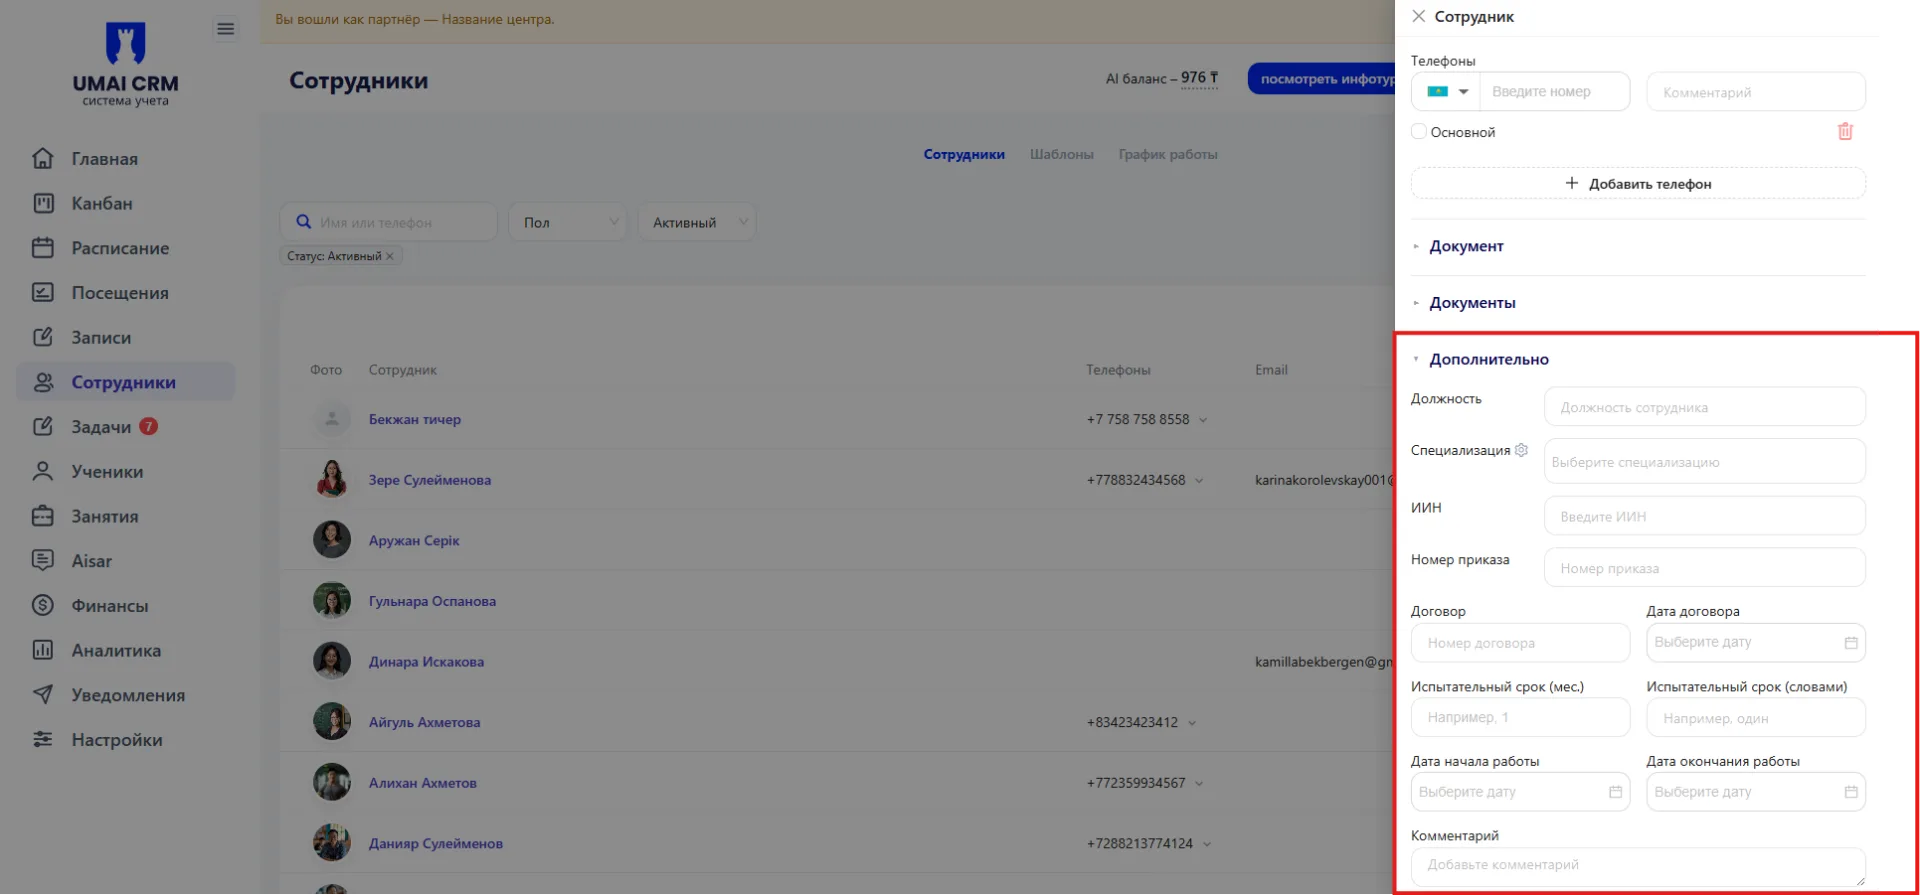
Also in this block you can specify:
- Individual ID number (IIN);
- Order number;
- Contract;
- Contract date;
- Probation period (in months);
- Probation period (in words);
- Start date;
- End date;
- Comment.
After filling out the data, save the form to create the employee card.
2.5 Actions in the table
The action column contains buttons for managing the employee.
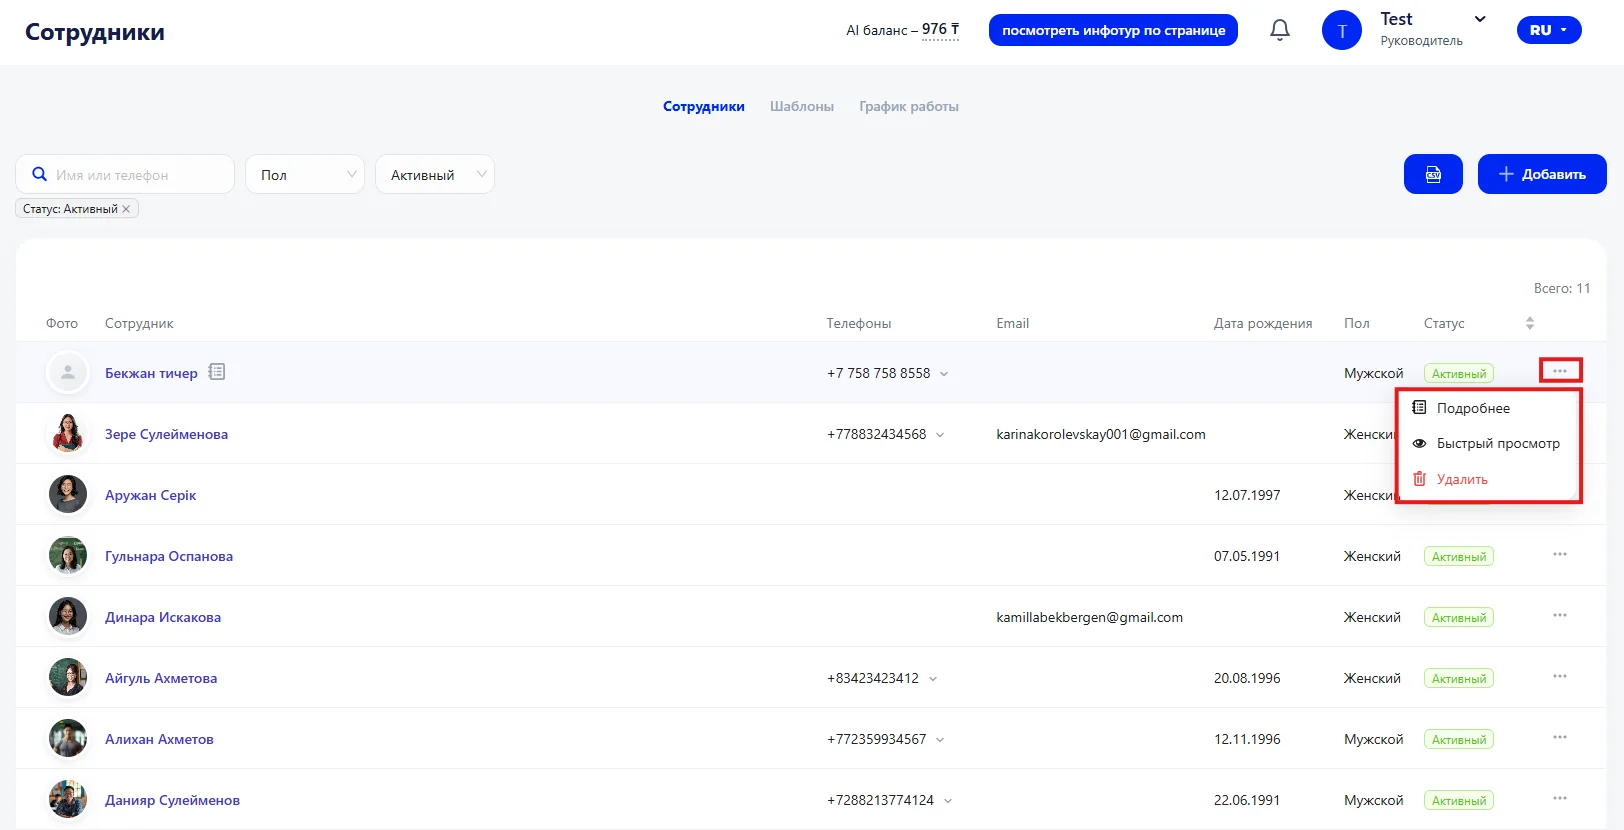
Details
Opens the employee's personal account where you can view and edit all employee data.
Quick view
Opens a panel with brief information about the employee without navigating to the card.
Delete
Deletes the employee from the system.
3. Tab «Templates»
The tab is used to create and store document templates related to employees.
Templates allow automatic generation of documents with employee data substitution.
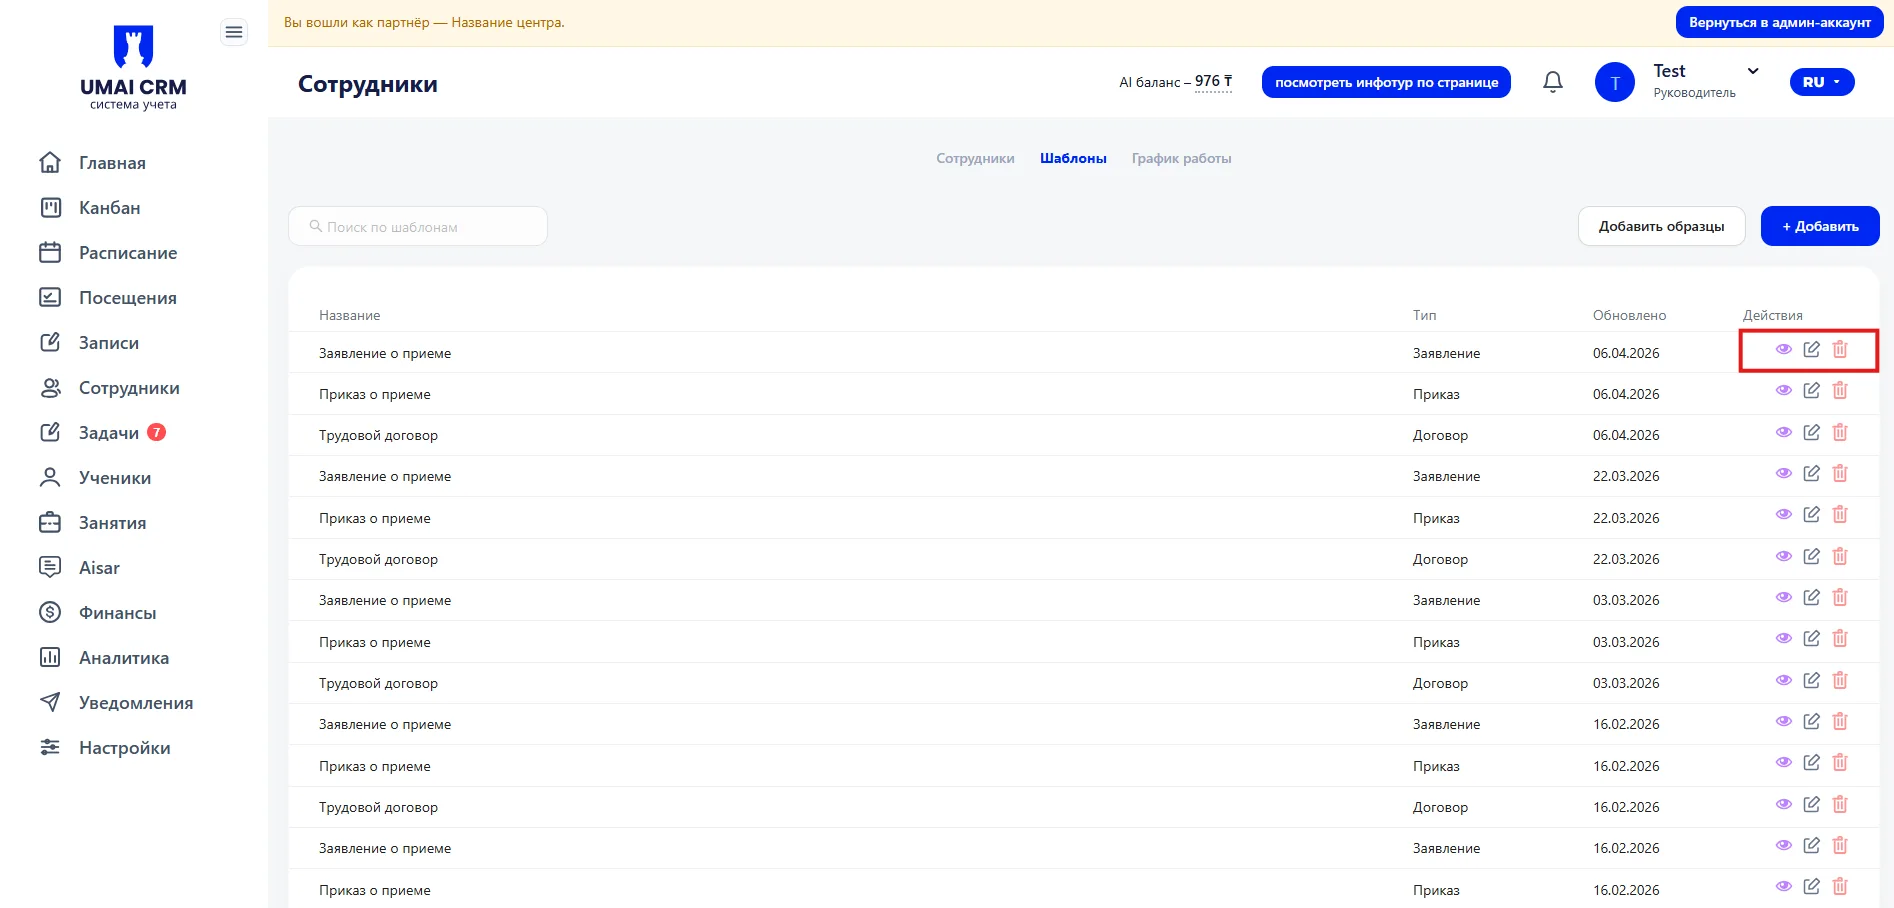
3.1 Templates table
After opening the tab, a table with the list of all document templates is displayed.
The table displays the following data:
- Title — the template's name.
- Type — document type.
- Updated — date of the last template change.
- Actions — buttons to manage the template.
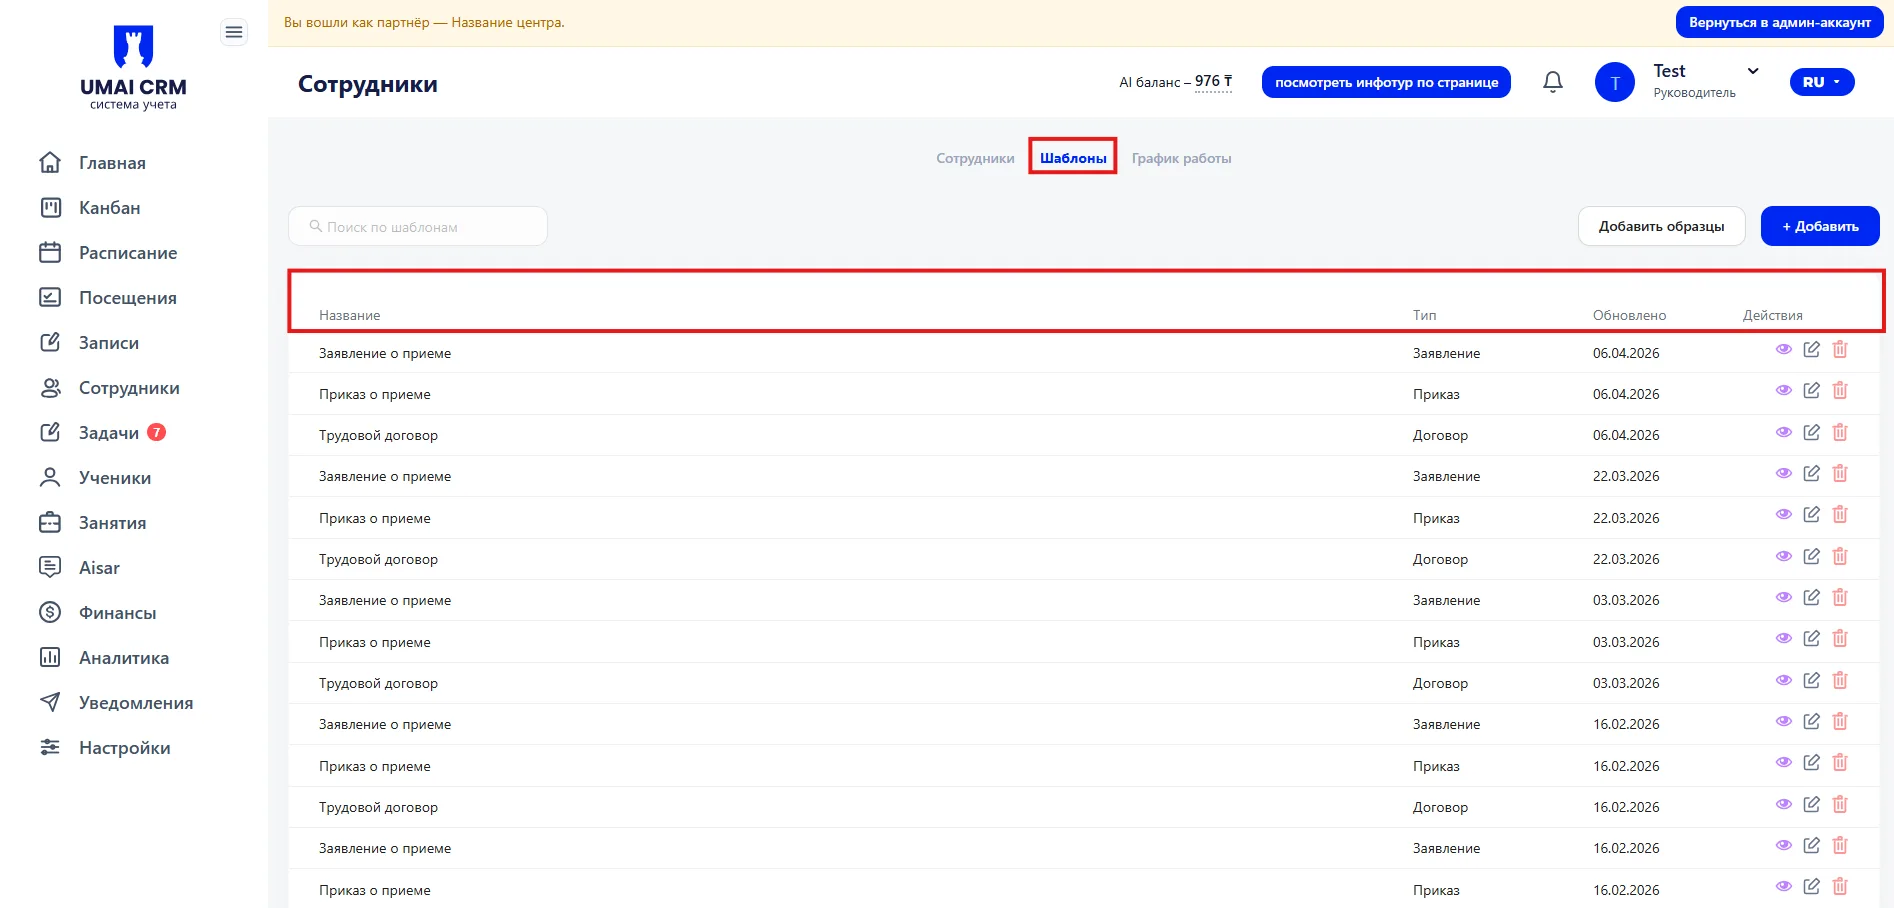
In the actions column the following buttons are available:
- View template;
- Edit template;
- Delete template.
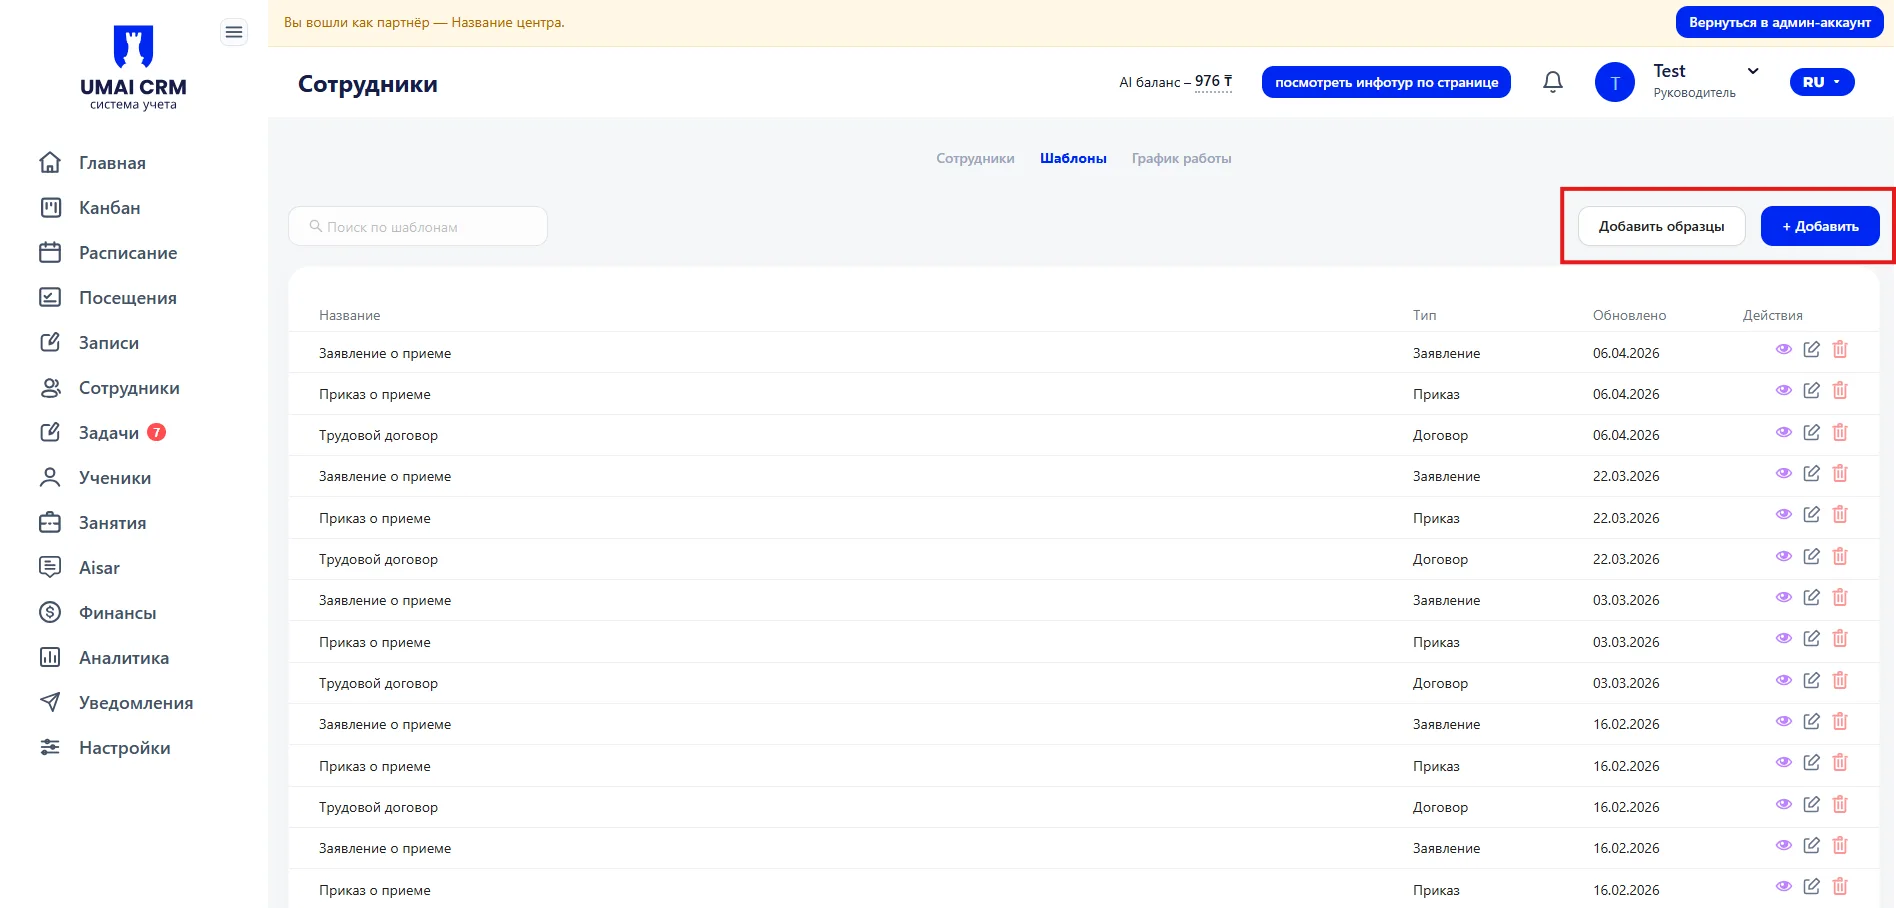
At the top of the page there are:
- Search field for templates;
- Button «Add samples» — adds ready-made examples of document templates that are already provided in the system;
- Button «+Add» — used to create a new template manually.
3.2 Adding a template
To create a new document template, click the «+ Add template» button.
The template creation form will open, where you need to specify:
- Template title;
- Document type;
- Sample document (if using a ready-made template);
- Template content.
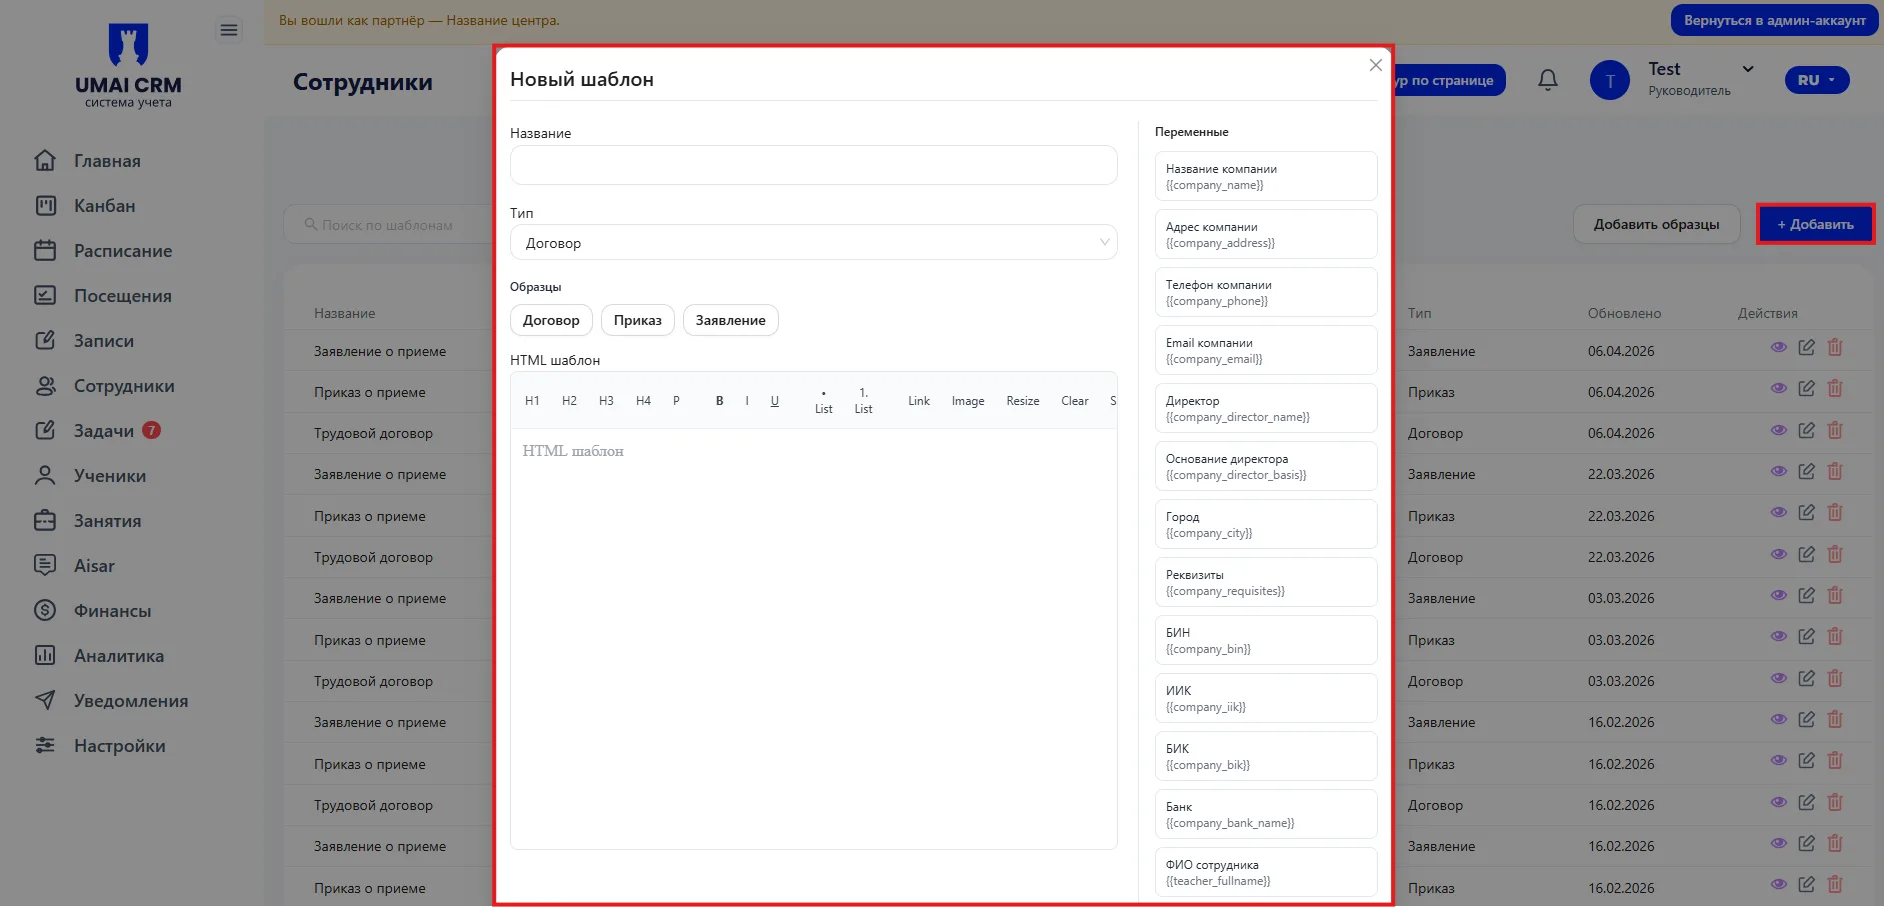
The main field is intended for entering the document text.
When creating a template, you can use variables that automatically substitute employee data when generating a document.
3.3 Actions in the table
The template table contains buttons for managing templates:
- View — opens the template for viewing.
- Edit — allows you to make changes to the document template.
- Delete — removes the template from the system.
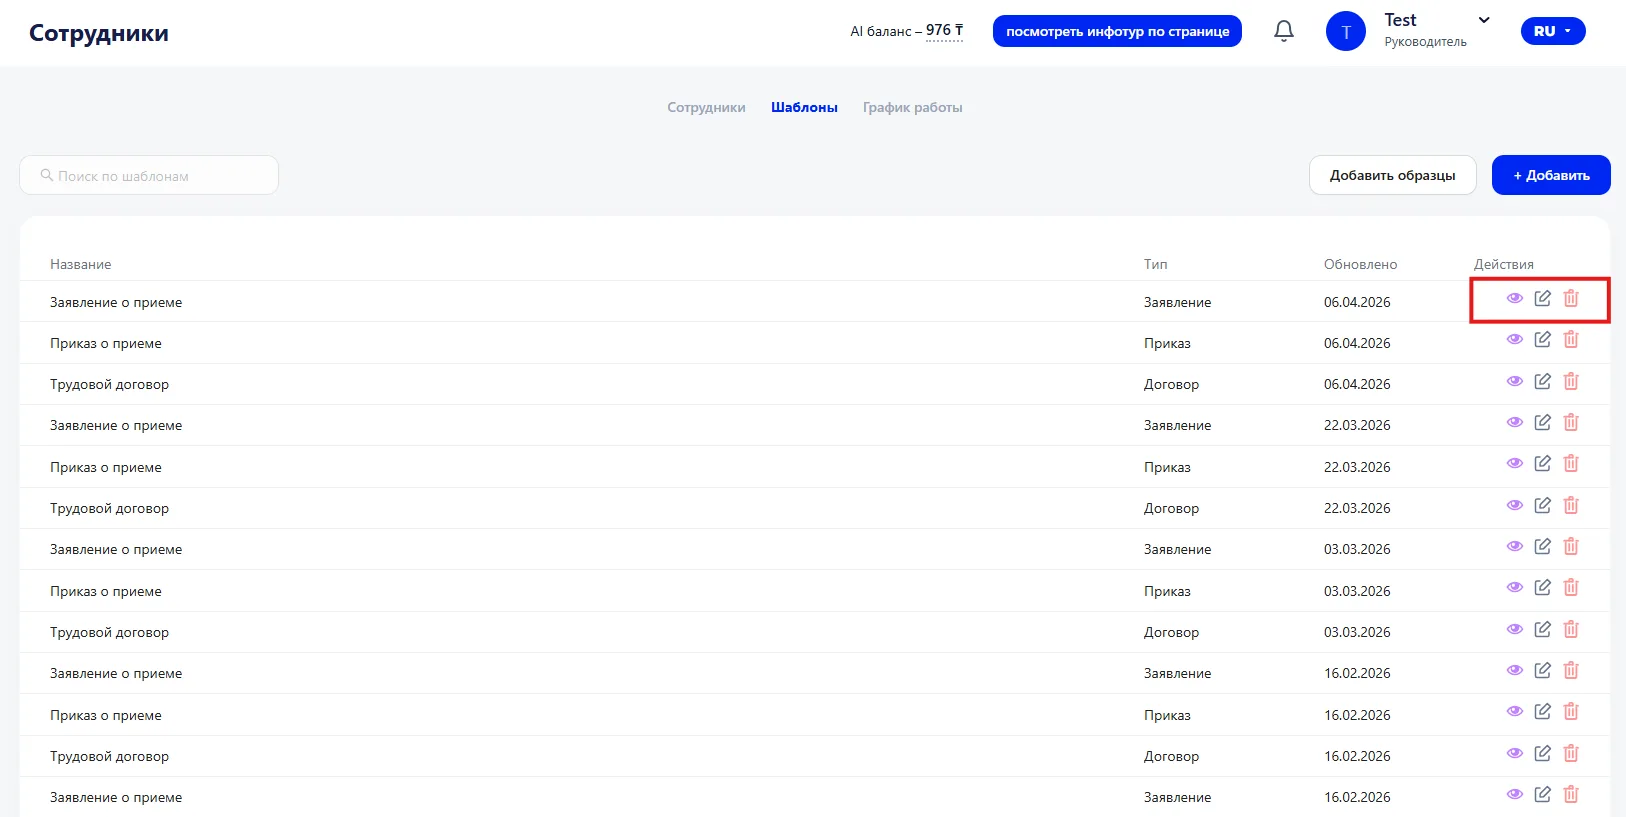
After editing, you must save the changes for the updated template to be used when creating documents.
4. Tab «Work schedule (График работы)»
The tab is used to configure and view employee work schedules.
The schedule allows you to control employees' working days and plan their workload.
4.1 Working with the table
The page displays a table with employees' work schedules.
The table lists employees vertically and dates and weekdays horizontally.
At the intersection of an employee row and the corresponding date, the employee's work schedule is indicated, displaying working hours by the hour. This structure allows quick viewing of employees' working days and controlling their occupancy.
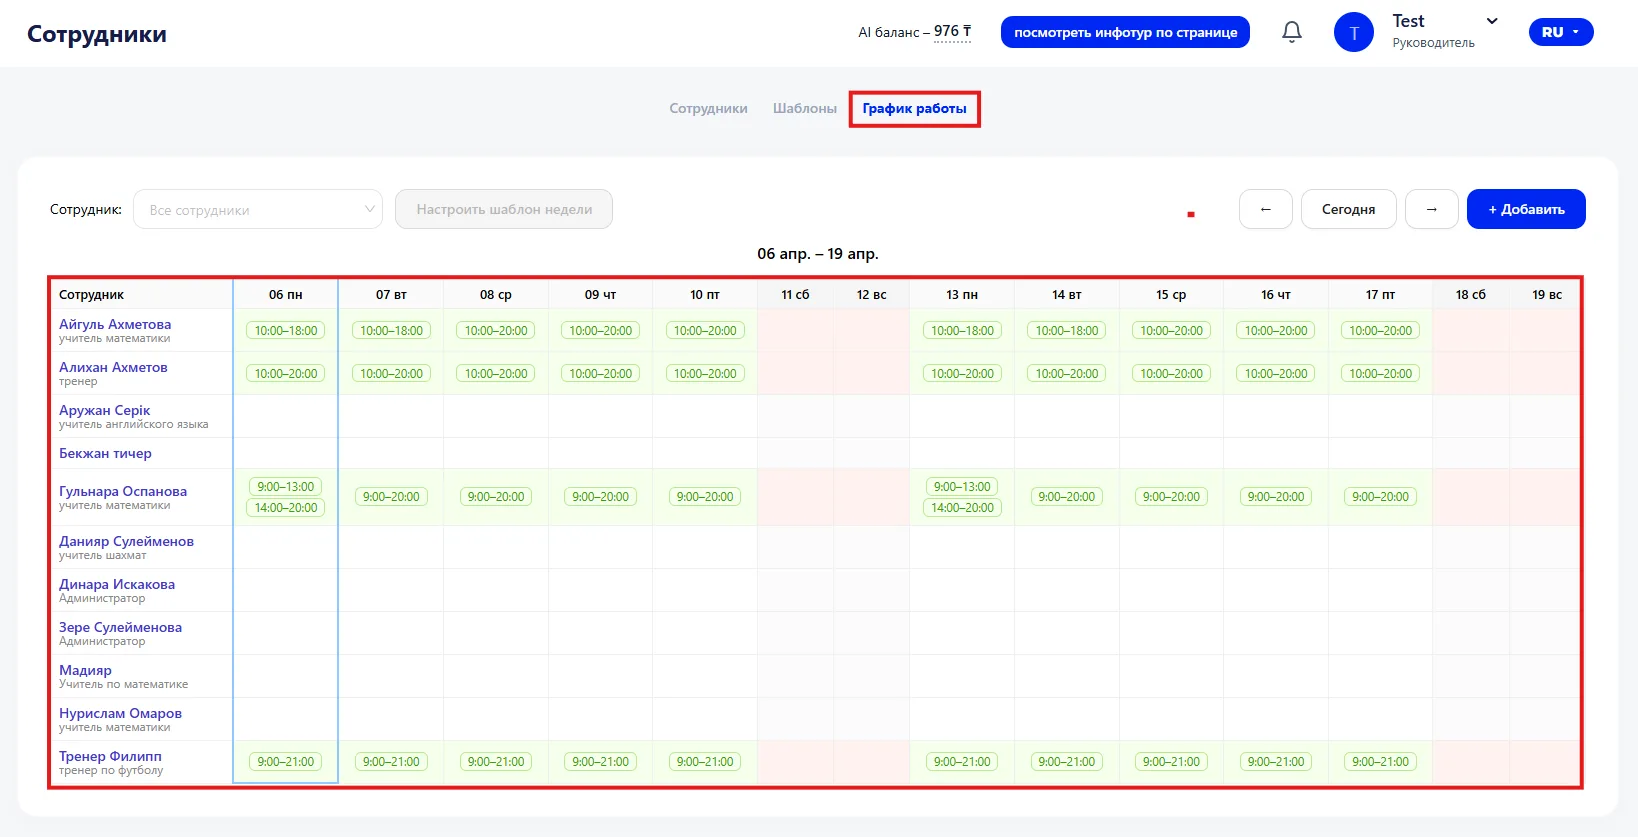
If necessary, the data can be exported in CSV format for further work with the schedule.
4.2 Adding a work schedule
To add a new work schedule, click the add schedule button at the top of the page.
After clicking, the schedule creation window will open, where you need to specify:
- Employee — select the employee for whom the work schedule is being created.
- Day — specify the day of the week.
- Workday status — determines whether the day is a working day or a day off.
- Working time — the working interval in hours.
If the workday status is disabled for the selected day, it will be marked in the schedule as a day off («вых»).
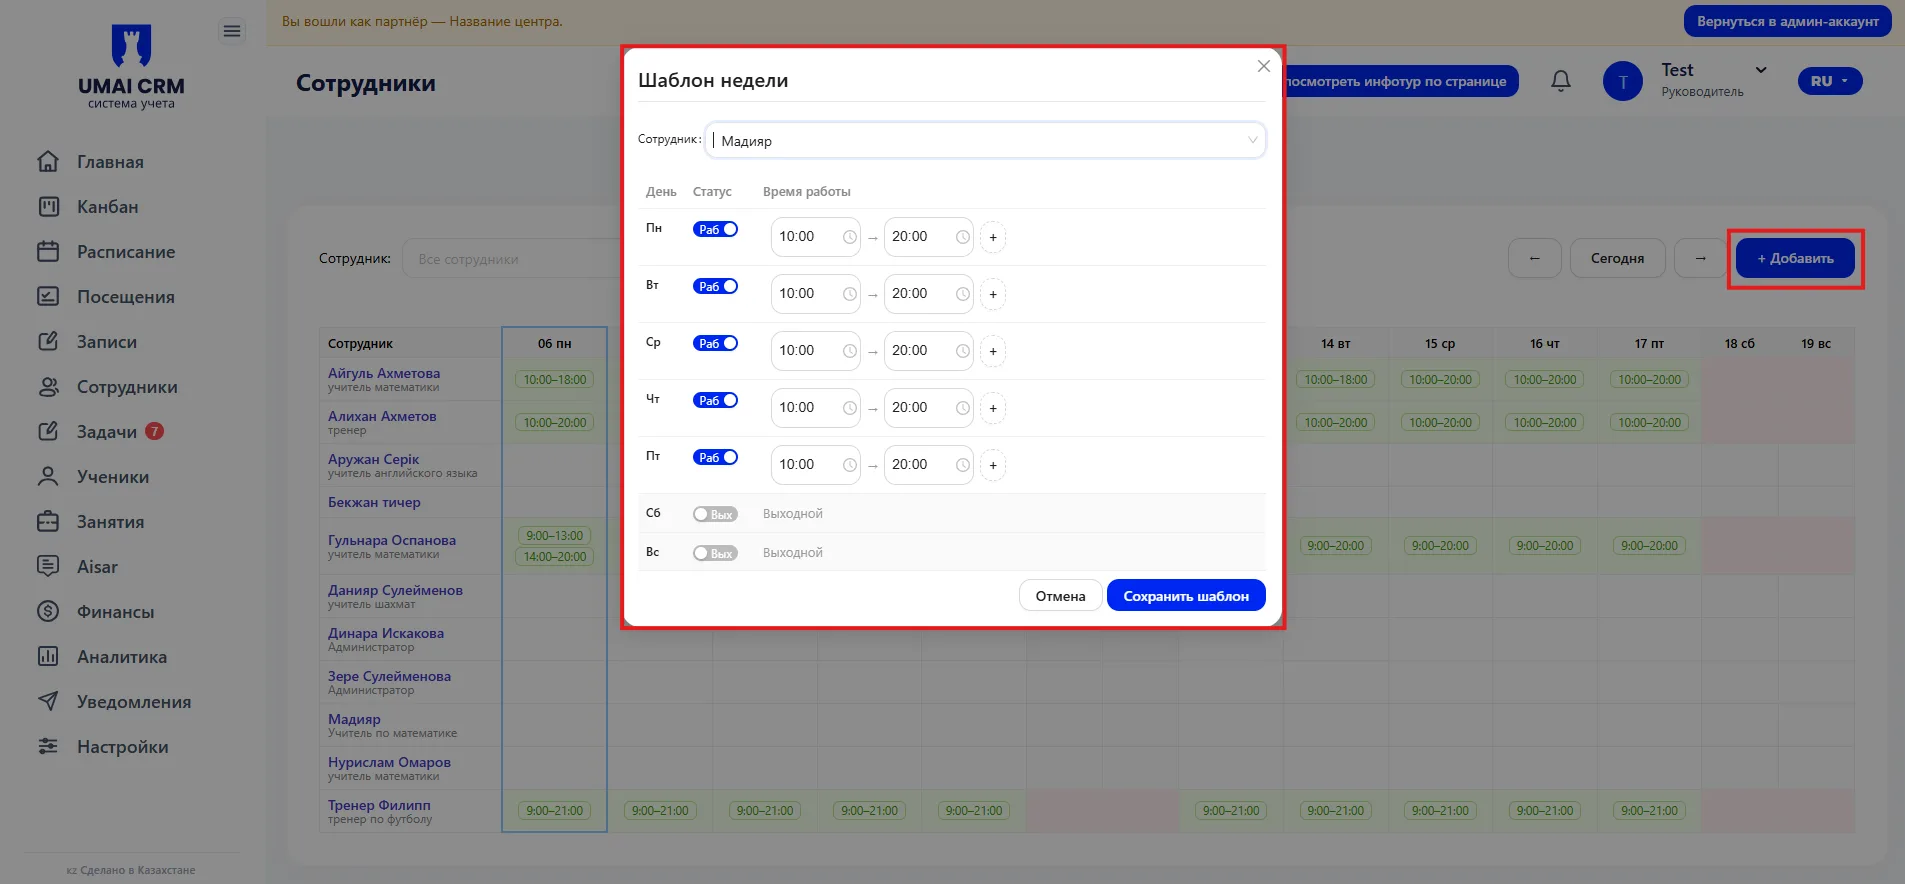
After saving, the schedule is displayed in the table and used for planning employees' working time.
Important to consider
- The employee status affects how they are displayed in the system. Employees with status «In archive» do not participate in the center's active work.
- When adding an employee, it is recommended to fill in contact details and position to simplify further personnel work.
- Employees' work schedules are used when planning the Schedule and help control workload.
- Up-to-date employee data and their work schedules help avoid errors when organizing the center's operations.